Can You Spackle Over Drywall Anchors? An In-Depth Guide
Table of Contents
- Introduction
- The Core Question: To Spackle or Not to Spackle?
- Understanding Drywall Anchors: The Foundation of the Problem
- The Professional Standard: Why Removal is Always Better
- Step-by-Step Guide: How to Properly Remove Drywall Anchors
- The Art of the Patch: Achieving an Invisible Repair After Removal
- The Exception: When and How to Spackle Over an Anchor
- Sourcing for Success: The Maden.co Advantage in MRO
- A Call to American Manufacturers
- Conclusion
- Frequently Asked Questions (FAQ)
Introduction
A facility manager prepares a commercial space for a new tenant, a process that involves transforming walls riddled with holes from previous occupants into pristine, unblemished surfaces. Each tiny plastic anchor left behind represents a decision point: take the fast route and patch over it, or invest the time to remove it properly for a flawless, professional finish? This scenario is a daily reality in maintenance, repair, and operations (MRO), where the choice between speed and quality has tangible impacts on cost, durability, and reputation. The seemingly simple question of whether you can spackle over drywall anchors opens a door to a much larger conversation about best practices, material science, and the value of doing a job correctly the first time.
This guide moves beyond a simple yes or no. We will dissect the technical realities of patching over embedded hardware, exploring why removal is almost always the superior professional standard. We will provide detailed, step-by-step instructions for properly removing various types of anchors and executing an invisible patch that upholds the highest standards of workmanship. Furthermore, we will connect these hands-on techniques to the broader strategic importance of sourcing high-quality, reliable components for all your MRO needs. The ultimate goal is to empower you not just with the "how," but with the "why," ensuring every repair contributes to the long-term value and integrity of your physical assets.
The Core Question: To Spackle or Not to Spackle?
The direct answer is yes, you can physically apply spackle over a drywall anchor. However, the more critical question for any professional is, should you? In most professional contexts—from commercial property management to industrial facility maintenance—the answer is a resounding no. Skim-coating over an anchor is a shortcut that often leads to long-term problems, compromising the quality of the repair and potentially causing more work down the line.
Why Spackling Over Anchors Fails the Professional Test
Covering an anchor with spackle or joint compound creates an inherently weak point in the wall surface. You are essentially creating a thin, brittle layer of plaster over a piece of plastic or metal that has different thermal expansion and contraction properties than the surrounding gypsum and paper of the drywall. This can lead to several undesirable outcomes:
- Ghosting and Telegraphing: Over time, as the building settles or experiences temperature fluctuations, the outline of the buried anchor can become visible through the paint. This faint bump or circle, known as "ghosting" or "telegraphing," ruins the smooth finish of the wall.
- Cracking and Chipping: The patch over the anchor is prone to hairline cracks forming around its perimeter. Any minor impact to that area of the wall is more likely to cause the spackle to chip away, exposing the anchor and requiring the repair to be redone.
- Surface Imperfections: It is exceedingly difficult to achieve a perfectly flat surface when spackling over an object. The result is often a subtle mound or dimple that becomes glaringly obvious under angled lighting or after a coat of paint with any level of sheen.
- Future Obstructions: Leaving an anchor in the wall creates a hidden hard point. If someone later tries to hang an item nearby or drill a new hole, they may hit the old, buried anchor, causing frustration, damaging their drill bit, or forcing them to abandon the location.
For a maintenance professional, the Total Cost of Ownership (TCO) of a repair is a critical metric. While spackling over an anchor saves a few minutes upfront, the risk of a callback to fix a cracked or visible patch means the long-term cost in labor and materials is significantly higher. Adhering to the principles of Industrial Excellence means choosing the method that guarantees the most durable and highest-quality result.
Understanding Drywall Anchors: The Foundation of the Problem
To understand why removal is superior, one must first appreciate the function and form of the hardware in question. Drywall anchors are essential for securing items to gypsum board, which lacks the structural integrity to hold a screw on its own. They work by expanding behind the drywall, creating pressure and friction that locks them in place. The variety of designs directly impacts the best method for removal.
Common Types of Drywall Anchors
-
Ribbed Plastic Anchors: These are perhaps the most common type for light-duty applications. A hole is drilled, the plastic sleeve is tapped into place, and as a screw is driven in, the anchor's sides expand or split behind the drywall. A quality, American-made Ribbed Plastic Anchor is a staple in any MRO toolkit due to its simplicity and effectiveness for mounting signs, thermostats, and other lightweight fixtures. Their design, however, means they grip the wall from behind, making a simple pull-out challenging.
-
Self-Drilling Anchors: Often called "zip-it" or threaded anchors, these are designed for efficiency. They feature a sharp, drill-like tip and coarse threads that bore directly into the drywall without a pilot hole. As with any component, quality matters; a well-engineered Medium-Duty Nylon Self-Drilling Anchor from a verified U.S. manufacturer ensures a clean installation without damaging the surrounding drywall. Their threaded nature makes them one of the easiest types to remove, as they can often be simply unscrewed.
-
Expansion Anchors (Sleeve-Type): These include metal molly bolts and other designs where a metal sleeve expands and compresses against the back of the drywall. They offer significant holding power but can be more difficult to remove cleanly.
-
Toggle Bolts: For heavy-duty applications, a toggle bolt consists of a screw and a spring-loaded wing mechanism. The wings are folded, pushed through a hole, and then spring open behind the wall. The screw is then tightened to clamp the item to the wall. The toggle itself is impossible to retrieve once the screw is removed.
Each of these designs is embedded within the wall structure. Patching over them means contending with a foreign body that disrupts the homogeneity of the wall surface, which is precisely why removal is the professional standard.
The Professional Standard: Why Removal is Always Better
For any operation that values quality and long-term asset integrity, removing the drywall anchor before patching is the only acceptable method. The benefits extend far beyond simple aesthetics.
Key Takeaway: A proper repair restores the wall to its original state. Removing an anchor allows you to patch a hole consisting of uniform material (gypsum and paper), resulting in a repair that is as strong and stable as the surrounding wall.
Benefits of Anchor Removal
- Structural Integrity: A patch of joint compound filling a simple hole bonds directly with the drywall's gypsum core and paper facing. This creates a solid, cohesive repair. A patch over an anchor is merely a thin cosmetic layer covering a point of discontinuity.
- A Flawless, Invisible Finish: By removing the anchor, you eliminate the root cause of ghosting, bumps, and cracks. A properly executed patch after removal is truly invisible, capable of withstanding scrutiny under any lighting condition and lasting for the life of the paint job.
- Future-Proofing the Wall: A clean wall is a blank canvas. Removing old hardware ensures that future tenants or maintenance teams have a clear, unobstructed surface to work with, preventing the frustrating experience of hitting a hidden metal or plastic remnant.
- Upholding Workmanship Standards: In a professional setting, the quality of your work is your signature. Taking the extra step to remove anchors properly demonstrates a commitment to excellence and a respect for the property itself, reinforcing trust with clients and stakeholders.
This commitment to quality is a core part of our mission at Maden.co. We believe in championing the kind of Industrial Excellence that comes from using superior, American-made components and employing best-practice techniques.
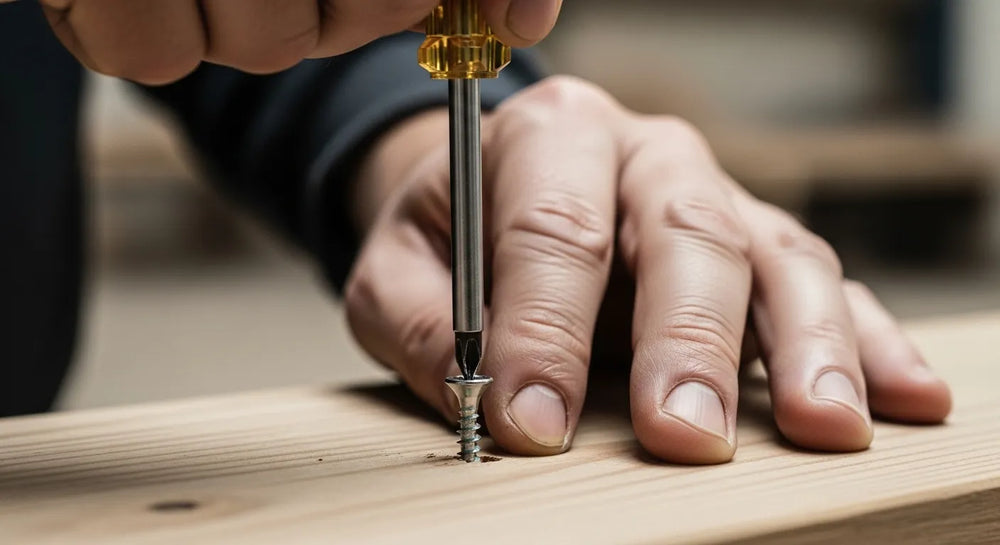
Step-by-Step Guide: How to Properly Remove Drywall Anchors
Removing an anchor without causing excessive damage to the surrounding drywall is a skill. The right technique depends entirely on the type of anchor you are dealing with.
Tools You'll Need:
- Utility knife with a sharp blade
- Needle-nose pliers
- Drill with various bit sizes
- Screwdrivers (Phillips and flathead)
- Hammer
- Putty knife
Method 1: Removing Plastic Expansion Anchors
These are the most common anchors found in walls.
- Try the Screw Method: Insert a screw into the anchor, turning it just two or three times so it gets a good grip but doesn't expand the anchor further.
- Pry and Pull: Use the claw of a hammer or a pair of pliers to gently pull the screw—and the anchor with it—straight out of the wall. Wiggle it slightly if it's stubborn.
- The Cut-and-Push Method: If the anchor head is flush and won't pull out, use a utility knife to carefully cut the collar of the anchor away from the drywall. Then, use a nail set or a small screwdriver to tap the remainder of the anchor body into the wall cavity. This leaves a smaller, cleaner hole to patch.
For MRO professionals, having a bulk supply of standard fasteners like the Medium-Duty Nylon Wall Anchor for #8 screws is essential. Knowing how to efficiently remove them during facility turnover is just as important as knowing how to install them.
Method 2: Removing Self-Drilling (Threaded) Anchors
These are generally the easiest to remove.
- Unscrew It: Insert a Phillips head screwdriver into the anchor head.
- Apply Gentle Pressure: While turning counter-clockwise, apply slight forward pressure to engage the threads, then pull back gently as you unscrew it. It should back out of the drywall just as it went in.
- Clean the Edges: Use a utility knife to trim away any frayed drywall paper around the edge of the hole.
Method 3: Removing Metal Molly Bolts
Molly bolts can be tricky.
- Back Out the Screw: Unscrew the screw until it is almost completely out of the bolt.
- Tap it In: Gently tap the head of the screw with a hammer. This should cause the expanded sleeve behind the drywall to collapse.
- Pull it Out: Once the sleeve is collapsed, you should be able to pull the entire molly bolt assembly out of the wall with pliers.
- Alternative (Push-In): If it won't pull out, unscrew the screw completely. Place a flathead screwdriver against the lip of the bolt and tap it with a hammer, pushing the entire sleeve into the wall cavity. This leaves a larger hole but is sometimes the only option.
The Art of the Patch: Achieving an Invisible Repair After Removal
With the anchor removed, you are left with a clean hole. Now, the real craftsmanship begins. A professional-grade patch is a multi-step process.
Step 1: Preparation is Key
- De-Burr the Hole: Use a sharp utility knife to carefully bevel the edge of the hole, cutting away any loose paper or crushed gypsum. This creates a "V" shape that allows the patching compound to lock in more securely.
- Clean the Area: Wipe the area with a damp cloth to remove any dust or debris, which can interfere with adhesion.
Step 2: Choose the Right Material
- Spackling Compound: Best for very small holes (nail holes, anchor holes less than 1/4 inch). It dries faster but is less durable and can shrink. Lightweight spackle is easy to sand but offers little structural strength.
- All-Purpose Joint Compound ("Mud"): This is the professional's choice for most repairs. It's stronger, more durable, and less prone to shrinking and cracking than spackle. It takes longer to dry but provides a far superior result.
Step 3: The Three-Layer Application
Rushing the patch with one thick coat is a common mistake that leads to cracking and shrinking.
- First Coat (The Fill): Using a flexible putty knife, press the joint compound firmly into the hole. The goal is to fill the void completely. The patch should be slightly recessed below the wall surface. Let this coat dry completely (drying time varies, but 12-24 hours is common for joint compound).
- Second Coat (The Build): Apply a second, wider coat of compound over the first, extending it about an inch beyond the edges of the original hole. Use the putty knife to "feather" the edges, applying more pressure on the outer edge of the knife stroke to create a thin, seamless transition to the wall. Let it dry completely.
- Third Coat (The Skim): Apply a final, very thin skim coat that is even wider than the second. This coat fills any minor imperfections or tool marks. Feather the edges carefully. This is the key to an invisible patch. Let it dry thoroughly.
Step 4: Sanding, Priming, and Painting
- Sanding: Use a fine-grit sanding sponge (220-grit) and sand lightly. The goal is to smooth the patch and blend the feathered edges, not to remove compound. Use a circular motion and a light touch. Wipe away all dust with a tack cloth or damp rag.
- Priming: This is a non-negotiable step. Primer seals the porous joint compound, preventing the paint from soaking in and creating a dull spot ("flashing"). It ensures the final paint coat has a uniform sheen and color.
- Painting: Apply one or two coats of your matching wall paint, and the repair will be undetectable.
The Exception: When and How to Spackle Over an Anchor
While removal is the gold standard, there is one specific, narrow scenario where recessing and spackling over an anchor might be considered: when a plastic anchor has been pushed so deep that attempting to remove it would cause significantly more damage to the drywall than simply patching over it. This should be a judgment call based on experience, not a default practice.
The Correct Recess-and-Patch Technique
- Set the Anchor: Use a nail set or the tip of a screwdriver to tap the head of the plastic anchor so it sits about 1/8 inch below the surface of the drywall. Do not break the drywall paper. You are creating a small divot.
- Apply Fiberglass Mesh: For a more durable repair, cut a small piece of self-adhesive fiberglass mesh tape and place it over the recessed anchor. This will help prevent cracks from forming.
- Patch in Layers: Apply joint compound over the mesh tape in thin layers, just as you would for a normal patch. You will need at least three coats, each one wider than the last, to properly hide the tape and feather the edges.
- Finish as Usual: Sand, prime, and paint as described above.
Sourcing for Success: The Maden.co Advantage in MRO
Achieving consistent, high-quality results in maintenance and repair depends heavily on the quality of the materials you use. For MRO buyers and procurement managers, establishing a reliable supply chain for everything from fasteners to specialized components is paramount. This is where we at Maden.co are changing the game. Our mission is to democratize access to American manufacturing, proving that sourcing U.S.-made products is not only possible but also a strategic advantage. Our entire business model is built on this principle; you can learn more about our mission to champion American manufacturing here.
By connecting industrial buyers with over 2.5 million products from our network of 800+ verified U.S. manufacturers, we help you build a more resilient and transparent supply chain. This directly addresses the challenges many businesses face with global sourcing, including long lead times, quality control issues, and geopolitical instability. For an MRO manager under pressure to complete a facility-wide renovation, the ability to quickly source a large quantity of a specific fastener, like a reliable Medium-Duty Nylon Self-Drilling Anchor, from a domestic supplier is a game-changer.
We understand that large-scale projects and inventory stocking require significant capital outlay. That's why we offer a powerful tool to empower your procurement strategy. For major renovations or stocking your MRO inventory, you can apply for Instant Financing at checkout to manage cash flow effectively and secure the materials you need without delay. This feature is designed to reduce procurement friction and help you execute your projects on schedule and on budget. If you have specific sourcing questions, our team is ready to help.
A Call to American Manufacturers
America's manufacturing revival is here, and we are proud to be at the forefront, building the digital infrastructure that connects the nation's best manufacturers with the businesses that need them. Our platform is built on the values of American Manufacturing Pride and Digital Innovation. If you are a U.S. manufacturer producing quality industrial components, from fasteners to complex machinery parts, we invite you to join our network. Expand your reach and become a part of a movement dedicated to strengthening our domestic industrial base. Register as a vendor and connect with thousands of industrial buyers committed to sourcing American-made.
Conclusion
The question of spackling over a drywall anchor serves as a microcosm for a larger philosophy in the industrial and MRO worlds. The quick fix rarely provides the best long-term value. The professional standard—removing the anchor and executing a proper, multi-layer patch—ensures durability, a flawless finish, and a lower total cost of ownership. It is a testament to quality workmanship and a commitment to excellence.
This same commitment should extend to your procurement process. Building a resilient, transparent, and all-American supply chain is the most effective way to ensure you always have the quality components you need to do the job right. Empower your maintenance and repair operations with a strategic partner dedicated to your success. Explore our catalog of over 2.5 million U.S.-made products today, and leverage our Instant Financing at checkout to streamline your next major procurement.
Frequently Asked Questions (FAQ)
1. Can I use wood putty instead of spackle to fill a hole from a drywall anchor? No, you should not use wood putty on drywall. Wood putty is specifically formulated to be rigid and non-shrinking for use on wood. It does not bond well with the paper and gypsum of drywall and is not designed to be sanded to a feather edge. It will likely crack, flake, and create a visible, discolored spot under paint. Always use a product designed for drywall, such as spackling or joint compound.
2. What happens if I paint directly over spackle or joint compound without priming? If you paint directly over an unprimed patch, the repair will likely be visible through the paint. This is a phenomenon called "flashing" or "ghosting." Joint compound and spackle are more porous than the surrounding painted drywall, so they absorb the paint differently, resulting in a dull, flat spot that stands out from the rest of the wall's sheen. A quality primer seals the patch, creating a uniform surface that ensures the final paint coat is even in both color and gloss.
3. Is it better to use a lightweight spackle or an all-purpose joint compound for patching anchor holes? For the best, most durable repair, all-purpose joint compound is the superior choice. While lightweight spackle is tempting because it dries quickly and is easy to sand, it has very little binding strength and is prone to cracking and chipping. All-purpose joint compound provides a much stronger, more durable patch that bonds better with the drywall and is far more resistant to future damage. It is the standard material used by professional drywall finishers for a reason.
4. How do I remove an anchor that has broken off flush with the wall? If the head or collar of a plastic anchor has broken off, leaving the body flush with the drywall, pulling it out is no longer an option. The best professional technique is to either "set" it or drill it out. To set it, use a nail punch or a Phillips head screwdriver to tap the remaining plastic piece so it falls into the wall cavity behind the drywall. Alternatively, you can use a drill bit that is slightly larger than the inner diameter of the anchor to carefully drill out the remaining plastic. Both methods will leave you with a clean hole that is ready for proper patching.


