Can You Use Concrete Screws in Brick? A Pro's Guide
Table of Contents
- Introduction
- Understanding the Mechanics: How Concrete Screws Work
- The Core Question: Applying Concrete Screws to Brickwork
- Critical Factors for Success: Brick Type and Condition
- The Mortar Joint Dilemma: To Drill or Not to Drill?
- Step-by-Step Installation Guide for Brick
- Common Pitfalls and How to Avoid Them
- Sourcing American-Made Fasteners: A Strategic Advantage
- Conclusion
- Frequently Asked Questions
Introduction
A single failed fastener can halt an entire project. For an MRO buyer facing an unexpected equipment repair or a design engineer specifying components for a new installation, the delay and potential rework caused by a screw that pulls out of a masonry wall is more than a minor annoyance—it’s a direct hit to budgets and timelines. The humble screw, often an afterthought, suddenly becomes the most critical component. This scenario is all too common, and it often stems from a fundamental question: was the right fastener used for the base material? One of the most frequent points of confusion in industrial and construction settings is the application of concrete screws in brickwork.
The quick answer is yes, you absolutely can use concrete screws in brick. However, this simple "yes" is dangerously incomplete. The true professional answer delves into the critical nuances of how, when, and why. Success isn't guaranteed by the fastener alone; it is the result of a systematic approach that considers the type and condition of the brick, the integrity of the mortar, the precise installation technique, and, most importantly, the quality of the screw itself. A failure in any one of these areas can compromise the integrity and safety of the entire fixture.
This article will serve as your authoritative guide to confidently and correctly using concrete screws in brick applications. We will dissect the mechanics of these powerful fasteners, explore the essential differences between brick and concrete substrates, and provide a detailed, step-by-step process for a secure and lasting installation. Our goal is to empower you with the technical knowledge to not only complete the task but to do so with an understanding of the engineering principles at play, ensuring reliability and efficiency. At Maden.co, we believe that building a stronger America starts with using the best components, and that begins with knowledge and access. This guide is a reflection of our commitment to Industrial Excellence and empowering our customers to build with confidence.
Understanding the Mechanics: How Concrete Screws Work
Before we can apply concrete screws to brick, it’s essential to understand what makes them unique. Unlike traditional screws that require a plastic anchor or a lag shield, a concrete screw is a self-tapping fastener designed to cut its own threads directly into masonry. This remarkable capability is what makes it a fast and effective solution for securing fixtures to concrete, block, and, as we’re discussing, brick.
The engineering behind a concrete screw is both simple and brilliant. It revolves around a few key features:
- Hardened Steel Construction: Concrete screws are made from high-strength, case-hardened steel. This allows the threads to be harder than the base material, enabling them to cut into the masonry without deforming or breaking.
- Specialized Thread Design: The most recognizable feature is the thread pattern. Many concrete screws utilize a "hi-lo" or a serrated thread design. This alternating thread height creates a deeper, more aggressive cut into the material. The high threads provide the primary cutting and holding action, while the lower threads add stability and help clear debris, resulting in a tighter, more secure grip with superior pull-out and shear resistance.
- The Pilot Hole is Key: The magic of a concrete screw is entirely dependent on a precisely drilled pilot hole. The fastener doesn't expand within the hole like a wedge anchor; instead, it relies on the tight mechanical interlock between its threads and the walls of the hole. If the hole is too large, the threads have nothing to bite into. If it's too small, the stress of driving the screw can be too great, potentially breaking the screw or, more likely in brick, cracking the base material. The manufacturer's specification for the pilot hole diameter is not a suggestion—it is a critical engineering requirement.
This mechanism provides a direct, vibration-resistant connection that is often stronger and faster to install than many traditional anchoring systems. The lack of an expansion mechanism also means that concrete screws can be installed closer to edges without the same risk of inducing spalling or cracking, a significant advantage when working with brittle materials like brick.
The Core Question: Applying Concrete Screws to Brickwork
With a firm grasp of how these screws function in a dense material like concrete, we can now address their application in brick. The fundamental principle of thread-cutting action remains the same. The screw's hardened threads will cut into the clay material of the brick, creating the same mechanical bond. However, brick is not concrete. It is a far more variable and often less predictable material.
The primary difference lies in consistency and composition. Concrete is a manufactured aggregate, generally providing a homogenous and predictable density. Brick, on the other hand, can vary dramatically in hardness, porosity, and internal structure.
- Hardness: Bricks range from relatively soft, porous, reclaimed bricks to extremely hard, dense-fired engineering bricks. The hardness will dictate the ease of drilling and the holding power of the screw.
- Internal Structure: The most significant variable is whether the brick is solid or cored (hollow). Attempting to use a standard concrete screw in a cored or hollow brick is a recipe for failure, as the threads will have insufficient material to engage with.
- Age and Condition: Older bricks can become brittle or soft over time. Weathering and exposure to moisture can degrade the material, reducing its structural integrity and, consequently, the pull-out strength of any fastener.
Therefore, while a concrete screw is mechanically capable of fastening into brick, a successful application requires a careful assessment of these variables. It's a process of verification, not assumption. This aligns with our core value of Supply Chain Transparency—it’s not enough to know what the product is; you must also understand the conditions in which it will perform optimally.
Critical Factors for Success: Brick Type and Condition
A successful installation begins long before you pick up a drill. It starts with a thorough evaluation of the brickwork itself. Making an incorrect assumption about the substrate is the most common point of failure.
Solid vs. Hollow/Cored Brick
This is the single most important factor to determine.
- Solid Brick: These are ideal for concrete screws. They provide a consistent, solid substrate for the screw's threads to cut into, offering excellent holding power. Most older brick construction and modern, high-quality face bricks are solid.
- Hollow or Cored Brick: These bricks have voids or "cores" running through them to reduce weight and material costs. Driving a concrete screw into the hollow section is impossible, as there is nothing for it to grip. Even if you manage to hit one of the "webs" (the solid portions of the brick), the holding power will be dramatically reduced and highly unpredictable. For any load-bearing or critical application, alternative fasteners like sleeve anchors or chemical anchors should be used for hollow brick.
You can often identify hollow brick by tapping on it—it will produce a more hollow sound than a solid brick. If in doubt, drilling a small test hole will provide a definitive answer.
Brick Hardness and Density
The material properties of the brick itself will influence both the installation process and the final holding strength.
- Soft, Porous Bricks: Often found in older, interior, non-structural walls, these bricks are easy to drill but can be prone to crumbling. The threads of the screw may tear out the base material if over-torqued. It is crucial to drive the screw slowly and stop as soon as it is snug.
- Hard, Dense Bricks: Engineering bricks or high-quality face bricks are extremely durable. They offer the highest potential holding power but require more effort to drill. A high-quality carbide-tipped masonry bit and a hammer drill are essential. The risk here is not crumbling but cracking the brick if the pilot hole is too small or if excessive force is used.
Assessing Overall Brick Condition
Visually inspect the area where you plan to install the fastener. Avoid any bricks that show signs of:
- Spalling: The face of the brick is flaking or breaking off.
- Cracks: Any existing cracks are weak points that will be exacerbated by the pressure of drilling and installing a screw.
- Efflorescence: A white, powdery residue on the surface, indicating moisture issues within the wall, which may have compromised the brick's integrity.
Never attempt to install a load-bearing fastener into a damaged or deteriorating brick. The reliability of the connection is paramount.
The Mortar Joint Dilemma: To Drill or Not to Drill?
It can be tempting to drill into the mortar joints between bricks. The mortar is significantly softer and easier to drill than the brick itself, and it eliminates the risk of cracking a pristine brick face. However, for most applications, this is a poor choice.
Why Drilling into Mortar is Risky:
- Low Holding Power: Mortar has a much lower compressive strength than brick. The pull-out values for a screw installed in a mortar joint can be less than 25% of the value for the same screw installed in solid brick.
- Inconsistent Material: Mortar joints can contain voids, and their consistency can vary significantly throughout a wall, leading to unpredictable holding strength.
- Degradation: Mortar is more susceptible to degradation from moisture and age than high-quality brick. A seemingly secure hold today could weaken over time.
There is a very limited exception: for extremely light-duty, non-critical applications (e.g., hanging a small sign or securing a small conduit clip), installing in a solid, well-maintained mortar joint may be acceptable. However, for anything of significant weight or importance—shelving, equipment mounts, structural supports—you must always fasten directly into the body of a solid brick. The principle of Industrial Excellence demands that we never compromise on safety and reliability for the sake of minor convenience.
Step-by-Step Installation Guide for Brick
Once you have assessed the brick and chosen the proper location, the installation process requires precision. Following these steps will ensure maximum holding power and a secure, professional result.
1. Select the Right Screw
The application dictates the screw. Consider the weight of the item being fastened, the environmental conditions, and the desired finish.
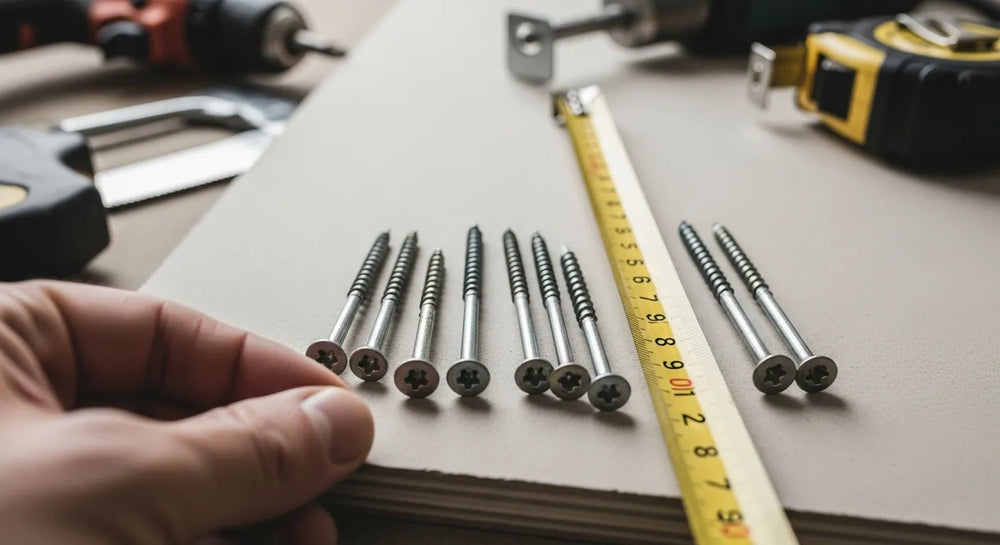
- Diameter and Length: Choose a diameter appropriate for the load. For length, calculate the thickness of your fixture plus a minimum embedment of 1 inch into the brick. For heavier loads, an embedment of 1.5 to 2.5 inches is recommended.
- Head Style: For applications requiring high clamping force and easy installation with a socket, a hex head is ideal. For a project demanding robust holding power, the American-made Hex Head Concrete Screws 3/16 x 1.85 offer reliability and ease of use. If a flush, clean finish is necessary, a flat head screw that can be countersunk is the proper choice. The 1/4 x 2-3/4 Flat Head Concrete Screws provide excellent strength with an unobtrusive profile.
- Coating: For interior, dry locations, a standard blue corrosion-resistant coating is sufficient. For exterior applications, or in damp environments like wash-down areas or basements, a superior coating is non-negotiable. A high-performance ceramic coating provides exceptional protection against rust and corrosion. For these demanding situations, a fastener like the Steel Blue Ruspert Ceramic Coating Flat Phillips® Drive Concrete Screw is the superior engineering choice, ensuring long-term durability.
2. Choose the Correct Drill Bit
This is a critical, non-negotiable step. Use a high-quality, carbide-tipped masonry drill bit that is designed for use in a hammer drill. The diameter of the bit must match the manufacturer's specification for the screw you are using (e.g., a 1/4" diameter screw typically requires a 3/16" pilot hole). Using the wrong size bit will guarantee failure.
3. Drill the Pilot Hole
- Use a Hammer Drill: A standard rotary drill will struggle with brick and will not produce a clean, properly sized hole. A hammer drill combines rotation with a percussion action to efficiently powderize the masonry.
- Mark Your Depth: Measure the required hole depth on your drill bit (screw embedment length + ~1/2 inch) and mark it with a piece of tape. This ensures you drill deep enough for the screw and any accumulated debris.
- Drill Straight: Keep the drill perpendicular to the wall surface. Drill steadily until you reach your marked depth.
4. Clean the Hole Thoroughly
This is the most-skipped step and one of the most critical for achieving maximum holding power. The dust and debris created during drilling acts as a lubricant and prevents the screw's threads from fully engaging with the solid base material.
- Use a wire brush with a diameter that matches the hole to scrub the sides.
- Use a can of compressed air, a manual blower bulb, or a vacuum to completely clear all loose particles from the hole. Repeat this brush-and-blow process at least twice. A clean hole can increase pull-out strength by over 30%.
5. Drive the Screw
- Use an Impact Driver or Drill: An impact driver is ideal, but a drill with a clutch setting will also work.
- Drive Steadily: Position the screw in the hole and drive it in a single, continuous motion. Do not back it out and restart.
- Do Not Over-Torque: This is crucial. Drive the screw until the head is seated firmly against the fixture. As soon as it is snug, stop. Continuing to drive it will strip the threads you just cut into the brick, destroying the connection.
Key Takeaway: The strength of a concrete screw installation in brick is a direct result of precision. A properly sized and thoroughly cleaned pilot hole is just as important as the quality of the screw itself. Taking the time to perform each step correctly is the difference between a temporary fix and a permanent, reliable solution.
Common Pitfalls and How to Avoid Them
Even with the right knowledge, mistakes can happen. Being aware of these common errors can help you avoid them on your next project.
- Drilling Too Close to an Edge: Always maintain a minimum distance of at least 3-4 inches from the edge of a brick or from another fastener. Drilling too close can cause the brick's edge to spall off.
- Assuming All Bricks are the Same: A procurement manager sourcing for multiple job sites must understand that the "brick" at one site may be vastly different from another. Always test in an inconspicuous area if you are unsure of the brick's quality or type.
- Reusing a Screw or Hole: Never back a concrete screw out and try to reinstall it in the same hole. The initial installation cuts precise threads; removing and reinserting the screw will damage these threads and severely compromise its holding power. A new, larger diameter screw or a different anchor type is needed if a screw is removed.
- Ignoring Manufacturer Specifications: The data sheets for quality fasteners contain critical information on required pilot hole size, minimum embedment depth, and performance data. Ignoring this information is a gamble. At Maden.co, we strive to provide easy access to this technical data to empower our customers to make informed decisions.
If you encounter unique challenges or have specific sourcing questions about finding the right American-made fastener for your application, don't hesitate to get in touch. Our team of experts is ready to help; you can reach us via our Contact Us page.
Sourcing American-Made Fasteners: A Strategic Advantage
The technical details of an installation are only one part of the equation. For a business, the source of the components is equally strategic. In a world of complex global supply chains, making the deliberate choice to source American-made fasteners offers tangible benefits that go far beyond the product itself.
For a procurement manager under pressure to keep a production line running, or an MRO buyer facing an unexpected equipment breakdown, the ability to quickly find a verified, U.S.-made part is a game-changer. This is the core of our mission at Maden.co. We are dedicated to democratizing access to American manufacturing, proving that American-made components are as accessible and convenient as any global alternative.
Here's why it matters:
- Unwavering Quality and Compliance: When you source a fastener from one of our 800+ verified U.S. manufacturers, you are getting a product held to rigorous domestic quality control standards and material certifications. This isn't just a screw; it's a guarantee of material traceability and performance, which is critical for compliance in many industrial sectors.
- Enhanced Supply Chain Resilience: The past few years have taught us the fragility of global supply lines. Sourcing domestically eliminates the risk of port delays, international shipping uncertainties, and tariffs. It provides a shorter, more transparent, and more reliable path from the factory floor to your job site.
- Superior Total Cost of Ownership (TCO): A fastener that fails prematurely due to poor materials or manufacturing defects costs far more than its purchase price. The costs of downtime, labor for rework, and potential damage far outweigh any initial savings. Investing in a high-quality, American-made screw is an investment in reliability and a lower TCO.
We are building the definitive platform to power the U.S. manufacturing revival. Our entire business model is built on this principle; you can learn more about our mission to champion American manufacturing here. And for the proud American manufacturers who produce these essential components, we offer a direct path to the industrial buyers who need your products most. Register as a vendor and join us in proving that America's manufacturing revival is here.
Conclusion
So, can you use concrete screws in brick? The answer is a resounding and qualified yes. When installed in solid, good-condition brick with the correct technique, they provide a fast, secure, and reliable fastening solution. Success hinges on a professional approach: carefully assessing the brick, drilling a precise and clean pilot hole, and selecting a high-quality screw designed for the specific application and environment. By avoiding mortar joints for critical loads and never over-torquing the screw, you can achieve a bond that is both strong and durable.
In today's competitive industrial landscape, efficiency and reliability are paramount. Wasted time and material from failed fasteners are unacceptable. By arming yourself with the right knowledge and the right components, you can eliminate these risks and execute your projects with confidence.
Don't let procurement friction slow you down. Explore our extensive catalog of over 2.5 million U.S.-made products and build a more resilient, reliable, and all-American supply chain. For larger projects or capital-intensive equipment purchases, we empower your business to manage cash flow strategically. You can apply for Instant Financing at checkout to streamline your procurement process and get the parts you need, when you need them.
Frequently Asked Questions
1. Can I reuse a concrete screw in the same hole in brick? No. A concrete screw works by cutting its own threads into the masonry. Once it is removed, those threads are cut. Reinstalling the same screw will not provide a tight fit and will result in a drastically reduced holding capacity. If a screw must be removed, you must drill a new hole in a different location or use a larger diameter screw.
2. What is the main difference between a concrete screw and a regular wood or metal screw? The primary differences are material hardness and thread design. Concrete screws are made from case-hardened steel, making them strong enough to tap into concrete and brick. Their threads are specifically engineered with a hi-lo or serrated profile to cut into brittle masonry material, whereas wood or metal screws are designed for softer, more malleable materials.
3. How deep should a concrete screw go into brick? The screw must be embedded deep enough into the brick to achieve sufficient holding power. A minimum embedment depth of 1 inch is the standard rule of thumb. However, for heavier applications, increasing the embedment to 1.5 inches or more is recommended, provided the brick is thick enough. Always consult the manufacturer's specifications for the specific screw you are using.
4. Do I need to use a hammer drill for installing concrete screws in brick? Yes. While you might be able to drill into very soft brick with a standard rotary drill, a hammer drill is strongly recommended for all brick applications. It creates a cleaner, more accurately sized hole far more efficiently and without overheating the drill bit. Using the wrong type of drill can result in an improperly formed hole, which will compromise the fastener's performance.


