Drywall Screws Per Ceiling Sheet: A Procurement Guide
Table of Contents
- Introduction
- Understanding Drywall Ceiling Installation Dynamics
- The Core Calculation: How Many Screws Per Drywall Sheet on a Ceiling?
- Factors Influencing Screw Count and Type
- Beyond the Numbers: Strategic Procurement for Drywall Ceilings
- Best Practices for Drywall Ceiling Installation
- Conclusion
- FAQ
Introduction
In the intricate world of commercial construction and facility maintenance, every component, no matter how small, plays a critical role in a project's success or failure. A seemingly minor miscalculation in material quantity, such as the number of drywall screws required for a ceiling, can cascade into significant delays, budget overruns, and even compromise structural integrity. Procurement managers, MRO buyers, and design engineers understand that precision in material planning is not merely a best practice; it is a fundamental requirement for operational efficiency and project solvency. This guide will delve into the precise calculations, industry standards, and strategic considerations for determining the optimal number of drywall screws for ceiling applications, emphasizing quality, efficiency, and the undeniable role of U.S.-made components in bolstering project success and supply chain resilience.
Understanding Drywall Ceiling Installation Dynamics
Installing drywall on a ceiling presents unique challenges compared to wall applications. Gravity is the primary adversary, constantly pulling the sheets downward and demanding a more robust fastening strategy. This inherent difference necessitates a distinct approach to screw count, spacing, and installation techniques to ensure long-term stability, prevent sagging, and maintain the aesthetic integrity of the finished surface.
Why Ceilings Demand Specific Attention
The forces at play when installing drywall on a ceiling are fundamentally different from walls. On a wall, gravity helps hold the sheet against the studs, reducing some of the stress on the fasteners. On a ceiling, however, gravity continuously works to pull the drywall away from the framing. This requires:
- Increased Screw Density: More screws are needed per square foot to counteract gravity and ensure the drywall remains securely fastened over time.
- Preventing Sagging: Proper screw spacing and type are critical to prevent the drywall from sagging, especially with heavier, thicker sheets or in humid environments.
- Structural Integrity: A securely fastened ceiling is essential not just for aesthetics but also for containing fire and sound, and supporting insulation or light fixtures.
Standard Drywall Sheet Sizes
Drywall sheets come in various standard dimensions, and understanding these sizes is the first step in accurately calculating screw requirements. The most common sizes for commercial and residential applications include:
- 4 feet x 8 feet (32 sq ft): Often used in smaller rooms or where maneuvering larger sheets is difficult.
- 4 feet x 12 feet (48 sq ft): A very common size, offering a good balance between coverage and manageability.
- 4 feet x 16 feet (64 sq ft): Ideal for large open spaces, reducing the number of seams and potentially speeding up installation.
The dimensions of the sheet directly influence how many framing members it will span and, consequently, the total number of screws required. A larger sheet will span more joists, demanding more fasteners.
The Core Calculation: How Many Screws Per Drywall Sheet on a Ceiling?
Determining the precise number of screws for a drywall ceiling is a calculation rooted in industry standards and best practices. While a general rule of thumb exists, a detailed approach ensures both structural integrity and cost efficiency.
General Rules and Industry Standards
The authoritative guidance for drywall installation comes from organizations like ASTM International, specifically standards such as ASTM C1280 for gypsum panel products and C1396 for gypsum board. These standards, alongside manufacturer recommendations and local building codes, dictate the minimum fastening requirements.
For ceilings, the prevailing industry standard for screw spacing is 7 inches on center (OC) along framing members, both in the field of the sheet and along all perimeter edges. This is a crucial distinction from wall applications, where spacing can often be 12 inches OC. The tighter spacing on ceilings directly addresses the gravitational pull and the need for enhanced support.
- Perimeter Screws: Every edge of the drywall sheet that abuts a framing member (joist, furring channel, blocking) must be fastened every 7 inches. This includes all four sides.
- Field Screws: Within the main body of the sheet, along every intermediate framing member, screws must also be spaced 7 inches apart.
Step-by-Step Calculation
Let's break down the process for a standard 4x8 foot drywall sheet, a common size for many ceiling installations.
- Identify Drywall Sheet Size: For this example, we'll use a 4 ft x 8 ft (48 inches x 96 inches) sheet.
- Determine Framing Layout: The most common framing layouts are 16 inches on center (OC) or 24 inches OC. For ceilings, 16 inches OC is generally preferred for optimal support, though 24 inches OC is sometimes permitted with thicker or sag-resistant drywall. We will illustrate both.
-
Calculate Screws for Perimeter:
- Along the 8-foot (96-inch) edges: (96 inches / 7 inches) = ~13.7 screws. Round up to 14 screws per edge. (14 screws * 2 edges = 28 screws)
- Along the 4-foot (48-inch) edges: (48 inches / 7 inches) = ~6.8 screws. Round up to 7 screws per edge. (7 screws * 2 edges = 14 screws)
- Total Perimeter Screws: 28 + 14 = 42 screws. (Note: corners often get double-fastened, which is typically accounted for in the rounding up and general best practice.)
-
Calculate Screws for Field:
-
16 inches OC Framing:
- An 8-foot sheet will span 6 joists (one at each end, plus four intermediate joists at 16", 32", 48", 64", 80"). Or, more simply, divide the length (96 inches) by the spacing (16 inches) to get 6 spans, meaning 7 lines of screws if starting at 0 inches.
- However, two of these "lines" are already accounted for in the perimeter screws along the 8-foot edges. So, we are looking at 5 intermediate lines of screws.
- Each intermediate line (4 feet or 48 inches) will need (48 inches / 7 inches) = ~6.8 screws. Round up to 7 screws.
- Total Field Screws for 16" OC: 5 intermediate lines * 7 screws/line = 35 screws.
-
24 inches OC Framing:
- An 8-foot sheet spans 4 joists (one at each end, plus two intermediate joists at 24", 48", 72"). Again, two "lines" are perimeter. So, we have 2 intermediate lines of screws.
- Each intermediate line (4 feet or 48 inches) will need (48 inches / 7 inches) = ~6.8 screws. Round up to 7 screws.
- Total Field Screws for 24" OC: 2 intermediate lines * 7 screws/line = 14 screws.
-
16 inches OC Framing:
-
Total Screws per Sheet:
- For 4x8 sheet on 16" OC framing: 42 (perimeter) + 35 (field) = 77 screws per 4x8 sheet.
- For 4x8 sheet on 24" OC framing: 42 (perimeter) + 14 (field) = 56 screws per 4x8 sheet.
Practical Example for a 4x12 Drywall Sheet
Let's extend this to a 4x12 foot (48 inches x 144 inches) sheet on 16 inches OC framing, which is a common scenario in larger commercial spaces.
- Identify Drywall Sheet Size: 4 ft x 12 ft (48 inches x 144 inches).
- Determine Framing Layout: 16 inches OC.
-
Calculate Screws for Perimeter:
- Along the 12-foot (144-inch) edges: (144 inches / 7 inches) = ~20.5 screws. Round up to 21 screws per edge. (21 screws * 2 edges = 42 screws)
- Along the 4-foot (48-inch) edges: (48 inches / 7 inches) = ~6.8 screws. Round up to 7 screws per edge. (7 screws * 2 edges = 14 screws)
- Total Perimeter Screws: 42 + 14 = 56 screws.
-
Calculate Screws for Field:
- A 12-foot sheet (144 inches) on 16 inches OC framing will have (144 / 16) = 9 spans, meaning 10 lines of screws.
- Two lines are perimeter, leaving 8 intermediate lines.
- Each intermediate line (4 feet or 48 inches) will need (48 inches / 7 inches) = ~6.8 screws. Round up to 7 screws.
- Total Field Screws: 8 intermediate lines * 7 screws/line = 56 screws.
-
Total Screws per Sheet:
- For 4x12 sheet on 16" OC framing: 56 (perimeter) + 56 (field) = 112 screws per 4x12 sheet.
Important Note on Rounding: Always round up when calculating screws to ensure you have enough. It is always better to have a few extra screws than to run short mid-project. Also, always add a buffer (e.g., 10-15%) to your total order for lost screws, mistakes, or damaged fasteners.
Factors Influencing Screw Count and Type
While the core calculation provides a solid baseline, several other factors can influence both the total number of screws needed and the specific type of screw that should be procured.
Framing Materials and Spacing
- Wood vs. Metal Studs/Joists: This is a primary determinant of screw type. Wood framing requires coarse-thread screws for better bite and pull-out resistance, while metal framing necessitates fine-thread screws to tap into the thinner gauge steel without stripping.
- 16-inch vs. 24-inch On-Center Spacing: As seen in the calculations, wider spacing (24 inches OC) significantly reduces the number of framing members a sheet spans, thus reducing the total screw count. However, wider spacing also places more stress on each fastener and the drywall itself, often requiring thicker or sag-resistant drywall panels to compensate. For critical applications, 16 inches OC is always the safer bet for ceilings.
- Furring Channels: In some ceiling installations, especially in renovations or to create a level surface, metal furring channels (hat channel) are installed perpendicular to the joists. These channels become the fastening surface, and the screws must be appropriately sized for them.
Drywall Thickness and Type
The thickness and type of drywall also play a role in screw selection.
- 1/2-inch vs. 5/8-inch Drywall: Standard drywall is typically 1/2-inch thick. However, 5/8-inch drywall is often used for fire-rated assemblies (Type X), enhanced soundproofing, or as a sag-resistant option for ceilings, particularly when framing is 24 inches OC. Thicker drywall, while heavier, can reduce the likelihood of sagging.
- Screw Length Requirements: The screw must penetrate at least 5/8-inch into the framing material for proper hold. For 1/2-inch drywall, a 1-1/4 inch screw is generally sufficient (1/2" drywall + 5/8" penetration = 1-1/8", leaving a buffer). For 5/8-inch drywall, a 1-5/8 inch screw is often recommended.
Screw Type and Specifications
Choosing the correct screw is as critical as calculating the quantity. Quality, U.S.-made drywall screws ensure superior performance and compliance with industry standards. At Maden.co, we focus on connecting buyers with precisely engineered fasteners.
- Coarse Thread: These screws feature widely spaced threads designed to dig into and hold securely in wood framing. For projects involving wood joists, a robust option like a 6 x 1-1/4 coarse thread drywall screw ensures excellent pull-out resistance and a firm hold, crucial for ceiling applications.
- Fine Thread: Characterized by closely spaced threads, fine-thread screws are engineered to tap into and self-drill through light-gauge metal studs or furring channels without stripping the material. For metal framing, a precise fastener such as a 6 x 1 fine thread drywall screw offers superior engagement and stability, preventing the loosening that can occur with coarse threads in metal.
- Length: As discussed, sufficient length is paramount for secure fastening. For scenarios requiring extra depth, perhaps due to thicker drywall, multiple layers, or specific framing requirements, an 8 x 4 drywall screw might be necessary to achieve the desired penetration and pull-out strength.
- Head Type: Drywall screws universally feature a bugle head design. This conical shape allows the screw head to countersink flush with the drywall surface without tearing the paper, creating a slight dimple for easy mudding and finishing.
- Corrosion Resistance: Most drywall screws have a black phosphate coating, which provides basic corrosion resistance and helps the screw blend in with the drywall during finishing. For environments with higher humidity or specific performance requirements, specialized coatings might be considered, though standard drywall screws are generally sufficient for most interior ceiling applications.
Adhesive Use and Its Impact
Some contractors opt to use drywall adhesive in conjunction with screws for ceiling installations. While adhesive can provide an additional layer of support, improve sound deadening, and reduce the likelihood of screw pops, it never eliminates the need for screws or allows for reduced screw count. Adhesives primarily act as a secondary support and sound dampener; screws remain the primary mechanical fasteners, responsible for bearing the load and securing the drywall to the framing. The screw count and spacing standards still apply even when using adhesive.
Beyond the Numbers: Strategic Procurement for Drywall Ceilings
For procurement managers and business owners, the decision extends beyond a simple count. It encompasses the strategic value of sourcing quality, reliable components that contribute to overall project success and long-term cost savings.
The Cost of Error: Why Precision Matters
Underestimating screw requirements or compromising on screw quality can lead to a cascade of costly problems:
- Material Waste: Rework due to failed fasteners or sagging drywall means wasted materials and additional purchasing.
- Labor Rework: Repairing screw pops, re-fastening loose sheets, or replacing entire sections of drywall due to inadequate fastening incurs significant labor costs and project delays.
- Project Delays: Any rework pushes back project timelines, leading to penalties, increased overhead, and frustrated clients.
- Safety Concerns: Sagging or loose drywall can pose a safety hazard, particularly in commercial or public spaces.
- Reputation Damage: Substandard work, regardless of its cause, reflects poorly on the contractor and procurement team.
This illustrates the true Total Cost of Ownership (TCO) – it’s not just the initial price of the screws, but the holistic financial impact of their quality and proper application. Investing in the right fasteners from the outset is an investment in project efficiency and future cost avoidance.
Sourcing Quality U.S.-Made Drywall Screws
The origin and quality of your industrial fasteners directly impact performance and supply chain stability. Sourcing U.S.-made drywall screws offers distinct advantages:
- Reliability and Consistency: American manufacturers adhere to stringent quality control standards and specifications, such as DIN and NPT where applicable, ensuring that each screw meets exact dimensional and performance criteria. This consistency reduces defects, minimizes failures, and builds confidence in the materials used.
- Supply Chain Resilience: Relying on domestic sources significantly mitigates risks associated with international shipping delays, geopolitical instability, customs issues, and fluctuating import tariffs. A robust domestic supply chain enhances predictability and reduces lead times, crucial for maintaining project schedules.
- Supporting American Manufacturing: Choosing U.S.-made products contributes to the domestic economy, supports local jobs, and fosters innovation within the American industrial sector. This aligns with a broader commitment to national economic strength.
At Maden.co, we embody American Manufacturing Pride, Digital Innovation, and Supply Chain Transparency. Our mission is to democratize access to American manufacturing, ensuring that procurement professionals can easily connect with the highest quality U.S.-made components. We offer a vast network of over 800+ verified U.S. manufacturers, providing access to over 2.5 million American-made products.
The Strategic Advantage of Maden.co
Our platform is engineered to transform the procurement process for industrial buyers.
- Verified Manufacturers: Every manufacturer on Maden.co undergoes a rigorous verification process. This ensures that when you source a product, like drywall screws, you are partnering with a reliable supplier committed to industrial excellence and adhering to critical industry standards.
- Vast Catalog and Ease of Access: For a procurement manager under pressure to source a specific coarse thread drywall screw, a design engineer needing precise length fasteners for a new commercial prototype, or an MRO buyer facing an unexpected equipment breakdown, the ability to quickly find, compare, and finance a verified, U.S.-made part is a game-changer. Our extensive catalog allows you to find exactly what you need, from a 6 x 1-1/4 coarse thread drywall screw for wood framing to a 6 x 1 fine thread drywall screw for metal, or even an 8 x 4 drywall screw for more demanding applications.
- Streamlined Procurement: We drastically reduce procurement friction and save valuable time by consolidating access to a diverse range of American manufacturers onto a single, intuitive platform. This digital innovation means less time spent searching and more time focused on critical project management.
- Instant Financing: A key differentiator and strategic tool for businesses is our "Instant Financing" option. This isn't merely a payment method; it's a mechanism designed to empower procurement managers and business owners to manage cash flow effectively and facilitate larger-volume purchases without tying up immediate capital. You can apply for Instant Financing at checkout to streamline your capital-intensive projects, turning large purchases into manageable expenses and ensuring your projects stay on track without financial bottlenecks.
- Customer Empowerment: Our platform is built around the core value of customer empowerment. We believe in providing you with the tools and transparency needed to make informed purchasing decisions, improving your Total Cost of Ownership and enhancing overall supply chain resilience. Our vision is to become the definitive platform that proves American-made components are as accessible and convenient as any global alternative, driving the manufacturing revival with our tagline: "America's manufacturing revival is here." You can learn more about our mission to champion American manufacturing here on our About Us page.
Empowering American Manufacturing
By choosing Maden.co, you're not just making a purchase; you're actively participating in the resurgence of American industry. We firmly believe that "America's manufacturing revival is here," and it's powered by the diligent work of American manufacturers and the strategic choices of American buyers. We encourage qualified U.S. manufacturers to join our growing network. Are you a U.S. manufacturer looking to expand your reach, connect with a broader base of industrial buyers, and contribute to the strength of the domestic supply chain? Register as a vendor and join the American manufacturing revival.
Best Practices for Drywall Ceiling Installation
Even with the correct number and type of screws, proper installation techniques are essential to achieve a durable and high-quality finish.
Preparation is Key
- Accurate Measurements: Double-check room dimensions and framing layouts to minimize cuts and waste.
- Proper Framing Inspection: Ensure all ceiling joists or furring channels are plumb, level, and securely fastened. Address any irregularities before hanging drywall.
- Environmental Conditions: Maintain consistent temperature and humidity within the building. Extreme conditions can cause drywall to expand or contract, leading to issues.
Installation Techniques
- Two-Person Lift: Drywall sheets, especially for ceilings, are heavy and awkward. Always use a two-person team or a drywall lift to safely position sheets, preventing injury and damage.
- Perpendicular Installation: Whenever possible, install drywall sheets perpendicular to the framing members. This method typically provides stronger support and helps to bridge minor framing irregularities, reducing the likelihood of sagging.
- Butt Joints vs. Tapered Edges: Plan your layout to minimize butt joints (ends of sheets without tapered edges), as these are harder to finish smoothly. Place tapered edges together where possible.
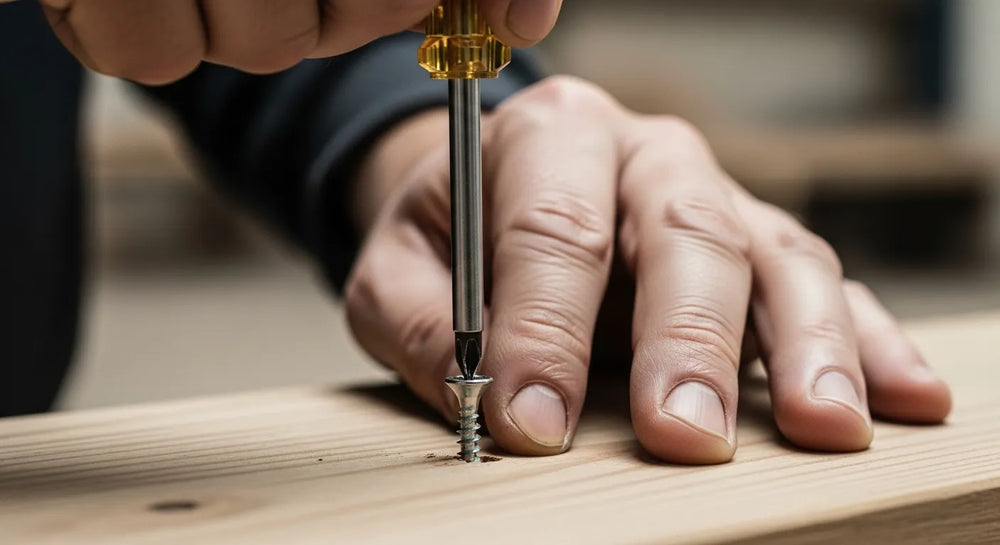
- Dimpling, Not Breaking, the Paper: Use a drywall screw gun with an adjustable clutch to drive screws just below the paper surface, creating a slight "dimple" without tearing the paper. Over-driving breaks the paper, severely compromising the screw's holding power.
- Avoiding Screw Pops: Screw pops occur when screws are either improperly driven, over-driven, or when wood framing shrinks, causing the fastener to push through the finish. Proper depth setting and ensuring wood framing is adequately seasoned can help prevent this.
Quality Control and Inspection
- Check for Flush Screws: After installation, inspect every screw to ensure it is flush or slightly dimpled below the surface, with no torn paper.
- Adequate Support: Confirm that all edges of the drywall sheets, including perimeter and intermediate joints, are adequately supported by framing and fastened according to the 7-inch OC standard.
- Visual Inspection: Conduct a final visual inspection of the entire ceiling to spot any potential issues before the finishing stages begin.
Conclusion
The seemingly straightforward task of hanging drywall on a ceiling requires meticulous planning, precise calculations, and a commitment to quality in every component. The number of screws per drywall sheet on a ceiling is not an arbitrary figure but a critical element dictated by gravity, industry standards, and the imperative for long-term structural integrity. By adhering to the recommended 7-inch on-center spacing for both perimeter and field screws, and carefully considering factors like framing material, drywall thickness, and screw type, procurement managers can mitigate risks and ensure project success.
Beyond the numbers, the strategic value of sourcing high-quality, U.S.-made drywall screws cannot be overstated. Such an approach guarantees adherence to superior manufacturing standards, bolsters supply chain resilience against global disruptions, and actively contributes to the revitalization of American industry. At Maden.co, we are dedicated to connecting industrial buyers with a vast catalog of over 2.5 million verified American-made products, upholding our core values of American Manufacturing Pride, Digital Innovation, Supply Chain Transparency, Industrial Excellence, and Customer Empowerment. We aim to be your strategic partner in building more reliable and efficient procurement processes.
We encourage you to explore our extensive catalog of U.S.-made drywall screws and other essential industrial components on Maden.co today. For specific sourcing inquiries or to leverage our platform for your next critical project, our team is ready to provide expert assistance through our contact page. Remember, for larger volume purchases or to manage your project budget more effectively, you can apply for Instant Financing at checkout, streamlining your capital-intensive projects and reinforcing the "America's manufacturing revival is here."
FAQ
Q1: How does drywall screw spacing for ceilings differ from walls?
A1: For ceilings, the standard screw spacing is 7 inches on center (OC) along all framing members, including the perimeter and field of the sheet. For walls, the spacing can typically be 12 inches OC. The tighter 7-inch spacing on ceilings is necessary to counteract gravity and prevent sagging.
Q2: What's the best type of screw for wood versus metal ceiling joists?
A2: For wood ceiling joists, coarse-thread drywall screws are recommended as their wider threads provide a better grip and pull-out resistance in wood. For metal ceiling joists or furring channels, fine-thread drywall screws are ideal because their closely spaced threads are designed to self-tap efficiently into light-gauge steel without stripping.
Q3: Can I use fewer screws if I also use drywall adhesive?
A3: No, drywall adhesive should be used in conjunction with, not as a replacement for, the required number of screws. While adhesive can provide additional support, reduce screw pops, and improve sound deadening, screws remain the primary mechanical fasteners. Industry standards for screw count and spacing still apply even when using adhesive.
Q4: What are the risks of using too few or too many screws on a drywall ceiling?
A4: Using too few screws significantly increases the risk of sagging, screw pops, and eventual drywall failure due to insufficient support against gravity. Using too many screws can weaken the drywall sheet, make finishing more difficult due to excessive dimpling, and is an unnecessary expense. Following the 7-inch OC spacing standard provides optimal balance.


