Epoxy Concrete Anchors: A Master Installation Guide
Table of Contents
- Introduction to Epoxy Concrete Anchors: Unrivaled Strength and Durability
- Essential Considerations Before Installation
- Tools and Materials Required for Epoxy Anchor Installation
- Step-by-Step Installation Guide: How to Install Concrete Anchors with Epoxy
- Common Pitfalls and How to Avoid Them
- Enhancing Procurement with U.S.-Made Quality
- Conclusion
- FAQ
In industrial and construction environments, the integrity of a structure often hinges on the reliability of its smallest components. Imagine the catastrophic implications of a piece of heavy machinery detaching from its foundation, a critical support beam shifting, or safety barriers failing due to inadequate fastening. These scenarios highlight a constant challenge for procurement managers, MRO buyers, and design engineers: how to ensure uncompromising structural stability and safety. The answer, for many critical applications, lies in the precise installation of epoxy concrete anchors.
This comprehensive guide delves into the intricate process of how to install concrete anchors with epoxy, providing the in-depth knowledge necessary to achieve superior bond strength, durability, and compliance. We will meticulously cover everything from selecting the right materials and preparing the substrate to executing each installation step with precision, and ultimately, ensuring the longevity and safety of your anchored structures. Our aim is to equip you with the expertise to confidently manage projects that demand the highest standards of anchoring, while also exploring how strategic sourcing through a marketplace like Maden.co can streamline your access to the quality, U.S.-made components essential for success.
Introduction to Epoxy Concrete Anchors: Unrivaled Strength and Durability
Epoxy concrete anchors, also known as chemical anchors, represent a cornerstone in modern construction and industrial fastening. Unlike traditional mechanical anchors that rely on expansion or friction within a drilled hole, epoxy anchors utilize a high-strength chemical adhesive to bond a threaded rod, rebar, or bolt into concrete, masonry, or stone. This chemical bond creates a monolithic connection between the anchor and the base material, distributing stress more evenly and providing exceptional resistance to static, dynamic, and seismic loads.
Why Choose Epoxy Anchors Over Mechanical Fasteners?
The decision to opt for epoxy anchors is often driven by their distinct advantages in critical applications:
- Superior Load-Bearing Capacity: Epoxy anchors typically offer significantly higher shear and tensile strengths compared to their mechanical counterparts, making them ideal for heavy-duty applications like securing structural steel, heavy machinery, and critical safety installations.
- Vibration and Seismic Resistance: The chemical bond is less susceptible to loosening under vibration or seismic activity, ensuring long-term stability in dynamic environments.
- Reduced Stress on Base Material: Unlike expansion anchors that create internal stress in the concrete, epoxy anchors bond uniformly, minimizing the risk of concrete cracking or spalling, especially in close-edge or close-spacing situations.
- Versatility in Substrates: They perform exceptionally well in various base materials, including cracked and uncracked concrete, solid masonry, and even damp conditions (with specific formulations).
- Sealing and Corrosion Protection: The epoxy resin can act as a sealant, protecting the anchor from moisture and corrosive elements, thus extending its lifespan.
- Customizable Embedment Depths: Epoxy systems allow for flexible embedment depths, which can be optimized for specific load requirements and concrete thicknesses.
Common Applications Requiring Epoxy Anchors
The robust performance of epoxy anchors makes them indispensable across a spectrum of industrial and commercial applications:
- Heavy Equipment Anchoring: Securing large machinery, generators, and manufacturing equipment to concrete slabs.
- Structural Steel Connections: Anchoring base plates for columns, beams, and bracing.
- Rebar Doweling: Connecting new concrete structures to existing ones, or extending reinforcement for concrete slabs and walls.
- Safety Barriers and Guardrails: Installing roadside barriers, warehouse safety systems, and architectural railings.
- Seismic Retrofitting: Enhancing the seismic resistance of existing structures.
- Facade and Cladding Installations: Securing exterior building components.
For such demanding applications, sourcing the right anchor type and ensuring its quality is paramount. At Maden.co, our mission is to democratize access to American manufacturing, providing industrial buyers with over 2.5 million U.S.-made products, ensuring quality and reliability for these critical components.
Essential Considerations Before Installation
Before even reaching for a drill, a thorough understanding of project requirements and environmental factors is crucial. Proper planning mitigates risks and guarantees a successful, compliant installation.
Substrate Analysis
The concrete or masonry base material is a key determinant of anchor performance.
- Concrete Strength and Condition: Verify the concrete's compressive strength. Is it cracked or uncracked? Are there any voids, spalls, or surface contaminants? These factors dictate the choice of epoxy and anchor type.
- Age of Concrete: Ensure the concrete has reached its design strength, typically 28 days, before anchoring.
- Aggregate Type: The composition of the aggregate can influence drilling and bonding.
Load Requirements
Understanding the forces the anchor will endure is fundamental.
- Tensile Load: The pulling force acting perpendicular to the concrete surface.
- Shear Load: The force acting parallel to the concrete surface.
- Combined Loads: Most real-world applications involve both tensile and shear forces.
- Dynamic vs. Static Loads: Dynamic (cyclic) loads, like those from vibrating machinery, require anchors with high fatigue resistance.
- Safety Factors: Always account for appropriate safety factors as per engineering specifications and local building codes.
Environmental Factors
Epoxy curing and long-term performance are sensitive to environmental conditions.
- Temperature: Both ambient and substrate temperatures significantly impact epoxy cure time and ultimate strength. Most epoxies have specific temperature ranges for optimal application and curing.
- Moisture: While some epoxies are formulated for damp conditions, always verify the product's suitability. Excessive moisture can compromise bond strength.
- Chemical Exposure: If the anchor will be exposed to chemicals, ensure the epoxy resin is resistant to those specific substances.
- Corrosion Risk: In corrosive environments, stainless steel anchors combined with appropriate epoxy formulations are essential.
Anchor Selection
The type of anchor rod or rebar must be compatible with the epoxy system and the application.
- Threaded Rods: Available in various grades (e.g., A36, Grade 5, Grade 8, Stainless Steel) and finishes. Ensure the thread type matches the intended fixture. For example, a reliable solution for many applications is a BN Products 3/8-inch Inside Thread Sanko Drop-In Concrete Anchor, designed for robust fastening.
- Rebar: Used extensively for concrete connections and extensions. The rebar's diameter and deformation pattern are critical for mechanical interlock with the epoxy.
- Specialty Anchors: Some applications may require custom-fabricated anchors or specific designs.
Compliance and Standards
Adherence to industry standards and building codes is non-negotiable for safety and regulatory approval.
- ICC-ES (International Code Council Evaluation Service): Provides comprehensive evaluation reports for anchoring products, detailing their performance in various conditions. Always specify products with relevant ICC-ES approvals.
- ACI (American Concrete Institute): ACI 318 (Building Code Requirements for Structural Concrete) and ACI 355.4 (Qualification of Post-Installed Adhesive Anchors in Concrete) are critical references for design and installation.
- Manufacturer Specifications: Always follow the specific instructions and data sheets provided by the epoxy and anchor manufacturer.
Understanding these considerations is paramount. For a procurement manager under pressure to source a specific anchor meeting rigorous DIN or NPT standards, or a design engineer needing material certifications for a new prototype, the ability to quickly find and verify U.S.-made parts is a game-changer. This is where platforms like Maden.co prove invaluable, connecting you directly with manufacturers committed to industrial excellence.
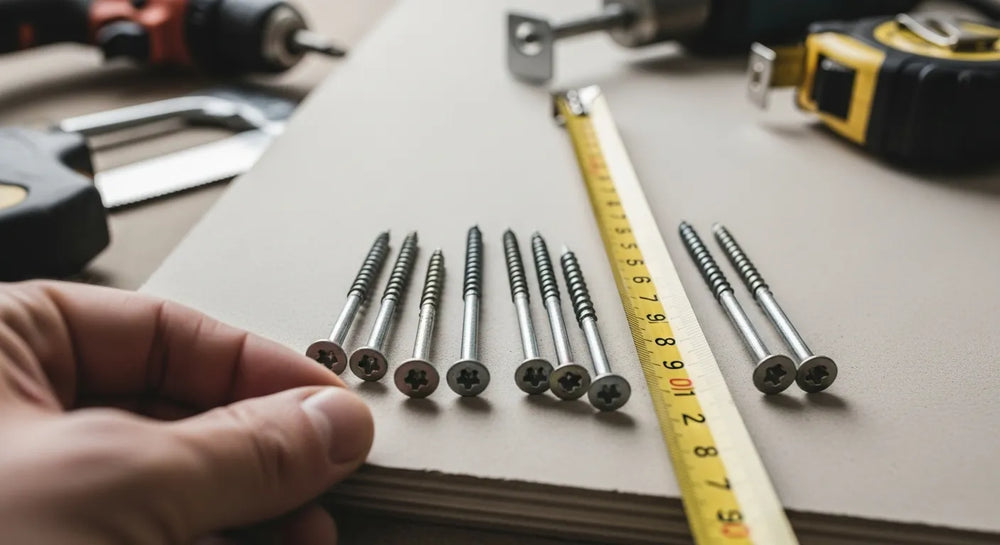
Tools and Materials Required for Epoxy Anchor Installation
Having the correct tools and materials on hand is not merely convenient; it is fundamental to the quality and safety of the installation. Using substandard equipment or incorrect materials can compromise the anchor's integrity.
Drilling Equipment
- Rotary Hammer Drill: Essential for drilling precise holes in concrete. Ensure it's powerful enough for the diameter and depth of the holes required.
- Carbide-Tipped Drill Bits: Use high-quality, sharp bits that match the specified diameter for the anchor system. The drill bit diameter is critical – typically slightly larger than the anchor rod/rebar to allow for epoxy insertion. Using a worn bit can result in an oversized hole, compromising bond strength.
Hole Cleaning Tools
This step is the most critical for bond strength. Do not cut corners.
- Wire Brush (Nylon or Steel): Specifically sized to the drill hole diameter. Used to scrub the inside of the hole to remove loose dust and debris.
- Air Compressor or Hand Pump/Blower Bulb: To thoroughly blow out dust from the drilled hole. A minimum of 80 PSI is often recommended for compressed air.
- Industrial Vacuum Cleaner: For removing larger debris, especially when drilling multiple holes or in dust-sensitive environments.
Epoxy Dispensing Equipment
- Epoxy Adhesive Cartridge: Contains the two-part resin and hardener system. Ensure it's within its shelf life and stored according to manufacturer recommendations.
- Static Mixing Nozzle: Attaches to the cartridge and ensures proper mixing of the two components as they are dispensed. Use a new nozzle for each cartridge or if there's an interruption in dispensing.
- Dispensing Gun: A specialized gun designed for the specific epoxy cartridge type (e.g., side-by-side, coaxial). Manual, battery-powered, or pneumatic options are available for different project scales.
Anchors and Related Hardware
- Threaded Rods, Rebar, or Specialty Anchors: As selected based on project requirements. Ensure they are clean and free of oil, grease, or rust. For those needing specific tooling to work with concrete anchors, a robust option is the 1-Headed Concrete Anchor Shear Connector Chuck, or for a more comprehensive solution, consider a Concrete Anchor Shear Connector Chuck Set. These tools are essential for the efficient and correct manipulation of anchors during installation.
- Nuts and Washers: To secure the fixture after the epoxy has cured.
- Torque Wrench: For applying the specified torque to the nuts, ensuring proper fixture attachment without overstressing the anchor.
Safety Gear (Personal Protective Equipment - PPE)
- Safety Glasses/Goggles: To protect eyes from drilling debris and chemical splashes.
- Gloves: Chemical-resistant gloves (e.g., nitrile) to protect hands from epoxy resins.
- Dust Mask/Respirator: To prevent inhalation of concrete dust during drilling and potentially epoxy fumes.
- Hearing Protection: During drilling operations.
By meticulously preparing with the right tools and materials, you lay the groundwork for a successful installation. Sourcing these critical components from verified U.S. manufacturers, as facilitated by Maden.co, adds an extra layer of confidence in their quality and performance.
Step-by-Step Installation Guide: How to Install Concrete Anchors with Epoxy
Precision and adherence to manufacturer instructions are paramount throughout the installation process. Each step builds upon the last, and neglecting any detail can compromise the anchor's ultimate strength and safety.
Step 1: Planning and Layout
Begin by accurately marking the anchor locations on the concrete surface. Use a tape measure, chalk line, and a marker to ensure precise placement.
- Verify Spacing and Edge Distance: Adhere strictly to minimum edge distances and spacing requirements specified by the anchor manufacturer or engineering plans. These distances are critical to prevent concrete breakout and ensure full bond strength.
- Check for Obstructions: Before drilling, use a stud finder, ground-penetrating radar, or review architectural drawings to check for embedded rebar, conduit, or post-tensioning cables that could be damaged during drilling.
Step 2: Drilling the Hole
This step requires precision in both location and depth.
- Select the Correct Drill Bit: Use a carbide-tipped drill bit matching the diameter specified by the epoxy anchor manufacturer. Too small, and the anchor won't fit; too large, and the bond strength will be compromised.
- Set Drill Depth: Use a depth gauge or mark the drill bit with tape to achieve the exact embedment depth required. Drill straight into the concrete, ensuring the hole is perpendicular to the surface. Any angle can reduce the effective embedment depth and load capacity.
- Drill with Care: Allow the drill to do the work; avoid excessive force that could overheat the bit or damage the concrete. For hard-to-reach or unique anchoring scenarios, specialized chucks and sets are indispensable. Products like the 1-Headed Concrete Anchor Shear Connector Chuck or the Concrete Anchor Shear Connector Chuck Set can provide the necessary versatility and control for precise drilling and anchor placement.
Step 3: Hole Cleaning – The Most Critical Step!
This step cannot be overemphasized. A clean hole is vital for the epoxy to bond effectively with the concrete. Any dust, debris, or moisture will act as a bond breaker, severely reducing the anchor's load capacity.
- Blow Out: Use an air compressor (at least 80 PSI) or a hand pump/blower bulb to thoroughly blow all dust and loose particles out of the hole. Start from the bottom and work upwards.
- Brush: Insert the appropriately sized wire brush into the hole and scrub vigorously, moving it in and out several times to remove any remaining fine dust particles adhering to the hole walls.
- Blow Out (Again): Repeat the blowing process to remove particles dislodged by brushing.
- Brush (Again): Repeat the brushing.
- Blow Out (Final): Perform a final blow-out to ensure the hole is spotless. Many manufacturers recommend a "blow-brush-blow-brush-blow" sequence.
- Inspect: Visually inspect the hole for cleanliness. If a visible film of dust or debris remains, repeat the cleaning cycle.
Step 4: Preparing the Epoxy
Proper mixing is essential for the epoxy to achieve its designed strength.
- Check Temperature: Ensure the epoxy cartridge and the concrete substrate are within the manufacturer's specified temperature range for optimal application and curing.
- Attach Mixing Nozzle: Securely attach the static mixing nozzle to the epoxy cartridge.
- Dispense Initial Amount: Before injecting into the hole, dispense a small amount (typically the first 3-6 inches) of epoxy onto a scrap surface until a uniform color is achieved. This ensures that both resin and hardener are properly mixed and extruded through the nozzle. Do not use this initial, unmixed material.
Step 5: Dispensing Epoxy into the Hole
This step requires careful control to ensure the hole is properly filled without creating air voids.
- Fill from the Bottom: Insert the mixing nozzle to the very bottom of the drilled hole.
- Slowly Withdraw and Fill: Begin dispensing the epoxy, slowly withdrawing the nozzle as the hole fills. The goal is to fill the hole approximately two-thirds (2/3) full. This ensures that when the anchor is inserted, the epoxy level rises to the top, fully encapsulating the anchor and filling any voids. Avoid overfilling, which leads to excessive waste, or underfilling, which compromises embedment.
Step 6: Inserting the Anchor
This step must be done within the epoxy's open working time.
- Clean the Anchor Rod: Ensure the anchor rod or rebar is free of oil, grease, rust, or other contaminants.
- Insert with a Twisting Motion: Slowly insert the anchor rod into the epoxy-filled hole using a twisting or rotating motion. This motion helps to fully coat the anchor, eliminate air voids, and ensure complete contact between the epoxy and the anchor surface.
- Ensure Proper Embedment: Push the anchor down until it reaches the specified embedment depth. Excess epoxy should be expelled from the top of the hole, indicating full encapsulation.
- Do Not Disturb: Once the anchor is in place, do not move, rotate, or disturb it until the epoxy has fully cured.
Step 7: Curing Time
Patience is crucial during the curing phase.
- Follow Manufacturer's Cure Schedule: Refer strictly to the epoxy manufacturer's data sheet for the specified cure time. This time varies significantly based on the epoxy type, ambient temperature, and substrate temperature.
- Do Not Load Prematurely: Applying any load to the anchor before it has fully cured will compromise its strength and could lead to failure. Observe the specified "minimum cure time before loading."
Step 8: Load Application
Once the epoxy has fully cured, the fixture can be attached.
- Attach Fixture: Place the fixture over the anchor and secure it with appropriate nuts and washers.
- Torque to Specifications: Use a torque wrench to tighten the nuts to the manufacturer's specified torque values. Over-tightening can stress the epoxy bond or the concrete, while under-tightening can lead to a loose fixture.
By following these meticulous steps, you ensure that your epoxy concrete anchors perform to their maximum potential, providing a secure and durable fastening solution.
Common Pitfalls and How to Avoid Them
Even with a detailed guide, mistakes can happen. Recognizing common pitfalls allows you to proactively avoid them and ensure a robust installation.
- Inadequate Hole Cleaning: As emphasized, this is the most frequent cause of anchor failure. Avoid: Rushing the cleaning process, skipping steps (blow-brush-blow-brush-blow is essential!), or using insufficient air pressure. Solution: Be meticulous. Invest in good brushes and a strong air source.
- Incorrect Hole Depth or Diameter: If the hole is too shallow, embedment strength is compromised. If too deep, it wastes epoxy. If the diameter is incorrect, the bond will be weak. Avoid: Using worn drill bits, guessing embedment depth, or not verifying drill bit size. Solution: Always use new, sharp, appropriately sized carbide bits and set depth stops.
- Improper Epoxy Mixing or Dispensing: If the two parts of the epoxy aren't thoroughly mixed, the chemical reaction won't complete, and full strength won't be achieved. Improper dispensing leads to voids. Avoid: Using old, expired, or improperly stored epoxy; reusing mixing nozzles; not purging the initial amount. Solution: Check expiry dates, store per instructions, always use a new static mixing nozzle, and purge until uniform color. Ensure you fill from the bottom, withdrawing slowly to prevent air pockets.
- Premature Loading: Applying load before the epoxy has fully cured will disrupt the chemical bond formation, leading to significantly reduced load capacity. Avoid: Estimating cure times, ignoring temperature-dependent cure schedules. Solution: Strictly adhere to the manufacturer's recommended cure times, factoring in ambient and substrate temperatures.
- Temperature Extremes: Epoxy performance is highly sensitive to temperature. Installation outside the recommended temperature range can prevent proper curing or lead to premature hardening. Avoid: Installing in freezing conditions without specialized cold-weather epoxy, or in extreme heat without accounting for reduced working time. Solution: Use temperature-specific epoxy formulations when necessary and adjust working/curing times according to manufacturer charts.
- Contaminated Anchor Rods: Grease, oil, or rust on the anchor rod surface can act as bond breakers. Avoid: Handling rods with dirty gloves, storing them uncovered in a dusty or oily environment. Solution: Ensure anchor rods are clean and dry before insertion.
By being aware of these potential issues and implementing the recommended solutions, you can significantly enhance the reliability and safety of your epoxy anchor installations.
Enhancing Procurement with U.S.-Made Quality
The detailed process of installing epoxy concrete anchors underscores a larger truth: the success of any industrial project relies on the quality of its components and the efficiency of its supply chain. For procurement managers, MRO buyers, and design engineers, sourcing robust, reliable, and compliant materials is not just a preference; it’s a business imperative. This is where Maden.co steps in as a strategic partner, transforming how American businesses access U.S.-manufactured industrial goods.
At Maden.co, our mission is clear: to democratize access to American manufacturing. We connect industrial buyers with an extensive network of over 800+ verified U.S. manufacturers, offering access to over 2.5 million American-made products. This commitment to domestic sourcing aligns with our core values of American Manufacturing Pride, Digital Innovation, Supply Chain Transparency, Industrial Excellence, and Customer Empowerment. We believe that America's manufacturing revival is here, and we are building the definitive platform to prove that American-made components are as accessible and convenient as any global alternative.
The Maden.co Advantage in Sourcing Critical Components
When you’re looking for specialized tools like a BN Products 3/8-inch Inside Thread Sanko Drop-In Concrete Anchor or the essential tooling like a Concrete Anchor Shear Connector Chuck Set for efficient anchor installation, Maden.co offers a distinct advantage:
- Quality and Reliability: Sourcing U.S.-made products from our verified manufacturers guarantees adherence to stringent quality control standards, ensuring the longevity and performance critical for high-stakes applications.
- Supply Chain Resilience: By minimizing reliance on complex global supply chains, Maden.co helps businesses enhance their resilience, reduce lead times, and mitigate risks associated with geopolitical shifts or international logistics challenges.
- Compliance with Standards: Many U.S. manufacturers on our platform produce items compliant with specific industry standards (e.g., DIN, NPT, ASTM), simplifying the procurement process for projects with strict regulatory requirements.
- Reduced Procurement Friction: Our intuitive platform simplifies the search and acquisition of hard-to-find components, saving valuable time and resources for procurement teams.
- Transparent Sourcing: We offer clear visibility into product specifications, material certifications, and manufacturer details, fostering trust and informed decision-making.
For businesses looking to partner with the best of American manufacturing, we encourage qualified U.S. manufacturers to register as a vendor and join the American manufacturing revival on our platform. Our entire business model is built on this principle; you can learn more about our mission to champion American manufacturing here on our About Us page. If you have specific sourcing questions or need assistance with complex project requirements, our team is ready to help; simply contact us.
Strategic Financing for Industrial Procurement
Recognizing the capital-intensive nature of industrial projects, Maden.co offers "Instant Financing" as a key differentiator. This isn't just a payment option; it's a strategic tool designed to empower procurement managers and business owners. It allows you to manage cash flow effectively and make larger-volume purchases without immediate upfront capital expenditure. This can be particularly beneficial for projects requiring substantial quantities of critical components, ensuring that crucial installations like those involving epoxy concrete anchors proceed without financial delays. You can apply for Instant Financing at checkout to streamline your capital-intensive projects, ensuring that you always have access to the U.S.-made components you need, when you need them.
Conclusion
The proper installation of epoxy concrete anchors is a critical undertaking that demands precision, quality materials, and an unwavering commitment to best practices. From the initial substrate analysis and meticulous hole cleaning to the precise application of epoxy and adherence to curing times, each step is vital to ensuring the ultimate strength, durability, and safety of your anchored structures. The consequences of improper installation can be severe, ranging from compromised structural integrity to costly failures and safety hazards.
By mastering the techniques outlined in this guide and understanding the underlying principles, procurement managers, MRO buyers, and design engineers can significantly enhance project reliability and minimize risks. Furthermore, by strategically sourcing high-quality, U.S.-made components from a trusted marketplace, businesses can build more resilient supply chains, reduce procurement friction, and confidently deliver projects that stand the test of time.
Don't let sourcing challenges or compromised quality undermine your critical installations. Explore the vast catalog of U.S.-made industrial products on Maden.co today. Discover thousands of high-quality components, including robust anchors, essential tooling like the 1-Headed Concrete Anchor Shear Connector Chuck, and much more, all designed to meet the rigorous demands of your industry. Leverage our Instant Financing option at checkout to streamline your capital-intensive projects and confidently procure the American-made excellence your operations deserve. Your journey towards unparalleled quality and efficiency begins here.
FAQ
Q1: What is the main advantage of epoxy concrete anchors over mechanical anchors?
A1: Epoxy concrete anchors create a monolithic, high-strength chemical bond with the concrete, distributing stress more evenly and offering superior resistance to dynamic loads, vibration, and seismic activity. They also minimize stress on the base material, reducing the risk of cracking, which is a common concern with expansion-type mechanical anchors.
Q2: How critical is hole cleaning for epoxy anchor installation?
A2: Hole cleaning is arguably the most critical step. Any dust, debris, or moisture remaining in the drilled hole will act as a bond breaker, severely reducing the epoxy's ability to adhere to the concrete and compromising the anchor's ultimate load-bearing capacity. A thorough "blow-brush-blow-brush-blow" cleaning sequence is essential.
Q3: Can epoxy anchors be installed in damp conditions?
A3: While some specialized epoxy formulations are designed for damp or water-filled holes, it is crucial to verify the specific product's suitability and follow the manufacturer's instructions for such conditions. Standard epoxies typically require a dry hole for optimal performance. Always check the technical data sheet for the specific epoxy system.
Q4: Why should I consider sourcing U.S.-made components for my anchoring projects?
A4: Sourcing U.S.-made components from verified manufacturers, such as those found on Maden.co, offers several key benefits: guaranteed adherence to stringent quality control standards, enhanced supply chain resilience by reducing reliance on global logistics, easier compliance with specific industry standards, and reduced procurement friction through direct access to reliable domestic suppliers. This ensures long-term performance and peace of mind for critical applications.


