How to Anchor Screws into Concrete for a Lasting Hold
Table of Contents
- Introduction
- The Nature of Concrete: Why Standard Fasteners Fail
- Choosing the Right Anchor: A Decision Driven by Application
- The Step-by-Step Installation Process: A Guide to Industrial Excellence
- Advanced Considerations for Professional Applications
- Conclusion: Building with Confidence and American Strength
- Frequently Asked Questions (FAQ)
Introduction
A single failed fastener can have cascading consequences. Imagine a heavy-duty shelving unit, laden with thousands of dollars in critical inventory, collapsing in a warehouse. Or consider a piece of vital machinery vibrating loose from its moorings on a factory floor, causing catastrophic downtime and posing a serious safety hazard. These are not just hypotheticals; they are the real-world results of improper anchoring into concrete. The integrity of an entire structure or system often rests on the smallest of components, and when that component is a screw driven into the unyielding mass of concrete, the margin for error is virtually nonexistent.
This is more than a simple DIY task; it is a fundamental principle of industrial construction, maintenance, and operations. For procurement managers, MRO buyers, and design engineers, understanding the precise methodology of how to anchor screws into concrete is critical for ensuring operational safety, project longevity, and protecting the Total Cost of Ownership (TCO). A fastener that fails prematurely costs far more in downtime, replacement labor, and potential damages than a high-quality, correctly installed component ever will.
This article provides an authoritative, in-depth guide to the professional standards and best practices for anchoring into concrete. We will move beyond basic instructions to explore the science behind the methods, the critical differences between anchor types, and the step-by-step process that guarantees a secure, reliable, and lasting hold. Our focus is on empowering you with the knowledge to make informed decisions that enhance supply chain resilience and uphold the principles of industrial excellence. At Maden.co, our mission is to provide direct access to the very best of American manufacturing, ensuring you have the high-caliber components needed to get the job done right, the first time.
The Nature of Concrete: Why Standard Fasteners Fail
Before diving into the "how," it is essential to understand the "why." Concrete is one of the most common construction materials in the world, prized for its immense compressive strength. However, it possesses very low tensile strength and is inherently brittle. Unlike wood, which has fibers that can grip a standard screw's threads, concrete is a composite of aggregate, sand, and cement. Driving a regular screw into it simply pulverizes this material, creating a dusty, oversized hole with no gripping power whatsoever.
This fundamental mismatch is the reason specialized concrete fasteners are not just recommended—they are mandatory for any application demanding structural integrity. The challenge lies in creating a connection that can resist two primary forces:
- Tensile Load: The force attempting to pull the fastener straight out of the concrete.
- Shear Load: The force attempting to slide or cut the fastener parallel to the concrete surface.
A successful anchor must overcome the brittle nature of the concrete to create a bond strong enough to withstand these loads over time, under conditions that may include vibration, temperature fluctuations, and moisture exposure. This is where the engineering of modern concrete screws and anchors demonstrates its value.
Choosing the Right Anchor: A Decision Driven by Application
The term "concrete screw" is often used as a catch-all, but the world of concrete fasteners is diverse. The selection of the right anchor is the first and most critical decision in the process. While many types exist, modern self-tapping concrete screws have become a preferred solution for a vast range of light- to heavy-duty applications due to their high performance, relative ease of installation, and removability.
Self-Tapping Concrete Screws: The Versatile Workhorse
These fasteners are engineered to tap their own threads directly into a pre-drilled pilot hole in concrete, brick, or block. Their design provides a powerful, vibration-resistant mechanical interlock with the base material. The key to their success lies in their specialized thread geometry and hardened steel construction.
When selecting a self-tapping screw, several factors must be considered:
Head Style
The head style is determined by the specific requirements of the fixture being attached.
- Hex Head: Ideal for applications where high torque is required for installation and where the head will remain exposed. They are easily driven with a standard socket or wrench. For securing machinery guards, support brackets, or industrial racking, a robust option like these U.S.-made Hex Head Concrete Screws 3/16 x 5" provides the necessary clamping force and durability.
- Flat Head (Countersunk): Used when a flush, snag-free finish is required. The head sits level with or below the surface of the material being fastened, making it perfect for applications like installing door frames, window sills, or certain types of signage. When aesthetics and a non-obtrusive finish are paramount, sourcing a fastener like these 1/4" x 2-3/4" Flat Head Concrete Screws ensures a clean and professional result.
Material and Coating
The operational environment dictates the necessary material and protective coating. An indoor, climate-controlled warehouse has very different requirements than an outdoor chemical processing facility.
Key Takeaway: Investing in the correct coating is a direct investment in lowering your Total Cost of Ownership. A fastener that resists corrosion prevents premature failure, reduces maintenance cycles, and protects the entire assembly from damage.
For MRO buyers dealing with equipment exposed to moisture, chemicals, or saline environments, specifying a fastener with advanced corrosion resistance is non-negotiable. Standard zinc plating may suffice for dry, interior applications, but harsher conditions demand superior protection. A prime example is a fastener with a multi-layer ceramic coating. For instance, the Steel Blue Ruspert Ceramic Coating Flat Phillips® Drive Concrete Screw is engineered for exceptional corrosion resistance, making it an ideal choice for outdoor fixtures, coastal area installations, or environments with chemical exposure. Sourcing such specialized, high-performance components through a reliable domestic marketplace eliminates supply chain uncertainty and ensures you receive a product with certified material specifications.
Diameter and Length
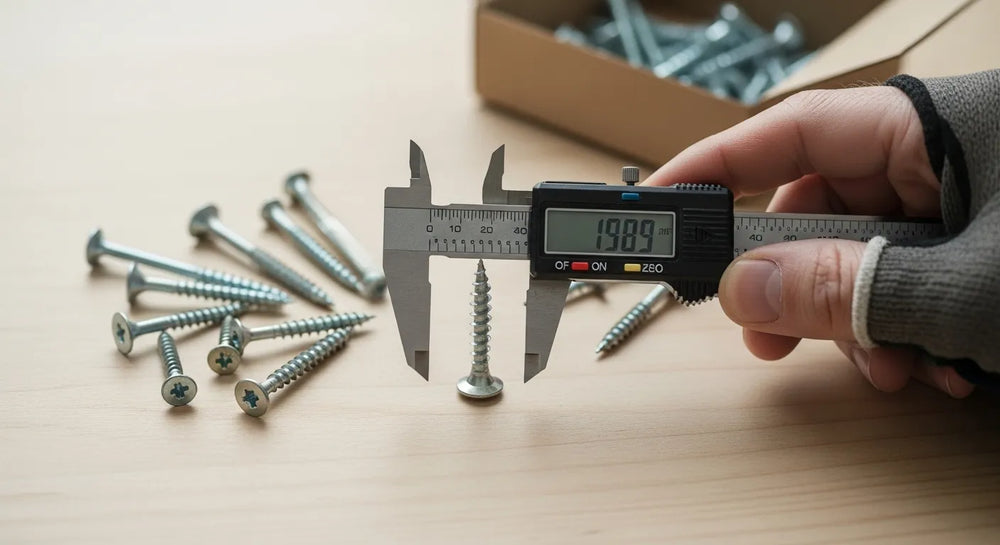
- Diameter: The screw's diameter is a primary factor in its holding strength. Common diameters range from 3/16" to 3/4". A larger diameter generally provides greater tensile and shear strength.
- Length: The screw length must be sufficient to pass through the fixture being attached and achieve the required minimum embedment depth into the concrete. The manufacturer will specify this minimum embedment, and it is crucial for achieving the published load values. A common rule is that the screw should embed into the concrete at least 1 inch.
The Step-by-Step Installation Process: A Guide to Industrial Excellence
Proper installation is a non-negotiable process. A high-quality fastener can fail if installed incorrectly. Following these steps with precision is the key to creating a secure and reliable connection.
Step 1: Assemble Your Tools and Personal Protective Equipment (PPE)
Before you begin, ensure you have the right equipment on hand. Rushing this step leads to mistakes and potential injury.
- Drill: A rotary hammer drill is strongly recommended over a standard drill. Its hammering action pulverizes the concrete efficiently, creating a cleaner hole with less effort and bit wear. For smaller diameter screws in softer block, a high-powered hammer drill may suffice.
- Masonry Drill Bit: Use a carbide-tipped masonry drill bit that meets ANSI standards. The bit's diameter must match the manufacturer's specification for the screw you are using. Using the wrong size bit is one of the most common causes of anchor failure.
- Installation Tool: An impact driver with the appropriate hex or Phillips driver bit is the best tool for driving the screws. It provides the necessary torque without the risk of over-tightening or stripping the head. A calibrated torque wrench may be required for applications with specific torque requirements.
- Hole Cleaning Tools: A wire brush correctly sized for the hole diameter and a source of compressed air (or a hand-pump blower) are essential.
- PPE: Always wear ANSI-rated safety glasses or goggles, heavy-duty gloves, and hearing protection, especially when using a rotary hammer. Concrete dust can contain crystalline silica, so a respirator (e.g., N95) is also highly recommended.
Step 2: Drill the Pilot Hole
This is the foundation of the entire installation. Precision here pays dividends in holding power.
- Mark Your Location: Precisely mark the spot where the fastener will be installed. If fastening a fixture, use the fixture itself as a template.
- Select the Correct Bit: Double-check that your carbide-tipped bit diameter matches the specifications for your concrete screw. This information is typically printed on the fastener's packaging or technical data sheet.
- Determine Hole Depth: The hole must be deeper than the screw's intended embedment depth. A good rule of thumb is to drill the hole at least 1/2 inch deeper than the screw will penetrate the concrete. This creates a space for dust and debris to collect, ensuring the screw can be installed to the proper depth. Use the depth gauge on your drill or wrap a piece of tape around the bit to mark the required depth.
- Drill the Hole: Hold the drill perpendicular (at a 90-degree angle) to the concrete surface. Applying steady, firm pressure, drill the hole to the predetermined depth. Do not allow the drill to wobble, as this can create an oversized, conical hole that will reduce the fastener's holding power.
Step 3: Clean the Pilot Hole (The Most Critical Step)
This is the single most overlooked yet most critical step in the process. Concrete dust left in the hole acts like a lubricant, preventing the screw's threads from achieving a proper, secure bite into the base material. A clean hole can increase the anchor's holding capacity by over 50%.
- Air Blast: Use compressed air or a hand blower to blow all loose dust and debris out of the hole. Be sure to wear your safety glasses, as dust will be forcefully ejected.
- Brush: Insert a correctly sized wire brush and scrub the inside of the hole vigorously. This action dislodges any remaining dust or small particles that are compacted against the walls of the hole.
- Air Blast Again: Blow the hole out one final time to remove the particles loosened by the brush. A truly clean hole is essential for industrial-grade performance.
Step 4: Drive the Concrete Screw
With a clean pilot hole, you are ready to install the fastener.
- Position the Fixture: Place your fixture over the hole.
- Insert the Screw: Insert the tip of the concrete screw through the fixture and into the pilot hole.
- Drive the Screw: Using an impact driver or drill set to a low speed, begin driving the screw. The screw should drive smoothly but with some resistance as the threads cut into the concrete.
- Set the Screw: Drive the screw until the head is seated firmly against the fixture. Be careful not to overtighten. Over-torquing the screw can strip the threads cut into the concrete or, in extreme cases, shear the head of the screw itself. The goal is to have the fixture snug and secure.
Advanced Considerations for Professional Applications
Beyond the basic installation, several factors must be considered in engineering and industrial settings to ensure long-term performance and safety.
Edge and Spacing Requirements
Concrete fasteners exert immense outward pressure on the concrete as they are installed. If a hole is drilled too close to an edge or another fastener, this pressure can cause the concrete to crack and "blow out," resulting in a complete failure of the anchor point. Always consult the fastener's technical data sheet for minimum edge distance and spacing requirements.
Embedment Depth and Load Capacity
The deeper a screw is embedded into sound concrete, the higher its pull-out or tensile strength will be. The manufacturer's load charts will provide performance data at various embedment depths. For design engineers specifying fasteners for critical loads, adhering to these embedment specifications is not optional; it is a core part of the design's safety factor.
Partnering with American Manufacturing for a Resilient Supply Chain
In today's complex global landscape, supply chain disruptions are a constant threat. For a procurement manager under pressure to source a specific NPT-compliant fitting, a design engineer needing specific material certifications for a new prototype, or an MRO buyer facing an unexpected equipment breakdown, the ability to quickly find and finance a verified, U.S.-made part is a game-changer.
This is the core of our mission at Maden.co. We are dedicated to democratizing access to American manufacturing, proving that American-made components are as accessible and convenient as any global alternative. Our platform connects industrial buyers with over 2.5 million products from a network of more than 800 verified U.S. manufacturers. By fostering supply chain transparency and championing industrial excellence, we empower businesses to reduce procurement friction, mitigate risk, and build more resilient operations. You can learn more about our commitment to rebuilding domestic manufacturing capabilities by reading about our mission here. We believe America's manufacturing revival is here, and we are building the digital infrastructure to support it.
If you are a domestic producer of industrial components, you are the backbone of this revival. We invite you to join our growing network of trusted suppliers. Are you a U.S. manufacturer? Register as a vendor and join the American manufacturing revival.
Conclusion: Building with Confidence and American Strength
Mastering the process of anchoring screws into concrete is a foundational skill that underpins safety, reliability, and efficiency in any industrial setting. It begins with a thorough understanding of the unique properties of concrete and culminates in a meticulous installation process where every step—from selecting the right American-made fastener to cleaning the pilot hole—is executed with precision.
By choosing high-quality, domestically sourced concrete screws and adhering to professional installation standards, you are not just fastening a fixture; you are investing in the long-term integrity of your facility and the safety of your team. This commitment to quality mitigates risk, lowers the total cost of ownership, and strengthens your entire operation.
Take the next step toward building a more resilient and efficient procurement process. Explore the vast catalog of verified, U.S.-made industrial components on Maden.co to find the precise fasteners for your next project. For larger purchases or to better manage project budgets, you can apply for Instant Financing at checkout to streamline your capital-intensive projects and keep your operations moving forward. If you have specific sourcing questions, our team is ready to help.
Frequently Asked Questions (FAQ)
1. What is the most common mistake when installing concrete screws? The most common and impactful mistake is failing to properly and thoroughly clean the pilot hole after drilling. Concrete dust left in the hole can reduce the screw's holding capacity by more than 50% by preventing the threads from making a clean, strong purchase in the base material. Always use a combination of compressed air and a wire brush to ensure the hole is completely free of debris.
2. Can I reuse a concrete screw? For non-structural, light-duty applications, a screw may sometimes be reused in a new hole. However, for any application involving significant loads or safety considerations, it is strongly recommended not to reuse concrete screws. The screw's threads are designed to cut into the concrete upon initial installation. Removing and reinserting it, even in the same hole, can compromise the integrity of the threads formed in the concrete, leading to a significantly reduced holding power.
3. How do I know what size and length of screw to use? The required size (diameter and length) depends on several factors: the weight of the object you are fastening (load requirement), the thickness of the fixture, and the manufacturer's specifications for minimum embedment. For critical applications, these specifications should be provided by a structural engineer. For general use, consult the technical data sheets available on the product pages to determine load capacities and required embedment depth for each screw size.
4. Why is it important to choose U.S.-made fasteners? Choosing U.S.-made fasteners provides several strategic advantages. It ensures a higher level of quality control, material traceability, and adherence to stringent industry standards (like DIN or NPT). Furthermore, it builds a more resilient and transparent supply chain, reducing lead times and the risks associated with global disruptions. Sourcing domestically also supports the American economy and contributes to the revival of our nation's industrial base.


