How to Cover Anchor Holes in Drywall for a Flawless Finish
Table of Contents
- Introduction
- Understanding the Damage: A Look at Different Anchor Types
- Essential Tools and Materials for a Professional Repair
- Step-by-Step Guide: How to Cover Small Anchor Holes (Up to 1/2 Inch)
- Step-by-Step Guide: Repairing Medium to Large Anchor Holes (Over 1/2 Inch)
- Priming and Painting: The Crucial Final Steps
- The Bigger Picture: Proactive Maintenance and Supply Chain Strategy
- Conclusion
- Frequently Asked Questions (FAQ)
Introduction
A freshly painted wall in a commercial space, manufacturing facility, or office building represents a clean slate. Yet, beneath that pristine surface often lies a history of relocations, reconfigurations, and repairs. For any maintenance manager, MRO buyer, or facilities professional, the small but persistent challenge of drywall anchor holes is a familiar one. Whether preparing a space for a new tenant or performing routine upkeep, these voids are more than just cosmetic blemishes; they are interruptions to operational readiness. A poorly patched hole can compromise the wall's integrity, lead to visible imperfections after painting, and ultimately reflect poorly on the standard of maintenance.
This article moves beyond simple homeowner tips to provide a professional-grade, comprehensive guide for repairing drywall anchor holes of all sizes. We will delve into the specific techniques and materials required to achieve a durable, invisible repair that meets industrial and commercial standards. We will cover everything from assessing the initial damage caused by different anchor types to the critical final steps of priming and texture matching.
The underlying principle is one of Industrial Excellence—a core value we champion here at Maden.co. Just as sourcing the correct, high-quality component is crucial for manufacturing, using the right process and materials is essential for facility maintenance. This guide will empower you with the knowledge to not only fix the immediate problem but to do so efficiently and effectively, contributing to the overall value and integrity of your physical assets.
Understanding the Damage: A Look at Different Anchor Types
Before you can execute a successful repair, you must first understand the nature of the hole you're dealing with. Not all drywall anchors are created equal, and the voids they leave behind vary significantly in size and complexity. A one-size-fits-all approach is inefficient and often leads to subpar results. The type of anchor previously used dictates the repair strategy.
Small Holes: Expansion and Ribbed Anchors
These are the most common holes found in commercial and residential walls. They are typically created by simple, light-duty plastic anchors designed to expand behind the drywall as a screw is driven into them.
- Description: These holes are usually small, around 1/4 inch in diameter, and relatively clean. The primary challenge is removing the anchor itself without causing further damage.
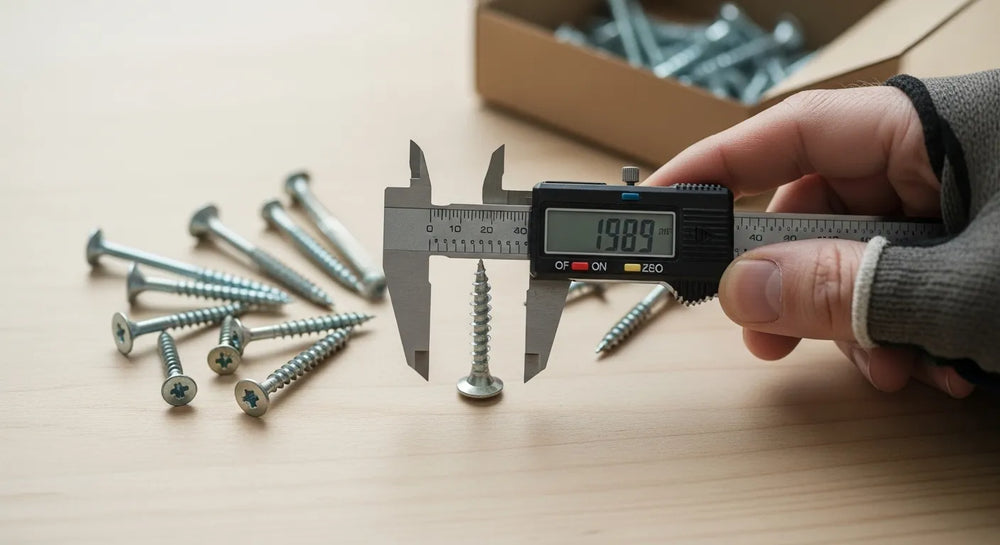
- Example Anchor: A common fastener for light-duty applications is the Ribbed Plastic Anchor. While excellent for securing lightweight fixtures, their removal can sometimes slightly widen the initial drill hole.
- Repair Strategy: These are the simplest to repair, typically requiring only a high-quality spackling compound and minimal sanding. The focus is on filling the void completely and feathering the edges for a smooth blend.
Medium Holes: Self-Drilling and Threaded Anchors
As you move into medium-duty applications, the anchors become more aggressive in their design, which results in a more substantial hole. These are often used for shelving, heavier pictures, or small cabinets.
- Description: These anchors, often made of nylon or zinc, feature coarse threads that bite directly into the drywall, eliminating the need for a pre-drilled hole. When removed, they can leave a hole that is 1/2 inch or larger, often with frayed paper edges.
- Example Anchor: The Medium Duty Nylon Wall Anchor #6 Self-Drilling Drywall Zip-It® is a prime example. Its self-drilling nature is a massive time-saver during installation but requires a more robust patching method upon removal.
- Repair Strategy: A simple spackle application is often insufficient here. These holes require a stronger filler, like a vinyl-reinforced patching compound or drywall joint compound, and often benefit from a small piece of mesh tape for structural support.
Large, Damaged Holes: Toggle Bolts and Molly Bolts
For heavy-duty applications like mounting televisions, heavy shelving units, or safety equipment, toggle bolts and molly bolts are the industry standard. Their removal, however, can leave behind the most significant damage.
- Description: Toggle bolts require a large hole to be drilled so the spring-loaded "wings" can pass through the wall. Molly bolts expand and grip the back of the drywall. Both can tear the paper and gypsum core upon removal, leaving voids of an inch or more in diameter, often with weak, unstable edges.
- Example Anchor: While we feature a range of powerful nylon anchors, the principles apply to heavier metal fasteners. The kind of holding power needed for serious loads, similar to what you might expect from a Medium Duty Nylon Wall Anchor #8 for Drywall in a robust application, can leave a sizable void if improperly removed.
- Repair Strategy: These holes cannot be simply filled. They require structural reinforcement using a self-adhesive patch, a "California patch," or even cutting out a square of drywall and replacing it. This level of repair requires joint compound, tape, and multiple coats to rebuild a flat, stable surface.
Assessing the damage correctly is the foundational step. It informs your choice of materials and techniques, saving you time and preventing the frustration of a failed repair that shows through a new coat of paint.
Essential Tools and Materials for a Professional Repair
Assembling the right toolkit is non-negotiable for achieving a professional finish. Investing in quality tools and materials not only makes the job easier but also ensures the durability of the repair. For an MRO buyer, having these items stocked and ready is key to minimizing downtime and handling maintenance requests efficiently.
Repair Compounds
- Lightweight Spackling Compound: Ideal for small pinholes and voids left by ribbed plastic anchors. It dries quickly, shrinks minimally, and is easy to sand.
- Vinyl-Reinforced Patching Compound: A step up from spackle, this compound offers more strength and adhesion, making it suitable for medium-sized holes from self-drilling anchors. It resists cracking and provides a more durable fill.
- All-Purpose Joint Compound ("Mud"): The workhorse for larger repairs. It's used for taping, filling, and finishing. It has strong adhesion but shrinks more than spackle and requires longer drying times. It’s essential when using mesh or paper tape.
- Topping Compound: A finer, lower-shrinkage compound used for the final skim coat over larger patches. It sands to an exceptionally smooth finish, making it easier to create an invisible repair.
Application and Finishing Tools
- Putty Knives: Have a set of flexible steel putty knives in various widths (e.g., 1.5", 3", 6"). A smaller knife is for applying compound to the hole, while larger knives are for feathering the edges.
- Utility Knife: Essential for preparing the hole by cutting away any loose paper or debris for a clean surface.
- Sanding Sponges/Blocks: A fine-grit (120-220 grit) sanding sponge is perfect for smoothing small to medium patches without gouging the surrounding wall.
- Drywall Mesh Tape: Self-adhesive fiberglass tape is excellent for reinforcing patches over medium to large holes. It prevents the compound from cracking as it dries.
- Self-Adhesive Drywall Patches: For larger holes, these patches (often aluminum-backed mesh) provide a rigid support structure over the void, simplifying the repair process significantly.
Priming and Painting Supplies
- High-Quality Primer: This is a non-negotiable final step. A PVA (polyvinyl acetate) drywall primer or a quality stain-blocking primer seals the new patch, preventing the paint from soaking in differently than the rest of the wall (a phenomenon called "flashing").
- Matching Wall Paint: Having the exact paint code on file is a hallmark of professional facility management.
- Brushes and Mini Rollers: A small brush for cutting in and a mini roller with the appropriate nap to match the existing wall texture.
Sourcing these maintenance supplies can be as critical as sourcing a specific industrial component. Our mission at Maden.co is to democratize access to American manufacturing, ensuring you can find what you need, when you need it. This commitment to a resilient supply chain extends from complex machinery parts to the essential MRO supplies that keep your facilities in top condition.
Step-by-Step Guide: How to Cover Small Anchor Holes (Up to 1/2 Inch)
This procedure is your go-to for the most common repairs, such as those left by picture hangers or lightweight shelving. The goal is efficiency and a flawless finish.
Step 1: Prepare the Surface
A lasting repair begins with meticulous preparation. Do not simply spackle over the hole.
- Remove Obstructions: If the plastic anchor sleeve is still in the wall, try to pull it out with needle-nose pliers. If it's stubborn, you can either tap it slightly deeper into the wall with a hammer and nail set or carefully cut the flange off with a utility knife so it sits below the drywall surface.
- Clean the Edges: Use a utility knife to carefully trim away any frayed drywall paper or crumbled gypsum from the edges of the hole. This ensures the patching compound adheres to a solid surface.
- Create a Divot: This is a crucial professional technique. Use the handle end of your screwdriver or putty knife to gently press on the hole, creating a slight, concave dimple. This allows the filler to sit slightly below the surface, preventing a visible mound after sanding.
Step 2: Apply the First Coat of Spackle
- Load Your Knife: Scoop a small amount of lightweight spackling compound onto the tip of your 1.5-inch flexible putty knife. For a small hole, you need less than you think.
- Press and Fill: Press the spackle firmly into the hole, ensuring the void is completely filled.
- Scrape and Smooth: Holding the putty knife at a 45-degree angle, press firmly and scrape the excess spackle off the wall in a single, smooth downward motion. Make a second pass horizontally. The goal is to leave the spackle only in the dimple, with the surrounding wall surface perfectly clean.
Step 3: Allow for Drying and Apply a Second Coat
- Patience is a Virtue: Let the spackle dry completely according to the manufacturer's instructions. Drying time varies based on humidity and patch depth. The spackle will typically change color from pink or gray to white when fully dry.
- Inspect for Shrinkage: As it dries, the spackle may shrink slightly, creating a small depression. This is normal.
- Apply a Second, Thinner Coat: If necessary, apply a very thin second coat. This time, use a slightly wider putty knife (e.g., 3-inch) to feather the edges a little further out from the original repair, creating a smoother transition.
Step 4: Final Sanding and Cleaning
- Light Touch is Key: Once the final coat is completely dry, use a fine-grit sanding sponge. Sand lightly, using circular motions. The goal is not to remove a lot of material but to blend the patch seamlessly with the surrounding wall.
- Feel for Smoothness: Close your eyes and run your fingertips over the patch. Your sense of touch is often more accurate than your eyes at detecting ridges or uneven spots.
- Wipe Down: Use a slightly damp cloth or a tack cloth to wipe away all sanding dust from the wall. This is critical for proper primer and paint adhesion.
Step-by-Step Guide: Repairing Medium to Large Anchor Holes (Over 1/2 Inch)
When you're dealing with a hole left by a toggle bolt or a self-drilling anchor that tore the drywall, spackle alone won't suffice. You need to add structural reinforcement to prevent the patch from failing.
Method 1: The Self-Adhesive Mesh Patch (For Holes up to 4-6 Inches)
This is the most straightforward method for achieving a strong, reliable repair on larger holes.
- Prepare the Area: Follow the same preparation steps as for a small hole: remove debris, trim frayed paper, and ensure the surface is clean. Sand the area around the hole lightly to scuff the paint, which helps the patch and compound adhere better.
- Apply the Patch: Choose a self-adhesive mesh patch that is at least one inch larger than the hole on all sides. Peel off the backing and center it firmly over the damage, smoothing it out from the center to the edges.
- Apply the First "Bed Coat" of Compound: Use a 6-inch putty knife or drywall taping knife to apply all-purpose joint compound. Start by forcing the compound through the mesh openings to fill the void behind it. Then, apply a thin, even coat over the entire patch.
- Feather the Edges: The key to an invisible repair is feathering. Extend the compound well beyond the edges of the patch, using firm, even pressure to create a thin, tapered edge that blends into the wall.
-
Dry, Recoat, and Sand: This process requires multiple coats.
- Let the first coat dry completely (this can take up to 24 hours).
- Lightly sand to knock down any high spots or ridges.
- Apply a second coat, this time with a wider knife (e.g., 8 or 10-inch), extending the feathered edge even further.
- Repeat with a third coat if necessary for a perfectly smooth transition.
- Perform a final light sanding once the last coat is fully cured.
Method 2: The "California Patch" (For a Professional, Seamless Repair)
This technique requires more skill but yields a superior, stronger result because it uses drywall paper for reinforcement, which bonds better with joint compound than fiberglass mesh.
- Cut the Patch: Cut a piece of scrap drywall that is about two inches larger in every dimension than the hole you are repairing.
- Prepare the Patch: Turn the patch over. On the back, use a utility knife to score a line one inch in from all four edges, cutting through the paper and into the gypsum core. Carefully snap the gypsum along the score lines and peel it away, leaving a square of gypsum "plug" with a one-inch paper flange around all sides.
- Test Fit: Ensure the gypsum plug fits snugly into the hole in the wall.
- Apply Compound and Set the Patch: Apply a thin layer of all-purpose joint compound to the wall around the edges of the hole. Gently press the patch into place, so the gypsum plug enters the hole and the paper flanges lie flat against the wall, embedded in the fresh compound.
- Finish the Patch: Use a taping knife to smooth the paper flanges, pressing out any excess compound and air bubbles. Immediately apply a thin skim coat of compound over the entire patch and feathered edges. Finish with subsequent coats and sanding as described in the mesh patch method.
This meticulous approach reflects a commitment to quality that resonates with our philosophy. Our entire business model is built on this principle; you can learn more about our mission to champion American manufacturing here. We believe that whether you're building a machine or maintaining a building, the best results come from using the right components and the right processes.
Priming and Painting: The Crucial Final Steps
You can execute a perfect patch, but if you fail at this final stage, the repair will be visible. This is where many rushed jobs fall short.
Why Priming is Non-Negotiable
Drywall joint compound and spackle are more porous than a painted wall surface. If you paint directly over the patch, the paint will absorb into it differently, creating a dull, blotchy spot known as "flashing." This effect is especially noticeable in rooms with a lot of natural light or when using paints with a sheen (like eggshell or satin).
Primer solves this problem by:
- Sealing the Patch: It creates a uniform, non-porous surface.
- Ensuring Even Sheen: It allows the topcoat of paint to dry evenly, so the sheen matches the rest of the wall.
- Improving Adhesion: It provides a better surface for the paint to grip, leading to a more durable finish.
The Painting Process
- Apply Primer: Use a brush or small roller to apply a coat of high-quality PVA or stain-blocking primer over the entire sanded patch area, extending slightly onto the surrounding wall. Let it dry completely.
- Match the Texture (If Necessary): If your walls have a texture like orange peel or knockdown, now is the time to replicate it. Aerosol wall texture sprays are available for this purpose. Practice on a piece of cardboard first to get the spray pattern right.
- Apply the Topcoat: Using your matching wall paint, cut in around the edges of the primed area with a brush. Then, use a mini roller to blend the paint into the rest of the wall. Feather your roller strokes to avoid leaving hard lines. You will likely need two coats of paint for a perfect blend.
The Bigger Picture: Proactive Maintenance and Supply Chain Strategy
A simple drywall repair, when viewed through a business lens, is a microcosm of a larger operational strategy. For procurement managers and MRO buyers, the real cost of maintenance isn't just a tub of spackle; it's the sum of labor time, material sourcing, potential downtime, and the overall standard of the facility.
Efficiency in these small tasks multiplies across an organization. A maintenance team that has to make multiple trips for supplies or uses inferior products that lead to rework is an inefficient team. This is where a streamlined procurement process becomes a competitive advantage. Partnering with a B2B marketplace that provides easy access to a vast catalog of verified, U.S.-made products—from industrial fasteners to MRO essentials—reduces procurement friction and improves your Total Cost of Ownership (TCO).
For large-scale renovation projects or managing tenant turnover across multiple properties, cash flow management is equally critical. The ability to make bulk purchases of necessary supplies without disrupting your capital budget is a game-changer. That's why we've integrated a strategic tool for businesses right into our platform. You can apply for Instant Financing at checkout to streamline your capital-intensive projects and keep your operations moving at full speed.
This ecosystem of reliable products and smart business tools is powered by the backbone of American industry. The revival of domestic manufacturing is not just about heavy industry; it’s about creating resilient, transparent, and efficient supply chains for businesses of all sizes. If you are a U.S. manufacturer contributing to this movement, we invite you to join us. Register as a vendor and become part of a network dedicated to industrial excellence.
If you have specific sourcing questions about finding the right maintenance supplies or any other industrial components, our expert team is always ready to help.
Conclusion
Mastering the art of covering drywall anchor holes is more than a simple maintenance task; it is a demonstration of a commitment to quality and attention to detail. By accurately assessing the damage, using the right professional-grade tools and materials, and following a meticulous step-by-step process—prepare, patch, sand, prime, and paint—you can achieve a truly invisible repair that stands the test of time. This not only maintains the aesthetic and financial value of your facility but also reflects a high standard of operational excellence.
Don't let facility maintenance or component sourcing slow you down. Build a more resilient and efficient supply chain by exploring the millions of U.S.-made products in the Maden.co catalog. Reduce your procurement friction, improve your TCO, and empower your team with the parts and supplies they need, sourced directly from America's premier manufacturers. For your next large-scale project or bulk MRO purchase, remember to leverage our Instant Financing option at checkout to keep your business moving forward.
Frequently Asked Questions (FAQ)
1. Can I use common household items like toothpaste or soap to fill anchor holes? While these are often cited as "life hacks," they are not professional or durable solutions for any facility. These materials are not designed to bond with drywall, will shrink and crack over time, often discolor, and will not hold paint correctly, leading to a visible and short-lived repair. For a lasting, professional result, always use a proper spackling or joint compound designed for drywall.
2. What is the main difference between spackle and joint compound? Spackle is a filler best suited for small holes (like those from nails or small plastic anchors) because it is formulated to dry quickly and shrink minimally. Joint compound, often called "drywall mud," is the ideal choice for larger repairs that require tape or patching. It provides stronger adhesion for tape, is more workable over large areas, and is used for finishing drywall seams, though it requires longer drying times and is more prone to shrinkage.
3. My patched area is still visible after painting. What did I do wrong? This issue, known as "flashing," is almost always caused by one of two things: you either forgot to apply a coat of primer over the patch before painting, or you didn't "feather" the edges of your joint compound far enough out, creating a visible ridge. The solution is to lightly sand the entire area to smooth the transition, apply a high-quality primer to seal the patch, let it dry, and then apply your final coats of paint.
4. How do I choose the right drywall anchor to minimize wall damage in the future? The key to preventing damage is to match the anchor's capability to the weight of the object being mounted. For lightweight items like small pictures or clocks, a simple Ribbed Plastic Anchor is typically sufficient. For medium-duty items like shelves or curtain rods, a more robust self-drilling anchor like the Zip-It® style provides a much more secure grip. Always consult the weight rating specified by the anchor manufacturer before installation to ensure a secure hold and avoid overloading, which is the primary cause of anchor failure and significant wall damage.


