How to Fill Anchor Holes in Drywall for a Pro Finish
Table of Contents
- Introduction
- Why a Professional-Grade Repair Matters
- Understanding the Anatomy of the Problem: Anchors and Drywall
- Step-by-Step Guide: How to Fill Anchor Holes in Drywall
- Advanced Scenarios and Professional Solutions
- The Maden.co Advantage: From Repair to Reinforcement
- Conclusion: Upholding Standards, One Repair at a Time
- Frequently Asked Questions (FAQ)
Introduction
Imagine this: a facility manager has just overseen a major office reconfiguration. Departments have shifted, equipment has been moved, and dozens of pieces of wall-mounted shelving, signage, and cabinetry have been relocated. The result is a sea of pockmarks, craters, and leftover plastic anchors dotting the walls—a visual testament to the changes, but also a significant maintenance task. Each small hole, seemingly insignificant on its own, collectively detracts from the professional appearance of the workspace. This isn't just about aesthetics; it's about asset preservation and upholding operational standards.
This guide moves beyond a simple DIY patch-up. We are focused on the professional-grade methods required in commercial, industrial, and operational settings. For MRO (Maintenance, Repair, and Operations) buyers, contractors, and facility managers, a wall repair is not a one-off task but a recurring part of the building's lifecycle. We will explore the entire process, from understanding the different types of anchors and their specific removal challenges to the multi-stage finishing techniques that ensure a truly invisible and durable repair. We will also touch upon why the initial choice of high-quality, American-made fasteners is a critical factor in minimizing such repairs in the first place.
Our core message is this: mastering the proper technique for filling anchor holes is a crucial skill for maintaining the integrity and value of your commercial property. A successful repair is structurally sound, visually seamless, and reflects the high standards of your organization. This process begins with a deep understanding of the right tools, the correct materials, and a procurement strategy that prioritizes quality components from the start, a principle at the heart of our mission at Maden.co.
Why a Professional-Grade Repair Matters
In a commercial or industrial setting, the quality of a wall repair has implications that extend far beyond simple cosmetics. While a poorly patched hole in a home might be a minor annoyance, in a business environment, it can communicate a lack of attention to detail and impact perceptions of the entire operation.
Beyond Aesthetics: The Impact on Your Business Environment
The physical environment of a business is a direct reflection of its brand and standards. Clean, well-maintained walls in an office, showroom, or manufacturing facility project an image of professionalism, order, and quality. Conversely, walls dotted with sloppy repairs, cracked patches, and visible imperfections can suggest neglect. For client-facing areas, this can subconsciously erode trust. For employee-focused spaces, it can contribute to a lower standard of care and morale. A professional-grade repair ensures that the physical space aligns with the company's commitment to excellence.
Preventing Future Damage and Ensuring Structural Integrity
A proper repair does more than just fill a void; it reinforces the damaged area of the drywall. When an anchor is removed, it often leaves behind crushed gypsum and torn paper, weakening the immediate vicinity. A quick dab of spackle might cover the hole, but it doesn't restore strength.
A professional technique involves clearing away loose debris and creating a solid base for the filler, ensuring the patch bonds securely with the surrounding drywall. This prevents the patch from cracking, shrinking, or failing over time, especially in high-traffic areas or on walls subject to vibration. An inferior repair can easily be compromised by a slight bump, leading to a cycle of repeated fixes.
The Total Cost of Ownership (TCO) of Doing It Right
In the world of MRO and facility management, Total Cost of Ownership is a critical metric. The cheapest solution is rarely the most cost-effective in the long run. Consider the cost of rework associated with a failed drywall patch:
- Labor Costs: An employee or contractor must return to the site to re-repair the same hole. This doubles the labor time invested.
- Material Costs: While minor, the need for more spackle, primer, and paint adds up across multiple failed repairs.
- Operational Disruption: The area may need to be cordoned off again, potentially disrupting workflow or customer access.
By investing the time to perform the repair correctly the first time, you drastically reduce the TCO. This same principle applies to the initial installation. Using a durable, properly specified, U.S.-made anchor minimizes wall damage upon removal and reduces the likelihood of fastener failure, preventing the need for repairs altogether. It's a clear example of how strategic sourcing directly impacts long-term maintenance budgets. Our commitment at Maden.co is to provide access to these superior components, championing a philosophy of Industrial Excellence that pays dividends over the entire lifecycle of your facility.
Understanding the Anatomy of the Problem: Anchors and Drywall
To master the repair, one must first understand the materials involved. Drywall, or gypsum board, is the ubiquitous surface of modern interiors, but its composition presents unique challenges for anchoring and subsequent repairs.
The Role of Drywall in Commercial Construction
Drywall consists of a core of gypsum plaster pressed between two thick sheets of paper. It's favored for its low cost, speed of installation, and fire-resistant properties. However, its primary weakness is its low shear strength and brittle nature. The gypsum core can easily crumble under focused pressure, which is precisely why anchors are necessary. An anchor's job is to expand behind or bite into the drywall, distributing the load of a fastener over a wider surface area than the screw alone could manage. The type of anchor used dictates the size of the hole and the complexity of the eventual repair.
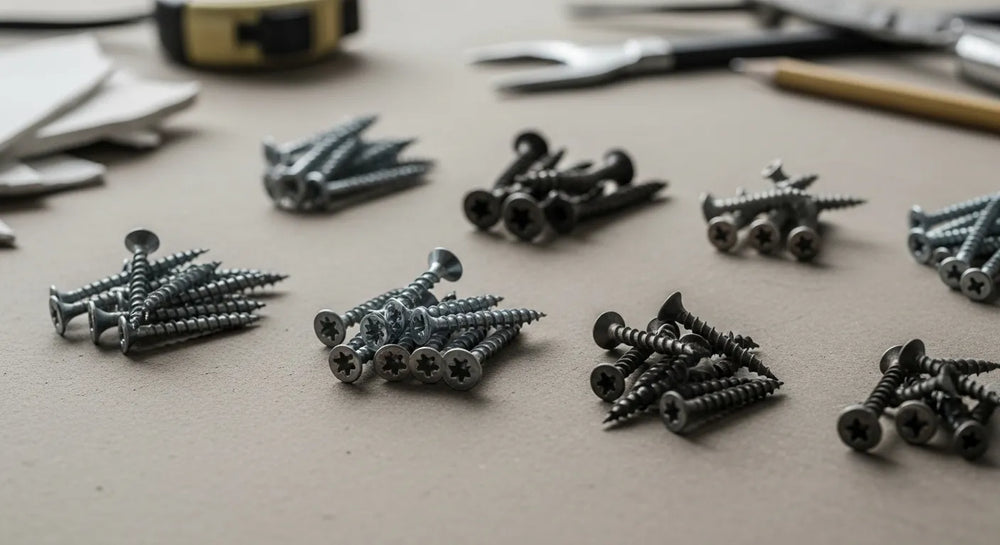
Types of Drywall Anchors and Their Removal Challenges
The market is filled with various anchor designs, each suited for different load capacities and installation requirements. Understanding their mechanics is key to removing them cleanly and planning the repair.
-
Ribbed Plastic Anchors: These are perhaps the most common type for light-duty applications. A hole is drilled, and the plastic sleeve is tapped into place. As a screw is driven in, the sleeve expands to grip the inside of the drywall. The challenge in removal is that the fins or ribs that provide grip can make them difficult to pull out without tearing the drywall paper. Using a high-quality, precisely molded fastener like this American-made Ribbed Plastic Anchor can ensure a cleaner installation and easier removal down the line due to superior material consistency.
-
Self-Drilling Anchors: Often called "zip-it" or "E-Z" anchors, these are popular for their fast installation, as they don't require a pre-drilled pilot hole. Their aggressive, wide threads cut directly into the drywall. While convenient, if they are removed by simply unscrewing them, they can sometimes tear a larger, more ragged hole than the anchor itself. The integrity of these anchors is paramount, which is why sourcing a dependable product like the Medium Duty Nylon Wall Anchor #6 Self-Drilling Drywall Zip-It® is a smart choice for professionals who value both speed and reliability.
-
Toggle Bolts and Molly Bolts: These are the heavy-hitters of the drywall anchor world, used for mounting heavier items like large shelving units or grab bars. Toggle bolts feature a spring-loaded "wing" that is inserted through a large hole and opens up behind the wall. Molly bolts are metal sleeves that expand and collapse against the back of the drywall as a screw is tightened. Both leave significantly larger holes upon removal and often require more extensive patching techniques.
Selecting the right anchor is the first step in preventing future maintenance headaches. At Maden.co, we empower procurement managers and design engineers by providing a vast catalog of over 2.5 million American-made products, ensuring you can find the exact component to meet your load requirements and quality standards. This commitment to Supply Chain Transparency means you know you are sourcing parts from our network of over 800 verified U.S. manufacturers.
Step-by-Step Guide: How to Fill Anchor Holes in Drywall
This process is a methodical craft. Rushing any step will compromise the final result. Follow this detailed guide to achieve a repair that is indistinguishable from the original wall surface.
Step 1: Gathering Your Professional Toolkit
Having the right tools and materials on hand before you begin is essential for efficiency and a quality outcome.
-
Tools:
- Utility Knife: With a fresh, sharp blade for cleanly trimming torn drywall paper.
- Putty Knives: A flexible 1.5-inch knife for application and a wider 4- or 6-inch knife for feathering edges.
- Sanding Block or Sponge: To ensure even pressure during sanding.
- Needle-Nose Pliers: For gripping and removing stubborn anchor parts.
- Drill or Screwdriver: For backing out self-drilling anchors or screws.
-
Materials:
- Spackling Compound: Best for small- to medium-sized holes (under a half-inch). It dries faster and shrinks less than joint compound. For professional use, choose a lightweight, sandable variety.
- Joint Compound: Better for larger repairs or when texturing is required, as it has a longer working time.
- Sandpaper: A range of grits, typically starting with 120-grit and finishing with 220-grit for an ultra-smooth surface.
- Primer: A high-quality, stain-blocking primer is non-negotiable.
- Matching Paint: Having the exact paint color and sheen is critical for an invisible repair.
-
Safety Gear:
- Safety Glasses: To protect eyes from debris during removal and sanding.
- Dust Mask: To prevent inhalation of gypsum and compound dust.
Step 2: Preparing the Surface for a Flawless Repair
This is the most critical stage. Improper preparation will guarantee a visible, failed patch.
-
Anchor Removal:
- Plastic Anchors: Try to back the screw out partially and pull both the screw and anchor out with pliers. If the anchor head is flush, you can often use the utility knife to carefully cut around the flange and push the anchor body into the wall cavity. This is often cleaner than trying to forcibly extract it.
- Self-Drilling Anchors: Use a screwdriver to slowly back the anchor out. If it starts to spin in place, apply slight outward pressure as you turn.
- Stuck Anchors: Never rip an anchor out. If it won't budge, the best professional method is to use a utility knife to cut the head/flange off, then use a nail set or screwdriver to tap the rest of the anchor body slightly below the surface of the drywall. It's better to patch over it than to create a massive hole by tearing it out.
-
Clean and Depress the Hole:
- Use the utility knife to carefully trim away any loose paper or crumbled gypsum from the edges of the hole.
- This is a key professional tip: Use the handle of your putty knife or a screwdriver to press gently on the edges of the hole, creating a slight, concave dimple. This ensures your spackle will be contained within the depression and won't form a convex mound on the wall, which is very difficult to sand flat.
Step 3: Applying the Filling Compound
- First Application: Scoop a small amount of spackling compound onto the tip of your 1.5-inch putty knife. Press the compound firmly into the hole, ensuring it fills the entire cavity. The goal is to slightly overfill the depressed area.
- Scrape and Feather: Immediately take your wider putty knife, hold it at a 30-45 degree angle to the wall, and draw it firmly across the patch in a single, smooth motion. This will remove excess compound and begin to "feather" the edges, creating a smooth transition to the surrounding wall. You may need to do this from a couple of different directions.
- Drying Time: Resist the temptation to touch it. Let the compound dry completely according to the manufacturer's instructions. This can take anywhere from one to several hours depending on the product, hole depth, and humidity. Rushing this step will cause you to sand into wet compound, ruining the patch.
Step 4: Sanding and Finishing for an Invisible Patch
- Initial Sanding: Wrap your 120-grit sandpaper around a sanding block. Lightly sand the dried patch using gentle, circular motions. The goal is to flatten the patch until it is perfectly level with the surrounding wall. Don't press too hard, as you can easily create grooves.
- Inspect by Touch and Sight: Close your eyes and run your fingers over the patch. You should not be able to feel any ridge or depression. Also, hold a light source at a sharp angle to the wall; shadows will reveal any imperfections.
- Apply a Second Coat: It is almost always necessary to apply a very thin second coat. Use your wide putty knife to skim a new layer of compound over the entire area, extending slightly beyond the first patch. This fills in any tiny pinholes or low spots. Let it dry completely.
- Final Sanding: Use your fine-grit (220-grit) sandpaper for the final sanding. This will create a glass-smooth surface ready for priming. Wipe the entire area clean with a dry or slightly damp cloth to remove all dust.
Step 5: Priming and Painting
- Prime the Patch: Apply a thin coat of high-quality primer directly over the sanded patch and the immediate surrounding area. This step is not optional. Spackling compound is more porous than drywall and its paper facing. Without primer, the paint will soak into the patch differently, causing a dull spot known as "flashing." The primer seals the patch and ensures the final paint coat has a uniform sheen.
- Match Texture and Paint: Once the primer is dry, you can paint. For a truly invisible repair on walls with a slight texture (like that from a paint roller), use a small, 4-inch roller with a nap similar to the one used on the rest of the wall. Dabbing with a brush will leave a different texture. Apply two thin coats of your matching paint for a perfect blend.
Advanced Scenarios and Professional Solutions
In a commercial setting, you will inevitably encounter more than just simple anchor holes. Being prepared for these situations distinguishes a professional from an amateur.
Handling Large or Damaged Holes
For holes larger than a half-inch in diameter, or where the drywall is cracked, spackle alone will not suffice. You need to reinforce the area.
- Self-Adhesive Mesh Tape: This is the standard professional solution. Cut a piece of fiberglass mesh tape slightly larger than the hole. Apply it over the hole, pressing firmly. Then, apply your first coat of compound directly over the mesh, forcing it through the openings to bond with the drywall behind it. This technique bridges the gap and provides significant structural reinforcement.
- The "California Patch": For holes several inches wide, this technique creates the strongest possible repair. It involves cutting a new piece of drywall larger than the hole, then scoring and snapping it to create a patch with a "border" of drywall paper around it. The paper border is then embedded in joint compound around the hole, much like regular drywall tape, creating a seamless and incredibly strong result.
Repairing Textured Drywall
Matching wall texture is an art form. A perfectly smooth patch on a textured wall is just as noticeable as a bump.
- Identify the Texture: Common textures include "orange peel" (a fine, bumpy texture) and "knockdown" (a more mottled, flattened texture).
- Use Texture Products: Aerosol spray-on textures are available in various forms to match common patterns. Practice on a piece of scrap cardboard first to get the spray distance and motion right.
- Application Technique: After your patch is filled and sanded smooth (but before priming), apply the texture. Once the texture is dry, you can then prime and paint the entire repaired area.
Scaling Repairs for Large Facilities
For an MRO team managing a large campus or multiple buildings, efficiency is key.
Key Takeaway: Standardize the repair process. Create kits with all necessary tools and materials. Document the exact brand and type of spackle, primer, and paint codes for different areas of the facility. This ensures consistency and quality regardless of which team member performs the repair.
This is where a streamlined procurement process becomes a massive advantage. For a manager responsible for hundreds of potential repairs, being able to order all necessary fasteners and MRO supplies in bulk from a single, reliable source is a game-changer. Our platform allows you to source everything from the initial fasteners, like the versatile Medium Duty Nylon Wall Anchor #8 for Drywall, to the consumables needed for repairs. For large-volume orders, you can leverage our Instant Financing option available during the checkout process to manage cash flow and equip your team without large upfront capital expenditures.
The Maden.co Advantage: From Repair to Reinforcement
This entire discussion about repairs highlights a fundamental truth: the lifecycle of a facility's maintenance begins with the quality of the components used in its construction and fitting. At Maden.co, our entire business model is built on the principle of providing unfettered access to the best industrial components America has to offer. You can learn more about our mission to champion American manufacturing here.
Sourcing with Confidence
Our value of American Manufacturing Pride is not just a slogan; it's a commitment to quality. When you source fasteners from our platform, you are choosing components engineered for durability and performance. This quality translates into fewer failures, less damage to building materials during the product lifecycle, and ultimately, lower long-term maintenance costs. We provide the Supply Chain Transparency that modern procurement professionals demand, connecting you directly with verified U.S. manufacturers.
A Partner in American Manufacturing
We are actively building the definitive platform for American-made industrial products because we believe America's manufacturing revival is here. If you are a U.S. manufacturer producing high-quality fasteners, MRO supplies, or other industrial components, we invite you to join our growing network of exceptional partners. Register as a vendor and become a vital part of this mission to make American-made the most accessible and convenient choice for industrial buyers.
Empowering Procurement Professionals
We understand the pressures on procurement managers, MRO buyers, and design engineers. You need specific parts, you need them to meet quality standards, and you need to acquire them without friction. Our platform is designed to solve these challenges. If you have specific sourcing questions or need help finding a hard-to-locate component, our team of experts is ready to assist. Please do not hesitate to contact our team for support.
Conclusion: Upholding Standards, One Repair at a Time
Learning how to fill anchor holes in drywall with professional precision is more than just a maintenance task—it is an exercise in upholding the standards of your organization. A seamless, durable repair contributes to a safe, professional, and well-maintained environment that benefits employees and clients alike. The process requires patience, the right tools, and a methodical approach that prioritizes proper preparation and finishing.
Ultimately, the best repair is the one you never have to make. By prioritizing high-quality, American-made components from the outset, you build a more resilient and reliable facility. You reduce the risk of fastener failure and minimize damage, saving significant time and resources over the long term.
Don't let minor wall damage detract from your professional environment. Explore the extensive catalog of American-made fasteners and industrial supplies on Maden.co to ensure your next installation is secure and your next repair is seamless. You can apply for Instant Financing at checkout to streamline your capital-intensive projects.
Frequently Asked Questions (FAQ)
1. What's the difference between spackle and joint compound for filling anchor holes? Spackling compound is generally thicker, dries faster, and is specifically formulated to resist shrinking, making it ideal for small- to medium-sized holes up to about a half-inch in diameter. Joint compound (or "mud") has a thinner consistency, a much longer drying time, and is better suited for taping drywall seams or handling very large repairs where more working time is needed. For typical anchor holes, spackle is the superior choice for professionals due to its speed and stability.
2. Can I just paint over a small anchor hole without filling it? No, this is not a professional solution. Paint is a thin film and will not fill the void left by an anchor screw. The hole will remain visible as a dark pockmark, and the paint may even sag into the hole, making it more noticeable. Taking the few extra minutes to properly fill, sand, and prime the hole is essential for a professional finish.
3. How long should I wait for the spackle to dry before sanding? Drying time varies based on the product, the depth of the fill, and the ambient humidity and temperature. Lightweight spackling can be dry to the touch and ready for sanding in as little as 30 minutes for a small hole. However, it's always best practice to follow the manufacturer's specific instructions. A good rule of thumb is to wait until the patch is uniformly white and feels completely hard and cool to the touch. If it feels soft or looks gray, it is still wet inside.
4. Why is my patch still visible after painting? This is almost always due to one of two reasons. The first and most common is "flashing," which occurs when the patch was not primed before painting. The porous spackle absorbs the paint differently than the surrounding wall, resulting in a dull or different-sheen spot. The second reason is improper sanding. If the patch was not sanded perfectly flat with the wall, it will show up as either a slight bump or a shallow depression, which becomes highly visible when light hits the wall at an angle.


