
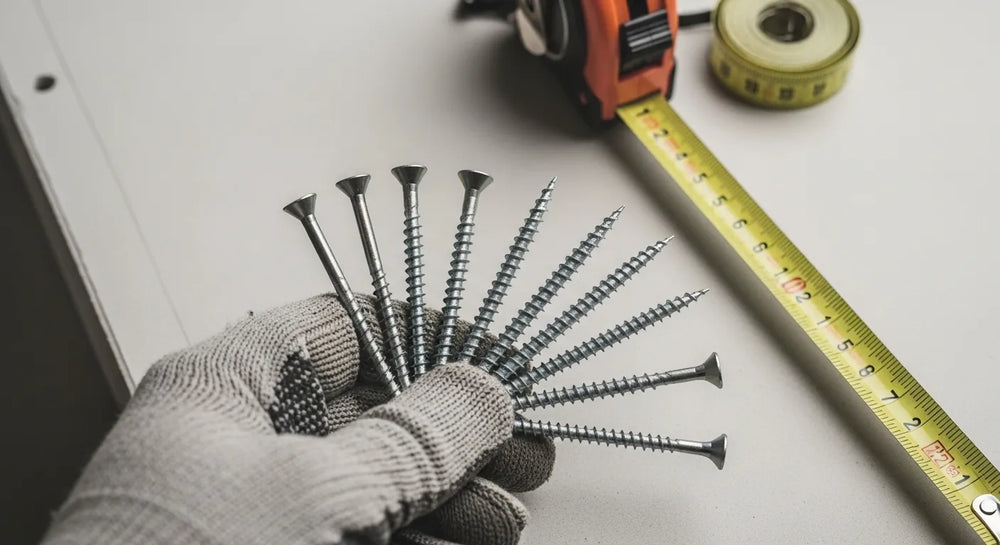
How to Fix Large Anchor Holes in Drywall: A Pro Guide
Table of Contents
- Introduction
- Assessing the Damage: More Than Just a Hole
- Repair Methodologies: From Simple Fills to Structural Fixes
- Choosing the Right Materials: A Foundation for Durability
- Beyond the Patch: Building Resilient Supply Chains for MRO
- Conclusion
- Frequently Asked Questions (FAQ)
Introduction
A facility manager walks through a newly reconfigured office space. The new equipment layout is perfect, but the walls tell a story of what used to be there: a constellation of large, jagged holes where heavy shelving, monitors, and industrial signage were once mounted. These aren't just cosmetic blemishes; they represent a point of failure, a structural weakness that compromises the wall's integrity for future use. For any professional in Maintenance, Repair, and Operations (MRO), procurement, or facility management, this scenario is all too familiar. A seemingly small problem like a damaged anchor hole can cascade into larger issues of safety, aesthetics, and operational readiness.
Ignoring a proper repair is a short-term shortcut that inevitably leads to long-term costs. A simple spackle-and-paint job might look fine for a day, but it will fail the moment a new load-bearing fastener is installed. This guide is designed for professionals who understand that a job worth doing is worth doing right. We will move beyond simple homeowner fixes to provide a detailed, step-by-step process for repairing large drywall anchor holes in a way that restores full structural integrity to the wall surface.
We will cover a comprehensive assessment of the damage, explore multiple professional repair methodologies—from patch-and-compound techniques to installing robust backer boards—and discuss the critical importance of selecting the right materials for a durable, lasting finish. Ultimately, this guide will demonstrate that a proper repair is the first step, and choosing high-quality, reliable American-made hardware for the re-installation is the key to preventing a repeat failure and ensuring operational excellence.
Assessing the Damage: More Than Just a Hole
Before you reach for the joint compound, a thorough assessment is the most critical step in a successful drywall repair. The type and extent of the damage will dictate the appropriate repair method, the materials required, and the time needed to complete the job to a professional standard. A quick glance is not enough; understanding the underlying issues will prevent a repair that fails within weeks.
Why a Proper Assessment Matters
In a commercial, industrial, or high-traffic environment, a wall is more than a divider; it's a functional surface. It needs to support shelving, safety equipment, displays, and machinery. A failed anchor hole indicates that the gypsum core of the drywall has been compromised. A superficial patch may cover the visual defect, but it won’t restore the load-bearing capacity. A proper assessment ensures:
- Safety: The repair will be strong enough to support the intended new fixture without risk of it pulling out.
- Durability: The fix will withstand the rigors of the environment and won't crack, shrink, or crumble over time.
- Efficiency: You choose the right method the first time, avoiding the wasted labor and materials of a failed repair that needs to be redone.
Categorizing the Damage
To streamline your approach, classify the hole into one of three categories. This initial diagnosis will guide your entire repair strategy.
- Category 1: Enlarged or "Spun-Out" Holes (Up to 1/2-Inch Diameter): This is common when a screw is over-tightened in a plastic anchor, causing the anchor to spin and chew away at the surrounding drywall. The hole is only slightly larger than the original anchor, and the paper facing of the drywall is mostly intact.
- Category 2: Significant Gaps (1/2-Inch to 2-Inch Diameter): This occurs when an anchor is forcefully pulled from the wall, taking a chunk of the gypsum core and paper with it. The hole is irregular, and the edges are often crumbled and weak.
- Category 3: Widespread Damage (Over 2-Inch Diameter): This level of damage usually results from a major failure, such as a heavy cabinet pulling completely free. The hole is large, there may be significant cracking radiating outward, and large sections of the paper facing may be torn away, exposing the brittle gypsum core.
Essential Tools and Materials for Assessment
Before you begin, gather a few basic tools to properly inspect the damage:
- Utility Knife: To trim away any loose paper or crumbled gypsum for a clear view of the hole's structure.
- Tape Measure: To accurately determine the hole's diameter.
- Stud Finder: To check if the damage is near a wall stud. If a stud is present nearby, it can be used as an anchor point for a more robust repair.
- Safety Goggles and Dust Mask: Drywall dust contains silica and other irritants. Always prioritize safety.
Repair Methodologies: From Simple Fills to Structural Fixes
With a clear assessment of the damage, you can now select the most effective repair technique. We will progress from the simplest method for minor holes to the most robust solution for significant structural damage, providing a solution for every category of damage.
Method 1: The Spackle & Re-Anchor Technique (For Category 1 Holes)
This method is ideal for small, "spun-out" holes where the primary goal is to create a solid base for a new, slightly larger anchor. It is a quick fix but should only be used for the most minor of enlargements.
- Preparation: Use a utility knife to carefully remove any frayed paper or loose bits of gypsum from around the edge of the hole. Vacuum out any dust.
- Filling: Using a flexible putty knife, press a high-quality spackling compound firmly into the hole. Overfill it slightly to account for shrinkage as it dries. Ensure the spackle makes solid contact with all sides of the cavity.
- Drying: Allow the spackle to dry completely. This is a critical step; patience is key. Drying time can vary from a few hours to over 24 hours depending on the product, depth, and ambient humidity. The patch should be hard and white, not gray or cool to the touch.
- Finishing: Once fully cured, use a fine-grit sanding sponge to sand the patch perfectly flush with the surrounding wall.
- Re-installation: You now have a solid surface. You can drill a new, precise pilot hole and install a new anchor. For a reliable, light-duty application after this type of repair, a standard fastener like a U.S.-made Ribbed Plastic Anchor provides excellent grip in the newly reconstituted material.
Method 2: The Drywall Patch & Compound Method (For Category 2 Holes)
For medium-sized holes up to about two inches, filling with spackle alone is insufficient. The repair needs reinforcement. A self-adhesive mesh patch provides the necessary structure for a durable and invisible repair.
- Preparation: Clean up the hole's edges with a utility knife, creating a slightly beveled edge if possible. This gives the joint compound more surface area to adhere to.
- Apply the Patch: Select a self-adhesive fiberglass mesh patch that is at least one inch larger than the hole on all sides. Center it over the damage and press it firmly onto the wall.
- First Coat of Compound: Using a 4- or 6-inch drywall knife, apply a thin layer of all-purpose joint compound (often called "mud") over the mesh patch. Start in the center and work your way outward, pressing firmly to force the compound through the mesh and into the hole. Feather the edges smoothly into the surrounding wall. The goal is to cover the mesh completely, but not to build up a thick hump.
- Dry and Recoat: Allow the first coat to dry completely (typically 24 hours). Once dry, use your drywall knife to scrape off any high spots or ridges. Apply a second, wider coat of compound, feathering the edges another two inches beyond the first coat. This blending is key to making the patch disappear.
- Final Skim Coat and Sanding: After the second coat is dry, inspect the repair. If needed, apply a very thin final skim coat to fill any minor imperfections. Once everything is fully cured, lightly sand the entire area with a fine-grit sanding block until it is perfectly smooth and flush with the wall. Use your hand to feel for any bumps or transitions.
- Prime and Paint: The repair is complete. Prime the patched area before painting to ensure the paint sheen matches the rest of the wall and to prevent the porous compound from absorbing the paint differently, a phenomenon known as "flashing."
Method 3: The Backer Board Method (For Category 2 & 3 Holes)
When you encounter a large hole (over 2 inches) or when you know a heavy item must be re-mounted in the same general area, the backer board method is the undisputed professional choice. This technique adds a solid piece of wood behind the drywall, creating a robust anchor point and ensuring the repair is as strong, or even stronger, than the original wall.
- Prepare the Hole: Use a drywall saw or utility knife to clean up the hole, cutting it into a neat square or rectangle.
- Create the Backer Board: Cut a piece of wood (a 1x3 pine board works well) about 4-6 inches longer than the width of the hole.
- Install the Backer: Drill a single drywall screw into the center of your wood backer board. This will serve as a temporary handle. Slide the backer board diagonally into the hole, then use the screw-handle to pull it up tight against the backside of the drywall, centering it behind the opening.
- Secure the Backer: While holding the backer board firmly in place with the handle, drive two drywall screws through the face of the existing drywall (one on each side of the hole) and into the ends of the backer board. The backer is now securely fastened. You can remove the center handle screw.
- Install the Patch: Cut a new piece of drywall to the exact dimensions of the square hole you created. Place this patch into the hole and secure it by driving one or two screws through it and into the wood backer board.
- Finish the Repair: You now have a solid, stable patch. From here, the finishing process is the same as with the mesh patch method. Apply drywall tape (paper tape embedded in mud is strongest for these seams) over the joints, apply multiple thin coats of joint compound, feathering each coat wider than the last. Sand, prime, and paint for a seamless, incredibly strong repair.
This method is the gold standard for commercial and industrial settings. It demonstrates a commitment to not just fixing the problem, but fortifying the area against future issues, embodying our core value of Industrial Excellence.
Choosing the Right Materials: A Foundation for Durability
The success of your repair depends as much on the quality of your materials as it does on your technique. In a professional setting, cutting corners on materials leads to premature failure and costly rework.
Joint Compound vs. Spackling
While often used interchangeably, these are different products for different jobs.
- Spackling Compound: Best for filling small nail holes and minor Category 1 anchor holes. It dries faster but is more brittle and prone to cracking in larger applications.
- Joint Compound ("Mud"): The correct choice for any repair involving tape or patches (Category 2 and 3). It is more flexible, stronger, and sands more smoothly. It comes in pre-mixed (all-purpose) and dry-mix (hot mud) varieties. For most repairs, a good quality all-purpose compound is sufficient.
Patches and Tapes
- Self-Adhesive Fiberglass Mesh: Easy to apply and great for beginners. It's effective for flat surfaces but doesn't have the same seam strength as paper tape.
- Paper Tape: The choice of professionals for creating the strongest possible joint. It requires being "bedded" in a layer of joint compound, which takes more skill, but it is less prone to cracking over time, especially at the seams of a backer-board repair.
Selecting the Right Replacement Anchor
After investing the time and effort into a professional repair, the final step—re-installing a fastener—is the most critical. Using a low-quality anchor at this stage negates all your hard work and starts the cycle of failure all over again. This is where a commitment to sourcing reliable, high-quality components becomes a strategic business decision, not just a hardware choice.
Sourcing verified, U.S.-made fasteners reduces the Total Cost of Ownership (TCO) by minimizing the risk of failure, rework, and associated downtime. For any MRO buyer or procurement manager, ensuring access to a reliable supply of these components is paramount.
Once your patch is fully cured and finished, consider these American-made options for your re-installation:
- For a versatile, medium-duty application in the newly repaired drywall, the Medium Duty Nylon Wall Anchor #8 for Drywall provides exceptional holding power through its robust expansion design, ensuring it grips securely.
- In situations where installation speed is a factor and the underlying wall is sound, a self-drilling anchor can be highly effective. The Medium Duty Nylon Wall Anchor #6 Self-Drilling Drywall Zip-It® is designed for fast, easy installation while still offering a reliable hold for medium loads.
By choosing the right anchor for the job, you complete the repair cycle with a component you can trust.
Beyond the Patch: Building Resilient Supply Chains for MRO
The challenge of fixing a large anchor hole in drywall is a microcosm of a larger issue faced by industrial buyers every day: the downstream consequences of upstream sourcing decisions. A single failed fastener can halt a project, cause a safety hazard, and consume valuable labor hours for repair. This illustrates why building a resilient, transparent, and high-quality supply chain for even the smallest MRO components is essential for modern business.
At Maden.co, we are dedicated to solving this exact problem. Our mission is to democratize access to American manufacturing, making it easier than ever for businesses to procure the high-quality parts they need to operate efficiently and effectively. We believe that America's manufacturing revival is here, and we are building the digital infrastructure to prove it. Our entire business model is built on this principle; you can learn more about our mission to champion American manufacturing here.
By connecting procurement managers, engineers, and MRO buyers with our network of over 800+ verified U.S. manufacturers and a catalog of over 2.5 million products, we eliminate the friction and uncertainty from the procurement process. This commitment to a robust domestic supply chain is a two-way street. We are constantly expanding our network of partners who share our dedication to quality. If you are a U.S. manufacturer, we invite you to register as a vendor and join the American manufacturing revival.
For a maintenance manager outfitting an entire facility or a procurement officer handling a large-scale renovation, managing cash flow is critical. That's why we offer a streamlined solution. You can apply for Instant Financing at checkout to streamline your capital-intensive projects, empowering you to acquire the quality components you need without disrupting your budget.
Conclusion
Fixing a large anchor hole in drywall is more than a simple repair; it's an opportunity to improve the integrity and functionality of your facility. By properly assessing the damage, choosing the right professional technique—whether it's a simple patch or a robust backer board—and using high-quality materials, you can create a fix that is truly permanent and reliable. This meticulous approach ensures that your walls are ready to meet the demands of a dynamic commercial or industrial environment.
This process highlights a larger truth: excellence is built on a foundation of quality components. The effort you put into the repair is only as good as the fastener you use for the re-installation. We encourage you to move beyond the cycle of repair and rework by starting with the right parts from the beginning. Explore the Maden.co catalog to discover the vast range of U.S.-made fasteners, hardware, and MRO supplies that can help you build, maintain, and operate with confidence. If you have specific sourcing questions or need help finding a particular component for your next project, our team is ready to help. Build with American-made quality and leave the drywall patches behind.
Frequently Asked Questions (FAQ)
1. How long should I wait for joint compound to dry between coats? It depends heavily on the product, ambient temperature, humidity, and the thickness of the application. As a general rule, you should wait a full 24 hours between coats to be safe. A fully cured coat will be uniformly white or off-white, hard to the touch, and will not feel cool, which indicates moisture is still evaporating. Rushing this step is the most common cause of cracks and failed repairs.
2. Can I just use a larger anchor in the old, damaged hole? While this can seem like a quick and tempting shortcut, it is not a professional or reliable solution. Forcing a larger anchor into a compromised hole can further damage the surrounding drywall, creating a "blowout" on the back side. It will not achieve the manufacturer's specified holding power and is highly likely to fail, especially under load, starting the repair cycle all over again.
3. What's the best repair method if I need to hang something heavy in the exact same spot? The backer board method is unequivocally the best solution for this scenario. By installing a solid piece of wood behind the drywall, you are no longer relying on the gypsum core for strength. You create a new, secure mounting point that is often significantly stronger than the original, un-repaired drywall, giving you complete confidence in re-hanging heavy items.
4. Why is sourcing U.S.-made anchors and fasteners important for MRO? Sourcing U.S.-made components from a transparent platform with verified manufacturers provides multiple strategic advantages. It ensures adherence to stringent quality control and material standards (like DIN or NPT), offers clear material traceability, and guarantees consistency across batches. For MRO and procurement professionals, this translates to reduced risk of premature equipment failure, enhanced operational safety, a simplified compliance process, and a stronger, more resilient domestic supply chain—ultimately lowering the Total Cost of Ownership.


