How to Get a Plastic Wall Anchor In Securely
Table of Contents
- Introduction
- Beyond the Basics: Why Professional Anchor Installation Matters
- Step 1: Selecting the Right Plastic Anchor for the Job
- Step 2: Assembling the Correct Tools and Materials
- Step 3: The Installation Process: A Detailed Walkthrough
- Common Mistakes to Avoid for a Flawless Installation
- Streamlining Procurement for MRO and Project-Based Needs
- Conclusion: Building on a Foundation of American Quality
- Frequently Asked Questions (FAQ)
Introduction
An MRO manager walks through a newly outfitted commercial space. The signage is crisp, the wall-mounted safety equipment is in place, and the fixtures look pristine. But a closer look reveals a problem: a slight sag in a heavy-duty first aid station, a piece of conduit pulling away from the wall, a decorative panel that isn't quite flush. The cause? Improperly installed plastic wall anchors. This small oversight now represents unplanned labor costs, potential safety hazards, and a risk to the facility's professional appearance. It’s a scenario that underscores a crucial truth in industrial and commercial settings: the smallest components often have the largest impact on project success and long-term operational integrity.
Knowing how to get a plastic wall anchor in correctly is more than a basic maintenance skill; it's a fundamental aspect of ensuring quality, safety, and efficiency. A securely fastened anchor represents reliability. A failed one represents rework, waste, and risk. This article moves beyond a simple DIY tutorial to provide a comprehensive guide for procurement professionals, design engineers, and maintenance teams. We will explore the critical steps of selecting the right American-made anchor for your application, detail a precise installation methodology, and identify common pitfalls that can compromise structural integrity. Our goal is to empower you with the knowledge to not only perform the task correctly but to understand why each step matters, ensuring every anchor contributes to a project's total value, not its total cost.
Beyond the Basics: Why Professional Anchor Installation Matters
In a high-stakes commercial or industrial environment, the method of fastening an object to a wall transcends simple convenience. It becomes a critical factor in operational safety, cost management, and compliance. The Total Cost of Ownership (TCO) associated with a seemingly insignificant component like a plastic anchor can escalate rapidly when installations fail.
Consider the cascading effects of a single anchor failure:
- Rework and Labor Costs: The most immediate impact is the need for removal, repair, and re-installation. This doubles the labor time and material consumption for a single fastening point, directly eroding project profitability and diverting maintenance resources from other critical tasks.
- Asset Damage: If an anchor fails while securing valuable equipment, signage, or inventory shelving, the cost of the damaged asset can dwarf the initial installation expense. For a design engineer specifying mounting hardware for a new product line, ensuring the anchor’s reliability is paramount to protecting the final product.
- Safety and Liability: In any MRO context, safety is non-negotiable. A wall-mounted fire extinguisher, safety data sheet (SDS) binder, or emergency lighting unit that detaches from the wall is a significant liability. Proper anchor installation is a foundational element of a safe work environment, mitigating risks that could lead to injury and costly compliance violations.
- Operational Disruption: A failed installation can necessitate shutting down an area for repair, interrupting workflow and reducing productivity. The "hidden" cost of this downtime is a significant factor in the TCO equation.
This is why we champion a holistic approach to procurement, one rooted in our core values of Industrial Excellence and Supply Chain Transparency. Sourcing high-quality, reliable components is the first step in mitigating these risks. By choosing verified U.S.-made fasteners, you are investing in materials that meet stringent quality control standards. At Maden.co, we connect businesses with a network of over 800 U.S. manufacturers, providing direct access to parts that are built for performance and durability. This commitment to American manufacturing isn't just about patriotism; it's a strategic decision to build more resilient and reliable systems from the ground up.
Step 1: Selecting the Right Plastic Anchor for the Job
The effectiveness of any wall anchor begins long before a drill is ever turned on. It starts with a precise and informed selection process. Using the wrong type of anchor for the wall material or load weight is the most common reason for installation failure. For procurement managers and engineers, specifying the correct component is as critical as the installation itself. Let’s explore some of the most common and versatile types of plastic anchors, each designed for specific applications.
The Ribbed Plastic Anchor: The All-Purpose Workhorse
The ribbed anchor is arguably the most recognizable type of plastic anchor. Its design is simple yet highly effective for light- to medium-duty applications in common materials like drywall, plaster, and some masonry. The external ribs are the key to its function; as a screw is driven into the anchor, these ribs expand and bite into the surrounding wall material, creating a secure friction fit that resists pull-out and rotation.
This design makes it an excellent choice for a wide range of MRO tasks, such as mounting smoke detectors, thermostats, lightweight signage, and small electrical components. When sourcing for general facility maintenance, having a stock of high-quality, U.S.-manufactured anchors like this Ribbed Plastic Anchor ensures your team has a reliable, go-to solution for everyday tasks. The consistency and material integrity of American-made products provide peace of mind that the anchor will perform as specified, every time.
The Tapered & Ribbed Design: Enhanced Holding Power
For applications requiring a bit more holding power or for use in slightly less uniform materials, an anchor with a combined tapered and ribbed design offers a superior solution. The tapered body allows for easier insertion into the pilot hole, reducing the force needed and minimizing the risk of damaging the wall surface. Once seated, the ribs provide the same anti-rotation and gripping benefits as a standard ribbed anchor.
This dual-action design makes the Tapered and Ribbed White Plastic Anchor particularly useful for securing items that may experience minor vibrations or require a more robust hold, such as wall-mounted cable organizers, small control panels, or decorative fixtures in a commercial space. The improved design can often provide a more secure fit, contributing to a longer-lasting and more reliable installation.
The Conical Anchor: Simplicity and Versatility
The conical anchor is prized for its simplicity and ease of use, particularly in high-volume applications where speed and efficiency are key. This type of anchor typically features a smooth, conical body that splits at the tip. As the screw penetrates, it wedges the two halves apart, pressing them firmly against the sides of the pilot hole.
While often used for lighter loads, a well-made conical anchor can be incredibly effective. They are a staple for electricians and contractors mounting junction boxes, conduit clamps, and other lightweight hardware. For procurement managers looking to source for large-scale projects, the straightforward design of a U.S.-made Conical Bantam Plastic Anchor ensures consistent performance and rapid installation, helping to keep projects on schedule and within budget.
Key Selection Criteria
To ensure you choose the right anchor, always evaluate your project against these four critical criteria:
- Wall Material: The single most important factor. Is it drywall (plasterboard), plaster, concrete, brick, or hollow-core block? Each material has a different density and composition, requiring a specific anchor type for optimal grip.
- Load Weight and Shear Force: Determine the total weight of the object being mounted. Critically, also consider the shear force—is the load pulling straight down, or is it cantilevered away from the wall, creating a lever effect? Always consult the anchor's load rating specifications and choose one that comfortably exceeds your requirements.
- Screw Size Compatibility: Every anchor is designed to work with a specific range of screw diameters and lengths. Using a screw that is too small will not expand the anchor properly, while one that is too large can split the anchor or damage the wall. This information is always included in the product specifications.
- Environmental Factors: Will the anchor be exposed to moisture, temperature fluctuations, or vibrations? While plastic anchors are corrosion-resistant, extreme conditions can affect their integrity over time. For demanding environments, ensure the plastic composition (e.g., nylon vs. polyethylene) is suitable.
Step 2: Assembling the Correct Tools and Materials
A successful installation relies on precision, and precision requires the right tools. Gathering everything you need before you begin prevents costly mistakes and ensures a professional, secure result.
Core Principle: The diameter of your drill bit must match the diameter of the anchor shaft. This is the golden rule of anchor installation. A hole that is too large will allow the anchor to spin or pull out. A hole that is too small will prevent the anchor from being fully seated and can damage the wall upon insertion.
Here is the essential toolkit for a professional installation:
- Safety Glasses: A non-negotiable first step. Drilling into any wall material can create dust and debris.
- Power Drill: A standard corded or cordless drill is sufficient for drywall and plaster. For masonry like brick or concrete, a hammer drill is required to create a clean, precise hole without overheating the bit.
- Drill Bits: A full set of high-quality drill bits is a crucial investment. The correct size is often printed on the anchor itself or its packaging. When in doubt, you can hold the drill bit up in front of the anchor; the bit should be the same diameter as the anchor's body, not including the ribs.
- Hammer or Rubber Mallet: Used to gently tap the anchor into the pilot hole until it is flush with the wall surface. A rubber mallet is preferable for softer wall materials like plaster to prevent marring.
- Screwdriver or Screw Gun: A manual screwdriver provides excellent control over torque, preventing over-tightening. For larger projects, a screw gun set to a low torque setting can increase efficiency.
- Tape Measure and Pencil: For accurate placement.
- Level: To ensure the final mounted object is perfectly horizontal or vertical.
By assembling this toolkit, you are setting the stage for an installation that is not just successful, but repeatable and reliable across multiple applications.
Step 3: The Installation Process: A Detailed Walkthrough
With the correct anchor selected and the proper tools at hand, you can proceed with the installation. Follow these steps methodically to ensure a secure and durable fastening point.
1. Mark the Exact Location
Use your tape measure and pencil to mark the precise spot for the pilot hole. If you are mounting an object with multiple fastening points, use a level to ensure your marks are perfectly aligned. Double-check your measurements before proceeding.
2. Drill the Pilot Hole
Select the drill bit that matches the anchor diameter. When drilling into drywall, run the drill at a medium speed and apply steady, even pressure. For masonry, engage the hammer function on your drill. The goal is a clean, perpendicular hole. The depth of the hole should be slightly longer than the length of the anchor to accommodate any dust and allow the anchor to be fully seated. A piece of tape wrapped around the drill bit can serve as a simple and effective depth gauge.
3. Clear the Hole of Debris
This is a frequently overlooked but critical step, especially in masonry. Dust and debris left in the pilot hole can prevent the anchor from seating fully and reduce its gripping power. Use a small brush, a can of compressed air, or a vacuum to completely clear the hole.
4. Insert the Anchor
Gently push the anchor into the pilot hole until it meets resistance. If the fit is correct, it should be snug. Place the head of a screwdriver or a small block of wood over the anchor's flange and lightly tap it with a hammer or mallet until the flange is flush with the wall surface. The anchor should not spin freely in the hole. If it does, the hole is too large, and you must start over in a new location.
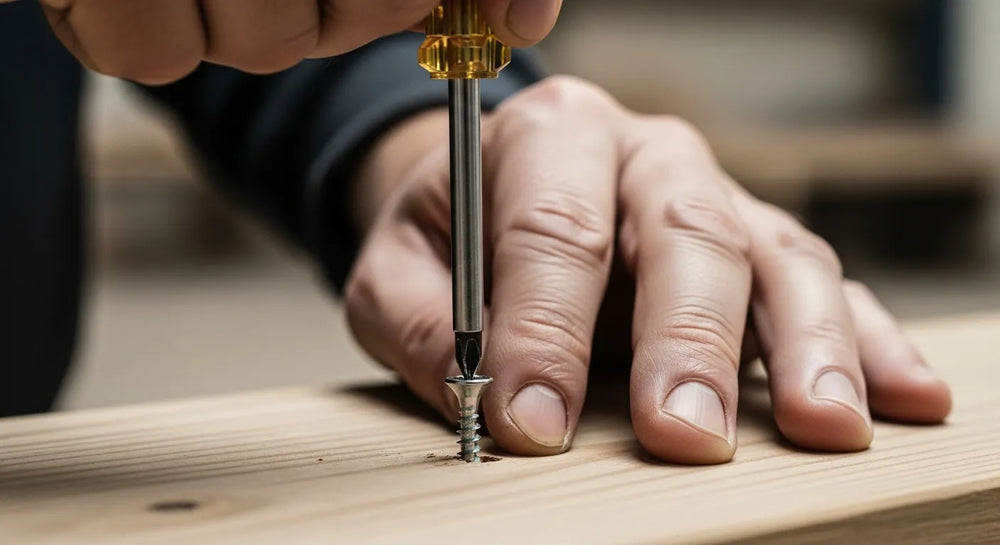
5. Drive the Screw
Place your object over the anchor and align the mounting hole. Insert the correct size screw and begin to turn it with a screwdriver or low-torque screw gun. You will feel resistance as the screw engages the anchor's internal threads and begins to expand the body. Continue driving the screw until it is snug.
Critical Warning: Do not overtighten the screw. Overtightening can strip the anchor's internal threads or cause the anchor's flange to break through the drywall surface, completely compromising the installation. The screw should be tight enough to hold the object securely without sinking the anchor head into the wall.
6. Test for Security
Once the screw is in place, gently tug on the mounted object to ensure it is secure. There should be no wiggle or play. If the fixture feels loose, the anchor may not have expanded correctly, and the installation should be redone.
Common Mistakes to Avoid for a Flawless Installation
Even with the best materials, simple mistakes can lead to failure. Awareness of these common pitfalls is key to ensuring every installation is a success.
- Using the Wrong Drill Bit Size: As emphasized earlier, this is the number one cause of failed anchors. Always verify the bit size against the anchor.
- Ignoring Load Ratings: Every anchor has a specified maximum load capacity. Exceeding this limit is a guarantee of eventual failure. Always build in a safety margin.
- Drilling a Messy or Angled Hole: A pilot hole that is not perpendicular to the wall will cause the anchor and screw to sit at an angle, applying uneven stress and reducing holding power.
- Leaving Debris in the Hole: This prevents the anchor from fully seating and expanding, drastically reducing its effectiveness.
- Choosing the Wrong Anchor for the Wall: Using a standard drywall anchor in hollow-core block or concrete will not work. You must match the anchor to the substrate.
- Reusing Old Anchors: Once an anchor has been expanded and a screw has been removed, it loses its structural integrity. Never reuse a plastic wall anchor. The cost of a new anchor is negligible compared to the cost of failure.
Streamlining Procurement for MRO and Project-Based Needs
For an MRO buyer facing an unexpected equipment breakdown or a procurement manager outfitting an entire facility, the ability to quickly find and source verified, U.S.-made components is a game-changer. The traditional procurement process—sifting through catalogs, vetting suppliers, and navigating complex supply chains—introduces friction and delays. This is the very challenge we set out to solve.
Our mission at Maden.co is to democratize access to American manufacturing. We believe that sourcing American-made components should be as convenient as any global alternative. By aggregating over 2.5 million products from a trusted network of U.S. manufacturers, we provide a single, streamlined platform for all your industrial supply needs. Our vision is to be the definitive engine driving "America's manufacturing revival is here." You can learn more about our mission to champion American manufacturing and build a more resilient domestic supply chain on our About Us page.
For businesses undertaking large-scale projects or managing significant MRO inventories, cash flow is always a key consideration. That's why we've integrated a powerful tool directly into our platform. When you're ready to make a bulk purchase of fasteners or other capital-intensive components, you can apply for Instant Financing at checkout to streamline your capital-intensive projects. This feature empowers businesses to acquire the necessary materials without disrupting their operational budget, turning a large capital expenditure into a manageable operating expense.
Furthermore, we are always looking to expand our network of quality American producers. If you are a U.S. manufacturer of industrial components, we invite you to join our mission. Register as a vendor and connect your products with thousands of industrial buyers dedicated to rebuilding America's industrial base.
Conclusion: Building on a Foundation of American Quality
Mastering how to get a plastic wall anchor in is a testament to a larger principle: excellence is achieved in the details. A secure anchor is the result of proper selection, precise technique, and, most importantly, high-quality components. By following the steps outlined in this guide—from choosing the right ribbed, tapered, or conical anchor to executing a clean installation—you ensure that every fastening point is a point of strength and reliability.
This dedication to quality is the cornerstone of American manufacturing. By choosing to source U.S.-made fasteners, you are not only ensuring superior performance and durability but also investing in a more transparent and resilient supply chain.
At Maden.co, we make it easy to act on that choice. Explore our extensive catalog of American-made anchors and fasteners to find the exact components your projects demand. For large orders or facility-wide stocking, remember to leverage our Instant Financing options at checkout to manage your procurement budget effectively. If you have specific sourcing questions or need assistance finding the right product for your application, our team is ready to help. Please do not hesitate to Contact Us for support.
Frequently Asked Questions (FAQ)
What happens if my pilot hole is too big for the plastic anchor?
If the pilot hole is too large, the anchor will not be able to expand and grip the wall material effectively. It will likely spin in place when you try to drive the screw, and it will not support any weight. The only correct solution is to remove the anchor, patch the hole, and drill a new, correctly sized pilot hole in a nearby location.
Can I reuse a plastic wall anchor?
No, you should never reuse a plastic wall anchor. The process of driving a screw into the anchor permanently deforms the plastic as it expands. Once the screw is removed, the anchor loses its original shape and much of its holding power. Attempting to reuse it will result in a weak and unreliable fastening.
How do I know the weight limit of a specific plastic anchor?
The load capacity or weight limit is a critical specification provided by the manufacturer. This information can typically be found on the product packaging or the technical data sheet. When sourcing components through a marketplace like Maden.co, these specifications are listed on the product detail page. Always choose an anchor with a load rating that significantly exceeds the weight of the object you are mounting to create a safe margin.
Why should I choose U.S.-made anchors for my business?
Choosing U.S.-made anchors provides several strategic advantages for a business. First, you benefit from consistent quality and adherence to stringent manufacturing standards, which translates to greater reliability and safety. Second, you are supporting a domestic supply chain, which reduces lead times, enhances transparency, and insulates your operations from global shipping disruptions. Finally, it aligns your procurement with a commitment to industrial excellence and the revival of American manufacturing.


