How to Get Plastic Drywall Anchors Out: A Pro Guide
Table of Contents
- Introduction
- Before You Begin: Safety and Tool Assessment
- Method 1: The Simple Pull-Out Technique
- Method 2: The Screw and Pry Technique
- Method 3: The Drilling-Out Method
- Method 4: The Cut and Push-Through Technique
- Preparing the Wall for Repair: The Professional Finish
- Choosing the Right Anchor for the Job: A Procurement Perspective
- The Maden.co Advantage: Streamlining Your Industrial Supply Chain
- Conclusion
- Frequently Asked Questions (FAQ)
Introduction
A facilities manager prepping a commercial space for a new tenant stares at a wall riddled with the ghosts of fixtures past: dozens of small, plastic drywall anchors. Each one represents a potential point of failure in creating a perfectly smooth, professional finish. Attempting to pry them out incorrectly could tear the drywall paper, leading to hours of extra patching, sanding, and repainting. This scenario is all too common in maintenance, repair, and operations (MRO), where efficiency is paramount and rework is a costly drain on resources. What seems like a minor task can quickly escalate, impacting timelines and budgets.
This post provides a definitive, professional-level guide on how to get plastic drywall anchors out of drywall correctly and efficiently. We will move beyond simple DIY tricks and delve into the four primary methods used by industry professionals, detailing when and how to deploy each technique for optimal results. We will cover the pull-out, the pry, the drill-out, and the push-through methods, ensuring you have the right approach for any situation. Furthermore, we will explore the critical, often-overlooked connection between the initial anchor selection and the eventual ease of removal, demonstrating how strategic procurement can prevent these headaches from the start. The ultimate goal is to empower MRO buyers, procurement managers, and on-the-ground technicians with the knowledge to handle this common task with precision, minimizing wall damage and maximizing productivity.
Before You Begin: Safety and Tool Assessment
Before tackling any anchor removal, a systematic approach focused on safety and proper tool selection is non-negotiable. A few moments of preparation can prevent injuries and ensure you don't turn a small repair into a major drywall reconstruction project.
Safety First: Essential Precautions
Even for a seemingly minor task, personal protective equipment (PPE) is crucial. Small plastic fragments or bits of drywall can easily become airborne projectiles.
- Eye Protection: Always wear safety glasses or goggles. Drilling or breaking an anchor can send sharp plastic shards flying unexpectedly.
- Gloves: A good pair of work gloves can protect your hands from blisters when using pliers and prevent scrapes from rough drywall edges or sharp utility knife blades.
Assembling Your Professional Toolkit
Having the right tools on hand prevents improvisation that can lead to wall damage. A well-prepared technician should have the following:
- Needle-Nose Pliers: Essential for gripping small screw heads or the flange of an anchor.
- Lineman's Pliers or Diagonal Cutters: Useful for gripping and twisting stubborn anchors or for cutting the flange.
- Utility Knife: A sharp blade is necessary for scoring around the anchor or cutting the flange flush.
- Screwdrivers: Both a Phillips and a flathead screwdriver are required. The flathead can be used for gentle prying, while the Phillips will drive the screws needed for extraction.
- Hammer: The claw end is perfect for prying when paired with a screw.
- Putty Knife: A 2-inch or 4-inch flexible putty knife is invaluable. It serves as a fulcrum to protect the drywall surface during prying and is essential for the subsequent patching process.
- Power Drill and Drill Bits: A variable-speed drill is needed for the drill-out method. Have a set of bits of various sizes available.
Assessing the Anchor Type and Condition
Not all plastic anchors are created equal. Identifying the type you're dealing with can inform your removal strategy.
- Expansion Anchors: These are the most common type, often with "ribs" along the body. When a screw is inserted, the anchor expands to grip the inside of the drywall. A quality Ribbed Plastic Anchor made from durable U.S.-manufactured nylon will be less likely to become brittle and break apart during removal.
- Self-Drilling Anchors: These threaded anchors, often called "zip-its," are designed to be screwed directly into the drywall without a pilot hole. Their wide threads provide a strong hold, but they can be more challenging to remove cleanly if they break.
- Anchor Condition: Is the anchor intact with its flange (the lip that sits on the wall surface) in good condition? Or is it broken, with the flange missing or the body stripped? A broken anchor will likely require a more aggressive removal method, such as drilling.
Understanding these factors allows you to choose the most efficient and least destructive removal method from the outset.
Method 1: The Simple Pull-Out Technique
This is the cleanest and simplest method, but it is only effective in specific circumstances. It works best when the anchor is already slightly loose or was installed in a hole that was marginally too large.
When to Use This Method
- The anchor wiggles slightly when you touch it.
- You are working with a thin or older piece of drywall where the anchor's grip may have weakened.
- The anchor was used for a very lightweight item and was not fully expanded.
Step-by-Step Instructions
- Insert a Screw: Choose a screw that fits the anchor snugly. Thread it into the anchor by hand or with a screwdriver, turning it only two or three full rotations. You want the screw threads to bite into the plastic but not far enough to expand the anchor again.
- Grip the Screw: Use your needle-nose pliers or lineman's pliers to get a firm grip on the head of the screw.
- Wiggle and Pull: Gently wiggle the screw back and forth and side to side. This motion helps break any seal the anchor flange has with the paint and wall surface and compresses the expanded part of the anchor inside the wall cavity.
- Extract: While continuing the wiggling motion, pull the screw and anchor straight out of the wall. Apply steady, even pressure. If it resists heavily, do not force it; move on to Method 2 to avoid damaging the drywall.
This technique, when successful, leaves the cleanest hole and requires the least amount of patching.
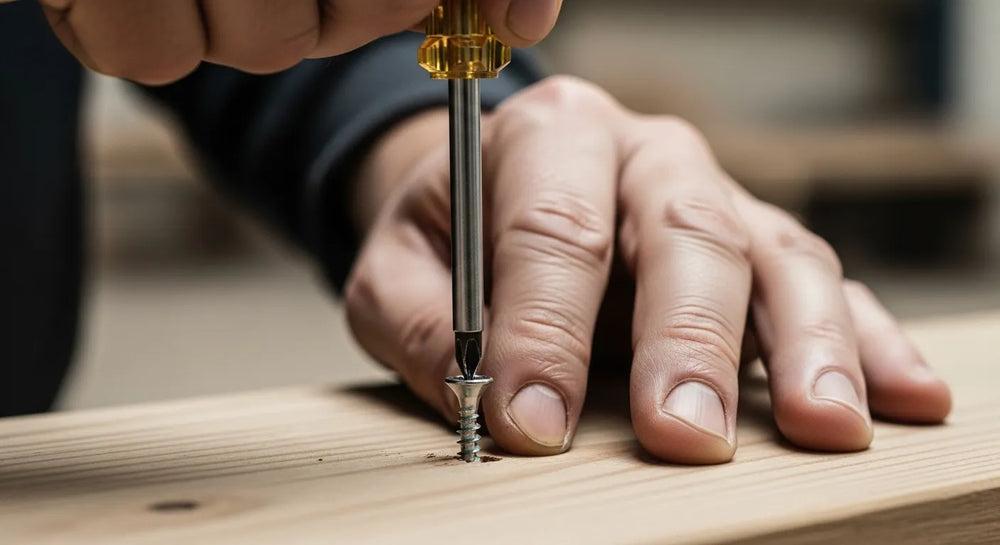
Method 2: The Screw and Pry Technique
This is the most common and reliable method for removing intact plastic drywall anchors. It leverages the power of a simple machine—the lever—to extract the anchor with controlled force, minimizing collateral damage to the surrounding wall surface.
When to Use This Method
- The anchor is firmly set in the wall and does not wiggle.
- The simple pull-out method failed.
- The anchor flange is intact and accessible.
Step-by-Step Instructions
- Select and Insert the Screw: As with the previous method, select a screw that fits the anchor. Drive it in about halfway—deep enough for a strong grip, but not so deep that it fully re-expands the anchor against the back of the drywall.
- Protect the Wall Surface: This is a critical step that separates a professional job from an amateur one. Place the flat blade of a wide putty knife on the wall, right beside the screw head. This will act as a fulcrum and distribute the prying force, preventing the hammer's claw or pliers from denting or crushing the soft drywall.
- Position Your Prying Tool: Place the claw of your hammer under the screw head, with the claw resting on the putty knife. Alternatively, you can use lineman's pliers, gripping the screw head and using the putty knife as your pivot point.
- Apply Gentle, Steady Leverage: Slowly and carefully apply pressure to pry the screw and anchor out of the wall. Do not yank or use sudden force. The goal is to ease the anchor out. You may need to reset your prying tool once or twice as the anchor emerges.
- Complete the Extraction: Once the anchor is mostly out, you can typically remove it the rest of the way by hand or with pliers.
This method provides excellent control and is highly effective for the majority of removal situations an MRO technician will face. Its success relies heavily on protecting the wall surface with a putty knife.
Method 3: The Drilling-Out Method
Sometimes, an anchor is simply too stubborn, damaged, or broken to be pried out. In these cases, destructively removing the anchor by drilling it out is the most effective, albeit most aggressive, option.
When to Use This Method
- The anchor's flange has broken off, leaving nothing to grip or pry against.
- The plastic is old and brittle, and the anchor shatters when you attempt to pry it.
- A self-drilling anchor has broken off below the surface of the wall.
- The anchor is spinning freely in the hole, preventing you from backing out the existing screw or inserting a new one.
Step-by-Step Instructions
- Choose the Right Drill Bit: This is the most crucial step. Select a drill bit that is the same diameter as the inside of the anchor, or just slightly larger. A bit that is too small won't remove enough material, and a bit that is too large will unnecessarily widen the hole in the drywall.
- Set Your Drill: Use a variable-speed drill set to a low speed. High speeds can generate heat, melting the plastic and making a mess, or can cause the bit to "walk" and damage the surrounding wall.
- Drill with Precision: Center the drill bit carefully in the opening of the anchor. Apply light, steady pressure and begin drilling. The goal is to essentially obliterate the plastic anchor from the inside out.
- Clear the Debris: As you drill, the plastic will either break into small pieces or wrap itself around the drill bit. You may need to reverse the drill periodically to clear the shavings. Continue until the entire anchor has been drilled out of the hole.
- Inspect the Hole: Once the anchor is removed, use a small screwdriver or pliers to clear any remaining plastic fragments from the hole before patching.
While this method is effective for impossible-to-remove anchors, it almost always results in a slightly larger hole that will require more care during the patching stage.
Method 4: The Cut and Push-Through Technique
In many professional MRO and construction settings, speed and a perfect finish are the top priorities. Sometimes, the best way to "remove" an anchor is to not remove it at all, but rather to permanently hide it within the wall cavity. This technique is often the fastest and results in the least amount of surface damage.
When to Use This Method
- You are repainting the wall anyway, so a small patch is already part of the workflow.
- Pulling the anchor out threatens to delaminate a large piece of the drywall's paper face.
- Time is of the essence, and multiple anchors need to be dealt with quickly.
Step-by-Step Instructions
- Remove the Screw: First, ensure any existing screw is completely removed from the anchor.
- Cut the Flange: Take a sharp utility knife and carefully cut the plastic flange of the anchor flush with the surface of the drywall. Be precise and avoid cutting into the surrounding drywall paper. Sometimes, you can use a hammer to gently tap a sharp flathead screwdriver or chisel, shearing the flange off cleanly.
- Recess the Anchor: Use a nail set or the tip of a Phillips screwdriver and place it on the remaining body of the anchor.
- Tap it In: Give the nail set or screwdriver a firm but controlled tap with a hammer. This will push the body of the anchor off the back of the drywall and into the hollow wall cavity, where it will fall harmlessly away.
- Ready for Patching: You are now left with a perfect, small, slightly recessed hole, ready for a quick application of spackling compound.
This method is a favorite among professional painters and drywall technicians because it completely avoids the risk of tearing the paper face of the drywall, which is often the most time-consuming part of a repair.
Preparing the Wall for Repair: The Professional Finish
Removing the anchor is only half the battle. Achieving a seamless, invisible repair is what signifies a job well done.
- Clean the Hole: Use your utility knife to carefully trim away any frayed drywall paper or loose gypsum from the edges of the hole. A clean opening ensures the patching compound will adhere properly.
- Apply Spackling Compound: For small holes left by anchors, a lightweight spackling compound is ideal. Use a flexible putty knife to press the compound firmly into the hole, leaving it slightly mounded to account for shrinkage as it dries.
- Scrape Flush: On your second pass, hold the putty knife at a 45-degree angle and scrape the surface clean, leaving only the filled hole.
- Sand Smooth: Once the compound is fully dry (check the manufacturer's instructions), lightly sand the area with a fine-grit sanding sponge (220-grit is a good choice). Feather the edges to blend the patch seamlessly with the surrounding wall.
- Prime and Paint: Always apply a coat of primer over the patch before painting. The texture and porosity of spackle are different from drywall, and without primer, the patched spot will show through the final coat of paint as a dull or different-colored spot, an effect known as "flashing." After priming, apply your matching topcoat.
Choosing the Right Anchor for the Job: A Procurement Perspective
The difficulty of removing a drywall anchor is often directly related to the quality and type of anchor chosen for the initial installation. For procurement managers and MRO buyers, thinking about the entire lifecycle of a component—including its eventual removal—is a key part of optimizing the Total Cost of Ownership (TCO). A cheap, brittle anchor that costs ten cents less can easily lead to an extra hour of labor and materials for wall repair, negating any initial savings.
This is where strategic sourcing becomes a competitive advantage. At Maden.co, we are committed to democratizing access to high-quality, American-made industrial components. Our platform connects buyers directly with over 800 verified U.S. manufacturers, ensuring you receive products that meet rigorous standards of quality and consistency.
Consider the application:
- For general-purpose MRO tasks like hanging signage or small equipment, a reliable, robust anchor is essential. Sourcing a high-quality Medium Duty Nylon Wall Anchor #8 for Drywall ensures you have a component made from durable nylon that won't easily break during installation or removal.
- For projects where speed is critical and removal is less of a concern, a component like the Medium Duty Nylon Wall Anchor #6 Self-Drilling Drywall Zip-It® can drastically reduce installation time.
- For versatility across different light-duty applications, stocking a classic, dependable Ribbed Plastic Anchor from a trusted American manufacturer provides consistency and predictable performance.
By sourcing through a dedicated B2B marketplace, a procurement manager can standardize the fasteners used across their facilities, ensuring that technicians are always working with a known, quality product. This reduces variability and makes both installation and removal more efficient.
The Maden.co Advantage: Streamlining Your Industrial Supply Chain
Our mission extends beyond simply providing parts. We aim to be a strategic partner in rebuilding and strengthening America's industrial base. Our entire business model is built on this principle; you can learn more about our mission to champion American manufacturing here. We believe that the American manufacturing revival is here, and we are dedicated to proving that sourcing U.S.-made components can be as convenient and efficient as any global alternative.
By providing a single platform with access to over 2.5 million products, we reduce the friction in the procurement process. Instead of vetting dozens of suppliers, you gain access to a network of pre-verified manufacturers committed to industrial excellence. This supply chain transparency means you know exactly where your components are coming from, ensuring quality and compliance.
For businesses looking to invest in larger projects or stock up on essential MRO supplies, managing cash flow is critical. That's why we offer a powerful tool to empower our customers. You can apply for Instant Financing at checkout to streamline your capital-intensive projects, allowing you to acquire the materials you need now without disrupting your operational budget.
If you are a U.S. manufacturer producing quality industrial components, we invite you to join our network. Register as a vendor and join the American manufacturing revival. Or, if you have specific sourcing questions or need help finding a particular component, our team is ready to help.
Conclusion
Mastering the art of removing plastic drywall anchors is a valuable skill for any maintenance professional. By understanding the four key methods—pulling, prying, drilling, and pushing—you can confidently tackle any removal scenario while minimizing wall damage and saving valuable time. Each technique has its place, and the ability to assess the situation and choose the right approach is the mark of a true professional.
However, the most effective long-term strategy is proactive rather than reactive. The effort required for removal is directly linked to the quality of the anchor used in the first place. By prioritizing high-quality, U.S.-made fasteners, businesses can reduce future labor costs and ensure the integrity of their facilities.
We invite you to explore the extensive catalog on Maden.co to find the reliable, American-made fasteners and components your business needs. Elevate your procurement process, enhance your supply chain resilience, and equip your team with the quality parts they deserve. And remember to leverage our Instant Financing option at checkout to make your purchasing process even smoother.
Frequently Asked Questions (FAQ)
Q1: What if the anchor just spins in the hole when I try to remove the screw? A: When an anchor spins, it has lost its grip on the drywall. To stop it from spinning, you can try to apply sideways pressure on the screw with a flathead screwdriver while you back it out. If that fails, try gripping the anchor's flange with needle-nose pliers to hold it steady while you turn the screw. If the flange is inaccessible or breaks, the drilling-out method (Method 3) is your best solution.
Q2: Can I reuse a plastic drywall anchor after removing it? A: It is strongly advised not to reuse a plastic drywall anchor. The removal process, particularly prying, almost always deforms the plastic ribs and compromises the anchor's structural integrity. Reusing it will result in a significantly weaker hold and is not a reliable practice for professional applications. The low cost of a new anchor makes replacement the only sensible option.
Q3: Is it better to push an anchor in or pull it out? A: It depends on your priority. If you want to salvage the anchor (which is not recommended) or if you are concerned about debris inside the wall cavity, pulling it out is better. However, for speed and achieving the cleanest possible surface for patching with minimal risk of tearing the drywall paper, the push-through technique (Method 4) is often superior and preferred by professionals.
Q4: How do I choose the right size screw for removing an anchor with the pry method? A: You want a screw that is large enough to get a good, solid bite into the anchor's plastic without being so large that it expands the anchor tightly against the drywall again. A good rule of thumb is to use the original screw that was in the anchor or one of a similar diameter. Insert it just 3-4 turns, enough to feel it grip firmly before you begin to pry.


