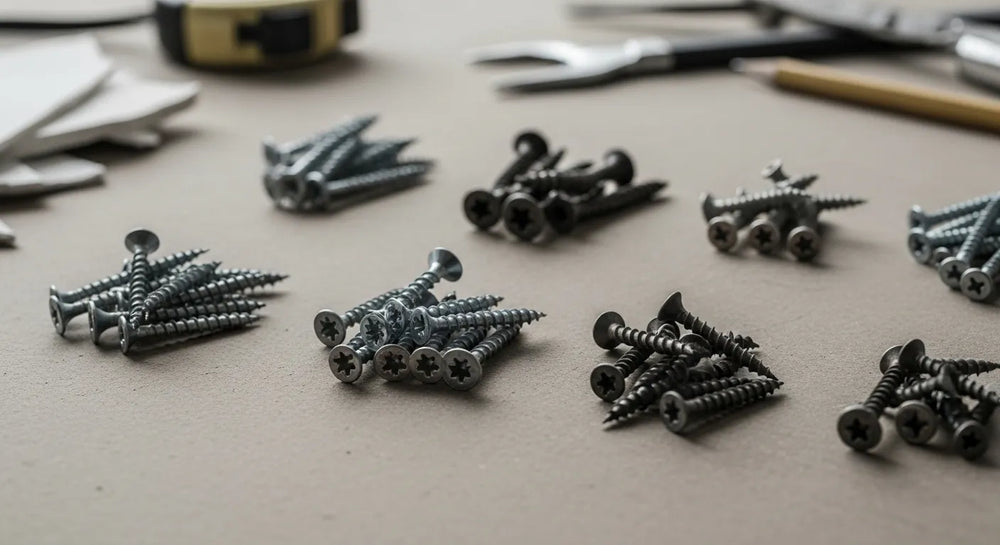
How to Get Screws Out of Drywall Anchors
Table of Contents
- Introduction
- Understanding the Challenge: Why Screws Get Stuck in Drywall Anchors
- Pre-Removal Assessment: The Professional's First Step
- Method 1: The Simple Extraction (For Non-Damaged Screws)
- Method 2: Tackling a Stripped Screw Head
- Method 3: Dealing with a Spinning Anchor
- Method 4: The Last Resort - Destructive Removal
- Post-Removal: Professional Drywall Repair
- Proactive Procurement: Preventing Future Anchor Issues with American-Made Quality
- Streamlining Your Procurement Process with Maden.co
- Conclusion
- Frequently Asked Questions (FAQ)
Introduction
A maintenance call comes in: a tenant has moved out, and the walls are riddled with the ghosts of pictures hung and shelves mounted. The task seems simple—remove the screws, patch the holes, and repaint. But then it happens. A screw spins endlessly, its anchor rotating uselessly within the drywall. Another screw head strips the moment the drill engages. What should have been a five-minute task now threatens to derail the entire day's maintenance schedule. For a facilities manager, MRO buyer, or professional contractor, this isn't just an annoyance; it's a direct hit to operational efficiency, labor costs, and project timelines.
This scenario highlights a fundamental truth in the industrial and commercial world: the smallest components can cause the biggest headaches. The integrity of a simple drywall anchor can have a cascading effect on everything from tenant satisfaction to budget adherence. At Maden.co, we understand that operational excellence is built on a foundation of reliable components. This guide is designed for the professional who can't afford delays. We will go beyond the basic DIY tricks and provide a comprehensive, step-by-step process for removing even the most stubborn screws from drywall anchors.
We will cover a systematic approach, from initial assessment to advanced extraction techniques for stripped screws and spinning anchors. More importantly, we will connect these tactical repairs to a strategic solution: how proactive procurement of high-quality, American-made fasteners can prevent these issues from occurring in the first place, saving you time, money, and frustration. Our mission is to prove that sourcing superior, U.S.-manufactured components is not only possible but also the most efficient and reliable path to operational success.
Understanding the Challenge: Why Screws Get Stuck in Drywall Anchors
Before diving into removal techniques, it’s crucial for any maintenance professional to understand the mechanics of the failure. A drywall anchor is a simple but clever piece of engineering designed to expand behind the fragile gypsum board, creating a secure point to distribute a load. When it works, it's an elegant solution. When it fails, it's because a critical part of the system has been compromised.
The Mechanics of Drywall Anchors: How They're Supposed to Work
Most common anchors, particularly plastic sleeve types, rely on friction and expansion. As a screw is driven into the anchor, it forces the anchor’s split ends to flare out behind the drywall. This flare prevents the anchor from being pulled out of the wall. Other types, like self-drilling anchors or toggle bolts, use different mechanisms but operate on the same principle of creating a brace on the hidden side of the wall.
The success of this system depends on a few key factors:
- Correct Hole Size: The pilot hole must be precisely the right diameter to allow the anchor to be inserted snugly but not loosely.
- Anchor Material Quality: The plastic or metal of the anchor must be robust enough to expand without cracking or deforming improperly.
- Screw Compatibility: The screw must have the correct diameter and thread pitch to engage the anchor and force expansion correctly.
- Drywall Integrity: The surrounding drywall must be solid and undamaged to provide the necessary support.
A failure in any one of these areas can lead to the common problems of stripped screws or spinning anchors.
Common Failure Points and Their Professional Implications
In a commercial, industrial, or multi-family housing environment, these failures are more than minor inconveniences. They represent tangible costs.
- Stripped Screw Heads: This often happens when a low-quality screw made of soft metal is used, or when an incorrect driver bit or excessive torque is applied. For a maintenance team, this means time is wasted searching for specialized extraction tools, potentially delaying other work orders.
- Spinning Anchors: A spinning anchor is a clear sign of system failure. It means the anchor itself has lost its grip within the drywall. This is typically caused by an oversized pilot hole, damaged drywall, or a low-quality anchor with insufficient ribbing to bite into the gypsum. The result is a screw that can neither be tightened nor loosened, trapping it in the wall.
- Damaged Drywall: Aggressive or incorrect removal attempts can turn a small anchor hole into a large, gaping wound in the wall. This dramatically increases the scope of the repair, requiring more time, more materials like larger patches and joint compound, and multiple visits for drying and sanding. For a property manager, this can delay unit turnover and impact revenue.
The core issue often traces back to the initial procurement decision. Sourcing the cheapest available fasteners without regard for material quality or engineering specifications is a classic example of sacrificing Total Cost of Ownership (TCO) for a lower upfront price. The few cents saved on an anchor are quickly erased by the dollars spent on additional labor and materials for repairs.
Pre-Removal Assessment: The Professional's First Step
Before reaching for a tool, a professional should take 30 seconds to assess the situation. This diagnostic step is what separates a quick, clean removal from a costly, wall-damaging struggle.
Identifying the Anchor Type
The removal strategy depends heavily on the type of anchor in the wall.
- Ribbed Plastic Anchors: These are the most common type, often blue, green, or gray. They expand as a screw is inserted.
- Self-Drilling Anchors (Zip-It® Style): These are larger, threaded anchors, typically made of nylon or a zinc alloy (Zamak), that are screwed directly into the drywall. They offer more holding power but can be trickier to remove if the screw inside is stuck.
- Molly Bolts (Hollow Wall Anchors): These are metal anchors with a sleeve that crumples and expands behind the wall as the bolt is tightened.
- Toggle Bolts: These feature a spring-loaded "wing" that opens up inside the wall cavity.
Knowing the anchor type informs you about what’s happening behind the wall and helps you choose the right extraction method.
Assessing the Screw Condition
Examine the screw head closely. Is it Phillips, flathead, or Torx? Is the head completely round and stripped, or is there still some purchase for a driver bit? Is the screw rusted, indicating a potential moisture issue in the wall? Is the screw head flush with the wall, or is there enough space to grip it with pliers?
Evaluating the Surrounding Drywall Integrity
Press gently on the drywall around the anchor. Does it feel solid, or is it soft and crumbly? Are there cracks radiating from the hole? If the drywall is compromised, any attempt to grip the anchor from the outside will likely fail and cause more damage. In these cases, a more invasive removal method may be necessary from the start.
Method 1: The Simple Extraction (For Non-Damaged Screws)
If the assessment shows a healthy screw head and a non-spinning anchor, the standard approach may work with a small modification. Often, a screw won't back out because there is no tension pulling it outward.
Technique: Applying Outward Pressure
The goal is to re-engage the screw threads with the anchor.
- Select the correct, high-quality screwdriver or driver bit that fits snugly in the screw head.
- Use a flathead screwdriver, putty knife, or the claw of a hammer to gently pry underneath the screw head. Apply slight but constant outward pressure.
- While maintaining this pressure, slowly turn the screw counter-clockwise with your other hand. The outward pressure often provides enough friction for the threads to catch and begin backing out.
Tools for Success
For professionals, having the right tool is paramount. A high-torque, variable-speed drill with a sensitive clutch is ideal. It allows for slow, controlled rotation to avoid stripping the screw. A set of professional-grade driver bits made from hardened steel will grip the screw head more effectively than cheaper alternatives.
Method 2: Tackling a Stripped Screw Head
A stripped screw head is one of the most common challenges. Force is not the answer; finesse and the right tools are required.
Using Screw Extractors
A screw extractor set is an essential piece of kit for any maintenance professional. These tools have reverse threads that bite into the stripped screw head as you turn them counter-clockwise.
- Create a Divot: Use a center punch to create a small indentation in the center of the stripped screw head. This prevents the drill bit from wandering.
- Drill a Pilot Hole: Select a drill bit recommended by the extractor set manufacturer (usually slightly smaller than the extractor itself) and drill a shallow hole into the center of the screw.
- Insert the Extractor: Place the extractor bit into the pilot hole. Give it a light tap with a hammer to ensure it’s seated.
- Extract the Screw: Attach a drill or a tap handle to the extractor. Apply firm downward pressure and turn it slowly counter-clockwise. The reverse threads will grip the inside of the screw, and as you turn, it will back the screw out of the anchor.
The Quick-Fix Methods
While not as reliable as an extractor, a couple of tricks can work in a pinch.
- The Rubber Band Trick: Place a wide rubber band flat over the stripped screw head. Press the screwdriver bit firmly into the rubber band and the screw head. The rubber provides extra friction that can sometimes be enough to grip the screw and turn it.
- The Steel Wool Trick: A small piece of steel wool can be used similarly to the rubber band to fill the stripped gaps and provide additional grip.
Cutting a New Slot
For larger screws where the head is accessible, a rotary tool with a cutting wheel can be used to carefully cut a new, straight slot across the screw head. This effectively turns a stripped Phillips head into a flathead, which you can then remove with a standard flathead screwdriver. This method requires a steady hand and proper safety glasses to protect from sparks and metal fragments.
Method 3: Dealing with a Spinning Anchor
A spinning anchor is a mechanical failure. The anchor’s bond with the drywall is broken, and it’s rotating freely with the screw. The key here is to stop the anchor from turning so the screw can be removed.
The Pliers Technique
This is the most direct approach.
- If possible, back the screw out just enough so that you can fit the tip of a pair of needle-nose pliers between the screw head and the wall.
- Grip the flange or head of the anchor firmly with the pliers. This will hold the anchor stationary.
- While holding the anchor, use a screwdriver to turn the screw counter-clockwise.
This method works well but requires the anchor's flange to be accessible. For anchors that are flush with the wall, another method is needed.
The Putty Knife Technique
- Wedge the sharp edge of a stiff putty knife or a thin flathead screwdriver under the edge of the anchor's flange.
- Apply pressure to jam the anchor and prevent it from turning.
- Simultaneously, use your other hand to unscrew the screw.
The root cause of a spinning anchor is often poor initial installation or, more frequently, a poorly designed anchor. High-quality anchors, such as a U.S.-made Ribbed Plastic Anchor, feature pronounced, sharp ribs designed to bite firmly into the surrounding drywall, providing superior resistance to rotation. Sourcing components with these intentional design features is a key part of a preventative maintenance strategy.
Method 4: The Last Resort - Destructive Removal
Sometimes, the screw and anchor are so compromised that a non-destructive removal is impossible. In these situations, the goal is to remove the hardware with minimal collateral damage to the drywall.
Drilling Out the Screw
If the screw head is stripped and an extractor fails, the next step is to drill out the screw itself.
- Start with a drill bit slightly smaller than the screw's shank.
- Carefully drill directly into the center of the screw. The goal is to destroy the screw's core, which will either allow you to pull the head off or break the screw entirely.
- Once the screw is neutralized, the anchor can often be pulled out with pliers or pushed into the wall.
Pushing the Anchor Into the Wall
This is often the fastest solution when the anchor is a simple plastic sleeve.
- Remove the screw using one of the methods above. If the screw cannot be removed, you can sometimes hammer the screw head flush with the wall, which will push the anchor into the wall cavity behind it.
- If the screw is out, you can use a hammer and a nail set or a screwdriver to gently tap the plastic anchor until it falls into the void behind the drywall.
- This leaves a clean, small hole that is very easy to patch.
Caution: This method should not be used with larger toggle bolts or molly bolts, as leaving a large piece of metal rattling inside the wall is unprofessional and can cause issues later.
Post-Removal: Professional Drywall Repair
Once the offending hardware is removed, the job is only half done. A professional finish is what distinguishes high-quality maintenance work.
- Clean the Hole: Use a utility knife to carefully remove any loose paper or crumbled gypsum from the edges of the hole. If there is a small crater, you can use the back end of your screwdriver handle to press the edges inward slightly, creating a better surface for the spackle to adhere to.
- Apply Spackle: For small holes, a lightweight spackling compound is sufficient. Use a flexible putty knife to apply the spackle, pressing it firmly into the hole. Apply a thin coat, slightly overfilling to account for shrinkage.
- Sand Smooth: Once the spackle is completely dry (check the manufacturer's instructions), use a fine-grit sanding block (120-grit or higher) to sand the patch perfectly flush with the wall.
- Prime and Paint: Apply a coat of primer to the patch to seal it and ensure the final paint coat matches the sheen of the surrounding wall. Then, apply the matching topcoat.
Proactive Procurement: Preventing Future Anchor Issues with American-Made Quality
Every stuck screw and spinning anchor is a lesson in the importance of proactive procurement. As we've demonstrated, the time and labor spent on a single failed fastener can easily cost 10 or 20 times the price of the component itself. This is where we at Maden.co champion a shift in thinking—from sourcing parts to building resilient systems. Our entire business model is built on this principle; you can learn more about our mission to champion American manufacturing here.
The Strategic Advantage of Sourcing Reliable Anchors
For an MRO buyer under pressure to keep a facility running smoothly or a design engineer specifying components for a new construction project, the reliability of a fastener is not a minor detail. It’s a critical variable in project success. Choosing a superior anchor from the start eliminates the downstream costs of failure.
Consider the Medium Duty Nylon Wall Anchor #6 Self-Drilling Drywall Zip-It®. This type of American-made anchor is engineered for efficiency and reliability. Its self-drilling design eliminates the need for a pilot hole, reducing installation time and the risk of choosing the wrong drill bit size—a common cause of anchor failure. The deep, sharp threads provide a far more secure purchase in drywall than a standard plastic sleeve, dramatically reducing the likelihood of a spinning anchor.
For applications requiring more substantial holding power, such as mounting commercial-grade shelving or fixtures, a product like the Medium Duty Nylon Wall Anchor #8 for Drywall provides a robust solution. Sourced from a verified U.S. manufacturer, this anchor is made from high-quality nylon that won't turn brittle or crack under pressure, ensuring a secure, long-lasting installation.
By sourcing such components through our platform, you are not just buying a part; you are investing in supply chain transparency and industrial excellence. You are choosing a component that has been manufactured to exacting standards, ensuring it performs as expected every single time. This is the essence of improving your Total Cost of Ownership.
Streamlining Your Procurement Process with Maden.co
Our mission at Maden.co is to democratize access to American manufacturing, making it as easy to source a U.S.-made industrial component as it is to buy a consumer product online. We connect industrial buyers with over 2.5 million American-made products from our network of more than 800 verified U.S. manufacturers.
Empowering Your Business with Instant Financing
We understand that for business owners and procurement managers, cash flow is critical. A large-scale facility upgrade or a bulk MRO order can represent a significant capital outlay. To reduce this friction, we offer a strategic tool to empower your purchasing power. You can apply for Instant Financing at checkout to streamline your capital-intensive projects. This isn't just a payment option; it's a way to acquire the high-quality components you need to improve your operations now, without disrupting your budget. It allows you to make the right long-term procurement decisions without being limited by short-term cash constraints.
For U.S. Manufacturers: Join the Revival
America's manufacturing revival is here, and we are at the forefront of this movement. We are dedicated to providing a platform where the quality and innovation of American industry can shine. If you are a U.S. manufacturer producing high-quality industrial components, we invite you to partner with us. Register as a vendor and join the American manufacturing revival, and let us connect your products with businesses across the country that value quality, reliability, and domestic sourcing. If you have any questions about our platform or specific sourcing needs, our expert team is ready to help. Please feel free to contact us for assistance.
Conclusion
A stuck screw in a drywall anchor is more than a simple maintenance task; it's a symptom of a larger operational challenge. While the professional techniques outlined in this guide—from using screw extractors to strategically drilling out a failed fastener—are essential for any MRO professional's toolkit, the ultimate solution lies in prevention, not just reaction.
The key takeaway is that strategic procurement is the most effective form of maintenance. By choosing high-quality, reliable, U.S.-manufactured anchors and fasteners from the outset, you dramatically reduce the likelihood of failures that consume valuable time, labor, and materials. This proactive approach reinforces the integrity of your facilities, enhances operational efficiency, and lowers your Total Cost of Ownership.
We invite you to stop fixing the problems caused by inferior components and start building a more resilient operation. Explore the extensive catalog of American-made products on Maden.co. Equip your team with the superior fasteners they need to do the job right the first time, and leverage powerful tools like our instant financing at checkout to make it happen.
Frequently Asked Questions (FAQ)
1. What's the best way to remove a screw from a spinning plastic anchor? The most effective method is to prevent the anchor from spinning. Try to grip the outer flange of the anchor firmly with a pair of needle-nose pliers while you turn the screw counter-clockwise with a screwdriver. If the flange is flush with the wall, wedge a stiff putty knife or flathead screwdriver under the edge to create friction and hold it in place while you unscrew.
2. Can I reuse a drywall anchor after removing the screw? It is strongly advised not to reuse a drywall anchor, especially in a professional or commercial setting. The removal process, as well as the initial installation, can compromise the anchor's structural integrity and its ability to grip the drywall. For safety and reliability, always use a new, high-quality anchor for any re-installation.
3. What should I do if the screw head breaks off completely? If the screw head snaps off leaving the shank in the anchor, removal becomes more difficult. The best professional solution is to use a drill bit that is slightly larger than the screw's shank diameter. Center the bit carefully on the broken screw and drill it out, which will destroy the remainder of the screw. The anchor can then be pulled out or pushed into the wall.
4. Why is it important to source high-quality, U.S.-made anchors for commercial projects? In commercial projects, fixture reliability and labor efficiency are paramount. High-quality, U.S.-made anchors are manufactured from superior materials to stricter tolerances. This ensures they install correctly, provide their rated holding power, and resist failure modes like spinning or cracking. Sourcing domestically also strengthens your supply chain, reduces lead times, and supports the American manufacturing ecosystem, leading to a lower Total Cost of Ownership when factoring in reduced failures and repair costs.


