How to Hang a Heavy Mirror on Drywall with Anchors
Table of Contents
- Introduction
- Understanding the Fundamentals: Drywall, Weight, and Shear Strength
- The Anatomy of a Drywall Anchor: A Procurement Perspective
- The Critical Role of Sourcing: Why American-Made Anchors Matter
- Step-by-Step Installation Guide: A Professional Protocol
- Beyond the Basics: Advanced Considerations for Commercial Installations
- Conclusion: Building with Confidence on an American Foundation
- Frequently Asked Questions (FAQ)
Introduction
An unsecured, heavy fixture in a commercial space is more than just an eyesore; it's a ticking clock representing a significant liability. Imagine the reception area of a corporate headquarters, a beautifully designed space meant to impress clients, where a large, ornate mirror suddenly crashes to the floor. The potential for injury, the cost of property damage, and the blow to the company's reputation are immense. This scenario isn't just about a simple DIY project gone wrong; for facilities managers, MRO buyers, and business owners, it highlights a critical point of failure in procurement and installation that can have serious consequences. The humble drywall anchor, often an afterthought in large-scale projects, becomes the single point of contact between a valuable asset and a catastrophic failure.
This guide moves beyond basic home-repair advice to provide a comprehensive, professional framework for understanding, sourcing, and installing heavy mirrors and other fixtures onto drywall. We will delve into the physics of load distribution, conduct a detailed analysis of various anchor types from a procurement perspective, and outline a meticulous installation protocol that ensures safety and longevity. Furthermore, we will explore the strategic business advantages of sourcing high-quality, American-made components to bolster supply chain resilience and guarantee material integrity.
Our objective is to empower you with the technical knowledge and sourcing intelligence required to execute these installations with confidence. By prioritizing the right materials and methods, you can transform a potential liability into a securely mounted asset, ensuring the safety of your environment and the integrity of your facilities.
Understanding the Fundamentals: Drywall, Weight, and Shear Strength
Before a single hole is drilled, a professional understands the materials they are working with. Drywall, while ubiquitous in modern construction for its cost-effectiveness and ease of installation, is fundamentally unsuited for bearing significant, concentrated weight.
Why Drywall Alone Isn't Enough
Standard drywall consists of a core of compressed gypsum plaster sandwiched between two thick sheets of paper. This composition gives it decent compressive strength but very poor tensile and shear strength. When you drive a screw directly into drywall, it is only gripping the soft, chalky gypsum. Any significant downward force (shear stress) or outward force (tensile stress) will cause the gypsum to crumble and pulverize, enlarging the hole until the screw, and whatever it is holding, pulls free.
The ideal scenario is always to mount a heavy object directly into a wall stud—the vertical wood or metal framing members of the wall. A screw driven into a stud transfers the load directly to the building's robust frame. However, design aesthetics, room layout, and functional requirements often dictate that a heavy mirror or fixture must be placed between studs. This is the precise challenge that a properly selected drywall anchor is engineered to solve. It works by distributing the load over a much wider surface area, either by expanding behind the drywall or by gripping it with deep, coarse threads, effectively bypassing the material's inherent weakness.
Calculating the Total Load: The Professional's Margin of Safety
Accurately determining the weight of the object is the first critical step. For commercial-grade mirrors or fixtures, the manufacturer's specification sheet should provide this information. If unavailable, use a reliable industrial scale. Remember to account for the entire assembly—a heavy, ornate frame can weigh as much or more than the mirror glass itself.
However, professionals don't just plan for the static weight of the object. They incorporate a crucial safety factor.
Professional Best Practice: Always select an anchor or combination of anchors rated to hold a minimum of four times the actual weight of the object you intend to hang. For an 80-pound mirror, you should use anchors with a combined rated capacity of at least 320 pounds.
This 4x safety factor accounts for variables that are often overlooked in residential settings but are critical in commercial or industrial environments:
- Dynamic Loads: Minor building vibrations from foot traffic, nearby machinery, or HVAC systems.
- Accidental Contact: The possibility of the object being bumped or jostled in a high-traffic area.
- Material Degradation: The long-term effects of temperature and humidity changes on the wall and fixture.
- Installation Imperfections: A slight over-torquing of a screw or a marginally oversized pilot hole.
Building in this robust margin of safety is a hallmark of professional installation and a non-negotiable aspect of risk management.
The Anatomy of a Drywall Anchor: A Procurement Perspective
The market is flooded with fasteners, but for a professional buyer, understanding the specific mechanics and applications of each type is essential for making an informed procurement decision. The choice is not merely about holding power but also about installation efficiency, material quality, and long-term reliability.
Deconstructing Anchor Types for Professional Applications
Let's break down the most common anchor categories, moving from light-duty options to the heavy-duty solutions required for substantial loads.
Expansion Anchors
These are the most common type of anchor. The basic principle involves a sleeve, typically plastic or nylon, that is inserted into a pilot hole. When a screw is driven into the sleeve, it expands, pressing firmly against the sides of the gypsum core.
- Ribbed Plastic Anchors: These are suitable for light-duty applications like hanging small pictures, clocks, or lightweight signage. For a procurement manager outfitting an office with standard decor, a U.S.-made Ribbed Plastic Anchor offers a reliable and cost-effective solution. However, their holding power is limited, and they should never be used for a heavy mirror. They serve as a familiar baseline but are insufficient for the task at hand.
Self-Drilling Anchors
Engineered for efficiency, self-drilling anchors feature a sharp, aggressive point and wide, deep threads that carve directly into the drywall, eliminating the need for a pilot hole. This dramatically speeds up installation, a significant benefit for large-scale MRO or outfitting projects.
- Nylon or Zinc "Zip-It" Style Anchors: These are excellent for medium-weight loads. Their wide threads provide a much more substantial grip on the gypsum than a simple screw. For tasks like installing shelving, large bulletin boards, or medium-sized mirrors, a quality, American-made fastener like the Medium Duty Nylon Self-Drilling Drywall Zip-It® Anchor is a top-tier choice. Its nylon construction provides flexibility and durability, preventing the brittleness that can plague low-quality zinc alternatives.
Sleeve-Type Anchors (Molly Bolts)
These anchors, often called "Molly bolts," offer a significant step up in holding power. They consist of a metal sleeve with a screw. When the screw is tightened, it causes the sleeve to crumple and expand behind the drywall, creating a very secure, load-bearing flange.
- Pros: High strength in both shear and tension. The screw can be removed and reinserted without the anchor falling into the wall, which is useful for maintenance.
- Cons: They require a precisely drilled pilot hole and can be more complex to set correctly than other types.
Toggle Bolts and Strap Toggles
For truly heavy loads, toggle bolts are often considered the gold standard. They provide the highest load-bearing capacity of any drywall anchor because they brace directly against the back of the wallboard, distributing the weight over the largest possible surface area.
- Spring Toggle Bolts: The classic design features a pair of spring-loaded wings attached to a screw. The wings are folded, pushed through a large pilot hole, and then spring open inside the wall cavity. Tightening the screw pulls the wings tight against the back of the drywall. The main drawback is that if the screw is ever fully removed, the winged toggle falls irretrievably into the wall cavity.
- Strap Toggles (Snap Toggles): A modern evolution, these use a plastic strap to position a solid metal toggle bar behind the wall. Once in place, the strap is cinched tight, and the excess is snapped off. This leaves a threaded receptacle ready to accept a machine bolt. This design is stronger, allows the bolt to be removed and reinserted, and often requires a smaller pilot hole than a comparable spring toggle.
Heavy-Duty Nylon Expansion Anchors
This category represents the pinnacle of expansion anchor technology, designed to rival the strength of some toggle bolts while offering a simpler installation process.
- Mechanism: These are not your standard, light-duty plastic anchors. They feature a robust, thick-walled nylon sleeve engineered to expand dramatically and grip the drywall with immense force when a corresponding lag screw is driven in.
- Application: For mission-critical installations, such as mounting large, heavy architectural mirrors in a corporate lobby, securing commercial-grade cabinetry, or installing heavy display screens, a professional-grade solution is non-negotiable. The American-made Medium Duty Nylon Wall Anchor for Drywall is precisely engineered for these demanding applications. Its superior material composition and design provide exceptional shear and pull-out strength, ensuring a secure mount that will stand the test of time.
The Critical Role of Sourcing: Why American-Made Anchors Matter
For a procurement professional, the brand of an anchor is less important than its verified performance, material integrity, and supply chain reliability. This is where the decision to source domestically becomes a powerful strategic advantage. At Maden.co, our entire platform is built on the principle of connecting industrial buyers directly with a vast catalog of verified American-made products.
Quality Control and Material Integrity
The difference between a fastener that meets its specified load rating and one that fails catastrophically often comes down to material science and manufacturing precision.
- Material Consistency: Many low-cost, imported anchors are made from brittle, recycled plastic that can crack during installation or become fragile over time. In contrast, U.S. manufacturers often use virgin nylon, which offers superior tensile strength and flexibility, allowing the anchor to expand without fracturing.
- Metallurgical Standards: The screw itself is just as critical. American-made fasteners typically adhere to strict metallurgical standards (like those from ASTM or SAE), ensuring the screw can handle the required torque without stripping its head or shearing off.
- Manufacturing Tolerances: Precise, consistent sizing is crucial. An anchor that is even a fraction of a millimeter off can compromise its grip. Our core value of Industrial Excellence is reflected in our network of over 800 verified U.S. manufacturers who adhere to the stringent quality control standards that industrial applications demand.
Supply Chain Resilience and Procurement Efficiency
Recent global events have exposed the fragility of extended supply chains. For an MRO buyer facing an urgent repair or a project manager on a tight construction schedule, waiting weeks for a container of critical fasteners from overseas is not a viable option.
Sourcing domestically through a streamlined marketplace radically simplifies this process. It reduces lead times from weeks to days, eliminates the complexities of customs and international shipping, and insulates your projects from geopolitical risks. Our mission is to democratize access to American manufacturing, proving that sourcing superior, U.S.-made components can be just as convenient as any global alternative. This belief is the driving force behind "America's manufacturing revival," and you can learn more about our mission to champion this cause here. Our growing network is the backbone of this revival. If you are a U.S. manufacturer committed to quality and excellence, we invite you to register as a vendor and join us in rebuilding America's industrial strength.
Step-by-Step Installation Guide: A Professional Protocol
Executing a flawless installation requires a methodical approach. The following steps outline a professional protocol that minimizes risk and ensures a secure, level, and lasting result.
Step 1: Site Assessment and Tool Preparation
Before starting, gather the necessary tools:
- High-quality electronic stud finder
- Professional-grade level (4-foot level recommended for large mirrors)
- Power drill with a full set of sharp drill bits
- Screwdriver or impact driver with appropriate bits
- Tape measure
- Pencil
Begin by using the stud finder to scan the entire area where the mirror will be hung. Mark the locations of all studs, even if you don't plan to use them. This provides a complete map of the wall structure. Your primary goal is to land at least one mounting point in a stud. If the mirror's placement makes this impossible, you will proceed with a heavy-duty anchor installation. Use the stud finder to also check for signs of electrical wiring or plumbing pipes.
Step 2: Precise Measurement and Marking
Measure the distance between the hanging points on the back of the mirror (e.g., from one D-ring to the other). For very heavy mirrors (over 100 lbs), it is strongly advised to use two separate, high-capacity anchor points rather than relying on a hanging wire. A wire places all the stress on a single point and can fail over time. Two distinct anchor points distribute the load and provide critical redundancy.
Transfer these measurements to the wall. Use your level to draw a faint, perfectly horizontal line where you want the tops of the anchors to be. Mark the exact spots for your pilot holes on this line. Double-check all measurements before proceeding.
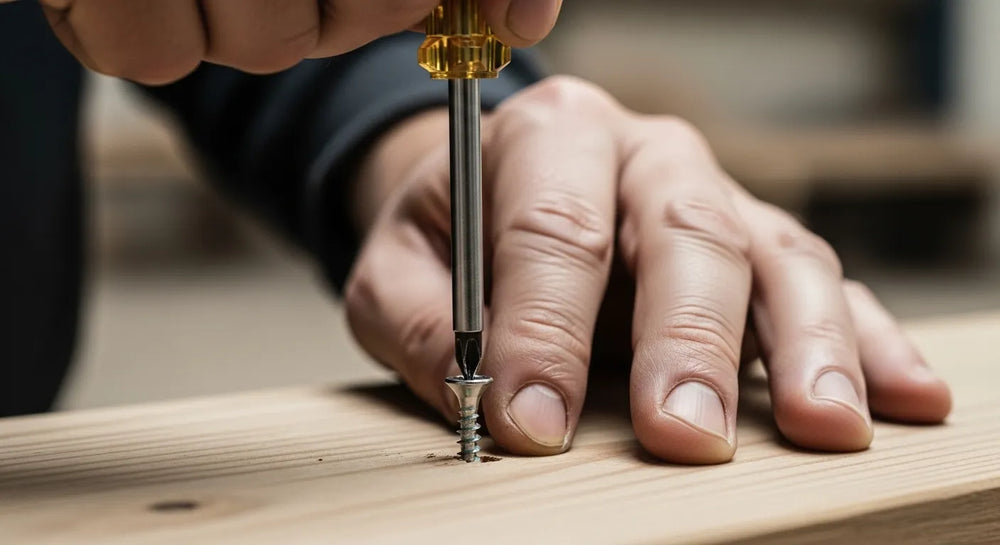
Step 3: Drilling the Pilot Hole (When Necessary)
The size of the pilot hole is dictated by the specific anchor you are using. This information is always included in the manufacturer's specifications. Do not guess.
- Too Small: You risk damaging the anchor or the drywall when trying to force it in.
- Too Large: The anchor will not have enough material to grip securely, rendering it useless.
Drill straight into the wall at your marked locations with steady, even pressure.
Step 4: Anchor Installation
Follow the specific instructions for your chosen heavy-duty anchor.
- For a Toggle Bolt: Pinch the spring-loaded wings flat against the screw and push them through the pilot hole. You will hear and feel them snap open inside the wall cavity. Gently pull the screw back toward you to seat the wings firmly against the interior of the drywall. Now, you can tighten the screw until it is snug.
- For a Heavy-Duty Nylon Expansion Anchor: Gently tap the Nylon Wall Anchor sleeve into the pilot hole with a hammer until its flange is flush with the wall surface. Insert the provided screw and tighten it. You will feel the resistance increase as the screw drives deeper, causing the anchor's body to expand and lock securely in place.
- For a Self-Drilling Anchor: For appropriate medium-duty tasks, place the point of the Self-Drilling Anchor on your mark. Using a drill on a low-speed setting, drive the anchor into the drywall until the head is flush. Avoid over-tightening, which can strip the drywall.
Step 5: Final Mounting and Verification
Drive your screws or bolts into the installed anchors, leaving the heads protruding just enough to engage the mirror's mounting hardware (typically ¼ to ½ inch). With at least one other person to help, carefully lift the heavy mirror and guide its hanging hardware onto the screw heads.
Once the mirror is hanging, place your level on top to confirm it is perfectly horizontal. Make any minor adjustments needed. Finally, press gently but firmly on the sides and bottom of the mirror. There should be no give, wobble, or creaking sounds. The mirror should feel like a solid, integrated part of the wall.
Beyond the Basics: Advanced Considerations for Commercial Installations
In a regulated commercial or industrial environment, a few additional factors must be considered.
Fire-Rated Walls and Building Codes
Many commercial buildings use fire-rated drywall in hallways, stairwells, and between units. Penetrating this wall assembly with holes and anchors can compromise its fire rating. In these situations, consult local building codes or a fire marshal. Often, the use of fire-rated sealants or specific types of UL-listed hardware is required to maintain compliance.
Managing Large-Scale Procurement and Cash Flow
Procurement for a large project, such as a hotel renovation or a new corporate office build-out, often involves purchasing thousands of individual components at once. An MRO manager might need to stock the facility with a wide array of fasteners to handle any repair. This can represent a significant upfront capital outlay.
To address this exact business challenge, we've integrated a powerful tool directly into our platform. This tool is designed not just as a payment method, but as a strategic lever for effective cash flow management. You can apply for Instant Financing at checkout to streamline your capital-intensive projects. This allows you to acquire all the necessary high-quality, American-made components you need in a single transaction, preserving your operating capital for other critical business needs.
Conclusion: Building with Confidence on an American Foundation
Securely hanging a heavy mirror on drywall is a microcosm of a larger principle in the industrial and commercial worlds: success lies in the intersection of correct procedure, deep material knowledge, and intelligent sourcing. We've seen that the structural limitations of drywall can be safely overcome by calculating the true load, applying a professional safety factor, and selecting a high-capacity anchor engineered for the task. The superior material integrity and manufacturing precision of American-made components are not abstract concepts; they are the tangible qualities that prevent asset damage and ensure workplace safety.
At Maden.co, we are dedicated to providing the tools and components that empower American businesses to build, maintain, and operate with confidence. Our platform eliminates procurement friction, providing direct access to a vast catalog of U.S.-made products and the Customer Empowerment that comes with supply chain transparency.
Don't let sourcing challenges or concerns over installation security become a bottleneck for your next project. Explore our extensive catalog of American-made industrial fasteners, from heavy-duty anchors to specialized hardware, and build with the assurance that only domestic manufacturing can deliver. Add the components you need to your cart today and leverage our Instant Financing option at checkout to make your procurement process powerful, seamless, and efficient.
Frequently Asked Questions (FAQ)
1. Q: Can I use two anchors to double the weight capacity? A: While using two anchors is standard for stability, you should not simply add their weight ratings together. The load is rarely distributed perfectly between two points. As a best practice, you should select individual anchors that can each safely support at least half of the total weight, and ideally much more, always adhering to a stringent 2x to 4x safety factor for each anchor point.
2. Q: What's the biggest mistake people make when hanging heavy items on drywall? A: The most common and dangerous mistake is underestimating the total load or using an underrated anchor. This includes using small plastic anchors designed for lightweight pictures for something truly heavy like a commercial mirror or cabinet. Always verify the object's weight, apply a 4x safety factor, and choose a heavy-duty anchor like a toggle bolt or a high-capacity nylon expansion anchor rated well above the object's actual weight.
3. Q: I hit something hard while drilling the pilot hole. What should I do? A: Stop drilling immediately. You may have hit a wood stud, a metal plate protecting plumbing or wiring, or a masonry wall. Use your electronic stud finder to confirm if it's a stud. If so, your job just became easier—use an appropriate wood screw instead of an anchor. If it's not a stud, do not force the drill. Investigate further before proceeding. If you have any doubts, especially about electrical or plumbing lines, contact our team for sourcing guidance or consult a licensed professional contractor.
4. Q: Why is sourcing U.S.-made anchors important for my business? A: Sourcing U.S.-made anchors from a verified marketplace like Maden.co provides critical business advantages that go beyond the product itself. You gain verifiable assurance of material quality and manufacturing consistency, which translates directly to enhanced safety, liability mitigation, and long-term reliability. It also strengthens your supply chain, dramatically reducing lead times and insulating your projects from the risks associated with international shipping. This commitment to domestic sourcing actively supports the American manufacturing ecosystem, a value we champion. You can learn more about our foundational mission here.


