How to Insert a Plastic Wall Anchor: A Professional Guide
Table of Contents
- Introduction
- Understanding the 'Why': The Critical Role of Wall Anchors
- Choosing the Right Anchor: A Procurement Manager's Checklist
- The Installation Process: A Step-by-Step Technical Guide
- Common Pitfalls and Professional Troubleshooting
- Scaling Up: Sourcing Anchors for Large-Scale Projects
- Conclusion
- Frequently Asked Questions
Introduction
A maintenance call comes in: a heavy-duty storage shelf, vital for organizing MRO supplies, has pulled away from the storeroom wall. The culprit? A single, failed plastic wall anchor. This seemingly minor component failure has now created a safety hazard, halted workflow, and necessitated an urgent repair. For procurement managers, facilities engineers, and business owners, this scenario highlights a critical truth: the integrity of an entire installation often rests on the smallest components and the precision of their installation. A fastener is only as strong as its anchor point.
Sourcing and installing something as ubiquitous as a plastic wall anchor might seem trivial, but in a professional, industrial, or commercial context, the stakes are significantly higher than hanging a picture frame. The process demands a deeper understanding of load-bearing principles, material compatibility, and proper technique. A failure can lead to damaged property, compromised safety, and costly operational downtime. This is why treating every component, no matter how small, with industrial-grade seriousness is paramount.
This guide provides a comprehensive, technical breakdown of how to select and properly insert plastic wall anchors for reliable, long-lasting performance. We will move beyond basic DIY advice to cover the critical considerations for professional applications, from understanding substrate materials and load capacities to mastering the installation process. We will explore the different types of U.S.-made anchors available and explain why sourcing high-quality, domestically manufactured components is a strategic decision for enhancing supply chain resilience and ensuring project integrity. The goal is to empower you with the knowledge to execute these common but crucial tasks with the precision and confidence required in any professional setting.
Understanding the 'Why': The Critical Role of Wall Anchors
Before diving into the "how," it's essential to grasp the "why." In industrial and commercial environments, from outfitting a new office to setting up light manufacturing spaces, wall anchors are fundamental for a vast range of applications far beyond simple decoration. They are used for mounting safety equipment, securing conduit and cabling, installing shelving for inventory, and affixing signage. The integrity of these installations is non-negotiable.
The Physics of a Secure Fastening
Standard drywall, plaster, or hollow masonry block lacks the density and structural integrity to hold the threads of a screw under load. Driving a screw directly into these materials will result in a weak connection that will quickly pull out under even minimal weight. This is where a wall anchor becomes indispensable.
A plastic wall anchor is an expansion fastener. When a screw is driven into it, the anchor expands, exerting outward pressure against the inner surfaces of the drilled hole. This expansion creates immense friction and a positive lock, effectively distributing the load over a much larger surface area within the wall material. This principle transforms a weak, localized point of contact into a robust, distributed anchor capable of supporting significant weight.
Key Takeaway: The anchor's primary function is to create a secure, threaded interface within a hollow or brittle substrate. It translates the rotational force of the screw into radial pressure, locking the fastener assembly into the wall.
The High Cost of Component Failure
In an MRO or facilities management context, the failure of a single wall anchor can have cascading consequences. Consider the implications:
- Safety Hazards: A fallen cabinet, piece of equipment, or heavy-duty shelving unit can cause serious injury.
- Asset Damage: The object being mounted can be destroyed, along with potential damage to other assets below it. The wall itself will also require significant repair.
- Operational Downtime: A failed installation can disrupt workflows, requiring immediate, unplanned maintenance that pulls resources from other critical tasks.
- Reputational Damage: Unsafe or poorly maintained facilities can impact employee morale and client perception.
These risks underscore the importance of two factors: using high-quality, reliable components and ensuring they are installed with meticulous attention to detail. This is a core principle of Industrial Excellence, emphasizing that every part of a system contributes to its overall reliability and safety.
Choosing the Right Anchor: A Procurement Manager's Checklist
The success of any anchor installation begins long before a drill is ever picked up. It starts with a strategic procurement decision. Selecting the correct anchor for the specific application, wall material, and load requirement is the most critical step in the entire process.
Material Matters: Analyzing the Substrate
The first and most important variable is the wall material, or substrate. The type of anchor you choose must be compatible with the material it is being inserted into.
- Drywall (Gypsum Board): The most common interior wall material in commercial buildings. It consists of a gypsum core pressed between two thick sheets of paper. It is relatively soft and brittle, requiring anchors that expand broadly behind the board to distribute weight.
- Plaster: Often found in older buildings, plaster is harder and more brittle than drywall. Drilling can cause cracking or crumbling if not done carefully. Anchors for plaster need to create a very secure grip without shattering the surrounding material.
- Hollow Concrete Block (CMU): Common in warehouses, utility rooms, and industrial facilities. The challenge here is the hollow nature of the blocks. You need an anchor that can either expand securely within the thin concrete shell or a toggle-style anchor that can brace against the inside of the hollow cavity.
- Brick or Solid Concrete: These dense, hard materials require heavy-duty anchors, often made of metal. However, for lighter-duty applications like securing conduit clamps or small junction boxes, specialized plastic anchors designed for masonry can be highly effective. They require a hammer drill for proper hole creation.
Load Capacity: Matching the Anchor to the Application
Every anchor is rated for a specific load capacity. This is typically expressed in pounds and can be broken down into two types of forces:
- Tensile Strength (Pull-Out Force): This measures the anchor's resistance to being pulled straight out of the wall. This is a primary concern for objects that hang vertically, like heavy signage.
- Shear Strength (Shear Force): This measures the anchor's resistance to a downward, slicing force parallel to the wall surface. This is the main force acting on anchors used for shelving or wall-mounted equipment.
For any professional application, it is imperative to consult the manufacturer's technical data sheet for the anchor's specific load ratings in different substrates. As a rule of thumb, always select an anchor with a load capacity that is at least four times the actual weight of the object you intend to mount. This 4:1 safety factor accounts for dynamic loads, vibration, and unforeseen stresses.
Types of Plastic Wall Anchors and Their U.S.-Made Advantages
At Maden.co, we believe in democratizing access to the vast catalog of American manufacturing. Sourcing domestically made components like wall anchors provides tangible benefits in quality, consistency, and supply chain transparency. Our platform connects industrial buyers with a network of over 800 verified U.S. manufacturers, ensuring you receive components that meet rigorous standards. Let's explore some common types.
-
Ribbed Plastic Anchors: These are arguably the most versatile and widely used type. The external ribs are designed to bite into the surrounding wall material as the screw is driven in. This action prevents the anchor from spinning in the hole during installation and provides exceptional holding power against both shear and tensile forces. For applications requiring a robust grip in drywall or plaster, a high-quality, U.S.-made Ribbed Plastic Anchor is an excellent choice due to its consistent molding and material integrity.
-
Conical (Bantam) Anchors: These anchors have a smooth, tapered shape and are typically used for lighter-duty applications. They are simple to install and effective for securing items like thermostats, smoke detectors, or lightweight cable management clips. The Conical Bantam Plastic Anchor is a reliable workhorse for these tasks, offering a straightforward solution when high load capacity is not the primary concern.
-
Tapered and Ribbed Anchors: Combining the features of the previous two types, these anchors offer a best-of-both-worlds solution. The tapered tip allows for easy insertion, while the ribs along the body provide enhanced anti-rotation and gripping power once the screw is installed. This design, found in products like the Tapered and Ribbed White Plastic Anchor, offers a good balance of installation ease and holding strength for a wide array of medium-duty tasks.
Sourcing these fundamental components from verified American manufacturers ensures that the polymer used is of a consistent grade, the dimensions are precise, and the stated load ratings are reliable—key factors for any project where safety and durability are priorities.
The Installation Process: A Step-by-Step Technical Guide
With the correct anchor selected, the focus shifts to execution. A perfect installation is a matter of precision and following a methodical process. Rushing any of these steps is the most common source of anchor failure.
Step 1: Gathering the Essential Tools and U.S.-Made Components
Before you begin, assemble all necessary tools and materials to ensure an efficient workflow.
- Safety Glasses: A non-negotiable first step to protect against dust and debris.
- Power Drill: A variable-speed drill offers the best control. For brick or concrete, a hammer drill is required.
- Drill Bits: A full set of sharp drill bits is crucial.
- Tape Measure and Pencil: For accurate marking.
- Level: To ensure your mounted object is straight.
- Hammer or Rubber Mallet: For seating the anchor flush with the wall.
- Screwdriver or Screw Gun: For driving the screw into the anchor.
- The Correct Anchors and Screws: Ensure the screw diameter and length are compatible with the chosen anchor.
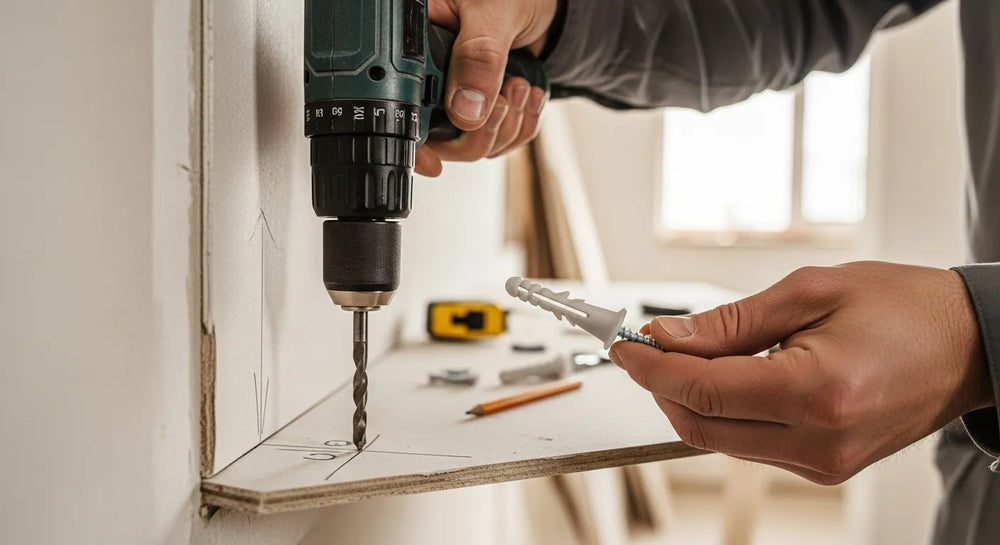
Step 2: Precision Drilling - The Foundation of a Secure Fit
This is where most installations succeed or fail. The diameter of the drilled hole must be perfectly matched to the anchor.
- Select the Correct Drill Bit: The required drill bit size is almost always printed on the anchor itself or its packaging. Do not guess. A hole that is too small will damage the anchor upon insertion. A hole that is too large will allow the anchor to spin, preventing it from expanding correctly and providing no holding power.
- Mark the Location: Use your tape measure and pencil to mark the precise spot for the hole. Use a level to mark multiple spots for items like shelves.
- Set the Drilling Depth: The hole should be slightly deeper than the length of the anchor. A simple way to control this is to measure the anchor against the drill bit and wrap a small piece of painter's tape around the bit to serve as a depth gauge.
- Drill the Hole: Place the tip of the drill bit on your mark. Start drilling slowly to create a pilot indentation, then increase the speed. Apply firm, steady pressure, keeping the drill perfectly perpendicular (90 degrees) to the wall surface.
- Clear the Debris: Once the hole is drilled, pull the drill straight out. Gently blow or use a vacuum to clear any remaining dust and debris from inside the hole. A clean hole ensures the anchor makes full contact with the wall material.
Step 3: Inserting the Plastic Wall Anchor Correctly
With a clean, correctly sized hole, the anchor can now be inserted.
- Initial Insertion: Push the anchor into the hole with your fingers. It should fit snugly. If it is extremely loose, your hole is too large. If it cannot be pushed in partway by hand, your hole may be too small.
- Seating the Anchor: Use a hammer or a rubber mallet to gently tap the anchor until its head is flush with the wall surface. Do not drive it below the surface of the wall. If the anchor deforms or bends, you are using too much force. The fit should be snug, not forced.
Step 4: Driving the Screw and Activating the Anchor
This final step engages the anchor's expansion mechanism.
- Position the Object: Place the item you are mounting over the anchor and align its mounting hole with the anchor's opening.
- Insert the Screw: Insert the correct size screw through the object and into the anchor.
- Drive the Screw: Using a screwdriver or a drill on a low-torque setting, begin driving the screw. You will feel initial resistance as the screw's threads engage the plastic. As you continue, you will feel the resistance increase significantly. This is the screw expanding the anchor's fins and locking it into place.
- Do Not Over-Tighten: Tighten the screw until it is snug and the mounted object is secure. Over-tightening can strip the plastic threads inside the anchor or even damage the drywall behind it, compromising the entire installation. The goal is a firm, secure fit, not maximum torque.
Common Pitfalls and Professional Troubleshooting
Even with careful planning, issues can arise. Here’s how to address common problems:
-
Problem: The anchor spins in the hole when driving the screw.
- Cause: The hole is slightly too large, or the initial grip of the ribs is not enough.
- Solution: Remove the screw and the anchor. Try a slightly larger anchor that corresponds to the hole size. If that's not an option, you can insert a small piece of a zip tie or a wooden matchstick alongside the anchor to fill the gap and provide the necessary friction.
-
Problem: The anchor pushes through the back of the drywall.
- Cause: The drilled hole was far too large.
- Solution: This requires a more significant repair. You will need to patch the hole with spackle or a drywall patch, let it dry, sand it, and then re-drill in the correct location with the correct bit size.
-
Problem: The screw doesn't feel tight.
- Cause: You may be using a screw with too small a diameter, which is failing to properly expand the anchor. Alternatively, you may have over-tightened and stripped the anchor.
- Solution: First, ensure you are using the screw size recommended for the anchor. If you have stripped the anchor, you will need to remove it (often requiring you to push it through the wall) and start over with a fresh anchor in a new hole nearby.
Scaling Up: Sourcing Anchors for Large-Scale Projects
For a business owner overseeing a facility fit-out or a procurement manager responsible for stocking MRO inventory, sourcing fasteners goes beyond a single project. The challenge is ensuring a consistent supply of high-quality components for countless applications across the organization. This is where a strategic partnership with a reliable supplier becomes a competitive advantage.
Sourcing fasteners and industrial components from a fragmented global supply chain introduces significant risks:
- Inconsistent Quality: Varying material grades and manufacturing tolerances can lead to unpredictable performance.
- Long Lead Times: Delays in international shipping can bring projects to a standstill.
- Lack of Traceability: It can be difficult to verify material certifications or compliance with industry standards.
At Maden.co, our entire mission is built to solve these problems. We are committed to championing American manufacturing by providing a seamless digital platform to connect you with the components you need. Our model is built on core values of American Manufacturing Pride and Supply Chain Transparency. By consolidating over 2.5 million products from a growing network of verified U.S. manufacturers, we reduce procurement friction and empower businesses to build more resilient, reliable, and domestic supply chains. You can learn more about our mission to champion American manufacturing here.
For a procurement manager under pressure to source a specific fastener, a design engineer needing material certifications for a new prototype, or an MRO buyer facing an unexpected equipment breakdown, the ability to quickly find and finance a verified, U.S.-made part is a game-changer. Our platform streamlines this process. For capital-intensive projects or large-volume inventory purchases, managing cash flow is critical. That’s why we offer a powerful tool for our business customers: you can apply for Instant Financing at checkout to streamline your capital-intensive projects. This allows you to acquire the materials you need now while managing payments on a schedule that works for your budget.
If you are a U.S. manufacturer producing high-quality industrial components, we invite you to join our mission. Register as a vendor and connect with a dedicated audience of industrial buyers who are actively seeking American-made solutions.
Conclusion
Mastering how to insert a plastic wall anchor is a foundational skill in any industrial, MRO, or commercial setting. It is a process that demands precision, a thorough understanding of materials, and a commitment to using the right component for the job. By moving beyond a simple DIY mindset and adopting a professional, methodical approach, you can ensure that every installation is safe, durable, and reliable.
This commitment to quality should extend to your sourcing strategy. Choosing to equip your teams with high-quality, U.S.-made anchors and fasteners is an investment in safety, performance, and supply chain stability. It eliminates the variables of inconsistent overseas quality and supports the domestic industrial base. America's manufacturing revival is here, and it's being built one secure fastener at a time.
When your next project demands reliable components, from specialized anchors to critical MRO supplies, explore our extensive catalog of American-made products. If you have specific sourcing questions, our team is ready to help. Streamline your procurement process, enhance your project integrity, and take advantage of strategic tools like Instant Financing at checkout to power your business forward.
Frequently Asked Questions
1. What is the most common mistake when installing a plastic wall anchor? The most frequent and critical error is using the wrong size drill bit. A hole that is even slightly too large will prevent the anchor from gripping the wall material, causing it to spin uselessly during screw insertion. A hole that is too small can damage the anchor or the wall. Always use the exact drill bit size specified by the anchor manufacturer.
2. Can I reuse a plastic wall anchor? It is strongly recommended not to reuse a plastic wall anchor. The process of inserting a screw and then removing it deforms the plastic fins and compromises the anchor's structural integrity. A reused anchor will not provide the same holding power and poses a significant failure risk, especially in professional applications.
3. How do I know the weight limit for a specific anchor? The weight limit, or load rating, is determined by the anchor's manufacturer and varies based on the wall material it is installed in (e.g., drywall vs. plaster vs. masonry). This information is found on the product's packaging or its technical data sheet. For professional and safety-critical applications, always consult these specifications and apply a safety factor of at least 4:1.
4. Why should our business source basic components like anchors from U.S. manufacturers? Sourcing even basic components like anchors from verified U.S. manufacturers provides several strategic advantages. It ensures superior quality control and material consistency, leading to more reliable performance. It strengthens your supply chain resilience by reducing dependence on long and often unpredictable global supply lines. Furthermore, it simplifies compliance verification and provides the pride and assurance that comes with supporting the domestic manufacturing economy.


