How to Install Drywall Anchors with Wings
Table of Contents
- Introduction
- The Critical Role of Anchors: Understanding Drywall's Limitations
- An Arsenal of Anchors: Choosing the Right Tool for the Job
- Pre-Installation Checklist: Preparation for a Flawless Mount
- The Definitive Guide: How to Install Drywall Anchors with Wings
- Common Pitfalls and How to Sidestep Them
- The Maden.co Advantage: Building Resilient American Supply Chains
- Conclusion: Strength in the Wall, Strength in the Supply Chain
- Frequently Asked Questions (FAQ)
Introduction
A critical piece of equipment needs mounting. The production line can't wait, the new safety signage is mandatory, or the shelving for vital MRO supplies must go up now. You’ve found the perfect spot on the wall, but a quick tap reveals the hollow truth: you’re dealing with drywall, and there isn't a stud in sight. For any facilities manager, engineer, or MRO buyer, this common scenario can instantly escalate from a minor task to a significant point of failure. A simple screw won't do; the integrity of the installation and the safety of the workplace are at stake. This is precisely where the winged drywall anchor proves its indispensable value.
This article provides a definitive, step-by-step guide for professionals on how to properly install drywall anchors with wings, ensuring a secure, reliable, and lasting mount. We will move beyond simple instructions to explore the mechanics behind these powerful fasteners, discuss alternative anchor types for various applications, and detail the common pitfalls that can compromise an installation. More importantly, we will connect the physical act of installation to the strategic act of procurement, illustrating how the quality of the component itself is the true foundation of any successful project. For professionals who demand reliability, the process begins not with a drill, but with sourcing high-quality, American-made components from a trusted B2B marketplace like Maden.co.
The Critical Role of Anchors: Understanding Drywall's Limitations
Before drilling the first hole, it's essential to understand the material you're working with. Drywall, also known as gypsum board or plasterboard, is a construction panel made of a gypsum core pressed between two thick sheets of paper. It's prized for its low cost, fire resistance, and ease of installation, making it the default interior wall surface in most modern commercial and industrial buildings.
However, its primary strength lies in its compressive force—its ability to be a stable wall surface. Its tensile strength, or its ability to withstand being pulled on, is extremely low. Driving a screw directly into drywall is like trying to anchor a ship in sand. The threads of the screw have very little solid material to grip, and the gypsum core will quickly crumble and pulverize under even a light load, leading to a loose fixture and a damaged wall.
This is the fundamental problem that all drywall anchors are designed to solve. Instead of relying on the weak grip of screw threads, an anchor works by distributing the load over a much larger surface area. A winged anchor, specifically, accomplishes this with exceptional effectiveness.
The Mechanics of a Winged Anchor
The genius of the winged anchor, often called a toggle bolt, lies in its simple yet robust mechanical design. It consists of two primary parts:
- The Bolt (or Screw): A machine screw of a specific length and diameter.
- The Winged Toggle: A spring-loaded mechanism threaded onto the bolt that can be folded flat to pass through a hole and then springs open on the other side.
When you push the folded wings through a hole drilled in the drywall, they deploy into the hollow space behind the wall. As you tighten the bolt, the wings are pulled flush against the interior surface of the drywall. This action clamps the drywall between the wings on the inside and the fixture you're mounting on the outside. The load from the mounted object is no longer concentrated on the crumbling gypsum around the screw shank; instead, it is spread across the entire surface area of the expanded wings, providing a secure hold capable of supporting significant weight. This principle of load distribution is what transforms a fragile panel into a viable mounting surface.
An Arsenal of Anchors: Choosing the Right Tool for the Job
While winged anchors are the heavy-lifters of the drywall fastener world, they are not the only solution. A savvy procurement manager or MRO professional knows that having access to a range of options is key to operational efficiency. Different applications call for different types of anchors, and understanding their specific uses prevents over-engineering a simple task or, more dangerously, under-engineering a critical one.
Our commitment at Maden.co is to Customer Empowerment, which begins with providing the knowledge to make informed sourcing decisions. We connect buyers with over 2.5 million American-made products, ensuring you can find the precise component for any application.
Self-Drilling Anchors
For light to medium-duty applications, such as mounting control panels, small brackets, or lightweight signage, speed is often a priority. Self-drilling anchors are engineered for maximum efficiency. These anchors feature a sharp, aggressive point that drills its own correctly-sized hole as you drive it into the drywall with a screwdriver or drill. Once flush with the wall, you drive your mounting screw into the center of the anchor, causing its body to expand slightly for a secure fit. For fast-paced jobs, a U.S.-made solution like the Medium Duty Nylon Wall Anchor #6 Self-Drilling Drywall Zip-It® can dramatically reduce installation time without sacrificing reliability.
Expansion and Ribbed Plastic Anchors
These are perhaps the most common type of anchor for very light-duty tasks. A small hole is drilled, the plastic sleeve is tapped into place, and as a screw is driven in, the sleeve expands or splits to press against the sides of the hole. They are ideal for applications like mounting thermostats, small pictures, or cable clamps where the load is minimal. The quality of the plastic is paramount; inferior materials can become brittle and fail over time. Sourcing a dependable, American-made fastener like this Ribbed Plastic Anchor ensures the material integrity needed for a lasting hold in these everyday applications.
Nylon Sleeve Anchors
Functioning on a similar principle of expansion, nylon sleeve anchors offer a more robust solution than their smaller plastic counterparts. They often feature a more aggressive expansion mechanism and are made from high-grade, durable nylon. These are excellent for medium-duty tasks that require a step up from a simple ribbed anchor but may not demand the full strength of a winged toggle bolt. A quality example, the Medium Duty Nylon Wall Anchor #8 for Drywall, provides a reliable hold for items like coat hooks, small shelves, and fixtures in moderate-use environments.
Understanding this spectrum of solutions allows for precise and cost-effective procurement. You can select the exact anchor needed, confident that each choice is backed by the quality and transparency of American manufacturing.
Pre-Installation Checklist: Preparation for a Flawless Mount
Proper preparation is the difference between a quick, successful installation and a frustrating, wall-damaging ordeal. Rushing this stage is a common amateur mistake. A professional approach involves a methodical checklist.
Essential Tools and Materials:
- Safety Glasses: A non-negotiable for any drilling task.
- Tape Measure & Pencil: For accurate placement.
- Level: To ensure your fixture is perfectly horizontal or vertical.
- Electronic Stud Finder: Crucial for confirming there are no studs, pipes, or electrical wires in your desired location. Modern stud finders can detect wood, metal, and live AC wiring.
- Drill (Corded or Cordless): With a full set of drill bits.
- Screwdriver or Screwdriver Bit: Matching the head of the anchor's bolt (typically Phillips or combination).
- The Correct Winged Anchor: Sized appropriately for the bolt you need and the weight of the object you are hanging.
Pro Tip: The required drill bit size for the pilot hole is almost always printed on the anchor's packaging. Never guess. Using a bit that is too small will prevent the toggle from passing through; a bit that is too large will result in a weak hold and potential failure.
The Definitive Guide: How to Install Drywall Anchors with Wings
With your tools gathered and your location marked, you are ready to perform the installation. Follow these steps precisely for a secure and professional result.
Step 1: Locate and Mark Your Mounting Point
Use your tape measure and level to determine the exact position for your anchor. Mark the spot lightly with a pencil. Use your stud finder to scan the area thoroughly. The goal here is to find a hollow cavity. If the stud finder indicates a stud, you must move your mounting point to a hollow section. If you absolutely must mount in that exact spot, you can forgo the anchor and use an appropriate wood screw directly into the stud.
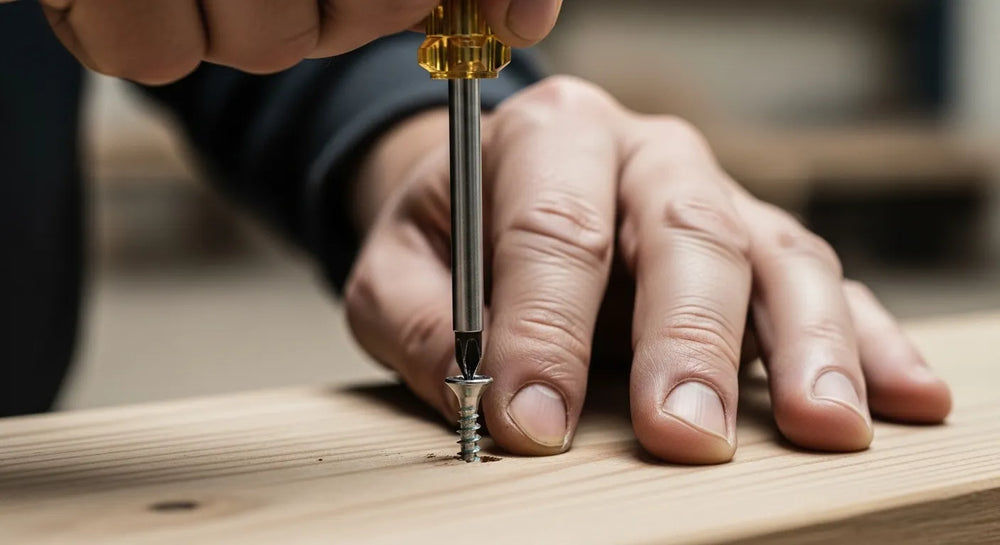
Step 2: Drill the Pilot Hole
Select the drill bit specified by the anchor manufacturer. Ensure your drill is perpendicular to the wall to create a straight, clean hole. Apply steady, gentle pressure and drill completely through the drywall. You will feel a change in resistance as the bit punches through the back of the board into the hollow space. Do not wobble the drill, as this can widen the hole and compromise the anchor's grip.
Step 3: Prepare the Anchor Assembly
This is the most critical step and the one most often done incorrectly. Unlike other anchors, a winged toggle bolt must be assembled through the item you are mounting before it is inserted into the wall.
- Take the bolt and pass it through the mounting hole on your shelf bracket, signage, or other fixture.
- With the bolt now through your item, thread the winged toggle onto the end of the bolt. Only screw it on a few turns—you need most of the bolt's length to work with. The wings should fold down towards the head of the bolt.
Step 4: Insert the Anchor into the Wall
Pinch the spring-loaded wings together so they are flat against the bolt. Hold them in this folded position and push the entire toggle mechanism through the pilot hole you drilled in the wall. The fixture you are mounting will still be outside the wall, held by the head of the bolt.
Step 5: Deploy the Wings
Once the folded wings are completely through the drywall and in the hollow cavity behind it, they will automatically spring open. You will often hear a faint "snap" or "click" as this happens. To confirm they have deployed correctly, gently pull back on the bolt. You should feel the wings catch firmly on the interior surface of the wall. This feedback is your confirmation that the anchor is properly seated.
Step 6: Tighten and Secure the Fixture
This final step requires a bit of technique. You must maintain outward tension on the bolt with one hand (pulling the fixture slightly away from the wall) while you tighten the bolt with a screwdriver in your other hand. This tension keeps the wings engaged and pressed against the back of the drywall, preventing them from spinning freely as you tighten.
Turn the screw until the base of your fixture is snug against the wall. Be careful not to over-tighten. The goal is to make it firm and secure, but excessive torque can crush the gypsum core of the drywall, compromising the integrity of the very material you are relying on for support. Once tight, your item is now securely mounted.
Common Pitfalls and How to Sidestep Them
Even a seemingly simple process can go wrong. Being aware of these common mistakes can save you time, materials, and the headache of drywall repair.
- Drilling the Wrong Size Hole: The most frequent error. Always verify the required bit size. A hole that's too small is an easy fix (just re-drill with the correct bit), but a hole that's too large is a major problem, often requiring you to patch the wall and start over in a new location.
- Forgetting the Fixture: Remember, the toggle bolt must pass through your item before going into the wall. If you insert and deploy the toggle first, you have no way to attach your item without completely removing the anchor (which is often not possible without it falling into the wall cavity).
- Losing the Anchor in the Wall: If you accidentally push the entire assembly—bolt and all—through the hole before tightening, the anchor will be lost inside the wall cavity forever. Always keep control of the bolt head.
- Over-Torquing the Bolt: The power of modern drills can be deceptive. It's easy to apply too much force and crush the drywall. For the final turns, consider using a hand screwdriver to get a better feel for the tension and ensure a snug, but not crushing, fit.
The Maden.co Advantage: Building Resilient American Supply Chains
The successful installation of a single anchor is a microcosm of a much larger industrial principle: operational excellence is built on a foundation of reliable components. For the procurement managers, MRO buyers, and design engineers we serve, sourcing challenges can cause significant friction, project delays, and budget overruns. Finding a specific, high-quality component should not be a bottleneck.
This is the core of our mission at Maden.co. We believe that America's manufacturing revival is here, and we are dedicated to proving that American-made products are as accessible and convenient as any global alternative. Our platform is built on the values of American Manufacturing Pride, Digital Innovation, and Supply Chain Transparency. We connect you directly with a network of over 800 verified U.S. manufacturers, giving you frictionless access to a vast catalog of industrial parts. If you are a U.S. manufacturer who shares these values, we invite you to join our growing network. Register as a vendor and join the American manufacturing revival.
For a procurement manager under pressure to source a specific fastener, a design engineer needing material certifications for a new prototype, or an MRO buyer facing an unexpected equipment breakdown, the ability to quickly find and finance a verified, U.S.-made part is a game-changer. Our entire business model is built on this principle; you can learn more about our mission to champion American manufacturing here. When you source through our platform, you are not just buying a part; you are investing in a more resilient, transparent, and reliable supply chain that reduces your Total Cost of Ownership (TCO) and mitigates risk. If you have specific sourcing questions about hard-to-find components, our team is ready to help.
We empower businesses to manage cash flow effectively with strategic tools built for industrial procurement. For larger projects or capital-intensive equipment upgrades, waiting on budget approval can be a major hurdle. To address this, we offer a seamless financing option directly within our platform. You can apply for Instant Financing at checkout to streamline your capital-intensive projects, allowing you to acquire the critical components you need, when you need them, without disrupting your cash flow.
Conclusion: Strength in the Wall, Strength in the Supply Chain
Mastering the installation of a winged drywall anchor is a valuable skill, ensuring that every fixture mounted is safe, secure, and reliable. It requires an understanding of the materials, a precise process, and an awareness of potential mistakes. The integrity of the final installation, however, starts long before the drill is ever picked up. It begins with the quality of the anchor itself.
Sourcing high-quality, dependable, American-made components is the first and most critical step in guaranteeing a successful outcome, whether you're mounting a single shelf or outfitting an entire facility. At Maden.co, we are your strategic partner in building a more efficient and resilient procurement process. We provide the tools, the access, and the support to ensure you can always find the right U.S.-made part for the job.
Explore our extensive catalog of fasteners and industrial components to see how we can help you eliminate procurement friction and strengthen your supply chain. For your next project, build with confidence, build with quality, and build with American-made parts sourced through Maden.co. And remember to leverage our Instant Financing at checkout to make your procurement process as seamless as possible.
Frequently Asked Questions (FAQ)
1. What is the main difference between a winged anchor and a self-drilling anchor? The primary difference is in their load-bearing capacity and installation method. A winged anchor (toggle bolt) offers significantly higher strength by clamping onto the back of the drywall, making it ideal for heavy items like shelving, cabinets, and large fixtures. Its installation requires pre-drilling a hole. A self-drilling anchor is designed for speed and convenience on light to medium-duty tasks, as it drills its own hole, but it has a lower weight rating because it relies on expansion within the drywall itself.
2. Can I reuse a winged drywall anchor (toggle bolt)? Generally, no. A standard winged toggle bolt is a one-time-use fastener. Once you unscrew the bolt completely, the winged toggle mechanism will fall off the end of the bolt and be lost inside the wall cavity, making it impossible to reuse.
3. How much weight can a winged drywall anchor hold? The weight capacity varies greatly depending on the size of the anchor and the thickness and condition of the drywall (e.g., 1/2" or 5/8"). A heavy-duty toggle bolt in standard 1/2" drywall can often hold 50 to 100 pounds or more. However, you must always check the manufacturer's specifications for the specific anchor you are using, as these ratings are the only reliable guide.
4. What should I do if I accidentally drill the hole too big for my anchor? Drilling a hole that is too large is problematic because the head of the bolt or the base of the fixture may not be large enough to cover it, and the anchor won't sit securely. You have a few options: you can try using a larger anchor that requires the hole size you accidentally drilled, use a large washer between the bolt head and the fixture to cover the hole, or, for the most professional result, patch the hole with a drywall compound, let it dry, sand it smooth, and then re-drill in the correct spot.


