How to Patch an Anchor Hole in Drywall: A Pro Guide
Table of Contents
- Introduction
- The Importance of a Proper Patch: Beyond Aesthetics
- Assembling Your Professional Drywall Repair Toolkit
- Step-by-Step Guide: Patching Small Anchor Holes (Under 1/2 Inch)
- Advanced Techniques: Tackling Medium to Large Holes (Over 1/2 Inch)
- Matching Wall Texture: The Final Step to an Invisible Repair
- Procurement Strategy: Sourcing Anchors and MRO Supplies for Success
- Conclusion
- Frequently Asked Questions
Introduction
Imagine the final walkthrough of a decommissioned commercial space. The equipment is gone, the floors are swept, but the walls tell a story of years of activity, marked by a constellation of holes where shelves, signage, and equipment were once mounted. For a facilities manager or MRO professional, this isn't just a cosmetic issue; it's a critical task that impacts asset value, lease agreements, and professional reputation. Simply dabbing some filler in the hole and calling it a day isn't an option when industrial standards and excellence are on the line. The difference between a hasty, amateur repair and a professional, invisible patch is a testament to quality workmanship and a core principle of effective maintenance.
This guide is designed for the professionals who understand that small details have a big impact. We will move beyond basic homeowner tips to provide a comprehensive, industrial-grade process for patching drywall anchor holes of all sizes. We will cover the specific tools and materials required, outline step-by-step techniques for everything from small screw holes to larger voids left by toggle bolts, and delve into the often-overlooked art of texture matching for a truly seamless finish. Our goal is to equip you with the knowledge to execute flawless drywall repairs that not only look perfect but also maintain the structural integrity and value of the property, reflecting a deep commitment to industrial excellence in every task.
The Importance of a Proper Patch: Beyond Aesthetics
In a professional setting, whether it's a corporate office, a manufacturing facility, or a multi-unit residential complex, the quality of a repair is a direct reflection of the organization's standards. A poorly patched hole can be a glaring sign of subpar work, but the implications run deeper than mere appearances.
Structural Integrity and Long-Term Asset Value
Drywall, or gypsum board, is a relatively fragile material. When an anchor is installed and later removed, it can compromise the integrity of the gypsum core and surrounding paper. A simple surface-level fill-up with spackle doesn't address this potential weakness.
- Prevents Future Damage: A professional patch reinforces the damaged area. By properly cleaning, beveling, and sometimes even backing the hole, you restore its strength. This prevents the spot from becoming a failure point if a new fixture is ever installed nearby.
- Maintains Wall Sheen and Finish: Improper patching often leads to a phenomenon called "flashing," where the repaired spot has a different texture or sheen than the surrounding wall, becoming obvious under certain lighting. This devalues the finish of the entire space.
- Reduces Total Cost of Ownership (TCO): Doing the job right the first time eliminates the need for future rework. The small investment in proper materials and techniques saves significant labor costs and operational disruptions down the line. It’s the same principle as choosing a high-quality anchor to begin with; selecting a dependable, U.S.-made Ribbed Plastic Anchor from the start ensures a secure hold and minimizes wall damage upon removal, lowering the overall lifecycle cost of the installation.
Professionalism and Compliance
In many commercial and industrial contexts, facility maintenance is governed by specific standards, lease agreements, or internal quality protocols.
- Meeting Contractual Obligations: When vacating a leased property, "broom-clean" condition often includes returning walls to their original state. A visible, poorly executed patch could lead to disputes or loss of a security deposit.
- Upholding Brand Standards: For any business, the physical environment is part of the brand experience. Flawless walls in an office, showroom, or facility communicate attention to detail and a commitment to quality that resonates with clients, employees, and partners.
- Safety and Reliability: In certain environments, the integrity of a wall is a safety factor. A properly repaired wall ensures that it can support future installations without failure, which is paramount in any operational setting.
This dedication to getting the job done correctly aligns perfectly with our core value of Industrial Excellence. At Maden.co, we connect industrial buyers with components that are built to last, because we believe that true efficiency comes from quality and reliability, not cutting corners.
Assembling Your Professional Drywall Repair Toolkit
A flawless repair begins with the right tools and materials. While a basic kit can handle a tiny nail hole, professional MRO teams managing numerous repairs require a more robust and versatile toolkit. Investing in quality supplies ensures efficiency, consistency, and a superior finish across every job.
Essential Materials: The Foundation of a Perfect Patch
The choice of compound is the most critical material decision. Using the wrong type can lead to shrinking, cracking, and a weak repair.
- Lightweight Spackling Compound: This is your go-to for small holes (less than 1/2 inch) left by screws or small plastic anchors. It's easy to apply, dries quickly, and sands with minimal effort. Its low-shrinkage formula is ideal for simple fill-ins.
- All-Purpose Joint Compound (Mud): For larger, more complex repairs (over 1/2 inch), joint compound is the superior choice. It provides greater structural strength and adhesion. It is available in pre-mixed tubs or as a dry powder ("hot mud") that you mix with water for a faster setting time. Hot mud is preferred by professionals for its rapid curing and extreme durability.
- Drywall Repair Patches: For holes too large to be filled with compound alone, self-adhesive mesh or aluminum patches provide the necessary backing and structure for the repair.
- Drywall Tape: For repairs requiring a backing board or the "California patch" method, fiberglass mesh tape or paper tape is essential for reinforcing the seams and preventing cracks.
- High-Quality Primer: This is a non-negotiable step for a professional finish. A quality stain-blocking primer seals the new compound, preventing moisture from the paint from altering its texture and ensuring the final color is uniform without flashing.
- Matching Paint and Texture: Having the correct paint (color, sheen, and type) is obvious. However, professional results require matching the wall's texture, often using aerosol texture sprays or specific application techniques with thinned compound.
Essential Tools: The Instruments of Precision
- Putty Knives: A set of flexible steel putty knives in various widths (e.g., 1.5-inch, 3-inch, 6-inch) is crucial. Smaller knives are for application, while larger ones are for feathering the compound smoothly into the surrounding wall.
- Utility Knife: A sharp utility knife is needed for cleaning out holes, beveling edges for better compound adhesion, and cutting drywall patches.
- Sanding Sponges or Blocks: Use a medium grit (e.g., 120) for the initial sanding and a fine grit (e.g., 220) for the final, smooth finish. A sanding sponge is often easier to control on a small patch than sandpaper alone.
- Drill with Bits: A cordless drill can be useful for cleanly removing stubborn plastic anchor sleeves or for installing backing boards on larger repairs.
- Tack Cloth or Damp Rag: Essential for wiping away all sanding dust before priming and painting. Any residual dust will ruin the final finish.
- Mini Shop Vacuum: For professionals doing multiple repairs, a small, portable shop vacuum with a brush attachment makes dust control quick and efficient, minimizing cleanup and creating a healthier work environment.
Sourcing these MRO supplies can be a challenge for procurement managers who need consistent quality and reliable availability. Our mission is to simplify this process, providing a single, trusted source for U.S.-made industrial products. We are built on the principle of Customer Empowerment, giving you the tools and components you need to succeed. You can learn more about our mission to champion American manufacturing here.
Step-by-Step Guide: Patching Small Anchor Holes (Under 1/2 Inch)
This is the most common repair scenario, addressing the small but unsightly holes left behind by common screws and plastic anchors. Following a meticulous process ensures the repair is not just filled, but truly invisible.
Step 1: Meticulous Preparation
The quality of your prep work will dictate the quality of the final patch. Do not rush this stage.
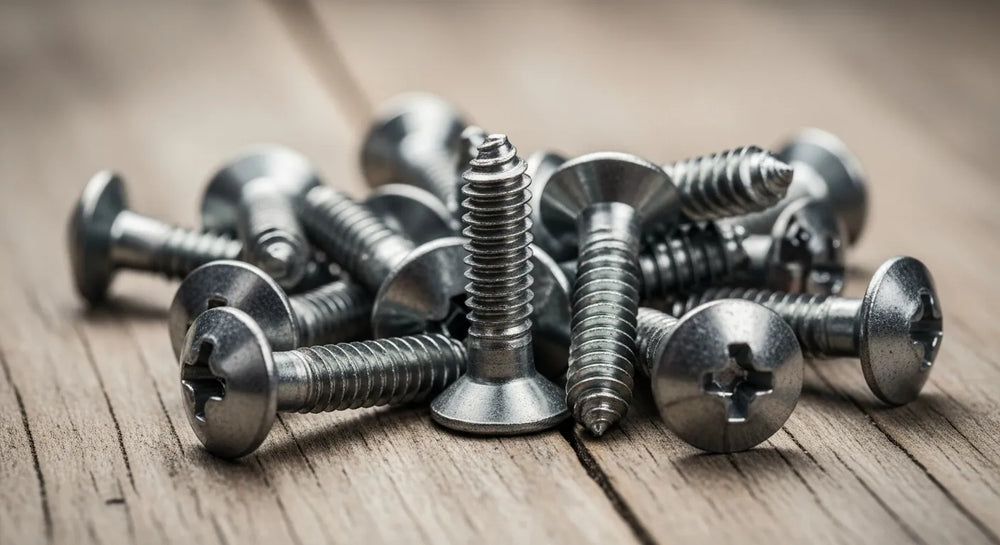
- Remove the Anchor: If the anchor sleeve is still in the wall, remove it completely. Sometimes you can back the screw in just a few turns and pull it straight out with pliers. Other times, you may need to use needle-nose pliers to grip the lip of the anchor and wiggle it free. If it breaks off below the surface, you can often push it into the wall cavity.
- Clean and Bevel the Hole: Using a sharp utility knife, carefully cut away any loose drywall paper or frayed edges around the hole. Then, angle the blade slightly and carve a small "V" groove or countersink around the hole's perimeter. This bevel allows the spackling compound to sit slightly below the wall surface, creating a stronger mechanical bond and preventing a raised bump from forming.
- Remove All Dust: Use a vacuum or a tack cloth to remove every particle of dust from the hole and the immediate surrounding area.
Step 2: The First Application (The Fill Coat)
This coat is about completely filling the void and creating a solid foundation.
- Load Your Putty Knife: Scoop a small amount of lightweight spackling compound onto the corner of your 1.5-inch or 3-inch putty knife.
- Apply with Pressure: Press the compound firmly into the beveled hole. The goal is to ensure there are no air pockets left inside. Approach the hole from multiple directions to guarantee it is packed solid.
- Scrape it Flush: Once filled, hold your putty knife at a 45-degree angle to the wall and scrape away all the excess compound from the surface. One or two clean passes should leave a filled hole that is perfectly flush with the wall. Resist the urge to leave a mound of spackle; this only creates more work during sanding.
Step 3: Curing and Sanding
Patience is key. Applying the next coat or painting before the compound is fully cured will ruin the repair.
- Allow for Complete Drying: Drying time varies based on the compound, temperature, and humidity, but typically ranges from a few hours to a full day. The compound will change color (usually from pink or gray to bright white) when it is fully dry and hard to the touch.
- Sand Smoothly: Using a fine-grit (220) sanding sponge, lightly sand the patched area. Your goal is not to remove a lot of material, but simply to knock down any minor ridges or imperfections, making the surface perfectly smooth and level with the wall. Use a light, circular motion.
Step 4: The Second Application (The Skim Coat)
For a truly professional, invisible finish, a second coat is almost always necessary. Spackle can shrink slightly as it dries, creating a minor divot.
- Apply a Thin Layer: Using a slightly wider putty knife (e.g., 3-inch or 6-inch), apply a very thin skim coat of spackle over the patched area, extending it about an inch beyond the original repair perimeter.
- Feather the Edges: This is a crucial technique. As you spread the compound, apply more pressure to the outer edge of the putty knife. This creates a paper-thin transition (a "feathered" edge) between the patch and the existing wall, making the repair impossible to detect by sight or touch after sanding.
- Dry and Sand Again: Let this second coat dry completely. Then, perform a final, very light sanding with your fine-grit sponge. Run your hand over the area; it should feel perfectly seamless.
Step 5: Priming and Painting for an Invisible Blend
This final stage is what separates an amateur patch from a professional one.
- Wipe Clean: Use a tack cloth to remove every trace of sanding dust.
- Spot-Prime the Patch: Apply a thin coat of high-quality primer directly over the sanded repair and the feathered edges. This seals the porous spackle, ensuring the paint absorbs evenly and preventing the patch from "flashing" or showing through the topcoat.
- Apply Matching Paint: Once the primer is dry, apply your first coat of matching wall paint. Use a small roller or brush that matches the original application method to help blend the texture. You will likely need two coats of paint for a perfect match.
Advanced Techniques: Tackling Medium to Large Holes (Over 1/2 Inch)
Larger holes, often caused by the removal of toggle bolts or accidental impacts, require more than just filler. These advanced methods provide the necessary structural support for a durable, long-lasting repair that is common in demanding industrial and commercial environments. The type of anchor initially used, like a robust Medium-Duty Nylon Wall Anchor for #8 screws, can often prevent the wall blowouts that necessitate these more involved repairs, reinforcing the importance of selecting the right U.S.-made component from the start.
Method 1: The Self-Adhesive Mesh Patch
This is an excellent solution for holes up to 4-5 inches in diameter where the damage is clean and there's no access to the back of the wall.
- Preparation: Clean the area around the hole and sand it lightly to scuff the paint for better adhesion.
- Apply the Patch: Select a self-adhesive mesh patch that is at least one inch larger than the hole on all sides. Center it over the hole and press it firmly against the wall.
- First Coat of Mud: Using a 6-inch putty knife, apply a thin layer of all-purpose joint compound over the entire mesh patch, pressing firmly to force the mud through the mesh and against the drywall.
- Feather and Dry: Feather the edges of the compound well beyond the patch itself. Let this first coat dry completely. It will likely take longer than spackle.
- Subsequent Coats: Apply at least two more thin coats of joint compound, extending each coat slightly further than the last and always feathering the edges. Allow each coat to dry fully and sand lightly in between. The goal is to build up thin layers to create a wide, flat, and invisible transition.
Method 2: The "California" or "Butterfly" Patch
This technique offers a very strong, integrated repair without requiring any backing strips. It is ideal for holes from 2 to 6 inches.
- Create the Patch: Cut a new piece of drywall that is about 2 inches larger than the hole in every dimension. On the back of this patch piece, use a utility knife to score a line 1 inch in from each edge, cutting only through the paper and gypsum, not the front-facing paper.
- Break and Peel: Gently snap the edges of the patch along your score lines and peel away the gypsum and back paper, leaving a 1-inch flap of the front-facing paper around the entire patch. This is your "butterfly" wing.
- Test Fit: Ensure your drywall "plug" fits neatly inside the hole.
- Apply Mud and Install: Apply a layer of joint compound to the wall around the hole. Lightly dampen the paper flaps of your patch, then press the patch into place. Use your putty knife to embed the paper flaps smoothly into the mud on the wall, removing all air bubbles and excess compound.
- Finish: Once dry, you can finish the patch with thin skim coats of compound, feathering the edges as you would with any other repair.
Method 3: The Backing Board Patch (The Most Durable)
For large, irregular holes or in high-traffic areas where strength is paramount, this is the gold standard.
- Square the Hole: Use a drywall saw and a straight edge to cut the damaged area into a clean square or rectangle.
- Install the Backer: Cut a piece of 1x3 lumber or plywood a few inches longer than the hole is wide. Apply a bead of construction adhesive to the ends. Insert the backer board into the hole diagonally, then pull it tight against the inside of the drywall. Secure it by driving two drywall screws through the existing wall and into each end of the board.
- Cut the New Drywall: Cut a piece of new drywall to the exact dimensions of the square hole you created.
- Install the Patch: Place the new drywall piece into the opening and secure it by driving screws into the backing board you just installed.
- Tape and Mud: You now have a repair that is as strong as the original wall. Apply fiberglass mesh tape over all four seams. Then, apply three coats of joint compound, treating the seams exactly as you would during a new drywall installation—a tape coat, a fill coat, and a finish coat, sanding between each.
The MRO buyer for a national retail chain, facing constant wall damage from fixture changes, needs a standardized, efficient repair process. By also standardizing their anchors to a high-quality product like the Medium-Duty #6 Self-Drilling Drywall Anchor, they reduce installation time and minimize future wall damage, creating a more efficient and cost-effective maintenance cycle.
Matching Wall Texture: The Final Step to an Invisible Repair
Even a perfectly flat and smooth patch will stick out on a textured wall. Replicating the existing texture is the final artistic touch that makes a repair truly vanish.
Identifying Your Wall's Texture
Before you can match it, you need to know what you're working with. Common textures include:
- Orange Peel: A fine, bumpy texture that resembles the skin of an orange. It's one of the most common textures.
- Knockdown: This texture is created by spraying on clumps of compound and then lightly "knocking them down" with a wide knife, creating a random, stucco-like pattern.
- Popcorn (Acoustic): A heavy, clumpy texture common on ceilings, though less so on walls today. Repairing this often requires specialized products.
Tools and Techniques for Blending
For small patches, aerosol texture sprays are a maintenance professional's best friend. They are available in various formulas to replicate common textures like orange peel and knockdown.
- Practice First: Before spraying on the wall, practice on a scrap piece of cardboard. This allows you to adjust the nozzle settings (for spray pattern) and your distance from the surface (for texture density) to get a perfect match.
- Apply in Light Coats: It's better to build up the texture in several light passes than to apply one heavy, goopy coat.
- Feather the Spray: Start spraying on the cardboard and move the can across your patch onto the wall, and continue spraying as you move off the other side. This prevents heavy spots at the start and end of your pass and helps blend the new texture into the old.
- Custom Textures: For less common textures, you may need to get creative by dabbing a sea sponge in thinned joint compound or using a specific roller nap to replicate the pattern.
Once your texture is applied and has dried completely (as per the product instructions), you can then prime and paint the area to complete the invisible repair.
Procurement Strategy: Sourcing Anchors and MRO Supplies for Success
A perfect repair is the result of both skilled labor and quality materials. However, for the MRO buyer, procurement manager, or business owner, sourcing these materials efficiently presents its own set of challenges. Managing dozens of vendors for small components like fasteners, compounds, and tools creates significant administrative overhead, complicates inventory management, and increases overall procurement friction.
This is the problem we are dedicated to solving. Our mission is to democratize access to American manufacturing, creating a single, transparent marketplace where industrial buyers can seamlessly connect with over 800+ verified U.S. manufacturers. With a catalog of over 2.5 million products, we are the definitive platform proving that sourcing American-made components can be as convenient and efficient as any global alternative. We believe America's manufacturing revival is here, and we are building the digital infrastructure to power it.
The Maden.co Advantage: A Streamlined Supply Chain
By consolidating your MRO and component sourcing through our platform, you unlock tangible benefits that go straight to your bottom line:
- Supply Chain Transparency: Know exactly where your products are coming from. Every vendor on our platform is a verified U.S. manufacturer, giving you confidence in quality, compliance, and ethical sourcing.
- Reduced Procurement Friction: Save countless hours by eliminating the need to manage multiple purchase orders, invoices, and vendor relationships. Find everything you need in one place, from highly specific industrial fasteners to everyday MRO supplies.
- Enhanced Resilience: A domestic supply chain is a more resilient supply chain. Reduce your exposure to international shipping delays, tariffs, and geopolitical disruptions by partnering with manufacturers right here at home.
Financing for Growth and Efficiency
Large-scale facility retrofits, seasonal maintenance projects, or simply stocking a new maintenance van with essential supplies can represent a significant capital outlay. We empower businesses to manage their cash flow strategically with our Instant Financing option. This isn't just a payment method; it's a tool to help you scale your operations effectively. When a major project requires a large-volume purchase of components, you don't have to sacrifice your operational budget. You can apply for Instant Financing at checkout to streamline your capital-intensive projects.
We are also committed to growing the ecosystem of American industry. If you are a U.S. manufacturer producing high-quality industrial components, we invite you to join our network of premier suppliers. Register as a vendor and become a part of the movement to rebuild America's manufacturing core. For any specific sourcing questions or to learn more about our platform's capabilities, our dedicated team is here to help. Please do not hesitate to contact us.
Conclusion
Mastering the art of the drywall patch is more than a simple maintenance task; it is a reflection of a commitment to quality, asset preservation, and industrial excellence. From the crucial preparation of a small anchor hole to the structural reinforcement of a large repair and the final, artistic blending of wall texture, every step contributes to a result that is not just adequate, but invisible. The process demands patience, the right tools, and a meticulous, professional approach.
This same commitment to excellence should extend to your procurement strategy. The choice of the initial anchor, the quality of the repair materials, and the efficiency of your supply chain all have a direct impact on your operational success and Total Cost of Ownership. Don't let component sourcing be a bottleneck. Turn to a partner dedicated to championing American manufacturing and simplifying your procurement process. Explore our vast catalog of U.S.-made industrial products to find the precise, high-quality components your projects demand, and ensure your business has the financial flexibility it needs by leveraging our Instant Financing option right at checkout.
Frequently Asked Questions
1. What is the main difference between spackling and joint compound?
Spackling compound is a lightweight, acrylic-based filler designed for small holes and cracks (typically under 1/2 inch). It dries quickly, shrinks very little, and is easy to sand. Joint compound, or "drywall mud," is a gypsum-based material designed for taping and finishing drywall seams. It is much stronger and more durable than spackle, making it the correct choice for larger repairs (over 1/2 inch) that require structural integrity.
2. Can I just paint directly over the spackle or joint compound?
No, this is a common mistake that leads to a poor finish. Both spackle and joint compound are very porous and will absorb the moisture from paint differently than the surrounding painted drywall. This causes "flashing," where the patch has a different sheen and texture. You must always seal the repaired area with a coat of quality primer before applying your final coats of paint.
3. How long should I wait for the patch to dry before sanding or painting?
Drying time depends heavily on the type of product used, the thickness of the application, and the ambient temperature and humidity. Lightweight spackle on a small hole may be dry in as little as 30-60 minutes. All-purpose joint compound on a larger, multi-coat patch may require 24 hours or more for each coat to cure fully. The best practice is to follow the manufacturer's instructions and ensure the patch is completely hard and uniform in color (usually bright white) before proceeding.
4. The drywall paper tore around the hole when I removed the anchor. How do I fix that?
Torn or fuzzy drywall paper must be addressed before applying any filler. Use a very sharp utility knife to carefully cut away all the loose and torn paper, creating a clean, crisp edge. Then, seal the exposed brown gypsum core with a coat of primer or a shellac-based sealer. This prevents the gypsum from absorbing moisture from the compound, which can cause bubbles to form in your patch. Once the sealer is dry, you can proceed with patching the hole as usual.


