How to Put Drywall Anchors In a Wall Correctly
Table of Contents
- Introduction
- The Critical Role of Drywall Anchors: Beyond the Basics
- A Buyer's Guide to Drywall Anchor Types
- Step-by-Step Installation: A Masterclass on How to Put Drywall Anchors in Wall
- Advanced Considerations for Professional Applications
- Common Mistakes and How to Avoid Them
- Conclusion: Building with Confidence and American Pride
- Frequently Asked Questions (FAQ)
Introduction
Imagine the sound—a sudden crack followed by a crash. A newly installed, heavy-duty shelf, laden with critical components in a workshop, has just torn a massive chunk from the wall, scattering expensive parts across the floor. This scenario, a frustrating reality in both commercial facilities and residential projects, is almost always preventable. It’s not a failure of the shelf or even the wall itself, but of the smallest, most overlooked component: the fastener. In the world of MRO, facilities management, and engineering, understanding how to properly put drywall anchors in a wall is not a trivial DIY skill; it is a fundamental aspect of safety, structural integrity, and operational excellence.
This article moves beyond simplistic instructions. We will provide a professional-grade analysis for procurement managers, MRO buyers, and design engineers who recognize that sourcing and installing the right component is critical to project success. We will explore the physics behind why anchors are necessary, conduct a deep dive into the various types of anchors and their specific applications, and provide meticulous, step-by-step installation guides. Our goal is to empower you with the knowledge to not only select and install drywall anchors with precision but also to understand the strategic procurement decisions that underpin a secure and reliable installation. This commitment to industrial excellence is at the core of our mission at Maden.co, where we are dedicated to connecting industrial buyers with the highest quality U.S.-manufactured products.
The Critical Role of Drywall Anchors: Beyond the Basics
To master the installation of drywall anchors, one must first appreciate the material they are designed to work with. Drywall, or gypsum board, is essentially a layer of hardened gypsum plaster pressed between two thick sheets of paper. While it offers excellent fire resistance and is easy to finish, its core is soft and brittle, offering very little holding power on its own.
Why You Can't Just Use a Screw
Driving a standard screw directly into a sheet of drywall is like trying to anchor a ship in loose sand. The threads of the screw have nothing substantial to grip. When subjected to force, especially downward (shear force) or outward (tensile force), the screw will easily pulverize the surrounding gypsum and pull out, often taking a chunk of the wall with it.
A drywall anchor is a purpose-built interface that solves this problem. It is inserted into the wall and then expands or deploys behind it, distributing the load over a much larger surface area. This expansion creates a secure clamp on the drywall, transforming a weak point into a robust mounting location capable of supporting significant weight. In a commercial setting, the consequences of fastener failure extend beyond simple inconvenience. It can lead to:
- Safety Hazards: Falling objects, from heavy mirrors in a corporate lobby to mounted equipment in a lab, pose a direct risk to personnel.
- Equipment Damage: A failed mount can destroy expensive monitors, diagnostic tools, or other wall-mounted assets.
- Operational Downtime: Repairing significant wall damage and remounting equipment takes time and resources, disrupting workflow.
- Reputational Harm: A poorly executed installation reflects poorly on the facility management or contracting team.
Matching the Anchor to the Application
Not all anchors are created equal. Selecting the appropriate anchor is a critical decision-making process for any procurement professional or engineer. The choice depends on a careful analysis of the application's specific demands.
- Load Capacity: This is the most crucial factor. Anchors are rated for light-duty (under 10 lbs), medium-duty (10-50 lbs), and heavy-duty (50+ lbs) applications. Always consult the manufacturer's specifications and err on the side of caution. Sourcing from a marketplace that provides direct access to verified manufacturer data ensures these ratings are reliable and accurate.
- Static vs. Dynamic Loads: A static load, like a picture frame, is constant. A dynamic load, like a wall-mounted hand sanitizer dispenser or a retractable tool reel, involves movement, vibration, and changing forces. Dynamic loads require more robust anchoring solutions to prevent them from working loose over time.
- Material and Environmental Factors: The anchor material—typically nylon, plastic, or zinc-plated steel—should be considered. For instance, in areas with potential moisture, a corrosion-resistant anchor is essential. The thickness of the drywall (most commonly 1/2" or 5/8") also plays a role in anchor selection and performance.
At Maden.co, we champion the principle of supply chain transparency. We believe buyers deserve to know exactly what they are getting, where it came from, and how it will perform. This commitment ensures that when you source a fastener, you receive a product with verified specifications you can trust for your most critical applications.
A Buyer's Guide to Drywall Anchor Types
The sheer variety of drywall anchors can be daunting. However, they can be categorized into several main types, each with a distinct mechanism and ideal use case. Understanding these differences is key for any MRO buyer looking to build a versatile inventory or a design engineer specifying components for a project.
Expansion Anchors: The Versatile Workhorse
These are perhaps the most common type of anchor. When a screw is driven into an expansion anchor, it forces the anchor's body to split and expand, pressing firmly against the inside of the pilot hole.
- How They Work: Friction and pressure are the key principles. The expanded fins or ribs bite into the gypsum, creating a secure hold.
- Best For: Light to medium-duty static loads. Think mounting smoke detectors, small signage, thermostats, and lightweight shelving.
- Example in Practice: For standardizing facility maintenance supplies, a high-quality, American-made Ribbed Plastic Anchor is an indispensable component. Its simple, reliable design makes it perfect for a wide range of everyday tasks, ensuring consistency and performance across numerous small-scale installations.
Threaded / Self-Drilling Anchors: Speed and Simplicity
Designed for efficiency, these anchors feature a coarse, auger-like thread and a sharp tip that allows them to be driven directly into drywall without a pilot hole.
- How They Work: The anchor cuts its own threads into the gypsum, creating a very secure fit. They are typically made from nylon or a zinc alloy (often referred to by a brand name like E-Z Ancor).
- Best For: Medium-duty applications where installation speed is a priority. They are excellent for mounting conduit clamps, light fixtures, and shelving brackets.
- Scenario in Focus: An electrical contractor is tasked with installing 200 light fixtures in a new office building. Pre-drilling a hole for every single anchor would add significant labor costs to the project. By specifying a reliable self-drilling anchor, the procurement manager can drastically reduce installation time. The Medium Duty Nylon Wall Anchor #6 Self-Drilling Drywall Zip-It® is an ideal U.S.-made solution, offering both speed and dependable holding power, directly contributing to project profitability.
Sleeve-Type Anchors (Molly Bolts): Medium-Duty Strength
Sleeve-type anchors, often called "molly bolts," offer a significant step up in strength from basic expansion anchors. They consist of a metal sleeve and a machine screw.
- How They Work: As the screw is tightened, it pulls the back of the sleeve forward, causing it to expand and compress like an umbrella behind the drywall. This creates a strong, load-bearing clamp.
- Best For: Heavier medium-duty items that require more stability, such as towel bars, curtain rods, and medium-sized mirrors or whiteboards. One advantage is that the screw can be removed and reinserted without losing the anchor in the wall.
Toggle Bolts: The Heavy-Duty Champions
When maximum holding power is non-negotiable, toggle bolts are the premier solution. They consist of a machine screw and a set of spring-loaded metal wings (the toggle).
- How They Work: The wings are folded and pushed through a pre-drilled hole. Once they clear the back of the drywall, they spring open. As the bolt is tightened, it pulls the wings flat against the interior surface of the wall, distributing the load over the widest possible area.
- Best For: Heavy-duty applications like mounting large televisions, heavy shelving units, grab bars, and even small wall-mounted cabinets.
- Considerations: The main drawback is the need for a relatively large pilot hole to accommodate the toggle mechanism. Additionally, if the bolt is fully removed, the toggle will fall down inside the wall cavity.
For a design engineer specifying fasteners for a new commercial build-out or hospital wing, having access to a diverse catalog of solutions is invaluable. Our platform provides access to over 2.5 million American-made products, from standard fasteners to highly specialized components, ensuring you can find the exact part to meet your project's technical requirements. Our entire business model is built on this principle of access and empowerment; you can learn more about our mission to champion American manufacturing here.
Step-by-Step Installation: A Masterclass on How to Put Drywall Anchors in Wall
Correct installation is just as important as correct selection. Following a precise, repeatable process ensures that every anchor performs to its maximum specified capacity.
Essential Tools and Preparation
Before you begin, gather the necessary tools to ensure a professional result:
- Tape measure
- Pencil
- Electronic stud finder
- Level
- Drill with appropriate drill bits
- Screwdriver (manual or electric)
- Hammer or rubber mallet
- Safety glasses
The Professional's First Commandment: Always Check for Studs. A stud finder is the most important tool in this process. Whenever possible, driving a screw directly into a wooden or metal stud is vastly superior to using any type of drywall anchor. Anchors are for use only in the hollow cavities between studs. Always scan the area first. If a stud is conveniently located, your job just became much simpler and more secure.
Once you've confirmed your desired location is hollow, use a level and tape measure to mark the precise spot for your anchor with a pencil.
Installation Guide for Expansion Anchors
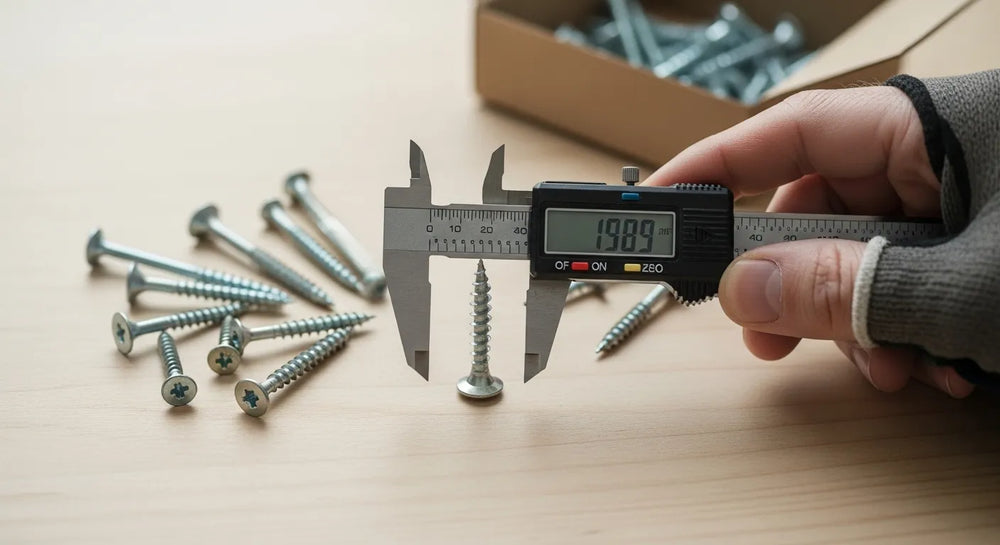
- Select the Right Bit: The anchor packaging will specify the required drill bit size. Using a bit that is too small will make it impossible to insert the anchor; too large, and the anchor will spin freely and fail to grip.
- Drill the Pilot Hole: Drill a clean, perpendicular hole into the drywall at your marked location.
- Insert the Anchor: Gently press the anchor into the hole. It should be a snug fit. If necessary, lightly tap it with a rubber mallet or hammer until the anchor's head is flush with the wall surface.
- Set the Anchor: Place your fixture over the anchor, insert the provided screw, and tighten it. You will feel the resistance increase as the anchor expands and sets. For standard jobs like mounting control panels or safety signage, a dependable fastener like the U.S.-made Ribbed Plastic Anchor ensures a secure, long-lasting hold.
Installation Guide for Self-Drilling Anchors
- Position the Anchor: Press the sharp tip of the anchor firmly against your pencil mark on the drywall.
- Drive the Anchor: Using a Phillips head screwdriver or a drill on a low-speed setting, apply firm, steady pressure and drive the anchor into the wall. The coarse threads will bite into the gypsum and pull the anchor in. Stop when the head of the anchor is flush with the wall. Be careful not to overdrive it, which can strip the drywall.
- Insert the Screw: Position your item and drive the screw into the anchor. The efficiency of this process is why procurement managers value components like the Medium Duty Nylon Wall Anchor #6 Self-Drilling Drywall Zip-It®, which significantly cuts down on labor time during large-scale installations.
Installation Guide for Toggle Bolts
- Drill the Hole: This method requires a larger hole. Check the packaging to determine the correct drill bit size needed to allow the folded toggle to pass through.
- Assemble the Bolt: Remove the toggle from the screw. Insert the screw through the mounting hole of the object you wish to hang. Then, thread the toggle back onto the end of the screw by a few turns.
- Insert the Toggle: Squeeze the spring-loaded wings of the toggle together so they are parallel with the screw. Push the entire mechanism through the hole in the wall. You will hear and feel the wings spring open once they are inside the wall cavity.
- Tighten and Secure: Pull the screw back towards you to ensure the wings are seated flat against the interior wall surface. While maintaining this slight outward pressure, tighten the screw until your fixture is held firmly against the wall.
Advanced Considerations for Professional Applications
For industrial buyers and engineers, the conversation around fasteners goes far beyond simple installation. It involves strategic thinking about cost, supply chain, and project management.
Understanding Total Cost of Ownership (TCO) in Fasteners
The sticker price of an anchor is a misleading metric. The true cost—the Total Cost of Ownership (TCO)—includes factors like:
- Cost of Failure: What is the cost of a failed anchor in terms of damaged equipment, potential injury, and operational downtime?
- Cost of Rework: How much labor is wasted removing a failed anchor, patching the wall, and re-installing correctly?
- Cost of Project Delays: What are the financial implications if a project is held up because of a shortage of specified, high-quality fasteners?
Investing in a slightly more expensive but rigorously tested, U.S.-made component like the Medium Duty Nylon Wall Anchor #8 for Drywall dramatically reduces these risks. This focus on long-term value and reliability improves TCO and is a hallmark of a smart procurement strategy.
Supply Chain Resilience and American Manufacturing
Recent global events have exposed the fragility of extended supply chains. For a procurement manager under pressure to complete a facility refit, an MRO buyer facing an unexpected equipment breakdown, or a design engineer needing specific material certifications for a new prototype, the ability to quickly find and source a verified, U.S.-made part is a game-changer.
This is the driving force behind Maden.co. Our mission is to democratize access to American manufacturing, making it as convenient to source domestically as it is from any global alternative. By connecting you with our network of over 800+ verified U.S. manufacturers, we help you build a more resilient, transparent, and reliable supply chain. We are proving that America's manufacturing revival is here. If you have specific sourcing questions about hard-to-find components or need assistance navigating our catalog, our team is ready to help.
Managing Procurement for Large-Scale Projects
Sourcing thousands of individual components for a large construction or manufacturing project is a complex logistical challenge. Our platform simplifies this by consolidating access to millions of products, reducing procurement friction and administrative overhead. Furthermore, we understand the importance of cash flow in capital-intensive projects. To support this, we offer a powerful strategic tool for businesses. You can manage your budget and make larger volume purchases more effectively by applying for Instant Financing at checkout. This allows you to secure the materials you need now while aligning payments with your project's financial milestones.
Common Mistakes and How to Avoid Them
Even seasoned professionals can make mistakes. Being aware of these common pitfalls is the best way to prevent them.
- Using the Wrong Anchor for the Load: Never try to hang a heavy object with a light-duty plastic anchor. Always respect the weight ratings.
- Over-tightening: Especially with plastic or self-drilling anchors, over-tightening the screw can strip the drywall or break the anchor itself, compromising its hold.
- Drilling the Wrong Size Pilot Hole: A hole that’s too large is the most common cause of a spinning, useless anchor. Always double-check the required bit size.
- Ignoring a Stud: Drilling into a stud with the intention of using a hollow-wall anchor will only damage the drill bit and frustrate you. Always use a stud finder.
- Reusing Old Anchor Holes: An old hole is compromised. The surrounding gypsum is weakened. It's always better to make a new hole a few inches away and patch the old one.
Conclusion: Building with Confidence and American Pride
Mastering how to put drywall anchors in a wall is a testament to professional craftsmanship and a commitment to safety and quality. It requires understanding the materials, selecting the right component for the job, and executing the installation with precision. From the MRO buyer ensuring facility safety to the engineer specifying components for a new product, the integrity of the fastener is paramount.
This dedication to industrial excellence and American manufacturing pride is the foundation of Maden.co. We eliminate the friction and uncertainty from industrial procurement, providing direct access to a vast catalog of verified, U.S.-made products. Stop letting supply chain hurdles and component uncertainty delay your projects. Build with the confidence that comes from using high-quality, domestically sourced parts.
Explore our extensive catalog of American-made fasteners on Maden.co today. For large orders or capital-intensive projects, empower your business and manage your budget strategically by applying for Instant Financing at checkout.
Are you a U.S. manufacturer committed to quality and excellence? Register as a vendor and join the American manufacturing revival.
Frequently Asked Questions (FAQ)
1. What's the strongest type of drywall anchor? For heavy-duty applications in hollow drywall, toggle bolts offer the highest load capacity. Their wing mechanism spreads the load over a very wide area on the back of the drywall, providing a superior hold compared to expansion or threaded anchors. Always check the specific weight rating on the packaging, as capacities can vary between different sizes and manufacturers.
2. Can I reuse a hole from an old drywall anchor? It is strongly advised not to reuse an old anchor hole. The process of removing the old anchor often damages and enlarges the hole, and the surrounding gypsum is likely compromised and weakened. This will prevent the new anchor from getting a secure grip. The professional standard is to patch the old hole and drill a new one at least a few inches away.
3. How do I know what size drill bit to use for my anchor? The required drill bit size will almost always be printed on the anchor's packaging or included in the product's online specifications. For expansion anchors, using the exact specified bit size is critical for a snug fit. If the size is not listed, you can hold the drill bit up in front of the anchor (not the lip); the bit should be the same diameter as the anchor's body, appearing to hide the body but leaving the fins or threads visible.
4. What if I hit a stud when trying to install an anchor? Hitting a stud is actually good news, as it's a far more secure mounting point than hollow drywall. If you hit wood, simply switch from a drywall anchor to a standard wood screw of appropriate length (it should penetrate the stud by at least 1 to 1.5 inches). If you hit a metal stud, you will need to use self-tapping sheet metal screws instead. This is why using an electronic stud finder before you drill is the most efficient first step.


