How to Remove a Screw From Concrete: Pro Steps
Table of Contents
- Introduction
- Pre-Removal Assessment: Diagnosis Is Half the Battle
- Method 1: The Direct Approach for Intact but Seized Screws
- Method 2: Strategies for Stripped or Damaged Screw Heads
- Method 3: Advanced and Destructive Removal Techniques
- Post-Removal: Preparing the Hole for the Future
- The Proactive Approach: Preventing Removal Headaches with Strategic Sourcing
- Conclusion
- Frequently Asked Questions
Introduction
An entire production line relocation is on hold. The MRO team is stalled, equipment sits idle, and every passing minute translates into lost productivity. The culprit? A single, unyielding concrete screw, its head stripped bare, anchoring a critical piece of machinery to the floor. This scenario is all too familiar for maintenance managers, engineers, and facility operators. A component worth pennies is causing a delay worth thousands. While fasteners are designed for permanence, the realities of industrial maintenance, retrofitting, and equipment upgrades demand effective removal strategies. A stuck, stripped, or broken screw isn't just an inconvenience; it's a direct threat to operational efficiency.
This article moves beyond basic DIY tips to provide a professional, in-depth guide for removing stubborn screws from concrete. We will dissect the process from initial assessment to advanced, last-resort techniques used by seasoned maintenance professionals. We will cover methods for dealing with intact but seized screws, stripped heads, and even fasteners that have sheared off at the surface. More importantly, we will explore how a strategic approach to procurement—prioritizing high-quality, American-made components from the start—can drastically reduce the frequency of these time-consuming and costly situations. Mastering the art of fastener removal is a critical skill, but understanding how to prevent the problem in the first place is a cornerstone of industrial excellence and a resilient supply chain.
Pre-Removal Assessment: Diagnosis Is Half the Battle
Before reaching for the biggest hammer or the most powerful drill, a methodical assessment can save you time, prevent damage to the surrounding concrete, and increase your chances of a successful first attempt. Rushing this stage is the most common path to escalating a simple problem into a complex one.
Safety First: Your Non-Negotiable Starting Point
Working with concrete, metal, and power tools requires an unwavering commitment to safety. Always wear the appropriate Personal Protective Equipment (PPE) before starting any removal process.
- Safety Glasses or Goggles: Protect your eyes from metal shavings, concrete dust, and potential fragments if a drill bit or the screw itself shatters under pressure.
- Heavy-Duty Gloves: Provide a better grip on tools and protect your hands from sharp metal edges and abrasive concrete surfaces.
- Hearing Protection: If using impact drivers or hammer drills, protect your hearing from sustained high-decibel noise.
- Dust Mask or Respirator: Drilling into or grinding concrete releases fine silica dust, which is hazardous to inhale.
Identify the Fastener Type and Condition
The type of screw head dictates your initial tool choice, while its condition determines your strategy.
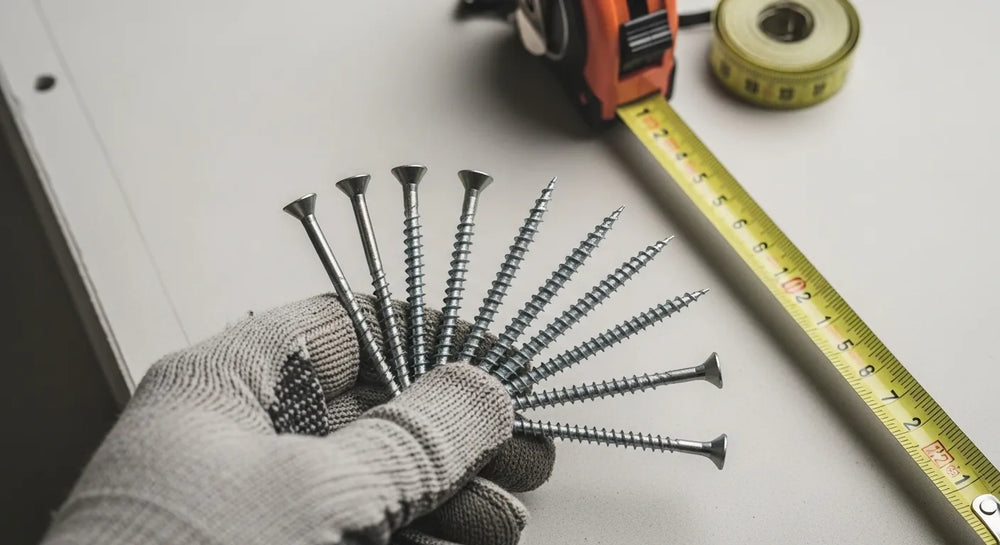
- Head Type: Is it a Phillips, slotted, hex, or Torx head? Using the wrong bit is the number one cause of stripping. For industrial applications, fasteners like a robust U.S.-Made Hex Head Concrete Screw provide superior torque transfer compared to Phillips or slotted heads, making both installation and removal more reliable.
-
Condition: Carefully inspect the screw.
- Intact but Seized: The head is in good condition, but the screw won't budge. This could be due to corrosion, over-torquing during installation, or a chemical bond with the concrete.
- Stripped: The recesses in the screw head are rounded out, preventing the driver bit from getting a grip.
- Rusted: Corrosion can both seize the screw and weaken the head, making it prone to breaking under torque.
- Broken or Sheared: The head has broken off, leaving the shank embedded in the concrete. This is the most challenging scenario.
Analyze the Surrounding Concrete
The integrity of the surrounding material is crucial. If the concrete around the fastener is cracked, crumbling, or spalling, applying excessive force could cause a larger section to break away. This could compromise the structural integrity of the mounting point and require significant repair work later. A solid, stable concrete base allows for more aggressive removal techniques if needed.
Method 1: The Direct Approach for Intact but Seized Screws
If the screw head is in good shape, your goal is to apply maximum torque without damaging it. This is the best-case scenario and should always be your starting point.
Applying Controlled Manual Force
Before resorting to power tools, a well-executed manual attempt can often succeed.
- Clean the Screw Head: Use a wire brush and compressed air to thoroughly clean out the recess in the screw head. Debris, paint, or rust can prevent the driver bit from seating fully, leading to a strip-out.
- Select the Perfect Bit: Use a high-quality, sharp driver bit that matches the head type exactly. A #2 Phillips bit for a #3 screw is a recipe for disaster. For industrial settings, investing in impact-rated bits is a wise choice, as they are made from harder steel and are less likely to deform.
- Use a Breaker Bar or Ratchet: For hex head screws, a long-handled ratchet or a breaker bar provides significantly more leverage than a standard wrench.
- Apply Downward Pressure: The key is to apply significant, consistent downward pressure (axial load) directly onto the screw head. This keeps the driver bit firmly seated and prevents it from camming out. Lean your body weight into the tool.
- Attempt a "Shock" Turn: Instead of a slow, gradual turn, try a sharp, forceful counter-clockwise jerk. Sometimes this initial shock is enough to break the static friction holding the screw in place.
Pro Tip: Apply a high-quality penetrating oil around the screw head. Let it soak for at least 30 minutes, or even overnight if possible. The oil will wick into the threads via capillary action, helping to dissolve rust and lubricate the connection.
Leveraging the Power of an Impact Driver
If manual force fails, an impact driver is the next logical step. Unlike a standard drill, an impact driver applies both rotational force and a series of rapid, concussive blows (impacts). These impacts are incredibly effective at jarring a seized fastener loose without stripping the head. The rapid-fire hammering action can break the bond of corrosion or friction far more effectively than steady torque alone.
This is where the quality of the original fastener becomes paramount. A well-manufactured screw, forged from high-grade American steel, is designed to withstand the intense forces of an impact driver. Lower-quality fasteners may shear or have their heads deform under this stress, turning a simple removal into a much more complex problem. Our commitment at Maden.co is to connect you with verified U.S. manufacturers who produce components built for these real-world industrial demands.
Method 2: Strategies for Stripped or Damaged Screw Heads
When the screw head is stripped, your primary challenge is finding a new way to grip and apply torque. This is where you transition from standard tools to more specialized removal equipment.
Using a Screw Extractor Set
A screw extractor set (often called an "easy out") is an essential tool for any maintenance department. These sets contain bits with reversed, tapered threads. The process involves two steps:
- Drill a Pilot Hole: Select a left-handed drill bit that is slightly smaller than the screw shank. Using a left-handed bit is a crucial pro-tip; the counter-clockwise drilling motion can sometimes generate enough friction to back the damaged screw out without even needing the extractor. Drill a perfectly centered hole into the head of the stripped screw.
- Insert and Turn the Extractor: Lightly tap the corresponding screw extractor into the newly drilled hole. As you turn the extractor counter-clockwise with a tap wrench or ratchet, its reverse threads bite into the walls of the pilot hole, gripping the screw. Continue turning, and the screw should back out.
Patience is key. Use a slow, steady turning force. Applying too much force too quickly can cause the extractor itself to break off inside the screw, creating a much more difficult problem.
Creating a New Slot with a Rotary Tool
If an extractor set isn't available or fails, you can often create a new purchase point. Using a rotary tool (like a Dremel) with a thin metal-cutting disc, carefully grind a new, deep slot across the top of the damaged screw head. This new slot allows you to use a large, flathead screwdriver to attempt removal.
This method requires a steady hand. Ensure the new slot is deep and wide enough for a robust screwdriver blade to get a solid grip. This technique provides a surprising amount of torque and is a classic solution for MRO professionals.
The Locking Vise-Grips Method
For screws where the head is not completely flush with the concrete surface (such as hex washer heads or round heads), a pair of high-quality locking vise-grips can be your best friend. Adjust the jaws to clamp down on the outside of the screw head with immense force. Once locked on, you can use the vise-grips as a handle to turn the screw counter-clockwise. For extra leverage, you can sometimes slide a steel pipe over one of the vise-grip handles.
Method 3: Advanced and Destructive Removal Techniques
When all else fails, and the fastener absolutely must be removed, it's time to employ methods that will destroy the screw in the process. These techniques require a higher skill level and should be considered last resorts.
Drilling Out the Entire Screw
This is the point of no return. The goal is to completely obliterate the screw by drilling through its core, leaving only the thin outer threads behind, which can then be cleaned out.
- Center Punch: Use a center punch to create a small indentation in the exact center of the screw. This will prevent your drill bit from wandering.
- Start Small: Begin with a small, high-quality drill bit (cobalt or titanium-coated is best for drilling into hardened steel).
- Step Up in Size: Gradually increase the drill bit size, working your way up until you are using a bit that is just slightly smaller than the screw's shank diameter. Use cutting oil to lubricate the bit and keep it cool.
- Remove the Remnants: Once the core is drilled out, the remaining thread fragments can often be picked out of the hole with a small pick or scribe.
This method requires precision. Drilling off-center can damage the threads in the concrete or enlarge the hole, making it unusable for a replacement fastener of the same size.
The Cautious Application of Heat
Disclaimer: This method carries significant risk and should only be performed by experienced professionals in a controlled environment with no flammable materials nearby.
The principle is simple: metal expands when heated. By using a propane or MAPP gas torch to apply rapid, concentrated heat to the head of the screw, you cause it to expand. When it cools, it contracts, and this expansion-contraction cycle can be enough to break the bonds of rust or corrosion. The heat should be applied quickly and directly to the screw, minimizing the amount of heat transferred to the surrounding concrete to reduce the risk of spalling. After heating, you can douse the screw with water to cool it rapidly (thermal shock) or let it cool and then attempt one of the previous removal methods.
The "Weld-a-Nut" Technique
For a screw that has sheared off flush with the concrete surface, this is often the most effective professional solution. If you have access to welding equipment, you can place a new nut on top of the broken screw shank and carefully weld the inside of the nut to the shank. The heat from the welding process helps break the bond, and once it cools, the newly attached nut provides a perfect hex head for a wrench or socket to grip. This technique offers immense torque and is a go-to for heavy equipment repair and industrial maintenance.
Post-Removal: Preparing the Hole for the Future
Successfully removing the screw is only part of the job. The final step is to prepare the hole for its next purpose.
- Thorough Cleaning: Use compressed air to blow out all dust and debris from the hole. Follow up with a wire hole brush to scrub the sides and remove any remaining fine particles or metal shavings. A clean hole is essential for the proper engagement of a new fastener.
- Damage Assessment and Repair: Inspect the hole and the surrounding concrete. If the removal process caused chipping or spalling, the area may need to be repaired with a concrete patching compound or anchoring epoxy before a new fastener can be installed securely.
- Reuse or Relocate: If the hole is still in good condition with clean threads, it can often be reused. If the hole is oversized or damaged, it is safer and more reliable to drill a new hole nearby for the replacement fastener.
The Proactive Approach: Preventing Removal Headaches with Strategic Sourcing
The most cost-effective way to deal with a stuck concrete screw is to prevent it from getting stuck in the first place. This is where procurement strategy and supply chain transparency become critical operational advantages. For a design engineer specifying fasteners for a new installation, or a procurement manager stocking the MRO supply closet, the choices made today directly impact the maintenance costs of tomorrow.
The Value of U.S.-Made Quality
Sourcing fasteners isn't just about finding the right size and thread pitch; it's about material integrity, manufacturing precision, and performance consistency. This is central to our mission at Maden.co. We believe that by democratizing access to America's industrial base, we empower businesses to build more reliable and resilient operations.
- Superior Materials and Coatings: A product like the Steel Blue Ruspert Ceramic Coating Flat Phillips® Drive Concrete Screw isn't just a screw; it's a piece of engineered hardware. Its advanced coating provides exceptional corrosion resistance, dramatically reducing the likelihood of it rusting and seizing in the concrete.
- Manufacturing Precision: U.S. manufacturers often adhere to stricter quality control standards. This means a Phillips head recess is formed to precise tolerances, ensuring a snug fit with the driver bit and minimizing the chance of stripping. When you source a product like these 1/4" x 2-3/4" Flat Head Concrete Screws from a verified domestic partner, you're getting a component built for performance, not just price.
- Reducing Total Cost of Ownership (TCO): A slightly higher initial investment in a quality fastener pays for itself many times over by eliminating hours of costly labor and operational downtime spent on removal. This is the essence of smart procurement—looking beyond the per-unit price to the total lifecycle cost.
Our entire business model is built on this principle of American Manufacturing Pride and Industrial Excellence. You can learn more about our mission to champion American manufacturing here. For U.S. manufacturers who share these values, we invite you to join the revival. Register as a vendor and join the American manufacturing revival.
Conclusion
A stuck screw in concrete can be a formidable obstacle, but it is rarely insurmountable. By following a methodical approach—starting with a thorough assessment, using the correct tools for intact screws, transitioning to specialized extractors for stripped heads, and saving destructive methods as a final resort—MRO professionals can overcome nearly any removal challenge.
However, the most powerful strategy is a proactive one. The real solution lies in building a supply chain founded on quality and reliability. By choosing precisely engineered, American-made fasteners from the outset, you dramatically reduce the likelihood of facing these frustrating and costly delays. This commitment to quality is the key to minimizing maintenance, enhancing safety, and improving your operation's bottom line.
Don't let fastener issues derail your projects. Explore the catalog on Maden.co to source the American-made components that keep your business running smoothly. For capital-intensive projects or large-volume orders, you can apply for Instant Financing at checkout to manage your cash flow effectively. If you have specific sourcing questions, our team is ready to help.
Frequently Asked Questions
1. Can I reuse a concrete screw after I've removed it? Generally, it is not recommended. The removal process, especially if it required significant force, can fatigue the metal. More importantly, the threads that cut into the concrete during the initial installation are often dulled or damaged upon removal, which will compromise the holding power of the screw if reinstalled. For safety and reliability, always use a new fastener.
2. What is the most common mistake people make when trying to remove a concrete screw? The most frequent error is using the incorrect size or type of driver bit. Using a bit that is too small, worn out, or of the wrong type (e.g., a Phillips bit in a Pozidriv screw) will not seat properly. This causes the bit to "cam out" under torque, rounding and stripping the screw head, which immediately makes the removal process much more difficult.
3. Is it better to drill a new hole or reuse the old one for the replacement screw? This depends entirely on the condition of the hole after the old screw is removed. If the hole is clean, the concrete is intact, and the original threads are in good shape, you can often reuse it with a new screw of the same diameter. However, if the hole is enlarged, stripped out, or the surrounding concrete is cracked, it is always safer and more secure to drill a completely new hole for the replacement fastener.
4. Why does sourcing U.S.-made screws matter for an industrial application? Sourcing U.S.-made screws from a verified supplier is about ensuring material consistency, stringent quality control, and reliable performance specifications. American manufacturers often operate under tighter regulations and quality standards, resulting in fasteners with superior metallurgical properties and more precise tolerances. This translates to a lower likelihood of failures like head stripping, shank shearing, or premature corrosion—the very issues that complicate removal and lead to costly downtime. It's a strategic choice for supply chain resilience and lower total cost of ownership.


