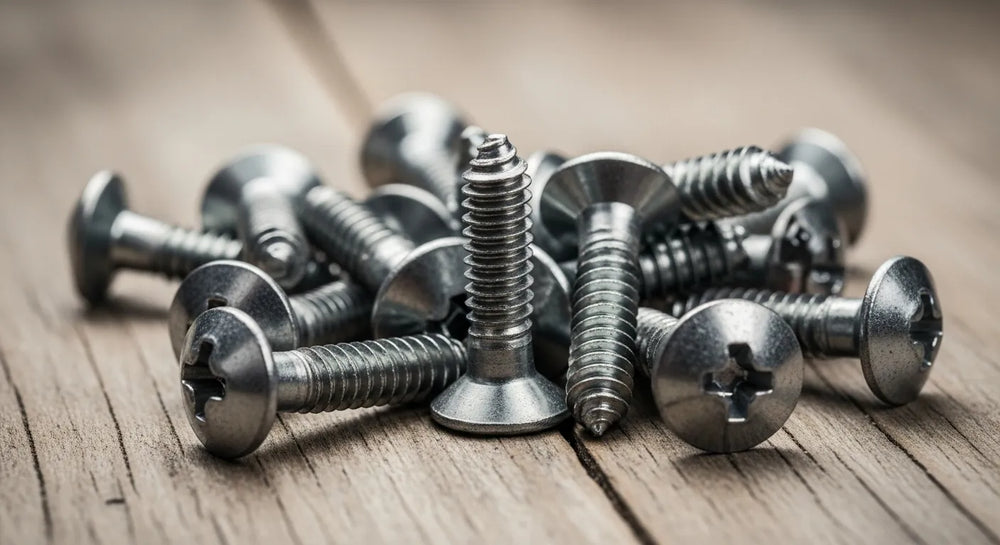
How to Remove a Screw Stuck in Metal Safely
Table of Contents
- Introduction
- The Anatomy of a Stuck Screw: Why Fasteners Fail
- Essential Preparations: Safety, Tools, and Mindset
- Gentle Giants: Initial Approaches for Less Damaged Fasteners
- Stepping Up the Game: Intermediate Removal Techniques
- The Last Resort: Destructive Methods for Stubborn Fasteners
- Prevention is Key: Mastering Fastener Selection and Installation
- Maden.co: Your Strategic Partner in Proactive Procurement and American Manufacturing
- Conclusion
- FAQ
The sudden halt of progress caused by a single, stubbornly stuck screw can be one of the most frustrating and costly experiences in any industrial, manufacturing, or MRO (Maintenance, Repair, and Operations) setting. Whether it’s a critical component on an assembly line, a rusted fastener on essential machinery, or a stripped screw delaying a prototype build, the inability to move forward translates directly into lost time, budget overruns, and diminished productivity. For a procurement manager overseeing vast inventories, an MRO buyer battling equipment downtime, or a design engineer finalizing a crucial build, understanding how to effectively and safely remove a seized fastener is not merely a handy skill—it's a critical operational imperative.
This comprehensive guide delves into the systematic approach required to tackle even the most recalcitrant screws. We will explore the common reasons why fasteners seize, detail the essential tools and safety precautions, and walk through a hierarchy of removal techniques—from the least destructive to the most aggressive. Crucially, we will also emphasize prevention, highlighting how thoughtful fastener selection and strategic sourcing of high-quality, American-made components can mitigate these issues from the outset. Our purpose is to equip you with the knowledge to resolve immediate challenges and, more importantly, to build a resilient procurement strategy that prevents future disruptions, ultimately enhancing your operational efficiency and safeguarding your investments.
Introduction
Imagine a critical production line grinding to a halt, not because of a major system failure, but due to a small, unassuming screw that refuses to budge. The ripple effect can be devastating: production schedules derailed, labor costs mounting, and delivery deadlines missed. This isn't just a minor inconvenience; it's a significant impediment to industrial excellence and a direct hit to your bottom line. The universal frustration of a seized fastener, whether corroded, stripped, or overtightened, is a challenge that virtually every professional in manufacturing, maintenance, and engineering eventually encounters. Addressing this problem effectively and efficiently is paramount to maintaining operational continuity and maximizing productivity.
In this comprehensive guide, we'll transform this common headache into a solvable problem. We will provide a structured, step-by-step approach to safely and effectively remove screws stuck in metal, beginning with gentle methods and progressing to more advanced techniques. Our discussion will cover critical preparatory steps, the necessary toolkit, and detailed execution instructions for each method. Beyond immediate solutions, we will also explore proactive strategies for preventing such occurrences, emphasizing the profound impact of sourcing high-quality, American-made components. Ultimately, mastering these removal techniques and adopting a preventative mindset, supported by reliable procurement, is crucial for maintaining operational efficiency and ensuring long-term success.
The Anatomy of a Stuck Screw: Why Fasteners Fail
Before attempting any removal technique, it’s beneficial to understand why a screw gets stuck in the first place. This insight can often guide your choice of removal method and help prevent similar issues in the future. Fasteners seize or break for a variety of reasons, each presenting its own unique challenge.
Corrosion and Galvanic Action
One of the most common culprits is corrosion. When metal fasteners are exposed to moisture, chemicals, or harsh environments, they can rust or corrode, effectively welding themselves to the surrounding material. This is particularly prevalent in outdoor applications, marine environments, or industrial settings where chemicals are present. Galvanic corrosion occurs when two dissimilar metals are in contact in the presence of an electrolyte (like water). For example, a steel screw in an aluminum housing can cause the aluminum to corrode rapidly, leading to the screw seizing. This issue highlights the importance of material compatibility in fastener selection.
Overtightening and Cross-Threading
Excessive torque during installation is a frequent cause of stuck screws. Overtightening can stretch the screw, deform its threads, or even cold-weld the threads to the female component, making removal incredibly difficult. Similarly, cross-threading—where a screw is driven into a hole at an incorrect angle, causing its threads to cut into or damage the existing threads of the mating part—creates immense friction and can seize the fastener firmly in place. This often happens due to rushed assembly or lack of precision.
Stripped Heads
A stripped screw head is perhaps the most visually frustrating problem. This occurs when the drive recess (Phillips, Torx, Hex, etc.) of the screw is rounded out, making it impossible for a screwdriver or bit to gain purchase. Common causes include using the wrong size screwdriver, applying insufficient downward pressure, using worn-out bits, or applying excessive torque, especially with power tools. For an MRO buyer facing an unexpected equipment breakdown, a stripped screw head can be a significant roadblock, demanding immediate, effective solutions to minimize costly downtime.
Thread Locker Adhesion
Many applications utilize thread-locking compounds to secure fasteners against vibration and loosening. While highly effective for their intended purpose, if a permanent (red) thread locker is used when a removable (blue) one was appropriate, or if too much compound is applied, it can effectively bond the screw to the threads, making removal extremely challenging without specialized techniques like heat application.
Sheared or Broken Shafts
In some cases, the screw's head might shear off entirely, or the shaft might break mid-thread. This can result from excessive torque, material fatigue, or inherent defects in the fastener's material. A broken shaft leaves no external point of engagement, presenting a significant challenge that often requires drilling or specialized extraction tools.
Understanding these underlying causes not only helps in the removal process but, more importantly, informs preventative measures, ensuring that future projects are built with greater resilience.
Essential Preparations: Safety, Tools, and Mindset
Before you even touch a stuck screw, proper preparation is key. This includes prioritizing safety, gathering the right tools, and adopting a patient, systematic approach. Rushing the process or using inappropriate tools can exacerbate the problem, causing further damage to the fastener, the surrounding material, or even yourself.
Safety First
Your safety is paramount. Always start by implementing essential safety measures:
- Eye Protection: Goggles or a face shield are non-negotiable, especially when drilling, grinding, or using percussive methods. Metal shards, rust particles, or chemical splashes can cause severe eye injuries.
- Gloves: Protect your hands from sharp edges, chemicals, and heat. Heavy-duty work gloves are recommended.
- Ventilation: If using penetrating oils, solvents, or applying heat (which can release fumes), ensure adequate ventilation to avoid inhaling harmful vapors.
- Work Area: Secure your workpiece. Use clamps, a vise, or stable work surfaces to prevent movement, which could lead to accidents or further damage. For large machinery, ensure it's de-energized and locked out if necessary.
- Appropriate Attire: Avoid loose clothing or jewelry that could get caught in rotating tools.
The Right Arsenal: Tools for Every Scenario
Having a comprehensive toolkit on hand will save you countless trips to the hardware store and ensure you're prepared for any eventuality.
- Penetrating Oil: Essential for breaking down rust and corrosion. Brands like Liquid Wrench or PB Blaster are highly effective.
- Manual and Impact Screwdrivers: A set of high-quality manual screwdrivers with various drive types (Phillips, flathead, Torx, Hex) is critical. An impact driver (manual or powered) can deliver a sudden rotational force combined with a downward strike, often freeing stubborn fasteners.
- Hammer and Center Punch: For marking drill points or tapping screws.
- Pliers and Vice Grips: For gripping exposed screw heads or shafts. Vice grips offer superior clamping force.
- Drill (Corded or Cordless): A variable-speed drill is essential for drilling pilot holes, using screw extractors, or drilling out fasteners.
-
Screw Extractors: These are specialized tools designed to grip and remove screws with damaged heads or broken shafts. They come in various types:
- Spiral Fluted (Easy-Outs): Tapered and threaded to bite into a drilled pilot hole.
- Straight Fluted: Similar to spiral, but with straight edges for biting.
- Left-Hand Drill Bits: Drill into the screw in a counter-clockwise direction, sometimes backing it out before an extractor is even needed.
- Rotary Tool (e.g., Dremel): With cutting wheels or grinding attachments for creating new slots or grinding down screw heads.
- Heat Gun or Small Torch: For applying heat to expand surrounding material or break down thread locker. A soldering iron can be used for smaller screws.
- Cold Spray (e.g., freeze spray): To shrink the screw itself.
- Nut Extractor Sockets: For rounded hex-head bolts.
- Files: For cleaning up damaged threads or burrs.
- Taps and Dies: For cleaning or re-cutting threads after removal, if necessary.
Patience and Persistence: The Right Mindset
Removing a stuck screw is often an iterative process. It rarely works on the first try, especially with deeply seized fasteners. Start with the least destructive methods and escalate only as necessary. Patience is key; forcing a solution too early can lead to greater damage, transforming a solvable problem into a significantly more complex and costly repair. For a procurement manager under pressure to source a specific component, understanding that a methodical approach to component removal can save money and prevent further part damage is crucial, avoiding the need to entirely replace a larger assembly due to one damaged fastener.
Gentle Giants: Initial Approaches for Less Damaged Fasteners
When faced with a stuck screw, always start with the least destructive methods. These techniques require minimal specialized tools and focus on leveraging mechanical advantage and chemical properties to free the fastener without damaging the surrounding material.
The Penetrating Oil Power Play
This is often the first line of defense, particularly for screws seized by rust or corrosion. Penetrating oils are specially formulated to creep into tiny crevices, dissolving rust and lubricating threads.
- Application: Apply a generous amount of penetrating oil directly onto the screw head and the surrounding area where the threads meet the material. For screws embedded in blind holes, try to get the oil into any visible gaps.
- Soak Time: This is critical. Resist the urge to immediately try and turn the screw. Allow the oil to soak for at least 15-30 minutes, or even several hours for severely corroded fasteners. Overnight soaking is often ideal.
- Tapping: While the oil is soaking, gently tap the screw head with a hammer. The vibrations can help the oil penetrate deeper into the threads and break the bond of rust. Be careful not to deform the screw head further.
- Reapplication: Reapply penetrating oil periodically, especially if you're leaving it to soak for an extended period.
After soaking, attempt to turn the screw slowly with the correct size screwdriver, applying firm, steady downward pressure to prevent cam-out (the bit slipping out of the head). If it starts to turn, work it back and forth a quarter turn at a time, reapplying oil, to gradually loosen the threads. This method is especially useful for an MRO buyer trying to free a rusted component on critical machinery, where minimizing damage to the surrounding part is crucial for quick repairs.
Applying Pressure and Impact
For screws that are merely very tight or slightly stubborn, combining downward pressure with rotational force can often free them.
- Manual Screwdriver with Pressure: Select the correct size and type of screwdriver bit for the screw head. Push down firmly on the screwdriver handle while slowly rotating it counter-clockwise. The downward pressure helps prevent the bit from slipping out of the screw head, especially with Phillips or Torx drives.
- Impact Driver (Manual): A manual impact driver is a tool that converts a hammer blow into a sudden, powerful rotational force. You place the appropriate bit into the driver, position it on the screw head, and strike the end with a hammer. The combined downward force and rotational jolt can often break the bond of a stubborn or slightly seized screw. This is particularly effective for Phillips head screws where stripping is common.
- Powered Impact Driver: For more robust applications, a powered impact driver (cordless or pneumatic) can provide quick, high-torque bursts. However, use caution as excessive force can strip the screw head entirely if not used correctly. Always start with a lower torque setting if possible.
Grip Enhancers for Stripped Heads
If the screw head is only slightly stripped or rounded, you might be able to create enough friction for the screwdriver bit to engage.
- Rubber Band Method: Place a wide, thick rubber band flat over the stripped screw head. Insert your screwdriver bit over the rubber band and into the screw recess. The rubber band fills the stripped gaps and provides extra grip. Apply firm, steady downward pressure and try to turn the screw slowly.
- Steel Wool/Abrasive Pad Method: Similar to the rubber band, a small piece of steel wool (or even a kitchen scouring pad) can be placed over the stripped head. The fibers can fill the damaged recess, allowing the screwdriver bit to gain purchase. This works best for shallower stripped heads.
These gentle methods are your best starting point. They are non-invasive and, if successful, can save you from more complex and potentially damaging procedures.
Stepping Up the Game: Intermediate Removal Techniques
When gentle approaches fail, it's time to employ more involved methods. These techniques may require specialized tools or a bit more technical skill, but they remain less destructive than drilling out the entire fastener.
Grasping the Head: Pliers and Vice Grips
If the screw head is accessible and slightly protruding, pliers or vice grips can provide the necessary leverage.
- Standard Pliers: For smaller screws, needle-nose pliers can sometimes get a grip on the edges of the screw head. Rotate slowly.
- Vice Grips (Locking Pliers): These are far more effective. Clamp the vice grips firmly onto the exposed edges of the screw head. Ensure you have a secure, tight grip. Once locked, use the vice grips to rotate the screw counter-clockwise. The locking mechanism allows you to maintain consistent pressure without slipping. This method is excellent for screws with rounded hex heads or those with only minimal protrusion.
The Thermal Expansion/Contraction Method
Changes in temperature can exploit the natural expansion and contraction properties of metals, helping to break a seized bond.
-
Heat Application:
- Heat Gun/Small Torch: Direct heat to the surrounding material (not directly on the screw head, initially). Heating the material around the screw causes it to expand, slightly loosening its grip on the screw threads. Apply heat for a short period (15-30 seconds), then immediately try to turn the screw while the surrounding material is still hot. Reapply penetrating oil while hot (caution: some oils are flammable, ensure good ventilation and distance from open flames).
- Soldering Iron: For very small screws in delicate materials, a soldering iron can be used to heat the screw head itself. The heat transfers down the shaft, expanding the screw and breaking down thread locker. Apply the hot tip to the screw head for about a minute before attempting to turn.
- Caution: Be mindful of the material you're heating. Avoid damaging plastics, wiring, or sensitive components.
-
Cold Application:
- Freezing Spray (e.g., electronic freeze spray): This works on the opposite principle. Apply cold spray directly to the screw head. The rapid cooling causes the screw to contract slightly. This can break the bond of rust or thread locker. Immediately after applying cold, attempt to turn the screw.
- Ice: For less precise applications, applying an ice cube to the screw head for several minutes can achieve a similar, though less dramatic, effect.
Creating Your Own Drive: Grinding a New Slot (Rotary Tool)
If a screw head is completely stripped or rounded, but still protruding, you can create a new drive slot.
- Rotary Tool (Dremel): Fit your rotary tool with a thin cutting wheel. Carefully, and with steady hands, cut a straight slot across the diameter of the screw head. The goal is to create a new slot deep and wide enough to accept a flathead screwdriver.
- Execution: Once the slot is cut, use a sturdy flathead screwdriver that fits snugly into the newly created slot. Apply firm downward pressure and slowly turn the screw. This method requires precision to avoid damaging the surrounding material.
The Screw Extractor Method: Precision Drilling and Extraction
This is a highly effective method for completely stripped screw heads or those with broken shafts, provided you can drill into the center of the fastener.
-
Pilot Hole Drilling:
- Center Punch: Use a center punch and hammer to create a small indentation directly in the center of the stripped or broken screw. This prevents the drill bit from "walking" off-center.
- Drill Bit Selection: Choose a drill bit that is smaller than the screw's core diameter. Most screw extractor sets come with recommended drill bit sizes. Using a bit that is too large can damage the threads of the surrounding material.
- Drilling: Using a variable-speed drill, start slowly and drill a pilot hole into the center of the screw. For especially tough screws, use a left-hand drill bit; sometimes, the counter-clockwise drilling action alone can loosen and back out the screw. Apply a small amount of cutting oil to the drill bit to reduce heat and friction, extending the bit's life. Drill to a depth roughly equal to the screw's diameter.
-
Extractor Insertion:
- Extractor Type: Select the appropriate screw extractor from your set. Spiral fluted extractors are common; they have a reverse-tapered thread. Straight fluted extractors offer a more aggressive bite.
- Insertion: Insert the extractor into the pilot hole. For spiral extractors, tap it gently with a hammer to ensure it seats firmly, then use a tap wrench, vice grips, or an adjustable wrench to slowly turn the extractor counter-clockwise. As it turns, its reverse threads will bite into the screw's material, eventually gripping it and backing it out.
- Patience: Apply steady, increasing torque. If the screw still doesn't budge, you may need to reapply penetrating oil and let it soak again.
When you eventually need to replace a removed screw, ensuring you select a high-quality, durable fastener is paramount. For critical applications requiring reliable self-tapping capabilities, a product like the Hi-Lo Double Lead Thread Self-Tapping Sheet Metal Screw from a trusted U.S. manufacturer can significantly reduce future risks of seized fasteners. Its unique thread design offers superior holding power and reduces installation torque, minimizing the chances of stripping.
Nut Extractor Sockets
For hex-head bolts that have become rounded or rusted to the point where a standard socket or wrench slips, specialized nut extractor sockets are invaluable. These sockets have internal spiral flutes designed to bite into the rounded edges of the fastener, providing a secure grip for removal. Simply select the closest size, tap it onto the rounded bolt head, and use a ratchet to turn.
These intermediate techniques significantly expand your capabilities for removing stubborn fasteners, offering precise and effective solutions before resorting to more drastic measures.
The Last Resort: Destructive Methods for Stubborn Fasteners
When all other methods fail, or when the value of the surrounding material outweighs the screw itself, destructive removal techniques become necessary. These methods often involve sacrificing the screw and potentially repairing the threads afterwards, but they guarantee removal.
Drilling Out the Screw Entirely
This is the ultimate solution when the screw head is completely gone, or the extractor method fails. It involves drilling away the entire screw, leaving an empty hole.
- Center Drilling: Start with a small drill bit (as used for extractors) to create a pilot hole precisely in the center of the screw. Precision here is critical to avoid damaging the surrounding threads or material.
- Progressive Drilling: Gradually increase the size of your drill bits, drilling into the center of the screw with each larger bit. The goal is to drill away the screw's core until the remaining screw material (the threads) can be easily picked out or collapsed. Use drill bits that are slightly smaller than the minor diameter of the screw's threads to avoid damaging the parent material's threads.
- Extracting Remaining Material: Once the majority of the screw's core is drilled out, use a pick, a small screwdriver, or even a tap to carefully clean out any remaining thread fragments from the hole.
- Retapping: After drilling out the screw, the original threads may be damaged or too loose. You will likely need to re-tap the hole with a slightly larger tap to create new, clean threads, or use a thread repair kit (like a Helicoil) to restore the original thread size.
- Caution: This method is the most invasive. Take your time, use cutting oil, and ensure your drill is perfectly perpendicular to the surface. For a design engineer needing specific material certifications for a new prototype, this method can be a last resort, but it emphasizes the need for high-quality fasteners from the outset to avoid such extensive repair work.
After drilling out a severely seized fastener, the integrity of the original threads might be compromised, necessitating re-tapping and a new, slightly larger screw. Proactively sourcing robust fasteners minimizes such drastic measures. For instance, robust solutions like the Steel Zinc Plated Type A Pan Slot Drive Self-Tapping Sheet Metal Screw offer dependable performance for a wide range of sheet metal applications, helping to prevent the very situations that lead to drastic removal tactics.
Welding a Nut Onto the Screw
This highly effective, but specialized, technique is for severely broken or recessed screws where other methods have failed.
- Welding Expertise: This requires welding equipment and experience.
- Process: Place a nut (slightly larger than the screw shaft, but smaller than the screw head's original diameter) over the broken screw shaft. Weld the inside of the nut to the screw shaft. The heat from welding helps to break the thread locker or rust bond, and the newly welded nut provides a strong, intact head for a wrench.
- Removal: Once the weld cools, use a wrench on the welded nut to turn and remove the screw.
Cutting Off the Head
If a screw is primarily for aesthetic purposes or if its protrusion isn't critical to the assembly, and access allows, you might simply cut off the head.
- Tools: Use a hacksaw, reciprocating saw (with a metal blade), or an angle grinder.
- Process: Carefully cut through the screw head flush with the surface. The remaining shaft will be embedded, but the visible problem is resolved. This is often a solution for furniture or non-structural components.
These destructive methods are powerful solutions when all else fails, but they come with the caveat of potential thread or material damage, often necessitating additional repair work. This further underscores the importance of prevention through quality component sourcing.
Prevention is Key: Mastering Fastener Selection and Installation
While knowing how to remove a stuck screw is invaluable, preventing them in the first place is far more efficient and cost-effective. Proactive procurement and diligent installation practices are crucial for maintaining operational uptime and extending the lifespan of your equipment and products.
Choosing the Right Fastener for the Job
The root cause of many stuck screw incidents can be traced back to improper fastener selection. Investing in the right components from the outset can save significant headaches and costs down the line.
- Material Compatibility: Always consider the materials being joined. Using dissimilar metals without proper insulation can lead to galvanic corrosion, rapidly seizing fasteners. For instance, using stainless steel fasteners with aluminum components without an inert barrier can accelerate corrosion of the aluminum.
- Thread Type and Pitch: Understand whether you need fine or coarse threads, and if a machine screw or a self-tapping screw is appropriate for your application. Incorrect thread pitch can lead to cross-threading and stripping.
- Coatings and Platings: Zinc plating, galvanization, and various corrosion-resistant coatings offer protection in harsh environments. Stainless steel (304, 316) provides inherent corrosion resistance. Match the coating to the environmental conditions.
-
Drive Type: The drive type impacts torque transfer and resistance to cam-out (when the driver bit slips out of the fastener head).
- Phillips: Common but prone to cam-out at high torques.
- Torx (Star): Excellent cam-out resistance, good for high-torque applications.
- Hex/Allen: Good torque transfer, but can strip if over-tightened or with worn keys.
- Square (Robertson): Very good cam-out resistance, popular in woodworking and certain industrial applications.
For design engineers, selecting the correct drive type is crucial for efficient assembly and preventing stripping. Fasteners with a square drive, like the Steel Zinc Plated Type A Truss Square Drive Self-Tapping Sheet Metal Screw, offer excellent torque transfer and reduced cam-out, ensuring a more secure and durable connection from the outset.
Proper Installation Techniques
Even with the best fasteners, poor installation practices can lead to problems.
- Pilot Hole Drilling: For self-tapping screws or when installing into solid material, always drill a pilot hole of the correct size and depth. This reduces stress on the fastener and prevents splitting or stripping.
- Torque Control: Overtightening is a leading cause of stripped heads and seized threads. Use torque wrenches or drivers calibrated to the manufacturer's specifications. For critical applications, ensure personnel are trained in proper torque procedures.
- Anti-Seize Compounds and Thread Lubricants: In environments prone to corrosion or high temperatures, applying anti-seize compounds can prevent fasteners from seizing and facilitate future removal. Thread lubricants can reduce friction during installation, preventing cold welding.
- Clean Threads: Ensure both male and female threads are clean and free of debris, paint, or burrs before assembly.
Regular Maintenance and Inspection
Proactive MRO (Maintenance, Repair, and Operations) is crucial. Regular inspections of bolted connections, especially in high-vibration or corrosive environments, can identify potential issues before they become critical. Lubricating fasteners during routine maintenance can also extend their life and ease future removal.
Maden.co: Your Strategic Partner in Proactive Procurement and American Manufacturing
At Maden.co, we understand that operational efficiency and supply chain resilience are non-negotiable for industrial buyers, procurement managers, MRO buyers, and design engineers. Our mission is to democratize access to American manufacturing, ensuring that quality, U.S.-made industrial components are as accessible and convenient as any global alternative. We are actively driving America's manufacturing revival, connecting industrial buyers with an unparalleled network of over 800+ verified U.S. manufacturers offering more than 2.5 million American-made products.
Building Resilience Through Domestic Sourcing
Sourcing through Maden.co isn't just about buying parts; it's about building a more secure and efficient procurement process rooted in core values:
- American Manufacturing Pride: We champion the quality, innovation, and reliability inherent in American-made products.
- Digital Innovation: Our platform provides a streamlined, user-friendly experience that transforms complex procurement into a simple, intuitive process.
- Supply Chain Transparency: Know exactly where your products come from. Our network features verified U.S. manufacturers, ensuring accountability and adherence to critical industry standards.
- Industrial Excellence: We provide access to components that meet stringent quality controls, enhancing the performance and longevity of your operations.
- Customer Empowerment: We equip buyers with the tools and access needed to make informed decisions and optimize their purchasing strategies. You can learn more about our commitment to this mission and our values here: About Us.
Tangible Benefits for Your Business
By partnering with Maden.co, you gain more than just a marketplace; you gain a strategic advantage:
- Improved Total Cost of Ownership (TCO): High-quality, durable U.S.-made components reduce the frequency of replacements, minimize downtime caused by component failures (like stuck screws), and decrease long-term maintenance costs.
- Enhanced Supply Chain Resilience: Reduce reliance on complex, extended global supply chains. Sourcing domestically mitigates risks from geopolitical instability, shipping delays, and fluctuating international tariffs, ensuring greater predictability and faster lead times.
- Reduced Procurement Friction: Our intuitive platform simplifies the search, comparison, and purchase process for hard-to-find industrial parts, saving valuable time and administrative effort.
- Ensuring Compliance: Access components that readily meet critical industry standards (e.g., DIN, NPT, ANSI), simplifying your compliance processes.
- Partnering with Verified U.S. Manufacturers: Gain confidence knowing your components come from a trusted network committed to quality and domestic production.
Streamlined Procurement with Instant Financing
A key differentiator for our platform is the availability of Instant Financing. This feature allows procurement managers and business owners to manage cash flow effectively and make larger-volume purchases without delay. Instead of being a barrier, financing becomes a strategic tool, enabling you to acquire the necessary components precisely when you need them, without straining immediate capital. You can apply for Instant Financing at checkout to streamline your capital-intensive projects, ensuring your operations never miss a beat due to capital constraints. This means you can invest in the superior quality American-made fasteners and components that prevent future issues, rather than being limited by upfront costs.
Join Our Network
Are you a qualified U.S. manufacturer producing industrial components? Expand your market reach and connect with thousands of industrial buyers who are actively seeking American-made products. Register as a vendor and join the American manufacturing revival. Let us help you grow your business and reinforce the strength of the domestic supply chain.
Conclusion
A stuck screw, while seemingly minor, can create significant bottlenecks in industrial operations, leading to costly downtime, project delays, and immense frustration. By understanding the common causes of fastener seizure and employing a systematic, patient approach to removal—starting with gentle methods and escalating only when necessary—you can effectively resolve these immediate challenges. However, the most effective strategy lies in prevention. Proactive procurement, focusing on high-quality, correctly specified, and robustly manufactured components, is paramount.
Maden.co stands as your strategic partner in this endeavor. We are committed to democratizing access to the finest American manufacturing, offering a vast catalog of over 2.5 million U.S.-made products from more than 800 verified manufacturers. Our platform not only simplifies your procurement process but also fortifies your supply chain, reduces your Total Cost of Ownership, and ensures compliance with critical industry standards. With innovations like Instant Financing available at checkout, we empower you to make strategic investments in quality that pay dividends in operational efficiency and resilience.
Don't let a stuck screw halt your progress or compromise your project's integrity. Equip yourself with the knowledge to tackle immediate problems, and for all your American-made industrial component needs, explore the unparalleled selection on Maden.co. Experience the difference that quality, transparency, and convenient financing can make for your operational efficiency and supply chain resilience. America's manufacturing revival is here, and we invite you to be a part of it. If you have specific sourcing questions or need assistance, our expert team is ready to help guide you: Contact Us.
FAQ
Q1: What's the best first step for a slightly stripped screw head?
A1: For a slightly stripped screw head, the least destructive first step is often to try the "rubber band" or "steel wool" method. Place a wide, thick rubber band or a small piece of steel wool over the stripped head, then firmly press your screwdriver bit into it. The rubber or steel wool can fill the gaps, providing enough friction for the bit to gain purchase and slowly turn the screw. Always apply firm downward pressure to prevent further stripping.
Q2: Can I use WD-40 as a penetrating oil?
A2: While WD-40 is an excellent lubricant and water displacer, it is not a dedicated penetrating oil. Dedicated penetrating oils (like PB Blaster, Liquid Wrench, or Kroil) are specifically formulated with lower surface tension and more volatile solvents, allowing them to creep into tighter spaces and dissolve rust more effectively. For truly seized screws, a specialized penetrating oil will generally yield better results.
Q3: When should I choose to drill out a screw versus using an extractor?
A3: You should typically attempt an extractor first when dealing with a stripped or broken screw, as it's generally less destructive to the surrounding material. Drill out a screw entirely as a last resort, when an extractor has failed, the screw is completely broken below the surface with no access, or if the original threads are already severely damaged and plan to be re-tapped anyway. Drilling out a screw carries a higher risk of damaging the parent material's threads, necessitating repair.
Q4: How does sourcing U.S.-made fasteners prevent future issues?
A4: Sourcing U.S.-made fasteners, especially from verified manufacturers like those on Maden.co, often leads to higher quality, consistent manufacturing standards, and rigorous material inspections. This reduces the likelihood of issues like premature corrosion, material fatigue, inherent defects leading to shearing, or imprecise threading that causes cross-threading. By using reliable, precision-engineered components, you inherently build greater resilience into your assemblies, minimizing the very problems that lead to stuck or broken fasteners in the first place, and improving your Total Cost of Ownership.


