How to Remove Plastic Shutter Anchors From Any Siding
Table of Contents
- Introduction
- Understanding the Anatomy of a Plastic Shutter Anchor
- Pre-Removal Assessment: Planning for Success
- Step-by-Step Anchor Removal Techniques
- Post-Removal: Professional Wall Repair
- Sourcing Superior Replacements: The Maden.co Advantage
- Conclusion
- Frequently Asked Questions (FAQ)
Introduction
A single stubborn plastic anchor, no bigger than your thumb, can bring an entire exterior renovation project to a grinding halt. For MRO buyers, facility managers, and contractors, what seems like a trivial task—removing old shutter fasteners—can quickly escalate into a frustrating and time-consuming problem, leading to project delays and increased labor costs. The seemingly simple plastic anchor, designed to hold fast against wind and weather, often refuses to yield without a fight, risking damage to siding, brick, or stucco in the process. This challenge is a microcosm of a larger issue in industrial procurement: the hidden costs and complexities of dealing with seemingly minor components.
This article provides a definitive, professional-grade guide on how to remove plastic shutter anchors efficiently and safely from any type of exterior wall material. We will move beyond simple DIY tips to offer a strategic approach suitable for large-scale maintenance and renovation projects. We will explore multiple removal techniques, from non-destructive extraction to controlled drilling, and provide expert guidance on troubleshooting common problems like broken or stripped anchors. Furthermore, we will discuss the critical next steps: repairing the wall surface and selecting high-quality, reliable replacement anchors.
Our goal is to empower you with the technical knowledge to tackle this common maintenance challenge while underscoring a core principle we champion at Maden.co: the profound impact that component quality has on the total cost of ownership and project success. By understanding the right techniques and sourcing superior, American-made hardware, you can transform a potential project bottleneck into a smooth, efficient part of your workflow.
Understanding the Anatomy of a Plastic Shutter Anchor
Before attempting removal, it is crucial to understand how these fasteners work. A plastic shutter anchor, often called a shutter plug or spike, is a type of expansion anchor. Its design is ingeniously simple yet effective. When inserted into a pre-drilled hole and a screw or pin is driven into its core, the anchor’s body expands, creating immense frictional force against the walls of the hole. This outward pressure is what provides the anchor’s formidable holding power, securing the shutter firmly to the building’s substrate.
This expansion mechanism is also precisely why they can be so difficult to remove. Simply pulling on the anchor head works against the very physics that make it effective. The anchor is designed to resist tensile (pulling) forces. Therefore, successful removal requires techniques that either overcome this frictional grip or bypass it entirely.
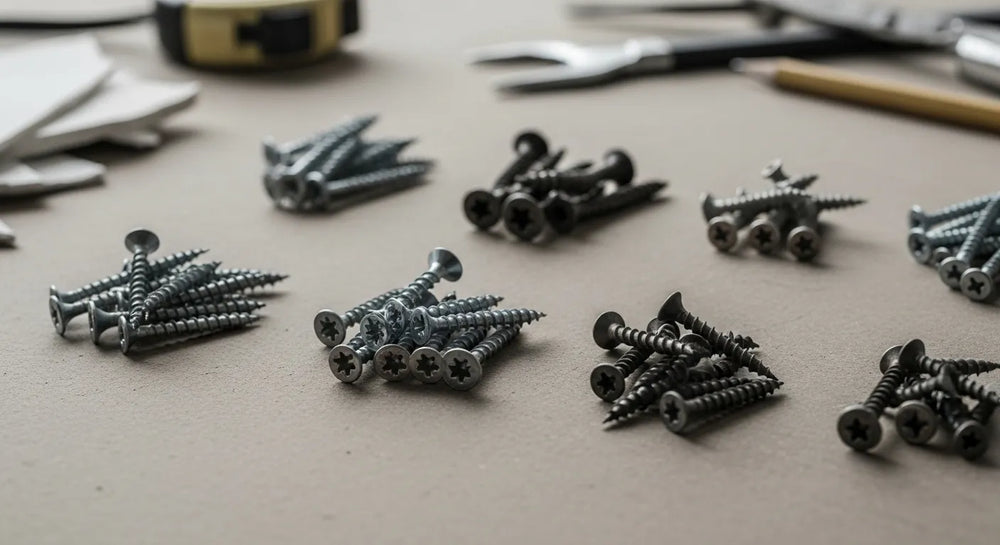
Common Types of Plastic Anchors
While the basic principle is the same, you will encounter several variations in the field. Recognizing the type can inform your removal strategy.
- Ribbed Anchors: These are one of the most common types. They feature external ribs along the shaft that bite into the surrounding material (brick, concrete, wood) for an enhanced grip. A high-quality Ribbed Plastic Anchor made in the U.S.A. is designed for maximum holding power, which means removal requires a technique that can counteract that powerful grip.
- Tapered and Ribbed Anchors: This design combines a tapered tip for easier insertion with pronounced ribs for secure fastening. The Tapered and Ribbed White Plastic Anchor is a versatile option often used in masonry and drywall, where the initial insertion requires more finesse.
- Conical and Bantam Anchors: These are typically lighter-duty anchors, often used for vinyl shutters on wood or fiber cement siding. The Conical Bantam Plastic Anchor has a cone shape that expands evenly, providing a secure fit without the aggressive bite of heavier-duty ribbed designs, sometimes making them slightly easier to remove.
Understanding these subtle design differences is a hallmark of industrial excellence. At Maden.co, we believe that empowering our customers with this level of product knowledge is fundamental to our mission. We are dedicated to providing not just parts, but solutions, and that begins with a deep understanding of the components that keep American businesses running.
Pre-Removal Assessment: Planning for Success
Rushing into the removal process without a proper assessment is a recipe for damaged siding and wasted time. A few minutes of preparation can save hours of repair work.
Step 1: Safety First
Even for a seemingly minor task, safety protocols are non-negotiable.
- Eye Protection: Always wear safety glasses. Plastic fragments can break off unexpectedly during drilling or prying, posing a significant risk to your eyes.
- Gloves: A good pair of work gloves will protect your hands from blisters and cuts when using pliers, pry bars, or drills.
- Stable Footing: If working on a ladder, ensure it is placed on a stable, level surface and that you maintain three points of contact.
Step 2: Identify the Wall Substrate
The material your anchor is set into will dictate the best removal method and the level of force you can safely apply.
- Brick or Masonry: This is a very hard, durable substrate, but the mortar joints can be brittle. Prying too aggressively against a mortar joint can cause it to crack or crumble. Drilling is often the most effective method here.
- Vinyl Siding: Vinyl is flexible and relatively soft, but it can crack, especially in cold weather. Excessive heat from drilling can also warp it. A gentle pulling or prying method is preferred. Avoid hammering directly on or near the anchor.
- Wood or Fiber Cement Siding: These materials are strong but can splinter or chip if you apply force incorrectly. Using a pry bar with a putty knife or a thin piece of wood underneath it can help distribute the pressure and prevent surface damage.
- Stucco: Stucco is a brittle cement-based plaster. It is highly susceptible to chipping and cracking. The cut-and-push method is often the safest bet for stucco to avoid costly and difficult patch repairs.
Step 3: Gather the Right Tools
Having the correct tools on hand before you begin will streamline the process. You may not need all of them, but it’s best to be prepared.
- Pliers: Needle-nose and standard slip-joint pliers.
- Vise Grips: For locking onto stubborn anchor heads.
- Utility Knife: With a sharp, fresh blade for cutting anchor heads.
- Drill: A variable-speed drill offers the best control.
- Drill Bits: A set of standard bits.
- Screws: A few coarse-threaded screws that are slightly smaller in diameter than the anchor's inner hole.
- Claw Hammer or Pry Bar: For leverage.
- Putty Knife or Small Wood Block: To protect the wall surface during prying.
Step-by-Step Anchor Removal Techniques
Here are four proven methods for removing plastic shutter anchors, ordered from the least to most aggressive. Always start with Method 1 and proceed to the next only if necessary.
Method 1: The Simple Extraction (Pliers or Vise Grips)
This is the ideal first attempt, especially for newer installations or anchors in softer materials like wood.
- Remove the Center Screw/Pin: If there is a screw or pin still in the anchor, remove it completely with a screwdriver or drill.
- Grip the Anchor Head: Firmly grasp the head of the plastic anchor with a pair of pliers or, for a more secure grip, lock a pair of vise grips onto it.
- Twist and Pull: While pulling straight out, simultaneously twist the anchor back and forth. This wiggling motion can help break the frictional bond between the anchor's ribs and the wall material.
- Apply Steady Pressure: Use consistent, firm pressure. Avoid yanking, as this can break the anchor head off, leaving the shaft stuck in the wall and complicating the removal. If it doesn’t budge with reasonable force, move on to the next method.
Method 2: The Screw and Leverage Method
This technique uses mechanical leverage to do the work for you and is one of the most effective non-destructive methods.
- Select a Screw: Choose a coarse-threaded screw (like a deck screw or lag screw) that is long enough to get a good grip and has a diameter just large enough to bite into the inside walls of the hollow anchor. Do not use a screw so large that it expands the anchor further.
- Insert the Screw: By hand or with a drill on a low-speed setting, drive the screw into the anchor. Only go in about half an inch to an inch—just enough for the threads to get a solid purchase.
-
Apply Leverage:
- Place the claw of a claw hammer under the screw head. If working on a soft surface like vinyl or wood, place a putty knife or a thin block of wood under the hammer’s head to act as a fulcrum and prevent marring the siding.
- Gently and slowly, rock the hammer back, using leverage to pull the screw—and the anchor with it—straight out of the hole.
- Alternatively, use a small pry bar for more controlled leverage.
Pro Tip: For MRO teams working on large facilities with hundreds of anchors to remove, mastering this leverage method can dramatically increase efficiency. It minimizes the risk of collateral damage, reducing the time and materials needed for subsequent surface repairs.
Method 3: The Drill-Out Method (Destructive Removal)
When an anchor is broken, stripped, or hopelessly seized, drilling it out is the most reliable, albeit destructive, solution.
- Choose the Right Drill Bit: Select a drill bit that is the same diameter as the inner hole of the anchor, or slightly larger than the screw that was originally used. The goal is to hollow out the anchor's core, causing its walls to collapse inward. Do not use a bit that is the full diameter of the anchor, as this will enlarge the hole in the wall.
- Center the Bit: Carefully place the tip of the drill bit in the exact center of the plastic anchor.
- Drill Slowly: Using a variable-speed drill on a low to medium setting, begin drilling. Apply light, steady pressure. You are drilling through plastic, not steel, so let the bit do the work. Drilling too fast can generate excessive heat, which can melt the plastic and potentially warp vinyl siding.
- Remove the Debris: As you drill, the plastic will shave away. The anchor may spin with the bit. Once you have drilled through the length of the anchor, its structure will be compromised. You can often pull out the remaining shell with needle-nose pliers or it may break apart. Use the pliers to clean any remaining plastic fragments from the hole.
This method requires a steady hand but is often the quickest way to deal with a truly stubborn fastener. It perfectly illustrates our value of Industrial Excellence—applying the right technique and tool to solve a problem efficiently and definitively.
Method 4: The Cut and Recess Method
In some situations, particularly with brittle surfaces like old stucco or when the anchor is located where it will be covered by new trim or shutters, complete removal is unnecessary and risky.
- Cut the Head Flush: Take a sharp utility knife and carefully slice off the head or flange of the plastic anchor so it is perfectly flush with the wall surface. Be extremely careful not to let the blade slip and score the siding. Multiple shallow passes are safer than one deep cut.
- Recess the Body: Use a hammer and a nail set or a sturdy punch to tap the remaining body of the anchor into the wall cavity. It only needs to be pushed in a quarter of an inch or so below the surface.
- Fill the Void: The small remaining depression can then be easily filled with an appropriate patching compound (more on this below). This method leaves the bulk of the anchor in the wall but results in a perfectly smooth surface with minimal risk of damage.
Post-Removal: Professional Wall Repair
Removing the anchor is only half the job. Leaving an open hole in the exterior of a building is an invitation for moisture intrusion, insect nesting, and energy loss. A professional finish requires proper patching.
- For Wood Siding: Use a high-quality, exterior-grade wood filler or epoxy. Press it firmly into the hole, slightly overfilling it. Once dry, sand it smooth and flush with the surrounding surface, then prime and paint to match.
- For Vinyl Siding: The best solution is a color-matched exterior caulk or a specialized vinyl repair kit. Apply the sealant into the hole, smoothing the surface with a wet finger or a caulking tool for a clean finish.
- For Brick/Masonry: Use a pre-mixed mortar repair tube. Squeeze the repair mortar into the hole, packing it tightly. Use a small trowel or putty knife to strike the surface so it matches the texture and shape of the surrounding mortar joints.
- For Stucco: Use an elastomeric stucco patch compound. These are designed to be flexible and resist cracking. Apply the patch and use a damp sponge or trowel to blend the texture with the existing stucco finish.
This attention to detail ensures the integrity and appearance of the building envelope are fully restored.
Sourcing Superior Replacements: The Maden.co Advantage
Once the old anchors are removed and the holes are patched, the final step is installing the new shutters with reliable hardware. This is a critical procurement decision. Opting for low-cost, unverified fasteners can lead to premature failure, weather damage, and the need to repeat this entire process in just a few years. This is where a strategic sourcing partner becomes invaluable.
At Maden.co, our entire mission is built on democratizing access to the vast and often hard-to-find catalog of American manufacturing. We connect industrial buyers directly with over 800 verified U.S. manufacturers, offering more than 2.5 million products. Our vision is to prove that sourcing high-quality, American-made components can be as convenient and efficient as any global alternative. You can learn more about our mission to champion American manufacturing here.
For a procurement manager under pressure to source components for a large-scale apartment complex renovation, a design engineer specifying fasteners for a new commercial building, or an MRO buyer facing an unexpected exterior repair, the ability to quickly find and procure verified, U.S.-made parts is a game-changer.
When selecting your replacement anchors, consider options engineered for longevity and performance:
- The Ribbed Plastic Anchor offers exceptional pull-out strength in a wide range of materials, making it a robust choice for high-wind areas.
- The versatile Tapered and Ribbed White Plastic Anchor is an excellent all-around option, providing easy installation and secure holding power for most standard applications.
- For lighter duty applications or when working with more delicate siding materials, the Conical Bantam Plastic Anchor provides a secure fit without creating excessive stress on the substrate.
By sourcing through our platform, you are not just buying a part; you are investing in supply chain transparency and resilience. You are partnering with manufacturers who adhere to rigorous quality standards, ensuring the components you install will perform as specified. For capital-intensive projects, this commitment to quality has a direct impact on long-term value. To help businesses manage these investments, we offer a strategic advantage: you can apply for Instant Financing at checkout to streamline your capital-intensive projects, improving cash flow without delaying critical work.
If you are a U.S. manufacturer of high-quality industrial components, we invite you to join our mission. Register as a vendor and join the American manufacturing revival.
Conclusion
Removing plastic shutter anchors is a task that demands more than just brute force; it requires a methodical approach, the right tools, and an understanding of the materials involved. By following the techniques outlined in this guide—from simple extraction to controlled drilling—professionals can tackle this common maintenance challenge efficiently while protecting the integrity of the building’s exterior.
The process serves as a powerful reminder that in the world of maintenance, repair, and operations, the quality of every single component matters. A well-made anchor installs correctly, holds securely for years, and can even be removed more easily when the time comes. This focus on quality and long-term value is the cornerstone of a resilient supply chain and a successful business.
We encourage you to solve your next procurement challenge by exploring the vast catalog of American-made products on Maden.co. From specialty fasteners to complex industrial components, find the verified parts you need to get the job done right, and leverage our Instant Financing option at checkout to make your procurement process as efficient as possible. If you have specific sourcing questions, our team is ready to help.
Frequently Asked Questions (FAQ)
1. Can I reuse old plastic shutter anchors? It is strongly advised not to reuse old plastic anchors. The removal process, no matter how careful, inevitably stresses and slightly deforms the plastic. Re-installing a used anchor compromises its expansion capability and significantly reduces its holding power, risking shutter failure in the future.
2. What is the single best tool for removing a very stubborn shutter anchor? For a non-destructive approach, the most effective tool combination is a coarse-threaded screw and a pry bar (with a wood block to protect the siding). The leverage this provides is superior to pliers alone. If the anchor is broken or this method fails, a variable-speed drill is the definitive tool for destructive, but complete, removal.
3. How do I know what size replacement anchor to buy? The new anchor should correspond to the size of the existing hole. If the hole is undamaged, you can use the same size anchor as the original. If you had to drill out the old anchor and the hole was slightly enlarged, you may need to step up to the next size anchor and use a corresponding drill bit to create a clean, uniform hole for it. Always check the manufacturer's specifications for the required drill bit size for the new anchor.
4. Why should I prioritize U.S.-made plastic anchors for my project? Choosing U.S.-made anchors from a trusted source like Maden.co provides several key advantages. You benefit from higher quality control, with plastics formulated for superior durability and UV resistance. They are manufactured to precise dimensional standards, ensuring a consistent and reliable fit. Furthermore, sourcing domestically strengthens the American supply chain, reduces lead times, and supports the industrial base that is critical to our national economy. It's an investment in quality, reliability, and American manufacturing pride.


