How to Remove Screws and Drywall Anchors Properly
Table of Contents
- Introduction
- Understanding the "Why": The Importance of Proper Removal
- Anatomy of a Drywall Anchor: Know Your Opponent
- The Professional's Toolkit: Assembling the Right Gear
- Step-by-Step Removal Techniques by Anchor Type
- Wall Repair: The Final Step to a Professional Finish
- Beyond Removal: Strategic Sourcing for Future Projects
- Conclusion
- Frequently Asked Questions (FAQ)
Introduction
A seemingly simple task—removing a screw from a drywall anchor—can quickly escalate into a frustrating and costly repair job. For a facilities manager overseeing an office reconfiguration, an MRO buyer managing building upkeep, or a contractor aiming for a flawless finish, a fist-sized hole in the wall is more than an inconvenience; it's a mark of inefficiency and an unnecessary expense. The integrity of a wall surface is a foundational element of any professional space, and knowing how to interact with it, from installation to removal, is a critical, often overlooked, skill. This process is not just about brute force; it's about understanding the mechanics of the hardware you're working with and applying the right technique to preserve the surrounding surface.
This article moves beyond simple DIY tips to provide a comprehensive, professional-grade guide on how to remove screws with drywall anchors. We will deconstruct the various types of anchors you’ll encounter, outline the proper tools for the job, and provide detailed, step-by-step instructions for removal and repair. More importantly, we'll connect this tactical knowledge to the strategic imperative of procurement and maintenance, exploring how choosing the right American-made components from the start can significantly improve the total cost of ownership and operational efficiency.
Our focus at Maden.co is to empower industrial and commercial professionals by providing direct access to the backbone of American industry. This guide embodies our commitment to industrial excellence, offering the practical knowledge needed to manage physical assets effectively, minimizing damage, reducing repair costs, and ensuring that every project, from installation to decommissioning, is executed with precision.
Understanding the "Why": The Importance of Proper Removal
Before reaching for the pliers, it's crucial to understand the implications of improper anchor removal. In a commercial or industrial setting, the consequences extend far beyond cosmetic blemishes.
Preserving Structural Integrity and Aesthetics
The most immediate risk of an improper removal is significant damage to the drywall. Prying or ripping an anchor out with excessive force can tear the paper facing of the drywall, crumble the gypsum core, and leave a crater that requires far more than a simple dab of spackle to fix. For businesses where facility appearance matters—from corporate offices to retail spaces—such damage can detract from the professional environment. Repeatedly making large repairs is inefficient and reflects poorly on maintenance standards.
Managing Total Cost of Ownership (TCO)
Every maintenance task has a cost, not just in materials but in labor. A five-minute removal and patch job is operationally insignificant. A one-hour job involving cutting out damaged drywall, installing a new piece, taping, mudding, and sanding is a significant time and cost sink. When you multiply this across dozens or hundreds of fixture changes in a large facility over its lifecycle, the financial impact becomes substantial. Proper removal technique is a direct contributor to a lower TCO for building maintenance.
Safety and Compliance
In certain applications, a damaged wall is more than an eyesore; it can be a safety concern. A poorly patched wall may not provide the same load-bearing capacity for future installations. Furthermore, understanding the full lifecycle of a component, including its removal, is part of a holistic approach to facility management that prioritizes safety and adherence to internal standards.
By treating anchor removal with professional diligence, you are not just pulling plastic from a wall; you are executing a controlled maintenance procedure designed to minimize cost, labor, and disruption. This mindset is central to operational excellence and is a value we champion by connecting buyers with durable, reliable, and well-documented U.S.-made components.
Anatomy of a Drywall Anchor: Know Your Opponent
To defeat the anchor, you must first understand its design. Different anchors employ different mechanical principles to create a secure hold in a hollow wall. This design dictates the correct removal method. Forcing a single technique on all types is the primary cause of wall damage.
Type 1: Plastic Expansion Anchors
These are the most common type of light-to-medium-duty anchors. When a screw is driven into them, the split sleeve expands behind the drywall, pressing against the inner surface to create a secure hold.
- Mechanism: Friction and expansion.
- Example: The classic Ribbed Plastic Anchor is a prime example. Its external ribs are designed to bite into the drilled hole to prevent spinning during screw installation, while the body expands to lock it in place.
- Removal Challenge: The expanded portion behind the wall makes it impossible to pull the anchor straight out through its original hole without causing damage.
Type 2: Self-Drilling / Threaded Anchors
These anchors are popular for their ease of installation, as they typically don't require a pre-drilled pilot hole. They have wide, aggressive threads that cut directly into the drywall, creating a very secure hold for medium-duty applications.
- Mechanism: Threaded friction.
- Example: A product like the Medium Duty Nylon Wall Anchor #6 Self-Drilling Drywall Zip-It® exemplifies this design. It combines a sharp, self-drilling tip with deep threads for a fast and robust installation.
- Removal Challenge: While designed to be unscrewed, the material (nylon or zinc) can sometimes strip if too much force is applied, or if the drywall around it has become soft or damaged.
Type 3: Metal Sleeve Anchors (Molly Bolts)
Molly bolts are all-metal anchors that provide significant holding power. They consist of a screw and a metal sleeve with slits. As the screw is tightened, it pulls the end of the sleeve towards the surface, causing the slitted portion to collapse and expand like a flower behind the drywall.
- Mechanism: Mechanical deformation and compression.
- Removal Challenge: The metal "flower" created behind the drywall is permanent and often wider than the installation hole, making removal of the sleeve itself extremely difficult without causing major damage.
Type 4: Toggle Bolts
For heavy-duty applications, toggle bolts are a common solution. They consist of a bolt and a spring-loaded, wing-like toggle. The toggle is folded, pushed through a hole in the drywall, and then springs open inside the wall cavity. Tightening the bolt clamps the toggle against the inner wall surface.
- Mechanism: Clamping force.
- Removal Challenge: The removal process is definitive: the toggle wing is designed to be abandoned inside the wall cavity. There is no method to retrieve it.
Understanding these mechanisms is the first step. For a procurement manager, specifying an anchor like the versatile Medium Duty Nylon Wall Anchor #8 for Drywall for a project requires understanding not only its installation and load capacity but also its eventual removal and replacement, which factors into long-term maintenance planning.
The Professional's Toolkit: Assembling the Right Gear
Using the wrong tools is as detrimental as using the wrong technique. A professional approach requires a dedicated set of tools, each with a specific purpose.
- Safety Glasses: Non-negotiable. Debris, drywall dust, or a slipping tool can cause serious eye injury.
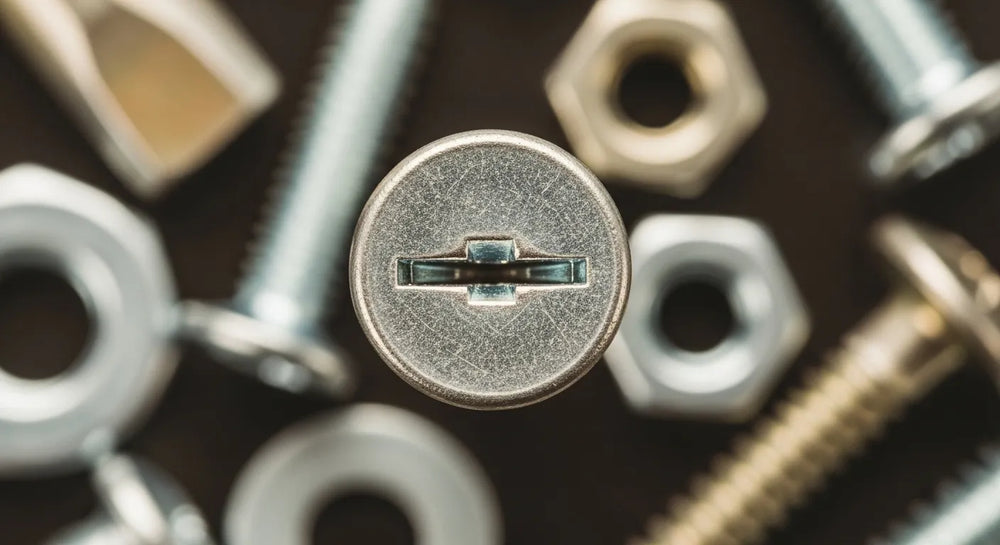
- Screwdriver Set (Manual and Powered): You need both Phillips and flat-head drivers in various sizes. A powered screwdriver with a variable clutch can speed up screw removal but must be used carefully to avoid stripping the screw head.
- Needle-Nose Pliers: Essential for gripping the flange of a plastic anchor or the head of a molly bolt sleeve. Their slender profile allows for precise work with minimal surface damage.
- Utility Knife: Used for scoring around an anchor's flange to break the paint seal, preventing the paint from tearing off with the anchor.
- Putty Knife: A flexible putty knife is used to gently pry stubborn anchor flanges and is the primary tool for applying spackle during the repair phase. A wider taping knife is useful for larger repairs.
- Hammer: Used to gently tap a screw head to disengage a molly bolt or to tap an anchor flush so it can be pushed into the wall cavity.
- Drill with Various Bits: Necessary for situations where a screw head is stripped and must be drilled out as a last resort.
Having these tools on hand transforms the task from a frustrating guessing game into a controlled, repeatable process, reflecting the kind of industrial excellence we believe in.
Step-by-Step Removal Techniques by Anchor Type
With a clear understanding of anchor types and the right tools assembled, we can now detail the specific removal procedures.
Method 1: Removing Standard Plastic Expansion Anchors
This is the most common scenario. The key is to decide whether to pull the anchor out or push it in. Pushing it in is often the path of least resistance and causes the least damage.
- Remove the Screw: Using the appropriate screwdriver, turn the screw counter-clockwise to back it out of the anchor completely.
- Assess the Flange: Examine the plastic lip (flange) of the anchor. If it sits proud of the wall, you have a good chance of grabbing it. If it's perfectly flush or recessed, pushing it through is the better option.
-
Option A: The Pulling Method (For Proud Flanges):
- Gently score the paint around the flange with a utility knife to prevent tearing.
- Grip the flange firmly with needle-nose pliers.
- Wiggle the anchor back and forth gently while pulling straight out. If it offers significant resistance, stop and proceed to Option B to avoid creating a large hole.
-
Option B: The Push-Through Method (Recommended):
- If the anchor won't pull out easily, or if the flange is flush, this is the superior method.
- You can either place a screwdriver tip on the anchor and gently tap it with a hammer, or re-insert the screw a few turns and tap the screw head.
- The goal is to push the anchor just far enough that it detaches from the hole and falls into the wall cavity.
- This method leaves a clean, perfectly round hole that is exceptionally easy to patch.
Method 2: Extracting Self-Drilling / Threaded Anchors
These anchors, like the Self-Drilling Drywall Zip-It®, are designed for easy removal.
- Remove the Fixture Screw: First, take out the screw holding the fixture in place.
- Engage the Anchor Head: The anchor itself will have a drive head, typically a Phillips head. Insert the corresponding screwdriver.
- Unscrew the Anchor: Apply firm, steady pressure and turn the screwdriver counter-clockwise. The anchor should back out of the drywall along the same threads it created during installation.
- Troubleshooting Strips: If the head begins to strip, stop immediately. Increase downward pressure and try again slowly. If it's completely stripped, you may need to grip the outer edge of the flange with pliers and try to turn it that way, or as a last resort, carefully drill out the center of the anchor.
Method 3: Dealing with Metal Sleeve Anchors (Molly Bolts)
Molly bolts require a specific sequence to disengage their locking mechanism. The goal is to remove the screw, but the sleeve will almost always remain.
- Loosen, Don't Remove: Back the screw out, but do not remove it completely. Leave it threaded in about a quarter of an inch.
- Tap to Disengage: Gently tap the head of the screw with a hammer. You should feel a slight give. This action pushes the entire assembly inward, causing the expanded "flower" behind the wall to flatten back toward the sleeve.
- Remove the Screw: Now you can fully unscrew and remove the screw.
-
Address the Sleeve: You are left with the hollow metal sleeve in the wall. You have two choices:
- Pry It Out: You can try to grip the flange with pliers and pull it out. This will likely cause moderate damage to the drywall that will need patching.
- Push It In: The cleaner method is to use a hammer and a nail set or screwdriver to tap the flange flush with the wall and then drive it slightly beneath the surface. You can then simply spackle over it. This is faster, cleaner, and more efficient.
Method 4: Conquering Toggle Bolts
This is the most straightforward removal, as there is no extraction.
- Unscrew Completely: Turn the bolt counter-clockwise until it is completely free. As you get to the last few threads, the toggle inside the wall will fall down into the wall cavity.
- Remove the Bolt: Pull the bolt out of the hole.
- The Toggle is Gone: The spring-loaded wing is now resting harmlessly at the bottom of your wall cavity. Do not attempt to retrieve it. Simply patch the remaining hole.
Wall Repair: The Final Step to a Professional Finish
Removal is only half the job. A professional finish requires meticulous repair of the resulting hole.
- Clean the Area: Use a utility knife to trim away any loose paper or crumbled gypsum around the edge of the hole. Wipe away any dust.
- Apply Spackling Compound: Using a flexible putty knife, apply a small amount of lightweight spackling compound, pressing it firmly into the hole. For the first coat, slightly overfill it, as spackle shrinks as it dries.
- Scrape Flush: Draw the putty knife across the patch at a 45-degree angle, leaving a smooth, flat surface.
- Dry and Sand: Allow the compound to dry completely according to the manufacturer's instructions. Once dry, lightly sand the area with a fine-grit sanding sponge until it is perfectly smooth and flush with the wall.
- Second Coat (If Needed): For deeper holes, a second thin coat of spackle may be necessary. Repeat the drying and sanding process.
- Prime and Paint: Always prime the patched area before painting. Primer seals the porous spackle, ensuring the final coat of paint matches the sheen and color of the surrounding wall.
Beyond Removal: Strategic Sourcing for Future Projects
This entire process highlights a crucial point for any procurement professional: the component lifecycle extends beyond installation. The ease of maintenance, repair, and removal are critical factors in the Total Cost of Ownership. This is where strategic sourcing becomes a competitive advantage.
At Maden.co, our mission is to democratize access to American manufacturing, connecting you with a network of over 800+ verified U.S. manufacturers. We believe that choosing the right component from the start is the most effective way to reduce long-term costs. When you source fasteners through our platform, you gain:
- Supply Chain Transparency: Knowing where your components come from provides traceability and quality assurance. This is a core value that underpins our entire operation. You can learn more about our mission to champion American manufacturing here.
- Access to Specification: For a design engineer specifying fasteners for a new commercial build-out or an MRO manager needing to match an existing component, access to detailed specifications is crucial. Our platform provides the data you need to make informed decisions.
- Enhanced Resilience: Relying on domestic supply chains insulates your projects from the volatility of global logistics. When you need a critical part, you can't afford to wait for a container ship. America's manufacturing revival is here, and it’s building more resilient operations for businesses like yours.
For a procurement manager under pressure to source a specific type of fastener for a large-scale project, or an MRO buyer facing an unexpected need for a bulk order of maintenance supplies, the ability to quickly find and finance verified, U.S.-made parts is a game-changer. That’s why we’ve integrated strategic tools to reduce procurement friction. For larger buys or capital-intensive projects, you can apply for Instant Financing at checkout to manage your cash flow effectively.
Furthermore, we are constantly expanding our network of American industrial excellence. If you are part of this vital ecosystem, we invite you to grow with us. Are you a U.S. manufacturer? Register as a vendor and join the American manufacturing revival.
Conclusion
Mastering how to remove screws with drywall anchors is more than a handy skill; it's a reflection of a professional commitment to quality, efficiency, and asset management. By understanding the mechanics of different anchors, using the right tools, and applying the correct techniques, you can turn a potentially damaging task into a clean and controlled procedure. This preserves the integrity of your facilities, reduces repair costs, and saves valuable labor time.
This detailed work is a microcosm of a larger business philosophy. The care taken in removing a single anchor should be the same care taken in sourcing every component for your operation. At Maden.co, we provide the platform to do just that. We empower you to build more resilient, transparent, and efficient supply chains by connecting you directly with the heart of American manufacturing.
Explore our catalog of over 2.5 million U.S.-made products and discover how our platform can streamline your procurement process. For your next project, ensure you have the highest quality components on hand and leverage tools like our Instant Financing option at checkout to make your purchasing process as efficient as your maintenance work.
Frequently Asked Questions (FAQ)
1. What's the biggest mistake people make when removing drywall anchors? The most common and damaging mistake is trying to forcefully pull out an anchor that is mechanically designed to be pushed into the wall cavity, such as a standard expansion anchor that has deployed or the sleeve of a molly bolt. This approach almost guarantees a large, torn hole in the drywall instead of a small, clean one, significantly increasing the complexity and cost of the repair.
2. Can I reuse a drywall anchor after removing it? It is strongly advised not to reuse drywall anchors, especially plastic expansion types. The removal process, whether by pulling or unscrewing, compromises their structural integrity. The plastic may be stressed, and the fins or threads designed to grip the drywall will be worn. For safety and reliability, always use a new, high-quality anchor for any new installation. Sourcing new, dependable components is always the best practice.
3. The screw is stripped and won't come out of the anchor. What do I do? If a screw head is stripped, first try placing a wide rubber band over the head before inserting the screwdriver to gain extra grip. If that fails, a dedicated screw extractor kit is the next best option. As a last resort, you may need to use a drill bit slightly larger than the screw's shank to carefully drill out the head of the screw, which will allow you to remove the fixture and then deal with the remaining anchor. If you have questions about sourcing specialty tools or fasteners, our team is ready to help. You can contact us with your specific requirements.
4. Why should my business prioritize U.S.-made fasteners like those on Maden.co? Prioritizing U.S.-made fasteners is a strategic business decision that pays dividends in several ways. It enhances supply chain resilience by reducing dependence on volatile international shipping and geopolitical instability. It ensures a higher standard of quality control and material traceability, which is critical for compliance and safety. Finally, it supports the domestic industrial base, contributing to a stronger national economy. Sourcing American-made is not just about patriotism; it's about making a smart investment in operational reliability and lowering your Total Cost of Ownership.


