
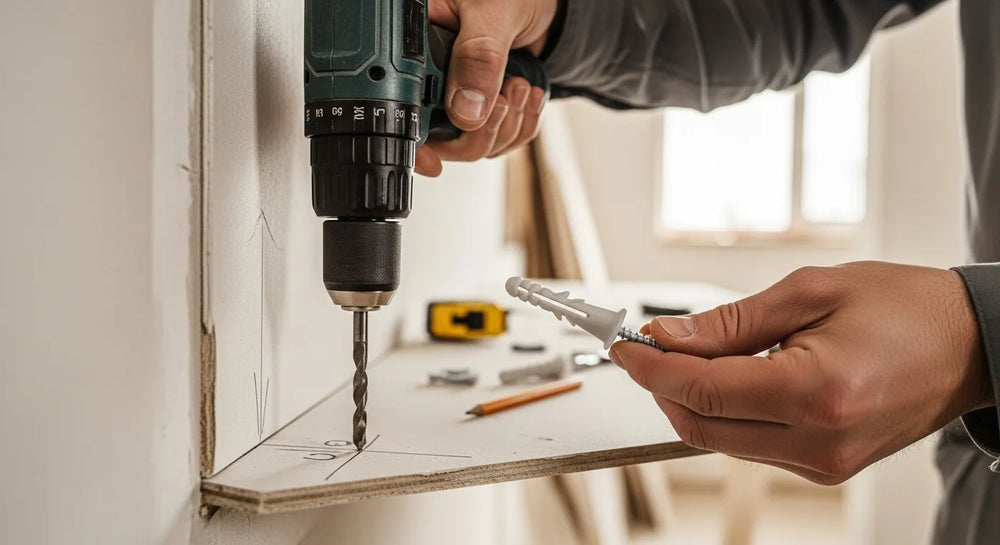
How to Remove Stuck Drywall Anchors: Pro Techniques
Table of Contents
- Introduction
- Understanding Drywall Anchor Types and Functionality
- Essential Tools and Safety Preparations
- Step-by-Step Removal Techniques for Each Anchor Type
- The Professional Finish: Repairing the Drywall
- A Strategic Approach to Procurement and MRO
- Conclusion
- Frequently Asked Questions
Introduction
A maintenance professional stares at a wall, a blueprint for a new shelving installation in hand. The problem? The wall is a minefield of old, stubborn drywall anchors left from a previous configuration. Each plastic nub and metal collar represents a potential delay—a risk of a clean, quick job turning into a multi-hour drywall repair nightmare. This small but common challenge in maintenance, repair, and operations (MRO) highlights a larger truth: the quality of the smallest components and the methods used to handle them can have a significant impact on project timelines and overall costs.
This article provides a definitive, professional-grade guide to removing even the most stubborn drywall anchors. We will move beyond simple tricks and delve into the technical methods required to preserve the integrity of your walls, saving you time, materials, and frustration. We will systematically explore the different types of anchors you’ll encounter, the essential tools for the job, and detailed, step-by-step instructions for removing each one cleanly. Furthermore, we’ll cover the critical final steps of patching and finishing the drywall for a seamless repair.
Ultimately, mastering these techniques reflects a commitment to industrial excellence. It’s about understanding that every component, from a heavy-duty bolt to a simple wall anchor, plays a role in the efficiency and success of an operation. This guide will equip you with the knowledge to handle these common MRO tasks with the precision and confidence of a seasoned professional.
Understanding Drywall Anchor Types and Functionality
Before you can effectively remove an anchor, you must first understand its design and how it secures itself within the wall cavity. Using the wrong technique for a specific anchor type is the fastest way to create a larger problem. For procurement managers and MRO buyers, specifying the correct anchor for an application is just as important as knowing how to remove the old ones. The choice affects installation speed, load-bearing capacity, and ease of future removal. At Maden.co, we connect businesses with a vast catalog of American-made industrial components, ensuring you can source the precise fastener for any job.
Common Drywall Anchor Categories
Let's break down the most common types of anchors you will encounter in commercial and industrial settings.
Expansion Anchors (Ribbed Plastic Anchors)
These are arguably the most common type of light-to-medium-duty anchor. They consist of a plastic, cone-shaped sleeve, often with ribs or "wings" along the side.
- How They Work: The anchor is inserted into a pre-drilled hole. As a screw is driven into the sleeve, the plastic expands or splits behind the drywall, creating pressure that holds it securely in place. The ribs help prevent the anchor from spinning during installation.
- Removal Challenge: Their expansion mechanism can make them difficult to pull straight out, especially if they were installed correctly and are tightly engaged with the gypsum. Using a quality, U.S.-made Ribbed Plastic Anchor from the start ensures a reliable hold and more predictable material behavior during removal.
Self-Drilling Anchors (Threaded or "Zip-It" Style)
These anchors are designed for fast installation and are common in applications where numerous fixtures need to be mounted quickly.
- How They Work: Typically made of nylon or a zinc alloy (like Zamak), these anchors have aggressive, wide threads and a sharp, self-drilling tip. They are screwed directly into the drywall using a screwdriver or drill, cutting their own threads into the gypsum panel. A screw is then inserted into the center of the anchor to mount the fixture.
- Removal Challenge: While they are designed to be unscrewed, problems arise if the head becomes stripped or if the anchor was over-tightened, compromising the surrounding drywall. In such cases, the anchor may just spin in place rather than backing out. A high-quality Medium Duty Nylon Wall Anchor #6 Self-Drilling Drywall Zip-It® made in the USA offers superior material strength, reducing the likelihood of a stripped head.
Sleeve-Type Anchors (Molly Bolts)
Molly bolts, or hollow-wall anchors, are a type of metal sleeve anchor that provides significant holding power for medium-to-heavy loads.
- How They Work: The anchor consists of a metal sleeve with a screw. After being inserted into a pre-drilled hole, the screw is turned, which causes the sleeve to crumple and expand behind the drywall, forming strong, spider-like legs that brace against the interior surface.
- Removal Challenge: These are among the most difficult to remove completely. The expanded metal sleeve is not designed to be extracted through the small installation hole. Attempting to pull it out with force will cause significant damage to the drywall.
Toggle Bolts
For the heaviest applications, toggle bolts provide exceptional strength by distributing the load over a large area behind the drywall.
- How They Work: A toggle bolt consists of a machine bolt and a spring-loaded, wing-like toggle. The wings are collapsed, pushed through a pre-drilled hole, and then spring open inside the wall cavity. As the bolt is tightened, the wings are drawn tight against the back of the drywall.
- Removal Challenge: By design, the toggle mechanism is impossible to remove through the installation hole. The removal process involves sacrificing the toggle itself.
Essential Tools and Safety Preparations
Having the right tools is non-negotiable for a clean and efficient removal process. Attempting the job with inadequate equipment is a recipe for damaged walls and personal frustration.
The Professional’s Toolkit
- Screwdrivers: A full set of Phillips and flathead screwdrivers is essential.
- Needle-Nose Pliers: Crucial for gripping anchor lips or the heads of partially inserted screws.
- Utility Knife: A sharp blade is needed for scoring around anchor heads and preparing holes for patching.
- Hammer: For tapping screws, punches, or putty knives.
- Power Drill: With a full set of drill bits, including a countersink bit for preparing holes for patching.
- Screw Extractor Kit: A valuable asset for dealing with stripped screw heads inside anchors.
- Putty Knife: A flexible 1.5-inch or 2-inch knife for applying spackle and providing leverage.
- Spackling Compound or Joint Compound: For patching holes.
- Fine-Grit Sandpaper (120-220 grit): For smoothing the dried patch.
- Primer and Touch-Up Paint: For a professional finish.
Critical Safety Precautions
Safety is the cornerstone of industrial excellence. Before starting any work, take a moment to assess the situation and ensure a safe environment.
- Wear Safety Glasses: Always protect your eyes from flying debris, gypsum dust, and metal or plastic fragments.
- Check for Utilities: Before drilling, cutting, or punching into a wall cavity, use a stud finder with AC wire and pipe detection capabilities. Accidentally hitting electrical wiring or plumbing can lead to serious injury and costly repairs.
- Use Tools Correctly: Ensure you are using the right tool for the job and handling it as intended. A slipping screwdriver or an improperly secured drill bit can cause injury.
Step-by-Step Removal Techniques for Each Anchor Type
Here we detail the professional methods for removing each type of stuck anchor. Always start with the least destructive method first.
Removing Plastic Expansion Anchors
These anchors are ubiquitous, and mastering their removal is a core skill.
Method 1: The Screw and Pliers Technique (Least Destructive)
This method is the first you should always attempt for plastic anchors with a collar or lip.
- Select the Right Screw: Find a screw that threads snugly into the anchor. The original screw is ideal.
- Insert the Screw: Turn the screw into the anchor just a few rotations—enough to get a solid grip but not enough to cause the anchor to expand further.
- Grip and Pull: Use needle-nose pliers or the claw of a hammer to grip the head of the screw.
- Leverage and Extract: Place a putty knife or a small block of wood against the wall next to the screw head to act as a fulcrum. This protects the wall surface. Gently and steadily pull the screw and anchor straight out. You may need to wiggle it slightly to loosen its grip.
Method 2: The Push-Through Method
If the anchor lacks a lip or is flush with the wall and won't budge, this is a viable, low-damage alternative.
- Remove the Screw: Completely remove the screw from the anchor.
- Recess the Anchor: Use a flathead screwdriver or a nail set and gently tap the head of the plastic anchor with a hammer until it sits just below the surface of the drywall (about 1/8 inch).
- Patch Over: Since the anchor is now recessed, you can simply apply spackle directly over it, effectively burying it in the wall. This is often faster and cleaner than trying to extract a stubborn, flush-set anchor.
Method 3: The Drill-Out Method (For Stubborn Anchors)
This is a more aggressive method for when the anchor is completely stuck or broken.
- Select a Drill Bit: Choose a drill bit that is slightly larger in diameter than the screw hole in the anchor, but smaller than the anchor's total outer diameter.
- Drill Slowly: Set your drill to a low speed. Carefully drill into the center of the plastic anchor. The goal is to hollow out the anchor, causing its structure to collapse.
- Collapse and Remove: As you drill, the plastic will break apart. You can then use needle-nose pliers to pull out the remaining fragments or simply push them into the wall cavity.
For facilities undergoing extensive renovations, having a reliable stock of replacement anchors is critical. Sourcing a consistent, quality product like the U.S.-made Medium Duty Nylon Wall Anchor #8 for Drywall ensures that new installations are secure and standardized.
Removing Self-Drilling (Threaded) Anchors
These are designed for easy removal, but complications can arise.
Standard Removal
Simply use a Phillips screwdriver to turn the anchor counter-clockwise. It should back out of the wall just like a large screw.
Troubleshooting: The Spinning Anchor
If the anchor spins in place without backing out, the surrounding drywall has been stripped.
- Apply Outward Pressure: Wedge the edge of a thin putty knife or a flathead screwdriver under the lip of the anchor.
- Maintain Pressure and Unscrew: While applying gentle outward pressure with the knife, use your other hand to slowly back the anchor out with a screwdriver. The pressure will help the threads catch on what remains of the solid gypsum.
Troubleshooting: The Stripped Head
If the Phillips head of the anchor is stripped, you cannot get a grip to turn it.
- Use a Screw Extractor: This is the most professional solution. A screw extractor bit is designed to bite into stripped metal or plastic as you turn it counter-clockwise.
- Cut a New Slot: If you don't have an extractor, you can carefully use a rotary tool with a cutting wheel to cut a new, straight slot into the anchor's head, allowing you to use a flathead screwdriver.
Removing Metal Sleeve Anchors (Molly Bolts)
Remember, the goal here is not to pull the expanded sleeve out of the wall.
Method 1: The Punch-Through Technique
This is the standard and cleanest method for removing molly bolts.
- Unscrew the Bolt: Using a screwdriver, turn the bolt counter-clockwise. You will feel resistance as the sleeve begins to draw closer to the back of the drywall. Continue turning until the bolt is almost completely out but still threaded in the anchor.
- Tap it In: Place the screwdriver tip on the head of the screw and give it a firm tap with a hammer. This will cause the bolt to push the expanded sleeve off its threads, breaking it free. The sleeve will fall harmlessly into the wall cavity.
- Remove the Bolt: The bolt should now be loose. You can fully unscrew it and remove it from the wall, leaving only a small, clean hole.
Method 2: Drilling Out the Head
Use this method if the punch-through technique fails or if the anchor is damaged.
- Use a Metal-Drilling Bit: Select a drill bit designed for metal that is slightly larger than the diameter of the screw.
- Drill the Head: Carefully drill into the center of the bolt head. Your goal is to sever the head from the flange of the anchor sleeve.
- Push it Through: Once the head is drilled off, the rest of the sleeve will be loose. Use a screwdriver or punch to push the remainder of the anchor into the wall cavity.
Removing Toggle Bolts
This is the most straightforward removal process, as the anchor is designed to be left behind.
- Unscrew the Bolt: Simply unscrew the bolt from the fixture and the toggle completely.
- Push the Toggle: As you remove the last threads of the bolt, the spring-loaded toggle wings will fall down inside the wall cavity.
- Remove the Bolt: Pull the bolt out of the hole. The job is complete, leaving only the hole to be patched.
The Professional Finish: Repairing the Drywall
A successful removal is only half the job. A professional finish requires a seamless patch that is invisible after painting.
- Step 1: Prepare the Hole: Use a utility knife to clean up the edges of the hole, removing any frayed paper or loose gypsum. For a stronger patch, you can slightly bevel the edge of the hole inward (creating a small V-groove). This gives the patching compound more surface area to adhere to.
- Step 2: Apply the First Coat: Using a flexible putty knife, apply a small amount of spackling or joint compound, pressing it firmly into the hole. The goal is to slightly overfill the hole.
- Step 3: Scrape it Smooth: In one smooth motion, scrape the putty knife over the patch, holding it at a 45-degree angle to the wall. This will remove excess compound and leave a flat, level surface.
- Step 4: Let it Dry and Apply a Second Coat: Allow the compound to dry completely according to the manufacturer's instructions. It will likely shrink slightly. Apply a very thin second coat, feathering the edges out beyond the original patch to blend it with the surrounding wall.
- Step 5: Sand Smooth: Once the final coat is fully cured, lightly sand the area with fine-grit sandpaper (180-220 grit) until it is perfectly smooth and flush with the wall. Use a light touch to avoid damaging the paper on the drywall.
- Step 6: Prime and Paint: Wipe away all sanding dust with a damp cloth. Apply a coat of primer over the patch. Primer seals the porous compound, ensuring the final coat of paint has a uniform sheen and color. Once the primer is dry, apply your matching wall paint.
A Strategic Approach to Procurement and MRO
The task of removing a single drywall anchor can feel minor, but when scaled across a large facility or multiple job sites, the cumulative time and cost of dealing with failed or improper fasteners become significant. This is where a strategic approach to MRO procurement pays dividends. The Total Cost of Ownership (TCO) of a component goes far beyond its purchase price. It includes the cost of installation, potential for failure, time spent on removal, and cost of repair.
At Maden.co, our entire business model is built on strengthening American industry from the ground up. You can learn more about our mission to champion American manufacturing here. We believe that providing direct access to over 2.5 million products from a network of more than 800 verified U.S. manufacturers empowers businesses to build more resilient and efficient operations. When a design engineer or MRO buyer sources components through our platform, they are not just buying a part; they are investing in supply chain transparency, industrial excellence, and verifiable quality. This reduces the risk of rework and delays caused by substandard materials. America's manufacturing revival is here, and it's being driven by businesses making the strategic choice to source domestically.
For large-scale renovation projects or unexpected capital-intensive repairs, we understand that managing cash flow is paramount. That's why we offer a strategic advantage to our partners. To help you acquire the necessary materials without disrupting your budget, you can apply for Instant Financing at checkout to streamline your capital-intensive projects. This empowers you to make larger, more efficient purchases while maintaining financial flexibility.
If you are a U.S. manufacturer producing high-quality industrial components, we invite you to be part of this movement. Register as a vendor and connect your products with thousands of American businesses committed to building a stronger domestic supply chain.
Conclusion
What begins with a stuck drywall anchor ends with a broader understanding of operational efficiency. By mastering the correct removal techniques for each anchor type and committing to a professional-grade repair process, you save time, reduce material waste, and uphold a higher standard of work. This attention to detail is a hallmark of excellence.
More importantly, this process should encourage a proactive mindset. The best way to deal with a stuck anchor is to prevent it from happening in the first place by using high-quality, application-appropriate fasteners from reliable sources. This is the foundation of a sound MRO strategy.
Don't let a small component cause a major project delay. We encourage you to explore our vast catalog of U.S.-manufactured fasteners and industrial supplies. Equip your team with the right parts for the job and experience a more resilient, transparent, and efficient procurement process. For any questions on sourcing or specifications, our expert team is ready to help; please don't hesitate to contact us.
Frequently Asked Questions
1. What's the biggest mistake people make when removing drywall anchors? The most common and damaging mistake is resorting to brute force. Trying to rip an anchor out with pliers without understanding its mechanism almost always results in a large, torn crater in the drywall, turning a one-minute task into a thirty-minute repair. The key is to use finesse and the correct technique for the specific anchor type.
2. Can I reuse a drywall anchor after I've removed it? It is strongly discouraged. Most anchors, particularly plastic expansion types, are designed for single use. The process of both installation and removal stresses and deforms the material, compromising its structural integrity. Reinstalling a used anchor introduces a significant risk of fixture failure. For safety and reliability, always use a new, high-quality anchor.
3. Is it always necessary to patch the hole after removing an anchor? If you plan to install a new, larger fixture in the exact same spot, you might be able to drill the hole out and use a larger anchor or a toggle bolt. However, for a professional aesthetic or if the hole is no longer needed, it's essential to properly patch, sand, and paint the area to restore the wall's original finish and structural integrity.
4. What if I don't know what kind of anchor is in the wall? Start by observing the anchor's head. If you see a plastic collar around the screw, it's likely an expansion anchor. If the entire head has a Phillips slot and appears to be one piece, it's probably a self-drilling anchor. If the flange is metal, it's a molly bolt. Partially backing out the screw can also provide clues. If you need assistance identifying fasteners for a large-scale project, our expert team is here to help; just reach out to us for support.


