
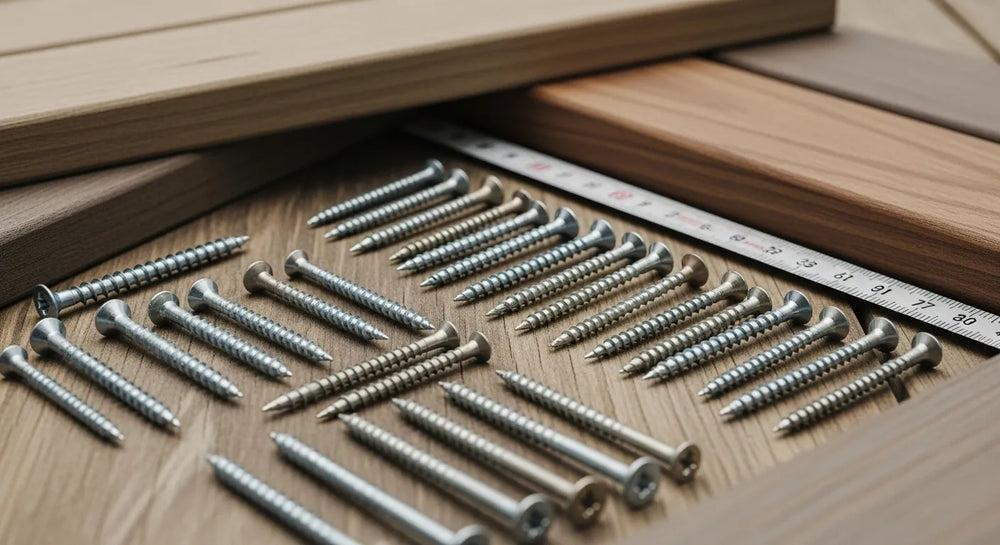
How to Remove Tapcon Screws from Concrete
Table of Contents
- Introduction
- Understanding Concrete Screws and the Importance of Proper Removal
- Pre-Removal Assessment and Tool Preparation
- The Standard Removal Process: A Step-by-Step Guide
- Troubleshooting: How to Handle Stubborn and Damaged Screws
- After the Removal: What to Do with the Empty Hole
- The Maden.co Advantage: Building Resilient Supply Chains
- Conclusion
Introduction
A single, stubborn fastener can bring an entire project to a halt. For any maintenance professional, facility manager, or engineer involved in retrofitting, renovating, or decommissioning a space, this scenario is all too familiar. You're tasked with removing old racking, machinery, or fixtures anchored securely into a concrete floor or wall, but the very hardware designed for maximum holding power now presents a significant removal challenge. The humble concrete screw, a cornerstone of industrial construction, becomes a time-consuming obstacle. This isn't just an inconvenience; it's a direct hit to project timelines and labor budgets. This post is designed to address this precise challenge head-on. We will provide a detailed, step-by-step guide for safely and efficiently removing Tapcon screws from concrete, covering everything from initial assessment and tool selection to tackling the most common problems like stripped heads and broken fasteners. At Maden.co, we believe that industrial excellence extends through the entire lifecycle of a component, from seamless installation to methodical removal, which is why empowering you with this practical knowledge is central to our mission.
Understanding Concrete Screws and the Importance of Proper Removal
Before diving into the "how," it's crucial to understand the "what" and "why." Concrete screws, often known by the popular brand name Tapcon, are high-performance fasteners specifically engineered to tap their own threads into pre-drilled holes in concrete, brick, or block. Their design, featuring specialized high-low threads and hardened steel construction, creates immense frictional resistance, providing the incredible holding power required for industrial applications.
This robust design is precisely why their removal requires a thoughtful approach. Attempting to brute-force a concrete screw can lead to a cascade of problems:
- Stripped Screw Heads: Applying incorrect torque or using the wrong size bit can round out the drive recess (whether Phillips or hex), making it impossible for a tool to get a grip.
- Snapped Fasteners: Excessive force, especially on a corroded or seized screw, can cause it to shear off below the surface, creating a much more complex and time-consuming extraction problem.
- Damage to the Concrete Substrate: Using improper leverage or aggressive techniques can chip, crack, or spall the concrete around the anchor point. This compromises the structural integrity of the surface and necessitates costly and often visible repairs.
For a procurement manager, these issues translate directly into higher Total Cost of Ownership (TCO). A simple removal task that spirals into a multi-hour repair job with added material costs is a tangible loss. For an MRO buyer, it means extended downtime for the equipment or area being serviced. This underscores the core value of Industrial Excellence—viewing every task, no matter how small, through the lens of efficiency, safety, and long-term value. Proper removal isn't just about getting the screw out; it's about preserving the asset it was secured to and ensuring the workspace is ready for its next phase with minimal friction.
Pre-Removal Assessment and Tool Preparation
Success in removing a concrete screw begins before you even pick up a drill. A few moments of careful assessment and preparation can save you hours of frustration.
Identifying the Screw Head Type
The first step is to correctly identify the type of screw head you're dealing with, as this will dictate your primary tool choice.
- Hex Head: This is one of the most common types in industrial settings. They feature an external hexagonal head and are removed using a matching socket or nut driver. The multiple points of contact provided by a socket make them less prone to stripping than other types when removed correctly. A great example of a quality American-made version is this Hex Head Concrete Screw, designed for reliable performance.
- Phillips or Flat Head: These are countersunk screws designed to sit flush with the material's surface. They require a specific Phillips or flat-head screwdriver bit. It is absolutely critical to use the exact size bit to fill the recess completely; using one that is too small is the number one cause of stripping. For applications requiring a flush finish and corrosion resistance, products like our U.S.-Made Steel Blue Ruspert Ceramic Coating Flat Phillips® Drive Concrete Screw are a common choice.
Your Essential Toolkit
Gathering the right tools beforehand prevents unnecessary trips back to the toolbox and ensures you're prepared for potential challenges.
Safety First: Always prioritize personal protective equipment (PPE). Concrete dust and metal shards are serious hazards.
- Safety Glasses or Goggles: Non-negotiable for protecting your eyes from flying debris.
- Work Gloves: Protect your hands from sharp edges and improve your grip.
Primary Removal Tools:
- Variable Speed Drill/Driver with Reverse Function: This is your workhorse. The variable speed allows you to start slowly and apply controlled torque, which is key to preventing stripping.
- Impact Driver (Use with Caution): An impact driver can be highly effective for breaking loose stubborn screws with its combination of rotational force and concussive blows. However, it can also easily strip or snap a screw if not used judiciously. Use it in short bursts on the lowest setting first.
- Socket Set or Nut Drivers: For hex head screws. Ensure you have the correct size for a snug fit.
- High-Quality Screwdriver Bit Set: For Phillips and flat head screws. Again, the fit is paramount. A fresh, unworn bit is always best.
Troubleshooting and Support Tools:
- Locking Pliers (Vise-Grips): Indispensable for grabbing onto stripped or damaged hex heads.
- Pry Bar or Cat's Paw: For applying gentle upward leverage on screws that are spinning in place.
- Penetrating Oil (e.g., WD-40, PB Blaster): Helps to loosen screws that are seized due to rust or corrosion.
- Wire Brush (Steel or Brass): For cleaning out the screw head recess of dirt, paint, or rust to ensure your tool can seat properly.
- Hammer: For tapping your bit into a dirty recess or for use with other tools.
The Standard Removal Process: A Step-by-Step Guide
With your tools gathered and the screw type identified, you can proceed with the removal. The key here is patience and control.
Step 1: Prepare the Work Area and Yourself
Ensure the area around the screw is clear of any obstacles. If you are working on a piece of equipment, make sure it is de-energized and stable. Put on your safety glasses and gloves.
Step 2: Clean the Screw Head
This simple step is often overlooked but is critically important. Use a wire brush to scrub out the recess of the screw head. If it's a Phillips head, you can use a pick or a small nail to clear any packed-in dirt, dried paint, or rust. Your driver bit or socket needs to seat as deeply and snugly as possible. A poor connection is a guaranteed way to strip the head.
Step 3: Apply Penetrating Oil (If Needed)
If the screw is in a damp environment or shows any signs of rust, apply a small amount of penetrating oil around the head. Let it sit for 10-15 minutes to allow it to wick down the threads and break the bonds of corrosion. This can make a significant difference, especially with older installations.
Step 4: Engage the Tool
Select the correct bit or socket. Confirm it's a tight fit with minimal wobble. Insert the bit into your drill/driver and set the drill to its reverse setting. Also, set the drill's clutch to a mid-to-high torque setting. This will prevent the drill from stopping prematurely but will still disengage if the screw is completely seized, which can save the screw head from stripping.
Step 5: Execute the Removal
- Apply Firm, Direct Pressure: Position the drill so it is perfectly aligned with the screw's axis. Push firmly into the screw. This downward pressure is essential to keep the bit fully engaged in the head and is the single best defense against stripping.
- Start Slowly: Begin squeezing the drill's trigger very slowly. You want to feel the screw begin to break loose. A sudden burst of high speed and torque is more likely to strip the head than remove the screw.
- Maintain Pressure and Increase Speed: Once the screw breaks free and begins to turn, you can gradually increase the speed. Continue to apply firm inward pressure throughout the entire process until the screw is completely backed out of the hole.
For most concrete screws, this controlled and methodical process will be all that is required for a successful removal.
Troubleshooting: How to Handle Stubborn and Damaged Screws
In the real world of MRO and facility maintenance, things don't always go according to plan. Screws get painted over, corrode, or were installed with excessive force. Here’s how to handle the most common removal problems.
Scenario 1: The Screw Head is Stripped
This is arguably the most frequent issue. Your approach will depend on the head type.
- For Stripped Hex Heads: This is where locking pliers become your best friend. Clamp the pliers onto the outside of the hex head as tightly as possible. Ensure you have a solid grip. With the pliers locked on, you can now turn them counter-clockwise to back the screw out. You may need to readjust your grip as the screw emerges.
-
For Stripped Phillips/Flat Heads: This is more challenging.
- The Rubber Band Trick: Place a wide rubber band over the stripped head and then press your screwdriver bit firmly into it. The rubber can sometimes fill the gaps and provide the extra friction needed to grip the screw.
- Use a Screw Extractor: A screw extractor kit (like an "Easy Out") is a purpose-built tool for this job. It involves drilling a small pilot hole into the center of the screw head and then using a tapered, reverse-threaded extractor bit to bite into the screw and back it out.
- Cut a New Slot: If you have access to a rotary tool (like a Dremel) with a cutting wheel, you can carefully cut a new, straight slot across the screw head. This allows you to use a large flat-head screwdriver to remove it.
Scenario 2: The Screw Spins But Won't Come Out
If you can hear the drill turning the screw but the screw isn't backing out, it means the threads in the concrete have been stripped out. The screw is no longer engaged with the base material.
To solve this, you need to apply upward force while turning the screw. Wedge the claw of a pry bar, a cat's paw, or the edge of a sturdy flat-head screwdriver under the screw's head. Apply gentle upward pressure to lift the screw as you simultaneously operate the drill in reverse. This pressure will hopefully engage the remaining threads and allow the screw to back out.
Scenario 3: The Screw is Snapped or Broken
This is the worst-case scenario. A screw that has snapped off flush with or below the concrete surface cannot be easily grabbed.
- If a Stub is Protruding: Even a small amount of exposed shank is enough. Use locking pliers to get the tightest possible grip and carefully turn it counter-clockwise.
- If It's Flush or Recessed: This requires more advanced techniques. The most common solution is to drill out the remainder of the screw. You'll need a high-quality drill bit designed for hardened steel. Start with a small bit to create a pilot hole and progressively move to larger bits until the screw is obliterated. Be aware that this process can easily damage the surrounding concrete and is often a last resort. In many cases, it is more efficient to simply leave the broken stud in place, patch over it, and drill a new hole for a new anchor a few inches away.
Choosing high-quality fasteners from the start, such as our American-made 1/4" x 2-3/4" Flat Head Concrete Screws, can significantly reduce the risk of snapping due to superior material tensile strength and adherence to strict manufacturing tolerances.
After the Removal: What to Do with the Empty Hole
Once the screw is out, you're left with an empty hole. You have two primary options:
- Reusing the Hole: If the removal was clean and the threads inside the hole appear intact, you may be able to reuse it. Clean the hole thoroughly with a vacuum or compressed air to remove all dust and debris. You may need to use a new screw of the same diameter or, in some cases, one that is slightly larger to ensure a tight fit.
- Patching the Hole: If the hole is damaged or will no longer be used, it's essential to patch it. This prevents it from collecting water and debris, which can lead to further cracking, and eliminates a potential trip hazard. Use a high-quality hydraulic cement or a two-part epoxy concrete patching compound. Clean the hole, mix the compound according to the manufacturer's directions, and pack it firmly into the hole using a putty knife. Smooth the surface to be flush with the surrounding concrete.
The Maden.co Advantage: Building Resilient Supply Chains
The challenges of removing a difficult fastener highlight a broader principle we champion at Maden.co: the immense value of starting a project with superior components. Our mission is to democratize access to American manufacturing, connecting industrial buyers directly with over 2.5 million products from a network of more than 800 verified U.S. manufacturers. We are building the definitive platform that proves sourcing American-made components is not only a patriotic choice but a strategic business decision. You can learn more about our foundational principles and our vision for the future of American industry by visiting our About Us page.
When you source fasteners through our marketplace, you are investing in:
- Supply Chain Transparency: You know exactly where your components are coming from, ensuring compliance and quality control.
- Industrial Excellence: Our vendors adhere to rigorous manufacturing standards, producing fasteners that perform reliably during both installation and, when necessary, removal.
- Customer Empowerment: Our platform reduces procurement friction, allowing you to find the exact part you need quickly, from hex cap screws to specialized hydraulic fittings.
For a procurement manager under pressure to source a specific DIN-compliant fastener, a design engineer needing material certifications for a new prototype, or an MRO buyer facing an unexpected equipment breakdown, the ability to quickly find and finance a verified, U.S.-made part is a game-changer. We understand that large-scale projects and major repairs require significant capital outlay. That’s why we offer a strategic tool to help manage your cash flow. You can apply for Instant Financing at checkout to streamline your capital-intensive projects, making it easier to acquire the high-quality components you need without delay.
And for the manufacturers who embody the spirit of American ingenuity, we invite you to join us. Are you a U.S. manufacturer? Register as a vendor and join the American manufacturing revival. If you have any specific sourcing questions or need help navigating our extensive catalog, our expert team is here to assist. Please don't hesitate to contact us.
Conclusion
Removing a Tapcon screw from concrete is a task that demands more finesse than force. By properly identifying the fastener, preparing the right tools, and applying a methodical, patient approach, you can handle the vast majority of removals without issue. For those inevitable stubborn screws, the troubleshooting techniques outlined above will equip you to tackle stripped heads, spinning screws, and even broken fasteners with confidence.
Ultimately, the entire lifecycle of a component matters. The quality of the initial installation, driven by superior American-made parts, directly impacts the ease of future maintenance and removal. By building a more resilient, transparent, and domestic supply chain, you're not just buying a part; you're investing in operational efficiency and a lower total cost of ownership. We encourage you to explore the Maden.co catalog and discover how our platform can empower your procurement process. Equip your next project with the reliability of U.S.-made components and leverage the strategic advantage of Instant Financing at checkout to make it happen.
Frequently Asked Questions
1. Can I reuse a Tapcon screw after I remove it? It is generally not recommended to reuse concrete screws, especially in load-bearing or critical applications. The removal process can dull the threads and compromise the screw's structural integrity, potentially reducing its holding power significantly upon reinstallation. For safety and reliability, always use a new screw.
2. What is the single most important tool for removing a concrete screw without stripping it? A variable speed drill/driver is the most critical tool. Its variable speed allows you to start with low RPMs to gently break the screw loose, while the ability to apply consistent, direct pressure helps keep the bit fully seated in the screw head, which is the best defense against stripping.
3. What should I do if the screw head is completely stripped and flush with the concrete? This is a challenging situation that often requires a screw extractor kit. This involves drilling a pilot hole into the center of the damaged screw and then using a specialized, reverse-threaded extractor bit to bite into the screw and back it out. This should be done carefully to avoid damaging the surrounding concrete.
4. Why should I choose U.S.-made concrete screws for my next project? Sourcing U.S.-made screws through a verified marketplace like Maden.co offers several key advantages: consistent material quality, adherence to strict manufacturing tolerances (like DIN or ANSI standards), and enhanced durability. This translates to a lower likelihood of installation or removal failures like stripping or snapping, providing better long-term value and a more reliable and resilient supply chain for your business.


