How to Screw Into a Concrete Patio: A Pro's Guide
Table of Contents
- Introduction
- Understanding the Challenge: Why Concrete Demands a Different Approach
- Essential Tools and Materials for a Professional Installation
- Choosing the Right Concrete Screw: A Critical Sourcing Decision
- The Step-by-Step Installation Process: A Guide to Precision
- Advanced Considerations and Troubleshooting
- Conclusion: Building on a Foundation of Quality
- Frequently Asked Questions
Introduction
A project is running smoothly—the framing is up, the materials are on site, and the timeline is holding. Then, you hit the literal concrete wall. The task is to securely fasten a railing, a ledger board, or a piece of heavy equipment to the existing concrete patio. Suddenly, the momentum grinds to a halt. A standard wood screw is useless, and an improper technique could crack the slab, compromising the entire structure and causing costly delays. This scenario is all too familiar for contractors, MRO buyers, and maintenance professionals. Anchoring to concrete is not just another task; it's a specific engineering challenge that demands the right knowledge, the right tools, and, most importantly, the right fasteners.
This article is designed for the industrial professional. We will move beyond basic DIY tips to provide a detailed, technical breakdown of how to properly and securely drive screws into a concrete patio. We will cover the critical differences in tooling, the science behind selecting the correct American-made concrete screw for your application, and a meticulous step-by-step process that ensures a permanent, high-strength connection. Here at Maden.co, we believe that America's manufacturing revival is built on a foundation of quality and expertise. Our mission is to democratize access to the very best U.S.-manufactured components, empowering you to complete your projects with confidence. This guide embodies that mission, providing the critical knowledge you need to master one of the most fundamental tasks in construction and industrial maintenance.
Understanding the Challenge: Why Concrete Demands a Different Approach
Unlike wood, which is a fibrous material that can be displaced and compressed by a screw's threads, concrete is an aggregate composite. It's incredibly strong under compression but brittle under tensile and torsional stress. Attempting to drive a standard screw into concrete will, at best, fail completely and, at worst, create microfractures that can lead to spalling or a catastrophic failure of the anchor point under load.
The primary challenges when fastening to concrete include:
- Hardness and Abrasiveness: Concrete will rapidly dull or destroy standard drill bits. It requires specialized carbide-tipped masonry bits and the percussive action of a hammer drill or rotary hammer to create a clean pilot hole.
- Brittleness: Improper pressure, drilling too close to an edge, or using the wrong fastener can cause the concrete to "blow out," creating a cone-shaped crater and rendering the anchor point useless.
- Inconsistency: A concrete slab is not a homogenous material. You can encounter hard aggregate (stone) or softer pockets of cement, and even hidden rebar or mesh, all of which can affect the drilling process and the holding power of the fastener.
Successfully screwing into concrete, therefore, is not about brute force. It's a process of precision: creating a perfectly sized and immaculately clean pilot hole that allows a specially designed screw to cut its own threads into the masonry, forming a secure mechanical interlock.
Essential Tools and Materials for a Professional Installation
Assembling the correct toolkit is the first step toward a successful and safe installation. Cutting corners here will lead to frustration, damaged materials, and a weak final product.
The Right Drill for the Job
Your standard cordless drill, even a powerful one, is not sufficient. You need a drill that combines rotation with a hammering action to effectively pulverize the concrete as the bit turns.
- Hammer Drill: This is the most common tool for this application. It uses a clutch mechanism to create a rapid, high-frequency hammering action. It is ideal for drilling holes for smaller diameter concrete screws (typically up to 1/2 inch) in standard concrete or block.
- Rotary Hammer (SDS Drill): For larger diameter holes, harder concrete, or high-volume work, a rotary hammer is the superior choice. It uses a piston mechanism to deliver a much more powerful, slower hammering blow. This makes drilling faster and less fatiguing for the operator.
High-Quality Drill Bits
The drill bit is where the work happens. Using a cheap or worn-out bit is a recipe for failure.
- Carbide-Tipped Masonry Bits: This is the only acceptable option. The carbide tip is extremely hard and can withstand the abrasion and impact of drilling into concrete. Ensure your bits are ANSI-compliant, which guarantees their dimensions are accurate—a critical factor for ensuring the screw fits correctly.
- Matching Bit to Screw: The concrete screw manufacturer will specify the exact diameter of the carbide bit required. Do not guess or substitute. A hole that is too small will prevent the screw from being driven, and a hole that is too large will result in zero holding power.
Critical Safety Gear
Drilling concrete generates fine crystalline silica dust, which is a serious respiratory hazard. Safety is non-negotiable.
- Eye Protection: ANSI-rated safety glasses or goggles are mandatory to protect against flying debris.
- Respiratory Protection: A P95 or N95-rated dust mask or respirator is essential to prevent inhalation of silica dust.
- Gloves: Heavy-duty work gloves protect your hands from abrasion and vibration.
Ancillary Tools
- Measurement and Marking: A quality tape measure, a carpenter's pencil or permanent marker, and a level are needed for accurate placement.
- Hole Cleaning Tools: This is one of the most critical and often overlooked steps. You will need a shop vacuum, compressed air (with a long nozzle), and a stiff wire brush correctly sized for the hole diameter.
Choosing the Right Concrete Screw: A Critical Sourcing Decision
Not all concrete screws are created equal. The design, material, and coating of the screw will dictate its performance, longevity, and suitability for your specific application. Sourcing high-quality, traceable fasteners is a cornerstone of professional work. It reflects our core value of Industrial Excellence—a commitment to using the best components to achieve the best results.
Understanding Concrete Screw Mechanics
Modern concrete screws are a marvel of engineering. They are case-hardened and feature a specialized thread pattern (often a high-low or serrated design) that is designed to tap, or cut, its own mating threads directly into the walls of the pilot hole. This creates a powerful mechanical bond without the expansion stress associated with traditional wedge or sleeve anchors, making them ideal for installations closer to edges.
Key Factors in Screw Selection
Head Style
The head style is chosen based on the fixture being mounted.
-
Hex Head: This is the most common style. The external hex head allows for high installation torque using a standard socket driver, making it perfect for attaching structural elements like brackets, railings, and machinery mounts. For projects requiring a strong, reliable hold for components like post bases or electrical junction boxes, a U.S.-made fastener like these Hex Head Concrete Screws, 3/16" x 2-3/4" provides the necessary clamping force and ease of installation.
-
Flat Head (Countersunk): When a flush, snag-free surface is required, a flat head screw is the answer. The head is designed to sit level with or slightly below the surface of the mounted fixture. This is essential for applications like installing door thresholds, signage, or low-profile tracks. Sourcing a part like these American-manufactured 1/4" x 2-3/4" Flat Head Concrete Screws ensures a clean, professional finish without compromising strength.
Material and Coating
For a concrete patio, which is exposed to moisture, temperature fluctuations, and potentially de-icing salts, corrosion resistance is paramount.
- Standard Blue Coating: Most concrete screws feature a special blue coating that provides a good level of corrosion resistance for dry, interior applications.
- Ceramic and Advanced Coatings: For exterior use, a superior coating is necessary. A product like the Steel Blue Ruspert Ceramic Coating Flat Phillips® Drive Concrete Screw offers a multi-layer system combining metallic zinc, a high-grade anti-corrosion chemical film, and a baked ceramic topcoat. This provides exceptional protection against rust and environmental degradation, significantly extending the life of the installation. For a procurement manager tasked with a coastal project or an MRO buyer in an industrial facility with chemical exposure, specifying a fastener with a Ruspert coating isn't just a choice; it's a strategic investment in long-term asset integrity.
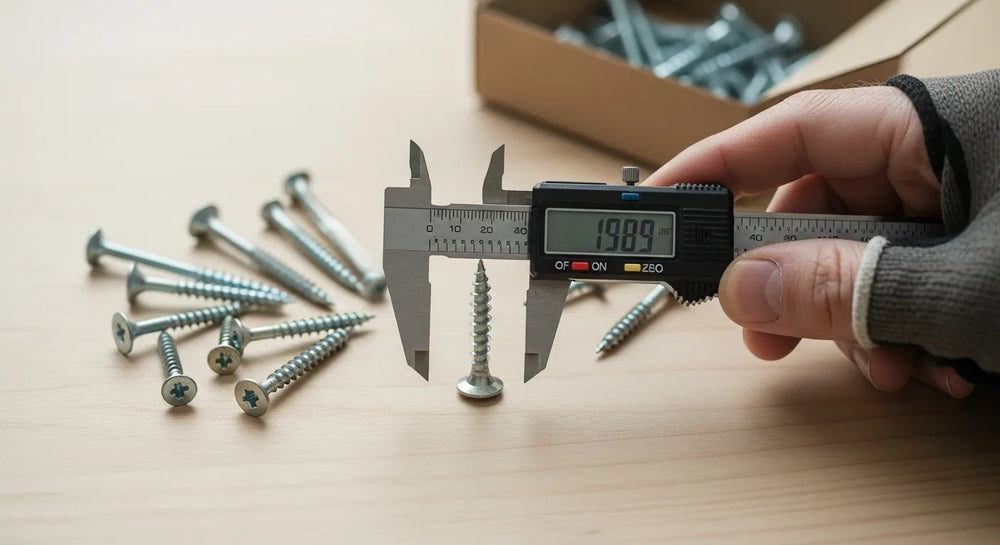
Diameter and Length
-
Diameter: The screw's diameter (typically 3/16", 1/4", 3/8", etc.) is determined by the weight of the object you are fastening and the load it will bear. Manufacturers provide load tables to help with this selection.
-
Length: To determine the correct length, you must know two things: the thickness of the material you are fastening and the required embedment depth into the concrete. The formula is: Screw Length ≥ (Fixture Thickness) + (Minimum Embedment Depth)Minimum embedment is typically 1 inch, while maximum embedment is usually around 1-3/4 inches. Embedding the screw too deep does not increase holding power and can make installation difficult. Always consult the manufacturer's specifications.
The Maden.co Advantage: Sourcing with Confidence
For a design engineer specifying fasteners for a new product or a purchasing manager trying to consolidate vendors, Supply Chain Transparency is crucial. When you source through our platform, you're not just buying a screw; you're partnering with a network of over 800 verified U.S. manufacturers. This provides unparalleled traceability and quality assurance. Our entire business model is built on this principle; you can learn more about our mission to champion American manufacturing here. This commitment ensures that the specifications on the data sheet match the product in the box, every single time.
The Step-by-Step Installation Process: A Guide to Precision
With the right tools and fasteners in hand, the installation process is straightforward but requires meticulous attention to detail.
Step 1: Mark Your Locations
Place your fixture in its final position. Use a level to ensure it is properly aligned. Using a pencil or marker, accurately mark the center of each hole that needs to be drilled. If fastening a heavy structural element, consult engineering plans to ensure you are not drilling too close to the concrete edge (a general rule is to maintain a minimum distance of at least 5 times the anchor diameter from any unsupported edge).
Step 2: Drill the Pilot Hole
- Select the Correct Bit: Double-check that you have the manufacturer-specified carbide-tipped bit for your chosen screw diameter.
- Set the Drilling Depth: The pilot hole must be deeper than the screw's intended embedment depth—typically by at least 1/2 inch. This provides space for the dust and debris generated as the screw taps its threads. You can set the depth using the depth stop on your drill or by wrapping a piece of tape around the drill bit to serve as a visual guide.
- Drill the Hole: Set your drill to "hammer" mode. Hold the drill perfectly perpendicular (90 degrees) to the concrete surface. Apply steady, firm pressure and begin drilling. Allow the tool to do the work; do not force it. Periodically pull the bit partially out of the hole to help clear dust and prevent it from binding.
Step 3: Clean the Hole (The Most Important Step)
A hole filled with concrete dust will dramatically reduce the screw's holding power, as the threads will be engaging with loose powder instead of solid concrete. This step cannot be skipped.
Pro-Tip: The professional standard for cleaning a pilot hole is a three-part process:
- Vacuum: Use a shop vacuum with a narrow nozzle to remove the bulk of the dust.
- Brush: Insert a properly sized wire brush and scrub the sides of the hole vigorously to dislodge any remaining fine particles.
- Vacuum/Blow: Perform a final vacuum or use oil-free compressed air to blow the hole completely clean. When using compressed air, always wear your eye protection. The hole is only ready when no more dust comes out.
Step 4: Drive the Screw
- Position the Fixture: Place your fixture back over the clean pilot holes.
- Start the Screw: Insert the tip of the concrete screw through the fixture and into the hole.
- Drive It Home: Using an impact driver or a drill with a clutch setting and the correct socket or Phillips driver bit, begin driving the screw. Drive it steadily and consistently until the head is seated firmly against the fixture.
- Do Not Over-Torque: This is critical. Over-tightening the screw will strip the threads you just cut into the concrete, completely compromising its holding strength. If the screw suddenly spins freely, you have gone too far. Most impact drivers are excellent for this task, as their "hammering" action helps seat the screw without the risk of continuous over-torquing associated with a standard drill.
Advanced Considerations and Troubleshooting
Common Problems and Solutions
- Screw Won't Go In: This usually means the hole is too small, not drilled deep enough, or is not sufficiently clean. It could also mean you've hit steel rebar. If you suspect rebar, you'll need to drill a new hole at least a few inches away.
- Screw Spins but Won't Tighten: The hole is too large, or you have stripped the threads by over-torquing. The only solution is to abandon that hole, move to a new location, and drill a fresh hole. In some cases, you can drill out the failed hole to accept the next larger diameter screw.
- Concrete Cracks or Spalls Near the Hole: This is typically caused by drilling too close to an unsupported edge or corner. Maintain proper edge distance as a preventative measure.
The Value of a Streamlined Procurement Process
For an MRO buyer facing an unexpected equipment breakdown or a procurement manager juggling multiple projects, delays in sourcing the correct fasteners can have significant downstream financial implications. Our platform is designed to eliminate this friction. Through Digital Innovation, we provide instant access to millions of U.S.-made products, allowing you to find, specify, and purchase the exact components you need in minutes, not days. This level of Customer Empowerment is changing how industrial procurement is done. This vast network is possible because we partner with the nation's best. Are you a U.S. manufacturer? Register as a vendor and join the American manufacturing revival.
If you encounter a unique challenge or need help sourcing a highly specific fastener for a difficult application, our team of experts is ready to help. Contact us to discuss your project's needs.
Conclusion: Building on a Foundation of Quality
Mastering how to screw into a concrete patio is a fundamental skill that separates amateur work from professional, long-lasting construction. It hinges on a clear understanding of the material, a commitment to a precise process, and an unwavering standard for the quality of the components used. The correct U.S.-made screw, chosen for its specific head style, material, and protective coating, is not just a piece of hardware; it is an investment in the safety, durability, and integrity of your project. The meticulous process of drilling a properly sized hole, cleaning it thoroughly, and driving the fastener correctly ensures that this investment pays off.
At Maden.co, we are dedicated to strengthening the backbone of American industry by making it easier than ever to source the high-quality, domestically manufactured products your business relies on. We are proving that "America's manufacturing revival is here" by providing the platform that connects you directly to the source.
Explore our extensive catalog of American-made concrete screws and other industrial components for your next project. For larger orders or capital-intensive projects, you can apply for Instant Financing at checkout to manage your cash flow effectively and keep your operations moving forward.
Frequently Asked Questions
1. What is the difference between a hammer drill and a rotary hammer?
A hammer drill uses two ribbed discs that click past each other to create a vibrating, high-frequency hammering action. It's best for smaller holes in softer masonry like brick or standard concrete. A rotary hammer uses a true piston mechanism to deliver a much slower but more powerful hammering blow, like a small jackhammer. It is far more efficient for drilling larger holes or working in hard, aged concrete.
2. Can I reuse a concrete screw?
It is not recommended. Concrete screws work by cutting their own threads into a very hard material. This process dulls the cutting edges of the threads. While a screw may be removable, it will have significantly less holding power if installed a second time, even in a new pilot hole. For safety and reliability, always use a new screw for each installation.
3. How deep should the screw go into the concrete?
This is known as embedment depth. For most light to medium-duty concrete screws, the required minimum embedment is 1 inch, and the maximum is 1-3/4 inches. Always follow the manufacturer's specific instructions for the screw you are using. The screw's holding power is established within this range; embedding it deeper does not add significant strength and can make it harder to install.
4. Why is cleaning the pilot hole so important?
The holding power of a concrete screw comes from the direct engagement of its sharp threads with the solid walls of the concrete pilot hole. If the hole is full of dust and debris, the threads will engage primarily with this loose powder, not the concrete itself. This can reduce the ultimate holding capacity by over 50%, leading to a weak connection that could fail under load. A clean hole is essential for a secure installation.


