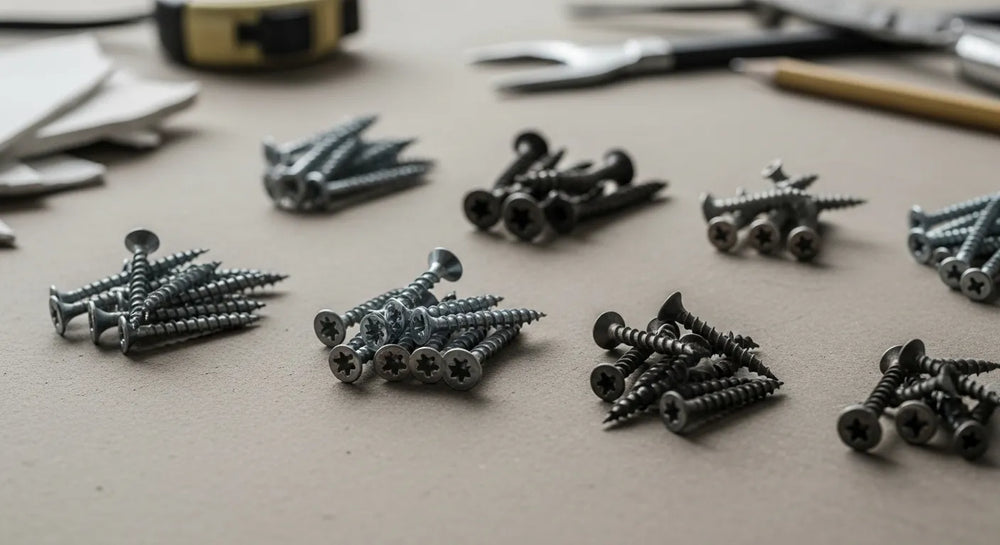
How to Use a Plastic Anchor and Screw
Table of Contents
- Introduction
- The Critical Role of Anchors in Industrial Environments
- Deconstructing the Plastic Anchor: Types and Materials
- The Definitive Step-by-Step Installation Guide
- Avoiding Common Pitfalls: A Troubleshooting Guide for Professionals
- Building a Resilient Supply Chain for Your Most Essential Components
- Conclusion
- Frequently Asked Questions (FAQ)
Introduction
A single, improperly installed fastener can bring a critical production line to a halt, compromise the safety of a workspace, or delay a high-stakes construction project by days. In the world of Maintenance, Repair, and Operations (MRO), procurement, and engineering, the smallest components often carry the most significant weight—both literally and figuratively. While a plastic anchor and screw might seem like a basic piece of hardware, their correct selection and installation are fundamental to structural integrity, operational uptime, and workplace safety. The failure of such a seemingly insignificant part is rarely just an inconvenience; it's a costly disruption that ripples through an entire organization.
This article is not another superficial DIY guide. It is a comprehensive resource for industrial professionals who understand that precision matters. We will move beyond the basics to explore the science behind how these components work, the critical differences between various anchor types, and the precise, step-by-step methodology for a flawless installation in professional settings. We will delve into common failure points, advanced troubleshooting techniques, and most importantly, how to build a resilient and reliable supply chain for these essential components. Our goal is to empower you with the knowledge to not only use a plastic anchor correctly but to institutionalize a standard of excellence in every fastening task, ensuring that every connection is secure, durable, and backed by the quality of American manufacturing.
The Critical Role of Anchors in Industrial Environments
In a commercial or industrial setting, walls are more than just partitions; they are functional surfaces required to support signage, shelving, control panels, conduit, safety equipment, and more. Unlike solid wood or metal studs, materials like drywall, plaster, and hollow concrete block lack the internal density to provide a secure purchase for a standard screw thread. Driving a screw directly into these materials is a recipe for failure. The threads have nothing substantial to bite into, and under even a minimal load, the screw will pull out, damaging the wall and whatever it was intended to hold.
This is where the plastic anchor becomes an indispensable engineering solution. Its function is to create an artificial, high-friction environment within a hollow or brittle substrate.
The Mechanics of Load Distribution
When a screw is driven into a properly installed plastic anchor, it doesn't just hold the screw in place; it forces the anchor to expand. This expansion exerts significant outward pressure against the inner surfaces of the drilled hole.
- Friction: The primary force at play is friction. The expanded anchor creates a tight, 360-degree grip on the surrounding material. The ribs, fins, or wings on the anchor's exterior are designed to maximize this surface area and prevent the anchor from spinning during installation or pulling out under load.
- Load Spreading: The anchor distributes the load of the attached object over a much larger surface area than the screw alone ever could. Instead of concentrating all the force on the weak, granular material immediately surrounding the screw threads, the anchor spreads that tensile and shear stress across the entire circumference and length of the hole, dramatically increasing the holding power.
The consequences of ignoring these principles can be severe. A failed anchor holding a heavy piece of equipment can lead to costly damage and create a serious safety hazard. For a procurement manager, sourcing substandard anchors that fail prematurely leads to increased MRO cycles, higher labor costs for replacements, and potential operational downtime. For a design engineer, specifying the wrong fastener can compromise the integrity and safety of an entire installation. This is why at Maden.co, we believe that every component, no matter how small, is critical to the success of the larger system.
Deconstructing the Plastic Anchor: Types and Materials
Not all plastic anchors are created equal. Understanding the distinct designs and material compositions is essential for matching the right component to the specific application, load requirement, and substrate material. Sourcing from a reliable marketplace ensures you have access to a variety of specialized, high-quality options to meet the diverse demands of an industrial facility. Our mission is to democratize access to the full spectrum of American manufacturing, ensuring you can find the precise component for the job.
Common Anchor Types for Professional Use
While hundreds of variations exist, most plastic anchors used in professional settings fall into a few key categories, each engineered for specific conditions.
-
Ribbed Plastic Anchors: These are the workhorses for light to medium-duty applications in drywall and plaster. The external ribs are designed to bite into the soft material of the wallboard as the screw expands the anchor, providing excellent resistance against both pulling out and spinning. Their straightforward design and reliable performance make them a staple in any MRO toolkit. For a durable, general-purpose solution made in the USA, the Ribbed Plastic Anchor is an industry standard, offering consistent performance for mounting everything from control boxes to light fixtures.
-
Tapered and Ribbed Anchors: This design offers enhanced versatility. The tapered body allows for easier insertion, while the combination of a split shaft for expansion and external ribs provides a secure hold. They are particularly useful when drilling into slightly less uniform materials or when a project requires a fastener that can accommodate minor variations in hole diameter. The Tapered and Ribbed White Plastic Anchor is an excellent example of this versatile design, perfect for projects requiring a large quantity of reliable, multi-purpose fasteners.
-
Conical Plastic Anchors: While they can be used in drywall, conical anchors truly excel in solid, brittle materials like masonry, brick, and concrete. Their simple, cone-shaped design relies on pure friction. As the screw is driven in, the cone is forced outward, creating immense pressure against the rigid walls of the drilled hole. They are typically used for lighter-duty applications in these hard materials. When you need a reliable, light-duty fastener for block or concrete walls, the Conical Bantam Plastic Anchor provides a secure, U.S.-made option.
Why Material Composition Matters
The plastic itself is a critical factor in an anchor's performance, especially in demanding industrial environments that may involve temperature fluctuations, moisture, or chemical exposure.
- Nylon: Often considered the premium material for plastic anchors. Nylon offers an excellent balance of strength, flexibility, and durability. It is more resistant to temperature extremes and becoming brittle over time compared to other plastics. This makes it the preferred choice for applications where long-term reliability is paramount or where the anchor may be subjected to minor vibration.
- Polyethylene: A more common and cost-effective material, polyethylene is suitable for many light-duty, indoor applications. It provides good initial holding power but can become brittle at very low temperatures and may degrade more quickly when exposed to UV light or certain chemicals.
Sourcing from verified U.S. manufacturers provides a level of material transparency and quality control that is often absent in anonymous global supply chains. At Maden.co, our commitment to Industrial Excellence means connecting you with suppliers who prioritize high-grade materials and consistent manufacturing processes. This focus on quality is a core tenet of our mission, which you can learn more about on our About Us page.
The Definitive Step-by-Step Installation Guide
Precision in execution is just as important as selecting the right component. A high-quality anchor installed improperly will fail. This detailed process ensures a secure and reliable fastening every time, meeting the high standards required in professional environments.
Step 1: Analyze the Load and Select the Correct Components
Before you even pick up a tool, you must assess the application.
- Determine the Load Weight: Know the exact weight of the object you are mounting. Always consult the anchor's packaging or technical data sheet for its maximum load rating. As a rule of thumb for critical applications, select an anchor rated for at least four times the actual weight of the object to create a sufficient safety factor.
- Identify the Substrate: Is it drywall, plaster, concrete block, or brick? The wall material dictates the type of anchor you must use.
- Match the Screw: The anchor is only half of the system. Select a screw with a diameter designed to properly expand the specific anchor you've chosen. The length must be sufficient to pass through the object you're mounting and fully engage the entire length of the anchor.
Step 2: Assemble the Professional Toolkit
Having the right tools on hand prevents mistakes and ensures efficiency.
- Power Drill with variable speed control
- A full set of high-quality drill bits
- Tape measure and pencil
- Level (laser or bubble)
- Hammer or rubber mallet
- Screwdriver or screw gun with a torque-limiting clutch
- Safety glasses
Step 3: Mark and Drill the Pilot Hole (The Most Critical Step)
This is where most installations succeed or fail.
- Mark the Location: Use your tape measure and level to precisely mark the spot for the hole.
- Select the Drill Bit: This is non-negotiable. Use the exact drill bit diameter specified by the anchor manufacturer. A bit that is too small will make inserting the anchor impossible without damaging it or the wall. A bit that is too large will result in a loose fit, and the anchor will spin in the hole, rendering it useless.
- Control the Depth: The hole should be slightly deeper than the length of the anchor. This ensures the anchor can be fully seated without bottoming out. A simple pro tip is to measure the anchor's length against the drill bit and wrap a piece of masking tape around the bit to serve as a depth gauge.
- Drill with Care: Hold the drill perfectly perpendicular (90 degrees) to the wall surface. Apply steady, even pressure. For drywall, use a moderate speed. For masonry, use a proper masonry bit and a hammer drill setting if available. After drilling, reverse the drill to cleanly pull the bit out and clear debris from the hole.
Step 4: Securely Insert the Anchor
- Inspect the Hole: Ensure the hole is clean and free of dust or debris, which can interfere with the anchor's grip.
- Insert the Anchor: Gently push the anchor into the hole until the collar is flush with the wall surface. If it meets firm resistance, do not force it. This likely means the hole is too small or there is an obstruction.
- Seat the Anchor: If the fit is snug, you may need to lightly tap the anchor's collar with a hammer or rubber mallet until it is perfectly flush with the wall. The collar prevents the anchor from being pushed too far into the wall cavity.
Step 5: Drive the Screw for Optimal Expansion
- Position the Object: Place your item (e.g., a mounting bracket) over the anchor.
- Start the Screw: Insert the screw through the object and into the mouth of the anchor.
- Drive with Control: Using a screwdriver or a drill on a low-speed, low-torque setting, begin driving the screw. You should feel resistance almost immediately as the screw engages the anchor's internal threads and begins to expand the body.
- Know When to Stop: Continue driving the screw until its head is snug against the surface of the object you are mounting. Do not overtighten. Overtightening is a common mistake that can strip the anchor's internal grip, break the anchor, or damage the drywall. The goal is to make it snug and secure, not to apply maximum force.
By following these precise steps, you transform a simple task into a repeatable, reliable process that upholds professional standards of quality and safety.
Avoiding Common Pitfalls: A Troubleshooting Guide for Professionals
Even experienced technicians can run into issues. Recognizing the signs of a problem and knowing how to correct it is a mark of true expertise.
-
The Spinning Anchor: This is the most common failure and is almost always caused by a pilot hole that is too large. If the anchor spins when you try to drive the screw, the battle is lost. You must remove it.
- The Fix: Remove the screw and the spinning anchor. You may need to use pliers. Drill a larger hole to accommodate the next size up of anchor and screw. It is not recommended to try and "fill" the hole with compound and redrill. Start fresh for maximum security.
-
The Stripped Screw: The screw tightens, then suddenly loses all resistance and just spins. This means the screw has stripped the inside of the plastic anchor.
- The Cause: This usually results from using a screw with a diameter that is too small for the anchor, or from aggressive overtightening with a power tool.
- The Fix: Back the screw out. If the anchor is still secure in the wall, you may be able to use a slightly larger diameter screw of the same length to get a new bite. If not, the anchor must be replaced.
-
The Crumbled Drywall: You drill a hole, and the drywall around it is soft, crumbly, or weak.
- The Cause: You've likely hit a spot that has previous water damage or a poorly taped seam.
- The Fix: Do not install an anchor in this location. The substrate is compromised and will not provide a secure hold. Move your mounting point a few inches to a solid section of the wall.
-
The Broken Anchor Collar: As you tap the anchor into place, the collar snaps off.
- The Cause: This typically happens when using excessive force with a hammer or trying to force an anchor into a pilot hole that is too small. It can also be a sign of a brittle, low-quality anchor.
- The Fix: Remove the damaged anchor and start over with a new one, ensuring your pilot hole is the correct size. Sourcing high-quality, non-brittle anchors made from premium nylon can significantly reduce this issue.
These are not just installation errors; they are procurement issues. A supply chain built on sourcing the lowest-cost, often unverified components, will inevitably lead to a higher frequency of these time-consuming and costly failures. This is where a strategic partnership with a platform dedicated to quality American manufacturing becomes a competitive advantage.
Building a Resilient Supply Chain for Your Most Essential Components
Consider this scenario: A facility manager is tasked with a plant-wide safety upgrade that requires installing 5,000 new sensor brackets, each requiring two specific-load-rated plastic anchors. The project is on a tight deadline. The usual supplier has a 4-week lead time on that quantity, and a cheaper alternative from an unknown online source arrives, but 15% of the anchors are malformed or brittle, causing constant installation failures and throwing the project timeline into chaos.
This is not a hypothetical; it's a common procurement challenge that highlights the weakness of a fragmented and opaque supply chain. This is the exact problem we built Maden.co to solve. We are driven by a vision to prove that American-made components are as accessible and convenient as any global alternative, fueling the American manufacturing revival.
For the procurement manager, MRO buyer, or engineer facing this challenge, our platform provides a transformative solution:
- Access and Scale: We connect you to a network of over 800 verified U.S. manufacturers and a catalog of over 2.5 million products. Find the exact anchor, in the exact material, with the exact load rating you need, all in one place.
- Transparency and Trust: Our commitment to Supply Chain Transparency means you know who is making your components. You're not buying from a faceless reseller; you're partnering with established American businesses committed to quality. This reduces the risk of receiving inconsistent or substandard parts.
- Efficiency and Empowerment: Our platform reduces procurement friction. Instead of juggling dozens of vendors, you can search, source, and purchase from a single, streamlined interface. This Customer Empowerment saves valuable time and internal resources, improving your Total Cost of Ownership (TCO). For large or capital-intensive orders, we offer a strategic tool to manage cash flow. You can apply for Instant Financing at checkout to streamline your capital-intensive projects, making it easier to procure the necessary volume without disrupting your budget.
For U.S. manufacturers producing high-quality fasteners and other industrial components, Maden.co offers a direct channel to the buyers who value your commitment to excellence. Are you a U.S. manufacturer? Register as a vendor and join us in rebuilding America's industrial backbone.
Conclusion
Mastering how to use a plastic anchor and screw is more than a technical skill; it's a commitment to a standard of quality. It reflects an understanding that operational excellence is built upon the reliability of every single component in the system. The process begins with a careful assessment of the application, followed by the precise selection of the right American-made anchor for the job. It continues with a meticulous installation methodology—drilling the correct size pilot hole, ensuring a flush fit, and driving the screw with control to achieve optimal expansion without overtightening.
By avoiding common pitfalls and troubleshooting effectively, you can ensure that every fastening point is a point of strength, not a potential point of failure.
This dedication to quality and reliability should extend to your procurement strategy. Building a resilient supply chain with trusted U.S. manufacturing partners is the foundation of long-term success. We invite you to explore the extensive catalog on Maden.co, where you can find the high-quality, American-made components your projects demand. Simplify your procurement, enhance your project's integrity, and take control of your supply chain. For your next project, leverage our platform and discover the strategic advantage of our Instant Financing option available at checkout.
Frequently Asked Questions (FAQ)
1. Can I reuse a plastic anchor? No, it is strongly advised not to reuse a plastic anchor. Once an anchor has been expanded by a screw and then removed, its structural integrity is compromised. It will not provide the same holding power and is highly likely to fail if reused. Always use a new anchor for a new installation.
2. What is the difference between a plastic anchor and a toggle bolt? A plastic anchor works by expanding and creating friction inside the hole. It is best for light to medium-duty loads. A toggle bolt is a heavy-duty anchor for hollow walls. It consists of a bolt and spring-loaded "wings" that open up inside the wall cavity, distributing the load over a very large area of the drywall. Toggle bolts are used when the weight of the object exceeds the capacity of even the strongest plastic anchors.
3. How do I know what size screw to use with my anchor? The anchor's packaging or the manufacturer's technical data sheet will specify the required screw diameter range. Using a screw that is too small will not expand the anchor properly, leading to poor holding power. A screw that is too large can split the anchor or make it impossible to drive. Always adhere to the manufacturer's specifications for a secure system. If you have any sourcing questions about matching components, our team is ready to help.
4. Why should my business choose U.S.-made anchors? Choosing U.S.-made anchors through a platform like Maden.co offers several strategic business advantages. You benefit from higher and more consistent quality control, superior material grades, and a more transparent and reliable supply chain. This reduces the risk of product failure, lowers long-term maintenance costs (TCO), and helps avoid project delays caused by sourcing issues. Supporting American manufacturing also contributes to a stronger domestic industrial base, aligning your procurement with values of quality and national pride.


