
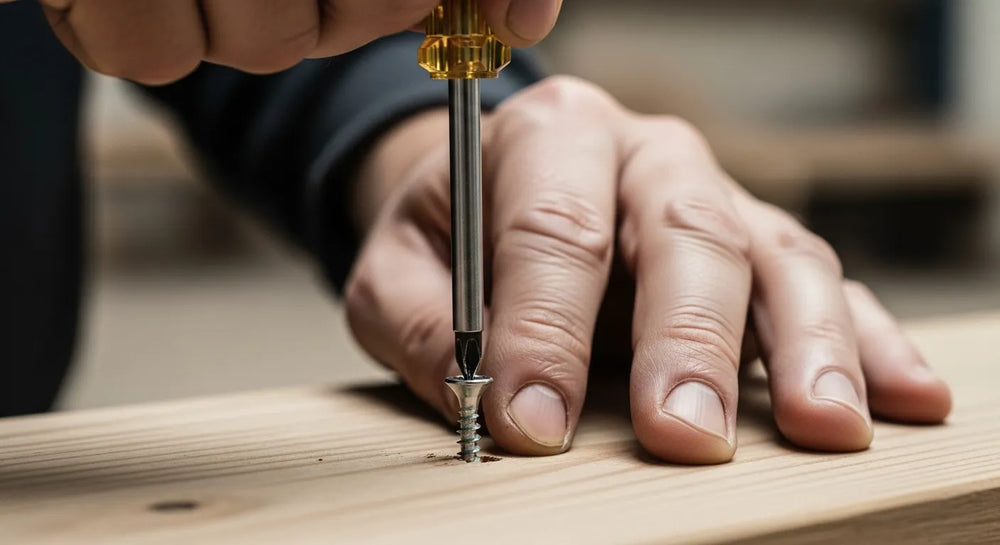
How to Use Different Drywall Anchors Correctly
Table of Contents
- Introduction
- Understanding the Fundamentals: Why Drywall Requires Anchors
- A Comprehensive Breakdown of Drywall Anchor Types
- The Professional's Checklist: How to Select the Right Drywall Anchor
- Step-by-Step Installation: Executing with Precision
- Building a Resilient Operation with Maden.co
- Conclusion: Securing More Than Just Fixtures
- Frequently Asked Questions
Introduction
A loose picture frame, a wobbly shelf, or a bathroom fixture that feels anything but secure—these are more than minor annoyances; they are symptoms of a fundamental misunderstanding of drywall. That ubiquitous, paper-faced gypsum panel that forms most interior walls in modern construction is remarkably efficient to install but notoriously poor at holding the direct force of a screw. For any procurement manager, MRO buyer, or facility maintenance professional, a seemingly simple task like mounting equipment can quickly become a liability if the right hardware isn't used. This is where the drywall anchor becomes one of the most critical, yet often overlooked, components in your toolkit.
This article moves beyond basic DIY advice to provide a professional-grade understanding of how to use different drywall anchors. We will explore the mechanical principles behind various anchor types, detail a systematic process for selecting the right anchor based on load, material, and application, and provide clear, step-by-step installation instructions to ensure a secure and lasting hold every time. The goal is to empower you with the technical knowledge to execute installations with confidence, reducing rework, enhancing safety, and optimizing the Total Cost of Ownership (TCO) for every project. At Maden.co, we believe that foundational knowledge, paired with access to high-quality, American-made components, is the key to industrial excellence.
Understanding the Fundamentals: Why Drywall Requires Anchors
Before diving into the different types of anchors, it's essential to understand why they are necessary. Drywall, or gypsum board, consists of a core of hardened gypsum plaster pressed between two thick sheets of paper. This composition makes it lightweight, fire-resistant, and easy to cut and install, but it also makes it brittle and crumbly.
When you drive a standard screw directly into a drywall panel (without hitting a wooden stud), the threads have very little solid material to grip. The gypsum core simply pulverizes around the screw threads. Any significant weight, vibration, or outward pulling force (known as tension) will cause the screw to rip out, taking a chunk of drywall with it.
A drywall anchor is a fastener insert designed to solve this problem. It works by creating a stable, load-bearing point within the hollow wall cavity. Instead of relying on the weak gypsum core, an anchor expands, grips, or braces against the back of the drywall panel, distributing the load over a much wider surface area. This mechanism transforms a weak point into a secure mounting point capable of supporting significant weight. Understanding this principle is the first step toward selecting and installing the correct hardware for any application.
A Comprehensive Breakdown of Drywall Anchor Types
The market is filled with a vast array of drywall anchors, each engineered for specific load capacities and installation scenarios. Choosing the wrong one can lead to failure, while the right one provides a secure mounting that can last for decades. Here, we categorize the most common types and detail their mechanics, ideal uses, and limitations.
Expansion Anchors
Expansion anchors are among the most common types, particularly for light-duty applications. Their primary mechanism involves expanding once inserted into the wall.
Ribbed Plastic Anchors
These are often the first type of anchor people encounter, frequently included in kits with shelves or picture frames. A ribbed plastic anchor is a tapered plastic sleeve with fins or ribs along its body.
- Mechanism: You first drill a pilot hole into the drywall that matches the diameter of the anchor sleeve. The anchor is then gently tapped into the hole until it is flush with the wall surface. As you drive a screw into the anchor, the sleeve splits and expands, pressing the ribs firmly against the inside of the drilled hole and the back of the drywall.
- Best For: Very light-duty applications such as small picture frames, smoke detectors, thermostats, and lightweight wall decor. They are generally rated for loads under 15 pounds.
-
Installation Note: The key to success with these anchors is drilling the correct pilot hole size. Too large, and the anchor won't grip; too small, and you risk damaging the drywall when you tap it in. For a reliable, U.S.-made solution for your light-duty fastening needs, consider a high-quality
Ribbed Plastic Anchorfrom our catalog.
Self-Drilling Anchors
Also known as threaded anchors, these are a significant step up in convenience and holding power from basic plastic expansion anchors. They are designed to be installed without a pre-drilled pilot hole.
- Mechanism: These anchors feature a sharp, self-tapping point and wide, aggressive threads designed to cut directly into the drywall. You simply use a screwdriver or a drill with a Phillips head bit to drive the anchor into the wall until the head is flush with the surface. The wide threads provide a large contact area, giving it a secure grip within the gypsum. Once the anchor is set, you drive your mounting screw directly into its center.
- Best For: Light to medium-duty applications, such as hanging towel bars, curtain rods, heavy pictures, and lightweight shelving. They offer a much stronger hold than ribbed anchors, often supporting between 25 and 75 pounds depending on their size and material (nylon or zinc alloy).
-
Our Recommendation: For projects requiring a balance of speed and strength, the
Medium-Duty Nylon Wall Anchor #6 Self-Drilling Drywall Zip-It®is an excellent choice. Its American-made quality ensures consistent performance and reliability, reducing the risk of anchor failure during installation.
Sleeve-Type Anchors (Molly Bolts)
Often called "Molly bolts" or "hollow wall anchors," these are all-metal anchors that provide substantial holding power for medium-to-heavy loads.
- Mechanism: A molly bolt consists of a machine screw threaded through a metal sleeve. The sleeve is designed with slits that allow it to collapse and expand like an umbrella. After drilling a pilot hole and inserting the entire anchor, you tighten the screw. This action pulls the tip of the sleeve toward the surface, causing the sides to flare out and clamp firmly against the back of the drywall. Once set, you can remove the screw to attach your fixture and then re-insert it.
- Best For: Securely mounting heavier items like large mirrors, shelving units, and bathroom grab bars. Their robust, all-metal construction makes them a trusted choice for applications where safety and stability are paramount.
Toggle Bolts
For heavy-duty applications, toggle bolts are often the go-to solution. They provide the highest load capacity of any common drywall anchor type by bracing a metal bar directly against the back of the wall.
Classic Spring Toggle Bolts
- Mechanism: This anchor consists of two parts: a machine screw and a spring-loaded, wing-like toggle. To install, you drill a relatively large hole in the drywall. You then collapse the wings, push them through the hole, and they spring open inside the wall cavity. As you tighten the screw, it pulls the toggle bar flush against the interior wall surface, creating an exceptionally strong bracing point.
- Best For: Hanging the heaviest items, such as flat-screen TV mounts (when studs are not an option), large cabinets, and heavy-duty commercial shelving. Their holding power can exceed 100 pounds.
- Limitation: The main drawback is the large pilot hole required. Additionally, if you remove the screw completely, the toggle will fall down inside the wall cavity.
Nylon Toggle Anchors
Modern variations on the toggle bolt aim to improve ease of installation while providing similar strength.
- Mechanism: These anchors, sometimes called strap toggles, use a plastic strap connected to a metal toggle bar. You drill a hole, insert the toggle, and slide a plastic collar along the straps until it's flush with the wall. You then snap off the excess strap length, leaving a threaded receptacle ready for your screw. This design prevents the toggle from falling into the wall if the screw is removed.
-
Best For: Applications requiring heavy-duty support with the convenience of a removable screw. The
Medium-Duty Nylon Wall Anchor #8 for Drywallis an innovative fastener that combines the ease of a sleeve-type anchor with the expanding action of a toggle, making it perfect for securing fixtures where reliable, medium-duty performance is required.
The Professional's Checklist: How to Select the Right Drywall Anchor
Choosing an anchor isn't guesswork; it's a calculated decision based on four key factors. Getting this right is what separates an amateur from a professional and a temporary fix from a permanent solution.
Factor 1: Weight Load and Force Direction
The single most important factor is the weight of the object you are mounting. Always check the manufacturer's specifications for the anchor's load rating.
- Light-Duty (Up to 20 lbs): Small pictures, smoke alarms, light decor. Ribbed plastic anchors and smaller self-drilling anchors are suitable.
- Medium-Duty (20 to 50 lbs): Towel racks, curtain rods, mirrors, medium-sized shelves. Larger self-drilling anchors, nylon toggles, and smaller molly bolts are appropriate.
- Heavy-Duty (50+ lbs): Large televisions, cabinets, grab bars, heavy shelving. Toggle bolts and heavy-duty molly bolts are required.
Beyond static weight, consider the type of force.
- Shear Force: This is a downward-pulling force, parallel to the wall, like a picture hanging from a hook. Most anchors handle shear force well.
- Tension Force (or Pull-Out Force): This is a force pulling straight out from the wall, like a grab bar being pulled or a ceiling-mounted hook. Toggle bolts excel at resisting tension because their bracing bar distributes the force across a wide area.
Factor 2: Drywall Thickness and Condition
Standard residential drywall is 1/2-inch thick, while 5/8-inch Type X drywall is often used in garages and commercial buildings for added fire resistance. Ensure the anchor's grip range is compatible with your wall thickness. For example, a molly bolt designed for 1/2-inch drywall may not expand properly in a 5/8-inch wall. The condition of the drywall also matters; old, brittle, or moisture-damaged drywall will have significantly reduced holding power.
Factor 3: Object and Fixture Design
The fixture itself can influence your anchor choice. A fixture with multiple mounting points allows you to distribute the weight across several anchors. A fixture with a small mounting base may require a single, high-strength anchor. Always use the hardware recommended by the fixture manufacturer if available.
Factor 4: Sourcing and Supply Chain Reliability
For industrial buyers, facility managers, and business owners, where you get your fasteners is as important as which fastener you choose. Sourcing from a reliable B2B marketplace ensures you receive consistently manufactured, high-quality products that meet stated specifications. At Maden.co, our mission is to democratize access to American manufacturing, connecting you with over 2.5 million products from a network of 800+ verified U.S. manufacturers. This commitment to an American-made supply chain ensures not only quality and compliance but also resilience and transparency. You can learn more about our mission to champion American manufacturing here.
Step-by-Step Installation: Executing with Precision
Proper installation is non-negotiable for achieving an anchor's maximum holding power. Here are the precise steps for three common anchor types.
Installing a Self-Drilling Anchor
- Mark Your Location: Use a pencil to mark the exact spot for the anchor. Use a stud finder first to ensure you are not drilling into a wall stud, pipe, or electrical wire.
- Position the Anchor: Place the sharp tip of the self-drilling anchor on your mark.
- Drive the Anchor: Using a drill with a Phillips bit or a manual screwdriver, apply firm, steady pressure and drive the anchor clockwise into the drywall. The anchor will tap its own hole.
- Set It Flush: Continue driving until the head of the anchor is flush with the surface of the wall. Do not overtighten, as this can strip the drywall and compromise the hold.
- Insert the Screw: Place your item over the anchor and drive the provided screw into the center of the anchor to secure your fixture.
Installing a Ribbed Plastic Anchor
- Mark and Check: Mark your location and check for obstructions behind the wall.
- Drill the Pilot Hole: Select a drill bit that matches the diameter of the anchor shaft (this is often printed on the anchor or its packaging). Drill a clean hole at your mark.
- Insert the Anchor: Push the anchor into the hole. If it's a tight fit, gently tap it with a hammer or rubber mallet until the head is flush with the wall.
- Set the Anchor: Drive your screw into the anchor. You will feel resistance as the screw causes the anchor to expand and grip the drywall. Stop when the screw is snug.
Installing a Classic Toggle Bolt
- Mark and Drill: Mark your location. You will need to drill a significantly larger hole to accommodate the collapsed toggle wings—check the packaging for the required bit size.
- Assemble the Bolt: Remove the toggle wings from the screw. Pass the screw through the mounting hole of your fixture, then re-thread the toggle wings onto the end of the screw.
- Insert the Toggle: Pinch the wings together so they are flat against the screw and push them through the drilled hole.
- Engage and Tighten: Once inside the wall cavity, the wings will spring open. Pull the screw back toward you to ensure the wings are braced flat against the interior wall surface. While maintaining this outward tension, tighten the screw with a screwdriver until your fixture is secure against the wall.
Building a Resilient Operation with Maden.co
For any business, operational efficiency relies on having the right parts at the right time. A delay caused by a failed fastener or a back-ordered component can have ripple effects on project timelines and budgets. This is the procurement friction we are dedicated to eliminating. Our platform is designed to provide industrial buyers with direct, easy access to a vast catalog of American-made products, from specialized fasteners to complex MRO components.
We believe that American-made components should be as accessible and convenient as any global alternative. This vision drives our commitment to Digital Innovation and Supply Chain Transparency. For MRO buyers facing an unexpected equipment breakdown or design engineers needing specific material certifications, the ability to quickly source and receive a verified, U.S.-made part is a game-changer.
To further support our customers, we offer strategic tools to manage procurement effectively. For larger-volume purchases or capital-intensive projects, you can apply for Instant Financing at checkout. This allows you to manage cash flow while securing the high-quality components your business needs to thrive.
And for the manufacturers who are the backbone of our economy: if you produce high-quality industrial products in the U.S., we invite you to grow with us. Are you a U.S. manufacturer? Register as a vendor and join the American manufacturing revival.
Conclusion: Securing More Than Just Fixtures
Mastering how to use different drywall anchors is a fundamental skill that enhances safety, professionalism, and efficiency in any maintenance, repair, or operations setting. It's a process that begins with understanding the simple mechanics of a hollow wall and extends to a calculated selection based on weight, material, and force. By choosing the correct anchor—whether it's a simple ribbed anchor for a lightweight sign or a heavy-duty toggle bolt for critical equipment—and installing it with precision, you ensure a secure, reliable result that reflects the high standards of your work.
This commitment to quality and reliability is at the heart of our mission at Maden.co. We empower businesses by providing a streamlined procurement process for millions of top-tier, American-made industrial products. Build with confidence, knowing you are supported by a transparent supply chain and the pride of American manufacturing.
Explore our comprehensive catalog of U.S.-made fasteners and industrial components today. Solve your procurement challenges and strengthen your operations, and remember to leverage our Instant Financing option at checkout to make your purchasing process even smoother. If you have specific sourcing questions or need help finding the right component for your application, our team is ready to help.
Frequently Asked Questions
1. Can I reuse a drywall anchor? It is generally not recommended to reuse drywall anchors, especially plastic ones. Once a plastic anchor has been expanded by a screw, it becomes deformed and loses much of its original holding power if removed and reinserted. Metal anchors like molly bolts can sometimes be reused if removed carefully, but their performance may still be compromised. For maximum safety and reliability, it is always best to use a new anchor for each installation.
2. What should I do if I hit a wooden stud while trying to install an anchor? Hitting a stud is actually a good thing! A wall stud provides a far more secure mounting point than any drywall anchor. If you hit a stud, simply discard the anchor and drive an appropriate-length wood screw directly into the center of the stud to hang your item. You get a stronger hold with less effort.
3. How do I know the exact weight capacity of a specific anchor? The weight capacity should always be listed on the anchor's packaging or the manufacturer's technical data sheet. These ratings are determined under ideal lab conditions, so it's a wise practice to use an anchor rated for significantly more weight than your object (a 2x to 4x safety factor is common). Remember that ratings are for static loads; items that vibrate or will be pulled on require a much stronger anchor.
4. What is the best anchor for hanging a heavy flat-screen TV? The safest and most secure method for hanging a TV is to mount it directly to wall studs using lag bolts. Use a stud finder to locate at least two studs and attach the TV mount to them. If studs are not available in the desired location, you must use heavy-duty drywall anchors like toggle bolts or strap toggles. Use multiple anchors as specified by the TV mount manufacturer, and ensure their combined load capacity far exceeds the weight of the television.


