How to Use Screws in Concrete: An Industrial Guide
Table of Contents
- Introduction
- Understanding the Mechanics: Why Concrete Screws Work
- Types of Concrete Screws: Choosing the Right Fastener for the Job
- The Step-by-Step Installation Process: A Guide for Industrial Professionals
- Common Mistakes and How to Avoid Them
- Why Sourcing American-Made Concrete Screws Matters
- Strategic Procurement: Streamlining Your Fastener Sourcing
- Conclusion
- Frequently Asked Questions
Introduction
Imagine this: a critical piece of machinery has just arrived at your facility. The installation is scheduled, the team is ready, but the project grinds to a halt. The fasteners specified for anchoring the equipment to the concrete floor are on backorder from an overseas supplier, or worse, the ones that arrived fail under initial load testing. This isn't just an inconvenience; it's a direct hit to your operational timeline, budget, and productivity. In the world of industrial construction, manufacturing, and MRO, the humble concrete screw is often the unsung hero holding critical infrastructure together. Using it correctly is not just a matter of technique—it's a matter of safety, structural integrity, and supply chain reliability.
This guide is designed for the professionals on the front lines: the procurement managers sourcing reliable components, the design engineers specifying fasteners for critical applications, and the MRO teams responsible for keeping facilities running safely and efficiently. We will move beyond basic instructions to provide a comprehensive, technical breakdown of how to select, source, and properly install concrete screws for maximum performance and longevity. We will explore the different types of screws, the critical importance of materials and coatings, the non-negotiable steps of the installation process, and the common pitfalls to avoid.
Ultimately, this article will demonstrate that achieving a secure, reliable fastening in concrete depends on two core principles: precision in execution and quality in sourcing. By understanding the mechanics and committing to a rigorous process, you can ensure your projects are built on a foundation of strength and reliability, supported by a resilient, American-made supply chain. Here at Maden.co, we are dedicated to this principle, connecting industrial buyers with the very best of American manufacturing.
Understanding the Mechanics: Why Concrete Screws Work
Unlike wood screws that displace soft material, or bolts that require a nut, concrete screws are a marvel of mechanical engineering designed for a uniquely unforgiving substrate. Their effectiveness hinges on a simple yet powerful principle: they are self-tapping. A correctly installed concrete screw meticulously cuts its own threads into the walls of a precisely drilled pilot hole, creating an incredibly strong mechanical interlock with the concrete.
This is fundamentally different from expansion anchors (like wedge or sleeve anchors), which work by exerting outward force against the sides of the hole. While effective, expansion anchors can introduce high stress into the concrete, making them less suitable for applications near edges or in brittle material.
The holding power of a concrete screw is determined by two primary forces:
- Pull-Out Strength (Tensile Load): This measures the force required to pull the screw straight out of the hole. It's a direct function of the depth of embedment and the quality of the threads engaged with the base material. A deeper embedment and cleaner, more perfectly formed threads result in higher pull-out resistance.
- Shear Strength: This measures the force required to snap the screw sideways. This is primarily determined by the screw's diameter and the tensile strength of the steel it's made from.
The magic happens in the relationship between the pilot hole and the screw's threads. The specialized, hardened threads are designed to be slightly larger than the hole, allowing them to abrade and cut into the concrete and masonry as the screw is driven. This process creates a perfect, custom-fit connection free from the expansion stress associated with other anchor types. This is why the precision of the drilling and cleaning process, which we will detail later, is not just best practice—it is absolutely essential to the fastener’s performance.
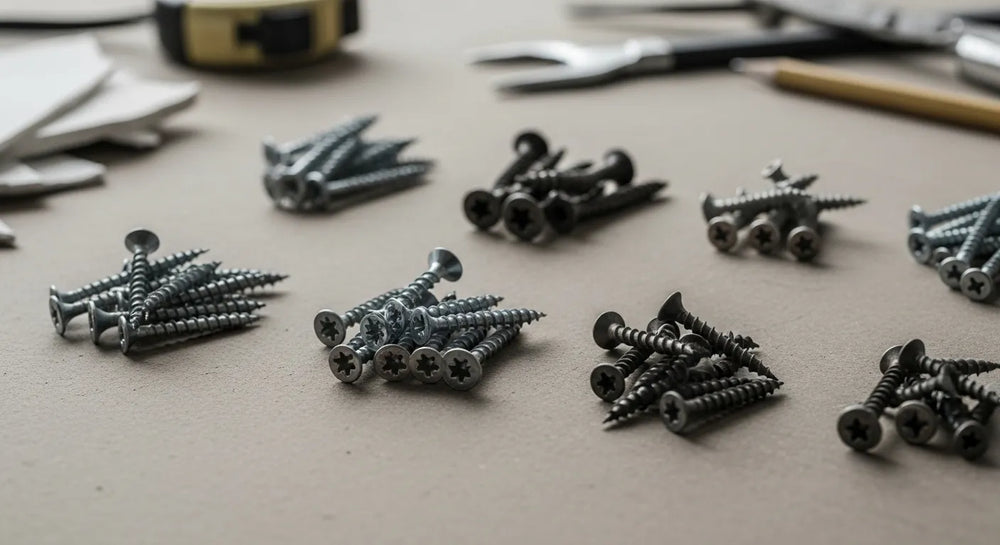
Types of Concrete Screws: Choosing the Right Fastener for the Job
Selecting the wrong fastener for an application is a common and costly mistake. The environment, the load requirements, and the nature of the object being fastened all dictate the ideal screw. A procurement manager sourcing for a new production line or an MRO buyer replacing fixtures in a wash-down area must understand these nuances to prevent premature failure and ensure operational safety.
Head Styles: Function and Finish
The head style of a concrete screw is chosen based on the application's specific needs for clamping force, surface finish, and installation tooling.
Flat Head (Countersunk)
A flat head screw is designed to sit flush with or slightly below the surface of the material it is securing. This is achieved by using a countersunk pilot hole in the fixture being mounted.
- Best For: Applications requiring a smooth, snag-free surface. This includes installing metal threshold plates, wall panels, electrical boxes, signage, and certain types of machinery trim. The flush finish is not only aesthetically pleasing but is also a critical safety feature in high-traffic areas, eliminating trip hazards.
- Example Application: For a clean and secure installation of wall-mounted safety guards or control panels, our American-made 1/4" x 2-3/4" Flat Head Concrete Screws provide the necessary strength while maintaining a low profile.
Hex Head (Washer Head or Flanged)
The hex head is the workhorse of structural fastening. It allows for high installation torque to be applied with a standard socket wrench, nut driver, or impact driver, providing superior clamping force. Many hex head concrete screws feature an integrated washer or a flanged head, which distributes the clamping load over a wider surface area, preventing damage to the fixture and increasing holding power.
- Best For: Heavy-duty and structural applications. This includes anchoring pallet racking, conveyor systems, machinery bases, support columns, and pipe hangers. The ability to apply significant, controlled torque makes them ideal for vibration-prone environments.
- Example Application: When securing the base plates of industrial shelving units, the robust design of these U.S.-sourced Hex Head Concrete Screws 3/16" x 2-1/4" ensures a reliable, high-strength connection that can be installed efficiently.
Material and Coatings: The Key to Longevity and Performance
The operational environment is the single most important factor when specifying the material and coating of a concrete screw. Using a standard carbon steel screw in a damp or corrosive environment is a recipe for premature failure, leading to costly repairs and potential safety hazards. This is where understanding coating technologies becomes a crucial part of the procurement process.
- Standard Zinc-Plated Carbon Steel: This is the baseline for most concrete screws. It is suitable for dry, indoor applications where moisture and corrosive chemicals are not present.
- Corrosion-Resistant Coatings: For any application with exposure to moisture, chemicals, or outdoor elements, a high-performance coating is non-negotiable. These advanced coatings create a durable barrier that protects the underlying steel from rust and degradation. They are essential for extending the service life of the fastening and ensuring long-term structural integrity.
A Note on Total Cost of Ownership (TCO): While a screw with an advanced coating may have a higher initial purchase price, its extended lifespan and resistance to failure dramatically lower the Total Cost of Ownership. Factoring in the cost of labor for replacement, equipment downtime, and potential safety incidents makes sourcing the correct coated fastener a financially sound decision.
- Example Application: Consider fastening junction boxes or conduit straps in a food processing facility subject to frequent high-pressure wash-downs. A standard screw would rust and fail within months. The exceptional multi-layer protection of a fastener like the Steel Blue Ruspert Ceramic Coating Flat Phillips® Drive Concrete Screw is specifically engineered for these harsh environments. Its ceramic topcoat provides a tough barrier against abrasion and chemical attack, ensuring a secure connection that lasts. Sourcing such specialized, high-quality components from verified U.S. manufacturers is at the core of our mission to build a more resilient and reliable industrial supply chain.
The Step-by-Step Installation Process: A Guide for Industrial Professionals
A high-quality American-made screw can only perform as designed if it is installed with precision and care. Deviating from the correct procedure will compromise the fastener's holding power, regardless of its quality. This five-step process embodies the value of Industrial Excellence, ensuring that every fastening is safe, secure, and reliable.
Step 1: Assembling the Right Tools and Personal Protective Equipment (PPE)
Before you begin, gather the necessary equipment. Using the wrong tools is not only inefficient but can also lead to improper installation and safety risks.
- Drill: A rotary hammer or hammer drill with a "hammer" setting is required. A standard drill driver lacks the percussion mechanism needed to effectively drill into concrete.
- Drill Bit: A carbide-tipped masonry bit that meets ANSI standards is essential. Most importantly, the bit's diameter must match the manufacturer's specification for the screw you are using. This information is typically printed on the product packaging or technical data sheet.
- Hole Cleaning Tools: A nylon or wire brush with a diameter matching the pilot hole, and a source of compressed air or a hand-powered blower bulb.
- Driving Tool: An impact driver or a calibrated torque wrench with the appropriate socket or bit for the screw head.
- PPE: Always wear ANSI-rated safety glasses to protect from flying debris and dust, as well as work gloves.
Step 2: Drilling the Pilot Hole with Precision
This is the foundation of the entire installation. The quality of the pilot hole directly dictates the strength of the fastening.
- Select the Correct Bit Size: Double-check that you have the exact bit diameter specified for your screw. For example, a 1/4" diameter concrete screw typically requires a 3/16" pilot hole. Using a bit that is too large will result in zero holding power. Using one that is too small will make the screw impossible to drive or cause it to snap under tension.
- Mark the Drilling Depth: The pilot hole must be deeper than the intended embedment of the screw. A good rule of thumb is to drill the hole at least 1/2" to 1" deeper than the screw will penetrate the concrete. This creates a reservoir for any remaining dust and debris to settle in, preventing the screw from bottoming out before it is fully tightened. Mark this depth on your drill bit with a piece of tape for a clear visual guide.
- Drilling Technique: Hold the drill perpendicular (at a 90-degree angle) to the concrete surface. Apply steady, firm pressure and let the hammer action of the drill do the work. Avoid "wobbling" or angling the drill, as this will create an oversized, conical hole that will compromise the screw's grip.
Step 3: Cleaning the Hole – The Most Overlooked Step
This is the single most critical and most frequently skipped step in the process. Concrete dust left in the pilot hole acts as a lubricant and a barrier. It prevents the screw's threads from achieving a deep, clean bite into the solid concrete, which can reduce the fastener's ultimate holding power by over 50%.
The proper procedure is a simple, four-part cycle:
- Brush: Insert the wire or nylon brush to the bottom of the hole and twist it as you pull it out to loosen all the dust from the sides.
- Blow: Use compressed air or a blower bulb to force all the loose dust out of the hole. (Always direct the dust away from your face).
- Brush: Repeat the brushing process one more time to dislodge any remaining stubborn particles.
- Blow: Repeat the blowing process to ensure the hole is completely clear of debris.
The hole is only ready when no more dust is expelled during the blowing step. This commitment to a clean hole is a hallmark of a professional installation.
Step 4: Driving the Screw Correctly
With a clean pilot hole, you are ready to install the fastener.
- Position the Fixture: Place your fixture over the hole and insert the screw through it and into the hole. Give it a few turns by hand to ensure it is starting straight and not cross-threaded.
- Drive the Screw: Using an impact driver or drill, drive the screw into the hole. Drive it until the head is seated firmly against the fixture.
- Avoid Over-Torquing: This is a crucial point of failure. The goal is to make the fixture snug, not to drive the screw with maximum force. Over-torquing can strip the threads you just created in the concrete, causing the screw to spin freely and lose all holding power. It can also place the screw under excessive tensile stress, potentially snapping it. If using a torque wrench, always adhere to the manufacturer's recommended torque values.
Step 5: Verification and Final Checks
Once the screw is installed, give the fixture a firm tug to ensure it is secure and does not move. For critical load-bearing applications, a formal proof-loading test using specialized equipment may be required as part of the quality assurance process.
Common Mistakes and How to Avoid Them
Even experienced professionals can make mistakes. Being aware of these common pitfalls can save significant time, money, and rework.
- Using the Wrong Bit: Always verify the required bit diameter. Do not "guess" or use a bit that is "close enough."
- Inadequate Hole Cleaning: Rushing this step is the most common cause of fastener failure. Follow the "brush, blow, brush, blow" method every time.
- Over-Driving the Screw: Let the tool do the work and stop when the fastener is snug. The threads in concrete are strong, but not invincible.
- Incorrect Spacing: Installing screws too close to an edge or to each other can cause the concrete to "spall" or break away. A general guideline is to maintain a minimum distance of 10 screw diameters from an unsupported edge and 5-10 screw diameters between fasteners, though this can vary based on concrete quality.
- Ignoring the Environment: Using an uncoated screw in a damp environment is guaranteeing a future failure. Always match the screw's coating to the environmental demands of the application.
Why Sourcing American-Made Concrete Screws Matters
In an era of complex global supply chains, the decision of where to source components has strategic implications that go far beyond the per-unit cost. For industrial buyers, choosing verified, U.S.-made fasteners offers tangible advantages in quality, reliability, and operational resilience. Our entire business model is built on this principle; you can learn more about our mission to champion American manufacturing here.
Quality, Consistency, and Compliance
American manufacturers operate under some of the most stringent quality control standards in the world. When you source a concrete screw from a verified U.S. producer, you are getting a product with:
- Consistent Material Integrity: The chemical composition and heat treatment of the steel are precisely controlled, ensuring predictable strength and ductility.
- Precise Manufacturing Tolerances: Thread geometry, head dimensions, and coating thickness are uniform from screw to screw, leading to consistent installation and performance.
- Verifiable Compliance: Products are often manufactured to meet specific industry standards (e.g., ASTM, ANSI), providing engineers and project managers with the documented assurance they need for critical applications.
This level of quality control directly reduces the risk of in-field failures, protects your company's reputation, and lowers the long-term TCO by minimizing rework and replacements.
Supply Chain Transparency and Resilience
The last few years have repeatedly demonstrated the fragility of long, opaque supply chains. Sourcing fasteners from domestic manufacturers through a transparent platform like Maden.co provides:
- Reduced Lead Times: Shorter transit distances mean faster, more predictable delivery schedules, allowing for better project planning and reduced inventory carrying costs.
- Enhanced Traceability: A clear line of sight to the manufacturer provides greater accountability and makes it easier to obtain technical data sheets, material certifications, and support.
- Insulation from Global Disruptions: By relying on a domestic manufacturing base, your operations are less vulnerable to international shipping delays, port closures, and geopolitical instability.
This is what we mean by Customer Empowerment. We provide the tools and access for procurement professionals to build a stronger, more reliable, and all-American supply chain. We are constantly expanding our network of top-tier American suppliers. Are you a U.S. manufacturer? Register as a vendor and join the American manufacturing revival.
Strategic Procurement: Streamlining Your Fastener Sourcing
For a procurement manager under pressure to source a specific coated hex head screw, a design engineer needing performance data for a new anchor design, or an MRO buyer facing an unexpected equipment breakdown, the ability to quickly find and finance a verified, U.S.-made part is a game-changer.
Maden.co was built to solve this exact problem. Our platform provides immediate access to over 2.5 million products from our network of more than 800 verified U.S. manufacturers. Instead of spending hours searching multiple supplier websites or catalogs, you can find the exact specifications you need in a single, streamlined marketplace. If you have specific sourcing questions or need help finding a particular specification, our team is ready to help.
We also understand that managing cash flow is critical for businesses of all sizes. A plant-wide upgrade or a large-scale construction project can require significant upfront capital for materials. To support your growth and operational needs, we offer a powerful financial tool.
You can apply for Instant Financing at checkout to streamline your capital-intensive projects. This allows you to acquire the high-quality components you need to move your business forward, while managing your budget and cash flow effectively.
Conclusion
Mastering the use of concrete screws is a fundamental skill in any industrial setting. It is a process that demands precision, the right tools, and an uncompromising commitment to quality, from the initial drilling of the pilot hole to the final turn of the driver. As we have outlined, success depends on understanding the mechanics of how these fasteners work, selecting the appropriate type and coating for the application, and meticulously following the correct installation procedure.
More strategically, however, project success and operational resilience depend on the quality of the components you source. By choosing high-grade, American-made concrete screws, you are not just buying a fastener; you are investing in verifiable quality, consistent performance, and a more resilient supply chain. This is the foundation of building with confidence.
Don't let fastener procurement be the weak link in your project. Explore our extensive catalog of U.S.-made concrete screws and other industrial components today. Simplify your purchasing process and manage your budget effectively by applying for Instant Financing directly at checkout. America's manufacturing revival is here, and it's ready to support your most critical projects.
Frequently Asked Questions
1. Can I reuse concrete screws? Generally, it is not recommended to reuse concrete screws in critical or load-bearing applications. The process of removing and reinserting a screw can damage the threads cut into the concrete and wear down the screw's own threads, significantly compromising its holding power. For temporary fixtures or light-duty applications, reuse may be possible, but it should be done with caution. For any structural or safety-critical fastening, always use a new screw.
2. What is the difference between a concrete screw and a wedge anchor? The primary difference is their mechanism. A concrete screw is a self-tapping, removable anchor that cuts its own threads into the concrete. A wedge anchor is a permanent, expansion-style anchor that works by expanding a clip at the bottom of the anchor against the walls of the pilot hole as a nut is tightened. Screws are often faster to install and are removable, while wedge anchors typically offer higher tensile strength for heavy-duty structural connections.
3. How close to the edge of the concrete can I install a screw? The minimum distance from an unsupported edge or another fastener is crucial to prevent the concrete from cracking or "spalling." While manufacturer specifications should always be followed, a common rule of thumb is to maintain a minimum distance of 10 screw diameters from an edge and between 5 to 10 screw diameters between adjacent fasteners. For example, a 1/4" screw should be installed at least 2.5 inches from an edge.
4. Do I absolutely need a hammer drill to install concrete screws? Yes. A standard rotary drill, even a powerful one, lacks the percussion (hammering) action necessary to efficiently drill into dense materials like concrete and masonry. Attempting to use a standard drill will be extremely slow, will quickly burn out the drill bit, and can result in an improperly formed hole. A hammer drill is the correct tool for the job and is essential for a proper, safe installation.


