Removing Wall Anchors: A Professional's Drywall Guide
Table of Contents
- Introduction
- Why Proper Anchor Removal Matters in a Professional Setting
- Identifying Your Anchor: The First Step to Flawless Removal
- The MRO Toolkit: Essential Tools for Anchor Removal and Repair
- Step-by-Step Removal Techniques by Anchor Type
- The Art of the Patch: Achieving an Invisible Repair
- Sourcing for Success: The Maden.co Advantage
- Conclusion
- Frequently Asked Questions
Introduction
In any commercial or industrial facility, walls are dynamic surfaces. Departments are reconfigured, equipment is upgraded, and fixtures are moved. This constant evolution often leaves a telling history: a series of empty holes punctuated by the plastic or metal remnants of wall anchors. For a facility manager or an MRO professional, this isn't merely a cosmetic annoyance. Each abandoned anchor represents a potential point of weakness in the wall, a mark of unprofessionalism, and a task that, if done incorrectly, can escalate from a minor patch job into a significant drywall repair project. The true cost of a poorly removed anchor isn't measured in spackle, but in wasted labor hours and compromised asset integrity.
This guide moves beyond simple home-repair tips to provide a comprehensive, professional-grade methodology for removing wall anchors from drywall. We will delve into the critical first step of identifying different anchor types, outline the essential tools for a clean extraction, and provide detailed, step-by-step techniques for each common category of anchor. Furthermore, we will cover the art of the invisible patch, ensuring that your repairs meet the highest standards of industrial excellence. The goal is to equip maintenance teams, MRO buyers, and facility managers with the knowledge to handle this common task with precision, efficiency, and a focus on long-term quality, reflecting the same commitment to excellence we champion here at Maden.co.
Why Proper Anchor Removal Matters in a Professional Setting
In the world of facility maintenance and repair, the difference between an amateur and a professional often lies in the details. The removal of a wall anchor is a perfect example. While it may seem trivial, the approach taken has tangible impacts on operational efficiency, safety, and the overall Total Cost of Ownership (TCO) associated with building maintenance.
Preserving Structural Integrity and Safety
Drywall is a composite material, consisting of a gypsum core pressed between two thick sheets of paper. Its strength lies in this laminated structure. When an anchor is ripped out carelessly, it doesn't just leave a hole; it often tears the paper facing and fractures the surrounding gypsum core. This creates a much larger, weaker area that is significantly more difficult to repair effectively. A simple patch over a compromised area may look fine initially, but it won't have the same strength and is prone to cracking or failing in the future, especially in high-traffic commercial environments. For MRO professionals, ensuring the long-term stability of every surface is a core responsibility.
The Total Cost of Ownership of "Quick Fixes"
A rushed, improper removal process invariably leads to higher costs down the line. Consider the workflow:
- Improper Removal: Tearing a large crater in the wall.
- Increased Material Usage: The larger hole requires more joint compound or spackle, and potentially mesh tape or a drywall patch.
- Extended Labor Time: A larger, uneven repair requires multiple coats of compound, with significant drying time between each, followed by more extensive sanding. A five-minute task becomes a multi-hour or multi-day affair.
- Aesthetic Compromise: Even after repair, a poorly patched area can often be seen under certain lighting conditions (a phenomenon known as "flashing"), detracting from the professional appearance of the space.
By contrast, a professional technique that minimizes initial damage leads to a quick, clean, and durable repair, directly lowering the TCO of wall maintenance. This mindset of prioritizing quality and long-term value is central to our mission at Maden.co, where we believe that starting with superior, reliable components is the first step to reducing downstream costs.
Upholding Professional Standards
In any business setting—be it a corporate office, a manufacturing plant, a retail store, or a healthcare facility—the physical environment is a reflection of the brand. Walls that are pockmarked with sloppy repairs send a message of carelessness. Conversely, immaculately maintained surfaces convey a commitment to quality and attention to detail. For a facility manager, mastering tasks like anchor removal is part of maintaining the high standards that protect and enhance the value of the physical asset.
Identifying Your Anchor: The First Step to Flawless Removal
Before you can choose the right tool or technique, you must accurately identify the type of anchor you're dealing with. Each is designed to function differently within the wall cavity, and therefore, each requires a specific removal strategy. Attempting to pull out an anchor designed to be pushed in is the most common cause of significant drywall damage.
Category 1: Expansion Anchors (Plastic/Nylon)
These are arguably the most common type of anchor for light-to-medium duty applications. They consist of a plastic or nylon sleeve that is inserted into a pre-drilled hole. When a screw is driven into the sleeve, the sides of the anchor expand, pressing firmly against the inside of the drywall to create a secure hold.
- Appearance: Typically a plastic sleeve, often with ribs along the outside to improve grip. The head may be flanged to sit flush with the wall.
- How They Work: Friction and expansion.
- Common Use: Hanging pictures, clocks, lightweight shelving.
- Example: A prime example of this category is the common Ribbed Plastic Anchor, a staple in maintenance kits across the country for its simplicity and reliability in light-duty applications.
Category 2: Self-Drilling / Threaded Anchors
These anchors are designed for faster installation, as they do not require a pre-drilled pilot hole. They have a sharp, threaded body that bores directly into the drywall, much like a large screw. They offer a stronger hold than many basic plastic expansion anchors.
- Appearance: A wide, sharp-threaded body made of nylon or zinc alloy, with a head that accepts a Phillips screwdriver.
- How They Work: They cut their own threads into the gypsum, providing a secure grip.
- Common Use: Installing curtain rods, thermostats, heavier wall decor.
- Example: The Medium-Duty Nylon Wall Anchor (#6 Self-Drilling Drywall Zip-It®) is a perfect illustration of this design, valued for its installation speed and holding power in MRO tasks.
Category 3: Sleeve-Type Hollow Wall Anchors (Molly Bolts)
Molly bolts are heavy-duty metal anchors designed for securing significant loads to hollow walls. They consist of a screw and a metal sleeve. As the screw is tightened, it pulls the back of the sleeve forward, causing it to collapse and flare out into a spider-like shape that clamps onto the back of the drywall.
- Appearance: A round, flanged head with a machine screw. The body is a metal sleeve that is slit down the sides.
- How They Work: The sleeve deforms and clamps onto the back of the drywall.
- Common Use: Mounting heavy mirrors, grab bars, small cabinets, and commercial fixtures.
Category 4: Toggle Bolts
Toggle bolts provide the strongest hold in drywall and are used for the heaviest applications. They are a two-part fastener: a long machine screw and a spring-loaded, wing-shaped nut (the "toggle"). The toggle is collapsed, pushed through a hole in the wall, and then springs open inside the wall cavity. Tightening the screw pulls the toggle flat against the back of the drywall.
- Appearance: A machine screw paired with a separate, spring-loaded metal wing mechanism.
- How They Work: A large metal bar braces against the back of the drywall, distributing the load over a wide area.
- Common Use: Hanging ceiling fans (in drywall ceilings), heavy-duty shelving, wall-mounted sinks.
The MRO Toolkit: Essential Tools for Anchor Removal and Repair
Having the right tools is non-negotiable for achieving a professional result with minimal effort. A well-equipped MRO cart should include the following for this task:
- Safety Gear: Safety glasses and a dust mask are essential, especially during sanding.
- Screwdrivers: A multi-bit screwdriver with Phillips and flathead bits of various sizes.
- Pliers: Needle-nose pliers are crucial for gripping anchor heads and screws. Standard pliers can also be useful.
- Utility Knife: A sharp utility knife with a fresh blade is needed for scoring, cutting flanges, and cleaning up holes.
- Hammer: For gently tapping anchors flush with the wall.
- Drill and Bits: A variable-speed drill is useful for more stubborn anchors. A set of bits can be used to drill out the center of a Molly bolt if needed.
- Putty Knives: A flexible 1.5-inch knife for applying compound and a wider 4-inch or 6-inch knife for feathering edges.
- Spackling or Joint Compound: Lightweight spackle for tiny holes, and all-purpose joint compound for more substantial repairs.
- Sandpaper/Sanding Sponge: A fine-grit (120-220) sanding sponge or paper for a smooth finish.
- Primer: A quality primer is critical for ensuring the patch doesn't show through the final coat of paint.
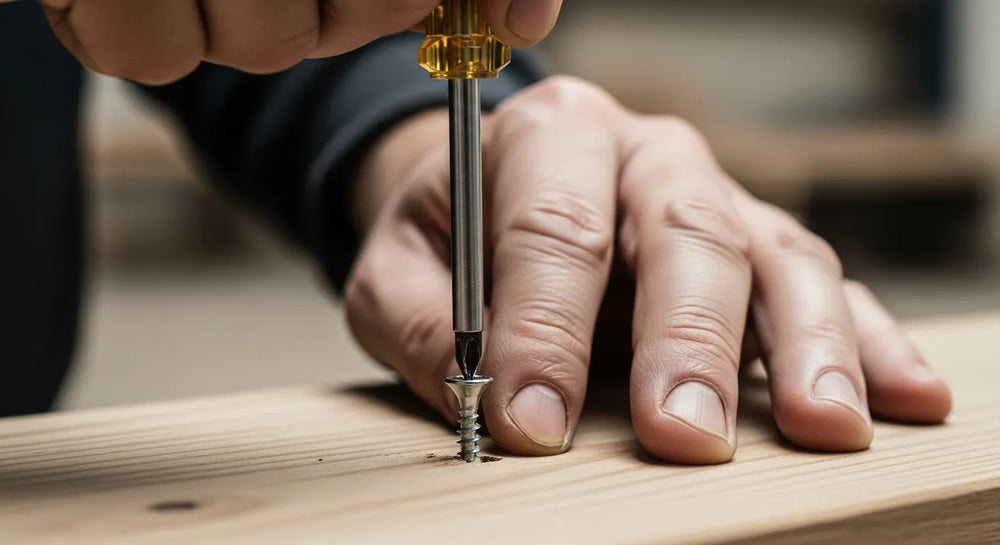
Step-by-Step Removal Techniques by Anchor Type
With your anchor identified and your tools ready, you can proceed with the appropriate removal technique.
Method 1: Removing Plastic Expansion Anchors
These common anchors offer a few options for removal. The best choice depends on how tightly the anchor is lodged.
- The Pull-Out Method (For Loose Anchors): If the anchor's flange is raised and it feels loose, you can often grip it firmly with needle-nose pliers and pull it straight out. Wiggle it gently as you pull to break it free.
- The Screw-and-Pull Method: If the anchor is too snug to grip, insert a screw that fits the anchor just a few turns—enough to get a good grip but not enough to expand the anchor again. Use the screw as a handle and pull it out with pliers. The quality of a U.S.-made fastener like a Medium-Duty Nylon Wall Anchor for Drywall (#8) often means it has a more secure fit, making this a reliable technique.
- The Push-Through Method (Professional Standard): This technique causes the least amount of damage to the drywall face. Instead of pulling the anchor out, you'll make it disappear into the wall. Use a flathead screwdriver or a nail set and gently tap the head of the anchor with a hammer until it is slightly recessed (about 1/8 inch) below the surface of the drywall. This leaves a small, perfectly round divot that is incredibly easy to fill with a single dab of spackle.
Pro Tip: Avoid the temptation to rip a stubborn plastic anchor out. The push-through method is almost always faster and cleaner, preventing the creation of a large, frayed crater that requires more extensive patching.
Method 2: Removing Self-Drilling / Threaded Anchors
Thanks to their design, these are typically the easiest to remove.
- Unscrew: Insert a Phillips head screwdriver into the anchor head.
- Apply Firm Pressure: Push firmly into the anchor as you turn counter-clockwise. This helps prevent the head from stripping.
- Extract: The anchor should back out of the wall cleanly, leaving a relatively neat hole.
Troubleshooting: If the anchor spins in place without backing out, the surrounding drywall has become stripped. In this case, use needle-nose pliers to grip the outer rim of the anchor's flange. Maintain pressure with the pliers to hold the anchor stationary while you use the screwdriver to back the screw out.
Method 3: Removing Molly Bolts (Hollow Wall Anchors)
Removing a Molly bolt correctly requires understanding that you are only removing the screw and flange, not the entire mechanism.
- Remove the Screw: Use a screwdriver to turn the screw counter-clockwise until it is completely removed from the anchor sleeve.
-
Address the Flange: The metal sleeve and its flange will remain in the wall. You have two professional options:
- Tap it Flush: Place a wide putty knife or a block of wood over the flange to protect the wall. Gently tap the flange with a hammer until it is slightly recessed below the drywall surface. This is the cleanest method.
- Pry it Out (with caution): You can try to slide a sharp putty knife under the flange and carefully pry it off. This carries a high risk of damaging the drywall paper, so it is generally not recommended.
- Push the Sleeve In: Once the flange is dealt with, use a screwdriver to push the remaining part of the anchor (the collapsed sleeve) deep into the wall cavity, where it will fall harmlessly away.
Under no circumstances should you try to pull the collapsed sleeve back through the hole. It will cause massive damage to the back and front of the drywall.
Method 4: Removing Toggle Bolts
This is the most straightforward removal of all, as the main component is designed to be abandoned.
- Unscrew the Bolt: Turn the machine screw counter-clockwise while pulling it slightly outward to keep the toggle engaged with the back of the wall.
- Push it Through: Once the screw is almost completely out, give it a final push. The screw will separate from the spring-loaded toggle, and the toggle will fall harmlessly down into the wall cavity.
The toggle itself is never retrieved. The only thing to patch is the original hole drilled for the bolt.
The Art of the Patch: Achieving an Invisible Repair
Removing the anchor is only half the job. A professional finish requires a meticulous approach to patching.
- Step 1: Preparation: Use a utility knife to carefully trim away any loose paper or frayed gypsum around the edge of the hole. Create a clean, slightly beveled edge. This gives the compound a solid surface to adhere to.
- Step 2: First Fill: Using a flexible putty knife, apply a small amount of spackle or joint compound, pressing it firmly into the hole to ensure there are no air pockets. For small anchor holes, the goal is to leave the patch slightly mounded or proud of the wall surface.
- Step 3: Skim and Feather: Once the first fill is completely dry (check the manufacturer's instructions), take a wider putty knife for the second coat. Apply a very thin layer of compound over the patch, extending it an inch or two beyond the original repair area. This is called "feathering" and it helps blend the patch into the surrounding wall.
- Step 4: Final Sanding: After the second coat is fully cured, use a fine-grit sanding sponge (120-220 grit) to lightly sand the patch. Use a circular motion and light pressure. The goal is to make the patch perfectly smooth and level with the wall. Run your hand over it; you shouldn't be able to feel the transition.
- Step 5: Prime Before Painting: This is the most commonly skipped step and the most critical for an invisible repair. Primer seals the porous joint compound, ensuring that the new paint absorbs evenly across both the patch and the original wall. Without primer, the patched area will have a different sheen ("flashing"), and the repair will be obvious.
Sourcing for Success: The Maden.co Advantage
A maintenance task as fundamental as removing a wall anchor highlights a broader principle in the industrial and commercial sectors: quality and reliability begin at the source. A poorly manufactured anchor that strips, breaks, or fails to hold properly complicates both installation and removal, wasting valuable time. For procurement managers and MRO buyers under pressure to maintain facilities and manage budgets, access to dependable, high-quality components is not a luxury—it is a strategic necessity.
This is the core of our mission at Maden.co. We are dedicated to democratizing access to American manufacturing, connecting industrial buyers with over 2.5 million American-made products from our network of 800+ verified U.S. manufacturers. Our vision is to prove that sourcing domestically is not only viable but superior, offering unparalleled supply chain transparency and industrial excellence. You can learn more about our mission to champion American manufacturing here.
For an MRO manager overseeing a large-scale facility renovation, sourcing thousands of consistent, high-quality fasteners is a critical procurement challenge. Our platform empowers them by reducing friction, providing detailed specifications, and guaranteeing a domestic supply chain. And for larger orders or capital-intensive projects, we offer a powerful tool to manage cash flow effectively. You can apply for Instant Financing at checkout to streamline your capital-intensive projects, making it easier than ever to invest in the quality components your facilities deserve.
This commitment to strengthening American industry is a two-way street. If you are a U.S. manufacturer producing the high-quality components that keep our country's facilities running, your products are in high demand. Register as a vendor and join us in proving that America's manufacturing revival is here.
Conclusion
Mastering how to take wall anchors out of drywall is more than a simple maintenance skill; it is a reflection of a professional commitment to quality, efficiency, and the preservation of assets. By correctly identifying the anchor, using the proper tools and techniques, and executing a flawless patch, you minimize damage, save time, and uphold the highest standards of facility maintenance.
This attention to detail at the most fundamental level is what separates world-class operations from the rest. Building and maintaining superior facilities starts with sourcing superior components. We invite you to explore the Maden.co catalog and discover a new standard of convenience and reliability for all your industrial procurement needs. Should you have specific questions or require assistance sourcing a particular component, our team is ready to help.
Frequently Asked Questions
Q1: What's the biggest mistake people make when removing wall anchors? A1: The most common and damaging mistake is trying to forcefully pull out an anchor that is designed to be pushed in, such as the body of a Molly bolt or a standard plastic expansion anchor. This approach almost always tears the drywall paper and creates a large, cratered hole that is far more difficult to repair cleanly than the small divot left by the correct "push-through" method.
Q2: Can I reuse a wall anchor after removing it? A2: It is strongly advised not to reuse wall anchors. Most types, especially plastic expansion anchors and metal sleeve-type anchors, are designed for a single use. The process of both installation and removal compromises their structural integrity. Re-inserting a used anchor significantly increases the risk of it failing to hold, which could lead to property damage or safety hazards. Sourcing new, high-quality anchors is always the safest and most professional choice.
Q3: Is it better to push an anchor into the wall or pull it out? A3: For many of the most common anchor types, such as ribbed plastic anchors and Molly bolts, pushing them so they sit just below the drywall surface is the superior professional technique. This method causes the least amount of trauma to the fragile paper face of the drywall, resulting in a smaller, neater, and more structurally sound area to patch. This leads to a faster and more invisible repair.
Q4: The anchor just spins when I try to unscrew it. What should I do? A4: This common problem occurs when the anchor has lost its grip within the drywall material. For threaded, self-drilling anchors, the best solution is to use a pair of needle-nose pliers to firmly grip the outer flange of the anchor, holding it stationary. While maintaining this grip, use your other hand to turn the screw with a screwdriver. The counter-pressure from the pliers will prevent the anchor body from spinning, allowing the screw to back out.


