Removing Wood Filler from Screws: Techniques for Restoration and Reacquisition
Table of Contents
- Understanding the Challenge: Why Wood Filler Becomes a Problem
- Preventive Measures: Avoiding Filler Obstruction
- General Principles for Wood Filler Removal
- Methods for Removing Wood Filler from Screws
- After Removal: Cleaning, Inspection, and Replacement
- Future-Proofing Your Fastener Strategy with Maden.co
- Conclusion
- Frequently Asked Questions
A seemingly minor obstruction can bring an entire industrial operation to a grinding halt. Imagine a critical piece of equipment requiring immediate maintenance, only to find the access screws are stubbornly encapsulated by hardened wood filler. What should be a straightforward task transforms into a frustrating bottleneck, delaying repairs, disrupting production schedules, and potentially escalating costs. This scenario is far from uncommon in manufacturing, MRO, and construction, highlighting the unexpected challenges that can arise when fasteners become compromised.
In the intricate world of industrial procurement and maintenance, every detail matters. The integrity of a screw, often overlooked until it fails, is paramount. When wood filler obscures a screw head, it not only prevents proper engagement with a driver but can also lead to stripped heads, damaged surrounding materials, and extensive downtime. This comprehensive guide is engineered to equip procurement managers, MRO buyers, design engineers, and business owners with the authoritative knowledge and practical techniques required to safely and effectively remove wood filler from screws. We will explore various methods, from gentle approaches for fresh filler to more aggressive tactics for stubborn, dried obstructions, ensuring you can restore functionality or prepare for seamless replacement. Furthermore, we will delve into the strategic advantages of leveraging a robust supply chain, like the one we champion at Maden.co, to prevent future occurrences and ensure a continuous supply of high-quality, U.S.-made fasteners for your projects.
Understanding the Challenge: Why Wood Filler Becomes a Problem
Wood filler is an invaluable product in many applications, used to repair damage, fill gaps, or create smooth surfaces. However, its presence over a screw head can create significant impediments. The composition of wood fillers varies widely, from water-based latex formulas to solvent-based epoxies and even two-part fillers, each presenting unique challenges for removal. When these materials cure and harden, they can form a tenacious bond, effectively locking out screwdrivers and other tools. This obstruction can lead to:
- Stripped Screw Heads: Attempting to force a driver into a partially obscured head often results in stripping, making future removal exponentially more difficult.
- Damaged Surrounding Materials: Aggressive removal attempts can chip or mar the wood, laminates, or other surfaces around the screw, necessitating additional repairs.
- Corrosion and Degradation: Some fillers, especially if moisture becomes trapped, can accelerate corrosion of certain screw materials, weakening the fastener over time.
- Delayed Maintenance and Project Timelines: The time spent wrestling with a filler-encapsulated screw is time lost, directly impacting operational efficiency and project delivery.
- Safety Risks: Impatience and improper techniques can lead to tools slipping, causing injury or further damage.
The problem of obscured screws underscores a broader challenge in industrial operations: the need for precision, durability, and accessibility in every component. At Maden.co, our mission is to democratize access to American manufacturing, ensuring that industrial buyers can always find the exact U.S.-made products they need, facilitating both initial assembly and critical maintenance. Our vision is to become the definitive platform that proves American-made components are as accessible and convenient as any global alternative, driving the manufacturing revival with our tagline: "America's manufacturing revival is here." This commitment extends to providing resources that empower businesses to maintain the integrity of their installations.
Preventive Measures: Avoiding Filler Obstruction
The adage "an ounce of prevention is worth a pound of cure" holds true when it comes to wood filler and screws. Proactive measures can largely mitigate the need for difficult removal processes. For design engineers and MRO buyers, considering long-term maintenance needs during the initial design and installation phases is crucial.
Strategic Planning for Fastener Placement
- Concealment vs. Accessibility: Evaluate whether screws truly need to be concealed. For many industrial applications, exposed fasteners are perfectly acceptable and aid in future maintenance. If concealment is desired for aesthetic or functional reasons, design elements that allow for easy access panels or caps can be incorporated.
- Recessed Fasteners: When screws must be hidden, consider recessing them adequately. This allows for a clean fill above the screw head while still providing enough depth to chip away filler if access is needed. Using escutcheon plates or specialized plugs can also provide a removable cover.
- Temporary Protection: Before applying wood filler, consider using masking tape or painter's tape directly over the screw head. A small piece of tape cut to size can protect the drive recess from filler intrusion. Alternatively, a thin layer of petroleum jelly or wax applied to the screw head can act as a release agent.
- Filler Application Technique: Instruct technicians to apply filler judiciously, avoiding overfilling areas around screw heads. Precision application, often using a putty knife or spatula, can minimize cleanup and potential obstruction.
Choosing the Right Fastener
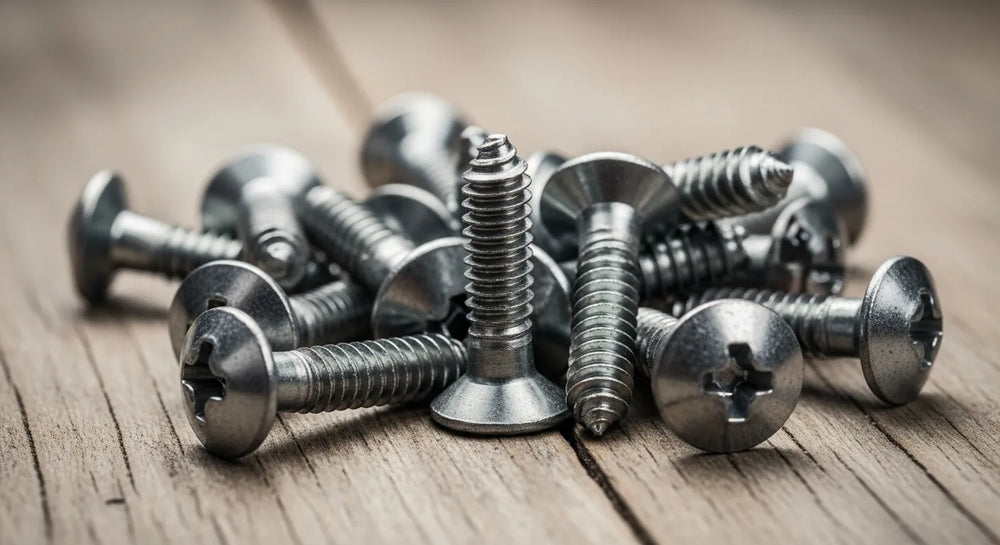
Selecting high-quality fasteners from reliable sources is another critical preventative measure. Screws with clearly defined drive recesses and durable materials are less prone to stripping even if some filler adheres. For instance, robust round slot drive brass wood screws or flat slot drive brass wood screws offer excellent resistance to corrosion and provide a solid engagement point for drivers. Similarly, for applications demanding superior corrosion resistance, an oval slot drive silicon bronze wood screw ensures long-term integrity, even in challenging environments.
At Maden.co, our network of 800+ verified U.S. manufacturers provides access to over 2.5 million American-made products, including an extensive range of high-performance fasteners. By emphasizing American Manufacturing Pride and Industrial Excellence, we connect you with components that meet rigorous standards, ensuring reliability from day one. Our platform streamlines the procurement process, allowing you to source specific, high-quality U.S.-made parts that resist wear and facilitate maintenance, ultimately improving your Total Cost of Ownership (TCO).
General Principles for Wood Filler Removal
Before diving into specific methods for how to remove wood filler from screws, several foundational principles apply across all approaches:
-
Assess the Situation:
- Filler Type: Is it a soft, fresh water-based filler or a hard, dried epoxy? This dictates the method.
- Screw Head Condition: Is it already partially stripped? What type of drive does it have (slotted, Phillips, Torx, square)?
- Surrounding Material: What type of wood or substrate is around the screw? How delicate is it?
- Access: Is the screw deeply recessed or flush with the surface?
- Gather the Right Tools: Having the correct tools readily available prevents frustration and potential damage.
- Prioritize Safety: Always wear appropriate personal protective equipment (PPE), including eye protection, gloves, and respiratory masks if using solvents or generating dust.
- Work Methodically and Patiently: Haste leads to errors. Begin with the least aggressive method and escalate only if necessary.
- Test in an Inconspicuous Area: If using solvents, always test them on a hidden part of the wood or material to ensure they don't cause discoloration or damage.
Methods for Removing Wood Filler from Screws
The approach to removing wood filler from screws will depend heavily on the type of filler, its age, and the extent of the obstruction. We’ll categorize these methods from least to most aggressive.
Method 1: Gentle Approaches (for Fresh or Softened Filler)
These methods are ideal for recently applied filler, water-based formulas that haven't fully cured, or when dealing with minimal obstruction.
Tools Needed:
- Small, sharp utility knife
- Dental picks or small awl
- Stiff-bristle brush (e.g., nylon or brass brush)
- Damp cloth or sponge
- Plastic scraper or putty knife
- Compressed air (optional, for dust removal)
Step-by-Step Guide:
- Preparation: Ensure the area is well-lit.
- Initial Scoring: Using a sharp utility knife, carefully score around the perimeter of the screw head. This helps to break the bond between the filler and the screw, as well as the surrounding wood, preventing chipping of the main surface. Make shallow cuts, increasing depth gradually.
- Prying with Picks: Gently insert a dental pick or a small awl into the score lines. Carefully pry small flakes of filler away from the screw head. Focus on clearing the drive recess first. Work slowly, applying minimal leverage to avoid bending or snapping the pick.
- Brushing and Wiping: Once the larger pieces are removed, use a stiff-bristle brush to dislodge smaller particles from the screw head and its recess. Follow up with a damp cloth to wipe away any softened residue, especially with water-based fillers.
- Compressed Air: For very fine dust or particles, a blast of compressed air can help clear the drive recess, but ensure eye protection is worn and the area is clear of people.
Safety Considerations:
- Always wear safety glasses.
- Cut away from your body when using a utility knife.
- Be mindful of delicate surrounding surfaces.
Method 2: Moderate Approaches (for Dried, Accessible Filler)
When filler has fully hardened but is still relatively accessible, these methods provide more leverage without resorting to power tools.
Tools Needed:
- Chisel (small wood chisel or specialized chiseling tool)
- Small flat-head screwdriver (dedicated for prying, not for driving)
- Heat gun (with extreme caution)
- Chemical solvents (acetone, mineral spirits, paint stripper – specific to filler type)
- Cotton swabs or small brushes for solvent application
- Gloves (chemical-resistant if using solvents)
Step-by-Step Guide:
-
Chisel Technique:
- Position the chisel blade at a low angle against the edge of the dried filler, aiming towards the screw head.
- Gently tap the chisel with a hammer or mallet, or simply apply steady hand pressure. The goal is to chip away small pieces of filler.
- Work around the screw head, slowly exposing the drive.
- For recessed screws, use a smaller, narrower chisel to get into the cavity.
- Once the head is mostly clear, use a dental pick to clear the drive recess.
-
Small Screwdriver/Pry Tool:
- A small, sturdy flat-head screwdriver can sometimes be used similarly to a chisel, prying small chunks of filler.
- Select a screwdriver with a tip that fits into the existing clearance around the screw head.
- Twist and lever gently to break up the filler.
-
Heat Gun (Use with Extreme Caution):
- Crucial Warning: Heat guns can damage wood finishes, char wood, or ignite flammable materials. Use only as a last resort for moderate methods and always on the lowest setting, moving continuously.
- Direct the heat gun briefly at the filler over the screw head, keeping it several inches away. The goal is to soften the filler, not melt or burn it.
- After a few seconds, test the filler with a dental pick or small scraper. If it has softened, carefully scrape it away.
- Repeat short bursts of heat and scraping until the screw head is clear.
- Allow the area to cool completely before proceeding.
-
Chemical Solvents:
- Identify Filler Type: Determine if the filler is water-based (often softened by water or alcohol), latex (acetone or mineral spirits), or epoxy (stronger solvents like paint stripper or specialized epoxy removers). Consult the filler manufacturer's recommendations if possible.
- Test First: Apply a small amount of the chosen solvent to an inconspicuous area of the wood to ensure it doesn't cause discoloration or damage.
- Application: Apply the solvent sparingly to the filler around the screw head using a cotton swab or small brush. Avoid saturating the surrounding wood.
- Dwell Time: Allow the solvent to penetrate and soften the filler for the recommended time (usually a few minutes).
- Scraping: Once softened, use a dental pick, small scraper, or stiff brush to remove the dissolved or softened filler.
- Cleanup: Wipe away residue with a clean cloth. Repeat if necessary. Ensure adequate ventilation.
Safety Considerations:
- Heat Gun: Maintain constant vigilance. Keep a fire extinguisher nearby. Do not use near flammable liquids or fumes. Protect surrounding areas with heat-resistant materials.
- Solvents: Work in a well-ventilated area. Wear chemical-resistant gloves and eye protection. Avoid skin contact. Dispose of rags properly as some can spontaneously combust.
Method 3: Aggressive Approaches (for Stubborn, Recessed, or Damaged Screws)
When filler is exceptionally hard, deeply recessed, or if the screw head is already compromised, more aggressive, power-tool-assisted methods may be necessary. These methods carry a higher risk of damage to the screw or surrounding material and should be approached with precision and caution.
Tools Needed:
- Drill (corded or cordless)
- Small drill bits (e.g., 1/16" or 1/8")
- Screw extractor kit (reverse-threaded bits)
- Rotary tool (e.g., Dremel) with grinding bits, cutting wheels, or routing bits
- Small screwdriver bits (for clearing after grinding)
- Lubricating oil (for drilling)
Step-by-Step Guide:
-
Drilling Out the Filler:
- Target the Drive Recess: Carefully select a drill bit slightly smaller than the width of the screw drive recess (e.g., for a Phillips head, choose a bit that fits within one of the cross slots).
- Center Punch (Optional but Recommended): If the screw head is still somewhat visible, use a center punch to create a small dimple in the exact center of the drive recess. This prevents the drill bit from wandering.
- Drilling: With the drill on a low speed, carefully drill into the filler, aiming to clear only the drive recess. Go slowly and apply minimal pressure. The goal is to remove the filler, not to drill into the screw itself.
- Check Progress: Periodically stop and use a pick or small screwdriver to see if the drive is becoming accessible.
- For Deeply Recessed Screws: If the screw is deeply recessed and completely covered, start with a very small drill bit (e.g., 1/16") to create a pilot hole in the center of where the screw head is presumed to be. Gradually increase the drill bit size, carefully opening up the cavity until the screw head is exposed.
-
Using a Rotary Tool (Dremel):
- Grinding Bit: For very hard fillers, a small grinding bit or routing bit on a rotary tool can effectively carve away the filler.
- Precision: Use extreme caution and a steady hand. The rotary tool spins at high RPMs, and a slip can quickly damage the screw head or surrounding material.
- Clearing the Recess: Use the grinding bit to meticulously remove the filler, focusing on the drive recess first.
- Cutting Wheel (for Severely Obscured Screws): If the entire head is covered and drilling isn't feasible, a thin cutting wheel can be used to carefully cut a new slot into the screw head, assuming it's a flat-head or you're creating a new slot for a slotted driver. This is a highly skilled maneuver and should only be attempted if replacement is already planned, as it can weaken the screw.
-
Screw Extractors (for Compromised Screws After Filler Removal):
- If, after removing the filler, the screw head is stripped or too damaged to turn with a regular driver, a screw extractor kit is the next step.
- Drill a Pilot Hole: The kit usually requires drilling a pilot hole into the center of the screw head (not just the filler). Follow the kit's instructions for the correct drill bit size.
- Insert Extractor: Insert the reverse-threaded extractor bit into the pilot hole.
- Slow Extraction: Use a wrench or tap handle to slowly turn the extractor counter-clockwise. As it turns, its reverse threads will bite into the screw metal, eventually gripping and backing out the stubborn screw.
Safety Considerations:
- Eye Protection is Mandatory: Drilling and grinding generate flying debris.
- Gloves: Protect hands from sharp tools and hot debris.
- Respiratory Protection: Fine dust from wood filler can be irritating; wear a dust mask.
- Tool Control: Maintain a firm grip on all power tools. Use low speeds for initial drilling or grinding to reduce the risk of slippage.
- Avoid Overheating: Prolonged drilling or grinding can generate heat, potentially damaging the screw or surrounding material.
After Removal: Cleaning, Inspection, and Replacement
Once the wood filler is successfully removed and the screw is either accessible or extracted, the process isn't complete.
Cleaning the Area
- Wipe Down: Use a clean, damp cloth to wipe away any remaining residue, dust, or solvent. For metal screws, a quick wipe with a degreaser or alcohol can ensure cleanliness.
- Air Dry: Allow the screw and surrounding area to dry completely.
Inspection and Assessment
- Screw Head Integrity: Inspect the screw head for any signs of damage—stripping, deformation, or corrosion. If the screw head is compromised, even if the filler is removed, it might be prudent to replace it to prevent future issues.
- Screw Shank and Thread: If the screw was extracted, inspect its shank and threads for damage. If bent or stripped, it absolutely requires replacement.
- Surrounding Material Damage: Check the wood or substrate for any nicks, chips, or discoloration caused during the removal process. Address these repairs as needed.
The Strategic Value of Replacement and Sourcing
Often, the best course of action after a difficult removal is to replace the compromised fastener with a new, high-quality component. This is where Maden.co provides unparalleled value. For a procurement manager under pressure to source a specific fastener, a design engineer needing material certifications for a new prototype, or an MRO buyer facing an unexpected equipment breakdown, the ability to quickly find and finance a verified, U.S.-made part is a game-changer.
At Maden.co, we emphasize Supply Chain Transparency and Customer Empowerment. We help you navigate a vast selection of American-made products, ensuring compliance with critical industry standards (e.g., DIN, NPT) and enhancing supply chain resilience. Our platform is designed to reduce procurement friction, connecting you directly with trusted U.S. manufacturers.
Whether you need a specific type of wood screw, a high-strength bolt, or a unique bracket, our extensive catalog means you're likely to find exactly what you need. Our digital innovation allows for quick searching, comparison, and purchasing, all while supporting American industries. Furthermore, for larger volume purchases or when managing capital-intensive projects, our "Instant Financing" option, available at checkout, provides a strategic tool to manage cash flow effectively.
Are you a qualified U.S. manufacturer? Register as a vendor and join the American manufacturing revival to expand your reach to industrial buyers across the nation.
Future-Proofing Your Fastener Strategy with Maden.co
The challenges of removing wood filler from screws are a microcosm of larger procurement and maintenance hurdles. The solution lies not just in effective removal techniques but also in a robust, forward-thinking sourcing strategy. By prioritizing quality, accessibility, and reliability from the outset, businesses can significantly reduce downtime, lower maintenance costs, and enhance overall operational efficiency.
At Maden.co, we are committed to being your strategic partner in building a more reliable and efficient procurement process. Our platform serves as America's premier B2B marketplace for U.S.-manufactured products, connecting industrial buyers with a diverse and verified network of suppliers. You can explore our mission and values on our About Us page, where we detail our commitment to American Manufacturing Pride and Digital Innovation.
By leveraging Maden.co, you gain:
- Access to Verified Quality: Ensure every screw, bolt, or component meets stringent American manufacturing standards.
- Enhanced Supply Chain Resilience: Reduce reliance on complex global supply chains by sourcing domestically.
- Improved Total Cost of Ownership (TCO): High-quality parts last longer, perform better, and require less frequent replacement, minimizing long-term expenses.
- Simplified Procurement: Our intuitive platform makes finding and acquiring parts efficient and transparent.
- Strategic Financing Options: Manage your capital more effectively with instant financing at checkout, enabling you to make crucial purchases without cash flow constraints.
When you choose to source through Maden.co, you're not just buying a product; you're investing in reliability, American quality, and a more resilient future for your operations. If you have specific sourcing questions or need assistance finding a particular component, our team is ready to help through our Contact Us page.
Conclusion
The task of removing wood filler from screws, while seemingly minor, can be a significant impediment to industrial efficiency and project timelines. From the initial assessment of the filler type and screw condition to the careful execution of gentle, moderate, or aggressive removal techniques, precision and patience are paramount. By understanding the tools and methods available, procurement managers, MRO buyers, and design engineers can minimize damage, restore functionality, and ensure operational continuity.
Beyond the immediate challenge of extraction, this process underscores the critical importance of a proactive approach to fastener selection and supply chain management. Sourcing high-quality, durable, U.S.-made components from the outset can prevent many of these maintenance headaches, guaranteeing easier future access and prolonging the life of your installations.
We encourage you to explore the extensive catalog of American-made products available on Maden.co. Discover how our commitment to American Manufacturing Pride, Digital Innovation, and Industrial Excellence can streamline your procurement, enhance your supply chain resilience, and improve your overall Total Cost of Ownership. For your next critical project or routine maintenance, find the superior U.S.-made fasteners you need, and remember that you can apply for Instant Financing at checkout to streamline your capital-intensive projects. Your journey towards more efficient and reliable procurement begins with us.
Frequently Asked Questions
Q1: Can I use household solvents like nail polish remover to dissolve wood filler from screws?
A1: While some nail polish removers contain acetone, which can dissolve certain types of wood fillers (especially latex-based), it's crucial to exercise extreme caution. Acetone can also strip finishes, discolor wood, or damage certain plastics. Always test the solvent on an inconspicuous area of the material first to ensure it won't cause damage. For best results, identify the specific type of wood filler and use a solvent recommended by its manufacturer or a general-purpose paint stripper, testing diligently.
Q2: What's the best way to prevent wood filler from getting into screw heads in the first place?
A2: Prevention is key. The most effective methods include applying masking tape directly over the screw head before applying filler, or dabbing a small amount of petroleum jelly or wax into the screw recess to act as a release agent. Additionally, instruct technicians to apply filler precisely and avoid overfilling areas around fasteners. When designing, consider access panels or covers for concealed fasteners that may require future maintenance.
Q3: How do I know if a screw extractor kit is necessary, or if I should try another method?
A3: A screw extractor kit becomes necessary when the screw head's drive recess is so severely damaged, stripped, or deeply encased in hardened filler that a conventional screwdriver can no longer engage it effectively. If, after carefully removing the bulk of the filler, you find the screw head still won't turn without slipping or further stripping, then it's time to consider a screw extractor. These kits are designed to bite into the screw itself to back it out.
Q4: If I damage the surrounding wood while trying to remove filler, how can Maden.co help with replacements or repairs?
A4: While Maden.co primarily offers industrial components and fasteners, the need for replacement parts often arises from such scenarios. If you damage the surrounding wood, you might require new wooden components or panels, or specific fasteners to re-secure repaired sections. Our platform provides access to a vast network of U.S. manufacturers offering various materials and components, allowing you to source high-quality replacement parts, including a full range of wood screws such as round slot drive brass wood screws, flat slot drive brass wood screws, or oval slot drive silicon bronze wood screws, to complete your restoration with durable American-made products.


