What Size Concrete Screw for 2x4s: A Pro's Guide
Table of Contents
- Introduction
- Deconstructing the 2x4: Understanding the Foundation
- The Core Principle: Minimum Embedment Depth
- Diameter and Its Impact on Strength
- Beyond Size: Head Style, Material, and Coating
- A Strategic Approach to Procurement for Industrial Buyers
- Step-by-Step Installation Best Practices
- Conclusion: Building on a Foundation of Quality
- Frequently Asked Questions (FAQ)
Introduction
A multi-million dollar construction project grinds to a halt. The reason isn't a complex equipment failure or a major material shortage. It's a series of sheared fastener heads on the bottom plates of newly framed walls. The procurement team sourced what they thought were standard concrete screws, but a slight variance in tensile strength and an incorrect length calculation led to catastrophic failure, requiring costly and time-consuming rework. This scenario, all too common in the industrial and construction worlds, hinges on a seemingly simple question: what size concrete screw do you use for a 2x4? The answer, however, is far more critical and nuanced than many professionals assume.
Choosing the correct fastener is not just a task for the job site; it's a strategic decision for procurement managers, MRO buyers, and design engineers. The right choice ensures structural integrity, project efficiency, and workplace safety. The wrong choice introduces risk, delays, and unforeseen costs that ripple through an entire operation. This article moves beyond simple rules of thumb to provide an authoritative, in-depth guide to selecting the right concrete screw for securing a 2x4 to concrete. We will deconstruct the fundamental principles of embedment depth and fastener diameter, explore the critical roles of material composition and head style, and outline a strategic procurement process.
By mastering these details, you can move from simply buying a part to making a strategic investment in your project’s success, ensuring every connection is built on a foundation of quality, reliability, and the strength of American manufacturing.
Deconstructing the 2x4: Understanding the Foundation
Before you can even consider the screw, you must have a precise understanding of the material being fastened. In the world of construction and industrial applications, assumptions about material dimensions can lead to immediate and significant errors in fastener selection. The common 2x4 is the perfect example of this critical detail.
Nominal vs. Actual Dimensions
The first and most important concept to internalize is the difference between a material's nominal size and its actual size. The term "2x4" is nominal, a shorthand reference that dates back to when the lumber was rough-sawn to those dimensions. However, the modern lumber you procure has been planed and smoothed on all four sides to create a uniform, finished product.
The actual dimensions of a standard 2x4 are 1.5 inches by 3.5 inches.
This 0.5-inch difference in thickness is not a minor discrepancy; it is the foundational number upon which your entire screw length calculation rests. Using the nominal "2-inch" thickness in your formula will result in selecting a screw that is half an inch too long, potentially causing installation issues or wasting material. For procurement professionals managing large-scale orders, this small error can multiply into significant budget overruns and logistical headaches.
Orientation Matters: The 1.5" vs. 3.5" Decision
The next critical variable is the orientation of the 2x4. How you position the lumber against the concrete surface directly determines the thickness you need to fasten through.
- Securing Flat (Laid on its Wider Face): When you lay a 2x4 flat, you are fastening through its thinnest dimension. The material thickness in your calculation is 1.5 inches. This is common for applications like furring strips, sleepers for a subfloor, or mounting plates for light-duty equipment.
- Securing on Edge (Laid on its Narrower Face): When you stand a 2x4 on its edge, you are fastening through its thicker dimension. The material thickness in your calculation is 3.5 inches. This is the standard orientation for wall bottom plates (sole plates) and other structural applications where vertical strength is required.
Failing to account for the orientation is a fundamental error that guarantees the selection of an incorrectly sized screw. A screw chosen for a flat-lay application will be far too short to properly secure a 2x4 on its edge, compromising the entire connection.
The Core Principle: Minimum Embedment Depth
Once you have established the precise thickness of the material you are fastening, the next piece of the puzzle is embedment depth. This is arguably the most critical factor in determining the holding power and overall reliability of the fastener.
What is Embedment Depth?
Embedment depth is defined as the length of the screw's threaded portion that is physically engaged within the base material—in this case, the concrete. It is the portion of the screw that is doing the actual work of holding the 2x4 in place. Insufficient embedment means the screw cannot generate the necessary friction and holding power, making the connection weak and prone to failure under load.
The "1-Inch Rule" and Beyond
For most light to medium-duty applications involving solid concrete, a widely accepted rule of thumb is to achieve a minimum embedment depth of 1 inch. This provides a solid baseline for generating adequate pull-out and shear strength for non-structural tasks.
However, treating this as an unbreakable rule is a mistake. Industrial excellence requires a deeper understanding of the variables at play. Consider the following:
- Base Material Quality: The 1-inch rule assumes you are working with solid, poured concrete with a good compressive strength (e.g., 3,000 PSI or higher). If you are fastening into a softer base material like cinder block (CMU), lightweight concrete, or older, weathered concrete, you must increase the embedment depth to compensate for the lower density. An embedment of 1.5 inches or even 2 inches may be necessary to achieve the desired holding power.
- Load Requirements: For applications that will bear significant weight or be subjected to vibration or shear forces (like machinery mounts or structural ledgers), the minimum embedment depth should be increased. Design engineers will often consult manufacturer-provided technical data sheets that specify load capacities at various embedment depths.
Calculating Total Screw Length
With the material thickness and required embedment depth determined, you can now calculate the necessary screw length using a simple formula:
Screw Length = Material Thickness + Minimum Embedment Depth
Let's apply this to our 2x4 scenarios:
-
Scenario 1: Fastening a 2x4 Flat
- Material Thickness: 1.5 inches
- Minimum Embedment Depth: 1 inch
- Calculation: 1.5" + 1" = 2.5 inches
- Required Screw Length: You need a screw that is at least 2.5 inches long. Standard available sizes would be 2.75 inches or 3 inches. When you need a reliable, countersunk finish for this type of application, a U.S.-made fastener such as these 1/4" x 2-3/4" Flat Head Concrete Screws provide the perfect length and a professional, flush finish.
-
Scenario 2: Fastening a 2x4 on Edge
- Material Thickness: 3.5 inches
- Minimum Embedment Depth: 1 inch
- Calculation: 3.5" + 1" = 4.5 inches
- Required Screw Length: You need a screw that is at least 4.5 inches long. A standard 5-inch screw would be the appropriate choice.
Always round up to the next available standard screw size to ensure you meet or exceed the minimum embedment requirement.
Diameter and Its Impact on Strength
While length determines whether the screw can engage the concrete properly, the diameter of the screw is the primary factor dictating its inherent strength. A larger diameter screw offers greater resistance to shear forces (side-to-side pressure) and higher tensile strength (pull-out resistance). For 2x4 applications, the choice typically comes down to two standard diameters.
Common Diameters for 2x4 Applications
The vast majority of wood-to-concrete projects are handled effectively with either 3/16-inch or 1/4-inch diameter screws. Choosing between them depends entirely on the load requirements of the application.
3/16" Diameter: The Versatile Choice
A 3/16" diameter concrete screw is an excellent choice for a wide range of light-duty and static-load applications. These are situations where the 2x4 is not a primary structural, load-bearing element. Examples include:
- Attaching furring strips to a concrete wall for drywall installation.
- Mounting electrical conduit clamps or junction boxes.
- Securing non-load-bearing framing or blocking.
The primary advantages of a 3/16" screw are ease of installation and a smaller required pilot hole, which means less aggressive drilling. For these standard applications, sourcing a dependable American-made fastener like these 3/16" x 1-3/4" Hex Head Concrete Screws from our verified network ensures performance and consistency across your project.
1/4" Diameter: The Heavy-Duty Standard
When the application involves structural loads, potential vibration, or significant shear forces, stepping up to a 1/4" diameter screw is the professional standard. This larger diameter provides a substantial increase in both shear and tensile strength, making it the required choice for applications such as:
- Securing the bottom plate (sole plate) of a load-bearing wall.
- Anchoring heavy-duty shelving brackets.
- Mounting machinery or equipment that may vibrate.
- Any application where safety and structural integrity are paramount.
The marginal increase in cost for a 1/4" screw is negligible compared to the massive increase in security and load-bearing capacity it provides. This is a clear instance where specifying the more robust option is a critical risk-management decision.
A Note on Pilot Holes
A concrete screw's performance is entirely dependent on the quality of its pilot hole. Unlike wood screws, which displace material, concrete screws work by cutting precise threads into a pre-drilled hole. Using the wrong size drill bit will lead to one of two failures:
- Hole Too Small: The screw will be extremely difficult or impossible to drive, potentially leading to a snapped head or a stripped drive recess.
- Hole Too Large: The screw's threads will not be able to engage the concrete properly, resulting in little to no holding power.
Always use a high-quality, carbide-tipped masonry drill bit in a hammer drill. The required pilot hole sizes are standardized:
- For a 3/16" diameter screw: Use a 5/32" drill bit.
- For a 1/4" diameter screw: Use a 3/16" drill bit.
Always verify the manufacturer's specifications for the exact screw you are using. This commitment to precision is a hallmark of industrial excellence and is made easier when you source from transparent, verified suppliers.
Beyond Size: Head Style, Material, and Coating
A truly strategic approach to fastener selection goes beyond length and diameter. The head style, base material, and protective coating are equally important factors that impact installation efficiency, finished appearance, and long-term durability, especially in demanding industrial or MRO environments.
Head Styles for Wood-to-Concrete Applications
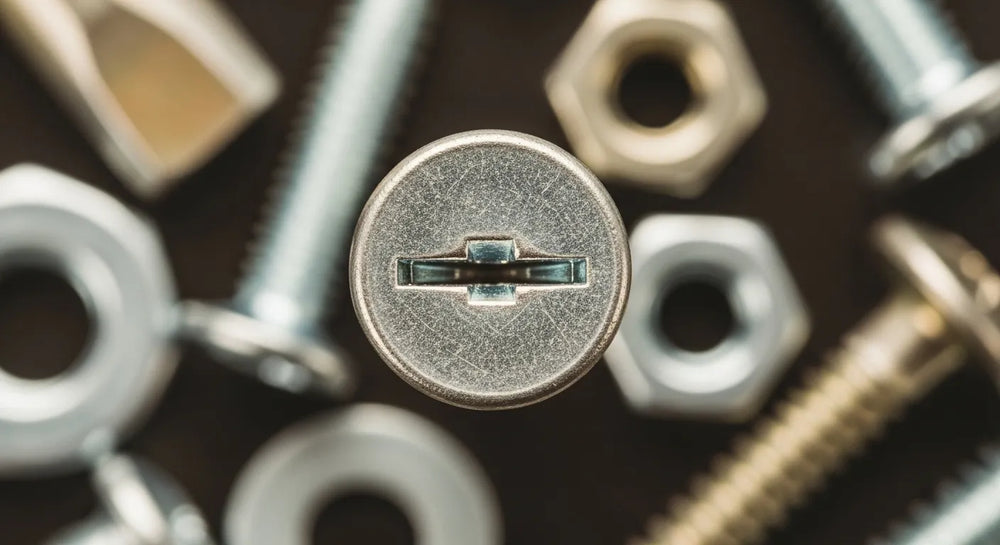
- Hex Head: This is the most common style for concrete screws. The external hex head allows for high torque application using a standard socket wrench or impact driver, making installation fast and efficient. The built-in washer face provides a large clamping surface against the wood. The only drawback is that the head protrudes from the surface of the 2x4.
- Flat Head (Countersunk): When a flush, snag-free finish is required, a flat head screw is the ideal choice. This design allows the screw head to sit level with or slightly below the surface of the wood. However, this requires an extra installation step: using a larger drill bit or a countersink tool to create a conical recess in the 2x4 for the head to sit in.
Material and Coating: The Key to Longevity and Compliance
The environment where the fastener will live determines the necessary material and coating. An incorrect choice can lead to premature corrosion and failure, compromising the entire assembly.
- Standard Carbon Steel: For interior applications in dry, climate-controlled environments, a standard carbon steel screw with a basic zinc plating is often sufficient.
- Corrosion-Resistant Coatings: For any exterior application, or in interior environments with high moisture or exposure to chemicals (e.g., food processing plants, water treatment facilities, coastal areas), a high-performance coating is non-negotiable.
This is where the Total Cost of Ownership (TCO) comes into sharp focus. For MRO buyers dealing with exterior repairs or design engineers specifying components for damp environments, a superior coating is essential. Sourcing a product like this Steel Blue Ruspert Ceramic Coating Flat Phillips® Drive Concrete Screw from a verified American manufacturer through our platform provides assurance of quality and performance. This U.S.-made fastener, with its multi-layer ceramic coating, offers exceptional resistance to rust and corrosion, reducing the TCO by preventing premature failure, eliminating the need for costly rework, and ensuring long-term structural integrity.
A Strategic Approach to Procurement for Industrial Buyers
For the procurement manager, business owner, or engineer, a concrete screw is not just a piece of hardware. It is a critical component within a complex system where failure is not an option. The cost of a failed fastener is never just the price of the screw itself; it's the cost of project delays, expensive rework, potential safety hazards, and damage to your company's reputation.
Supply Chain Resilience and American Manufacturing
In an era of unpredictable global supply chains, the risk of sourcing unverified components of questionable quality has never been higher. A shipment of fasteners that fails to meet ASTM standards or lacks proper material certifications can bring a project to its knees. This is precisely the challenge we are built to solve.
At Maden.co, we are dedicated to strengthening American industry by making it easier than ever to source high-quality, domestically produced components. Our mission is to democratize access to American manufacturing, connecting you with over 2.5 million products from a network of over 800 verified U.S. manufacturers. We believe in our core values of Supply Chain Transparency and Industrial Excellence, empowering you to build a more resilient and reliable procurement process. Our entire business model is built on this principle of trust and transparency; you can learn more about our mission to champion American manufacturing here.
Empowering Your Procurement Process
Consider a common industrial scenario: a procurement manager for a large manufacturing firm is tasked with sourcing 20,000 concrete screws for a plant expansion project. The engineering specifications are strict, requiring a specific 1/4" diameter, hex head, and a ceramic coating that meets a 1,000-hour salt spray test standard. Sourcing this internationally could involve long lead times, language barriers, and uncertainty about quality control.
Using our platform, that manager can filter specifically for U.S.-made products that meet their exact technical requirements. They can access detailed specification sheets and compliance documentation directly from the American manufacturer, drastically reducing procurement friction and mitigating risk. This is a tangible example of our commitment to Customer Empowerment.
Furthermore, for large-scale orders or capital-intensive projects, managing cash flow is critical. That's why we offer a strategic advantage to our partners. For qualified businesses, you can apply for Instant Financing at checkout to streamline your capital-intensive projects and secure the materials you need without delaying your operational timeline.
Step-by-Step Installation Best Practices
Correct fastener selection is only half the battle. Proper installation technique is essential to achieve the fastener's full performance potential.
- Select the Right Screw: Using the principles outlined above, confirm you have the correct length, diameter, and head style for your specific application.
- Gather the Right Tools: You will need a hammer drill, the correct size ANSI-standard carbide-tipped masonry drill bit, safety glasses, a wire brush, and a vacuum or compressed air source for cleaning the hole.
- Drill the Pilot Hole: Ensure the hammer drill is set to "hammer" mode. Drill a straight, perpendicular hole into the concrete. The hole must be at least 1/2 inch deeper than the screw's intended embedment depth. This extra space provides a pocket for dust and debris to settle, ensuring the screw can be fully installed.
- Clean the Hole Thoroughly: This is the most frequently skipped and most critical step. Use a wire brush to scrub the inside of the hole, dislodging any loose debris. Then, use a vacuum or oil-free compressed air to completely remove all dust from the hole. A clean hole allows the screw's threads to achieve maximum engagement with the solid base material.
- Drive the Screw: Using an impact driver or drill with the appropriate socket or bit, drive the screw steadily through the 2x4 and into the pilot hole. Drive until the head is seated firmly against the wood. Do not over-torque the screw, as this can strip the threads in the concrete or snap the fastener.
Common Installation Mistakes to Avoid
- Using the wrong size or a worn-out drill bit.
- Failing to clean the pilot hole of all dust and debris.
- Over-driving the screw, which compromises its holding power.
- Drilling too close to an unsupported edge of the concrete slab, which can cause the concrete to crack or spall.
Conclusion: Building on a Foundation of Quality
Choosing the right size concrete screw for a 2x4 is more than a simple measurement. It is a calculated process that involves a precise understanding of actual material dimensions, the non-negotiable rule of minimum embedment, and a strategic selection of diameter, head style, and material coating to match the application's demands. For American businesses, getting these details right is fundamental to ensuring safety, efficiency, and the long-term viability of your projects.
This commitment to quality and precision should not stop at the job site. It must extend to your supply chain. Choosing to source verified, U.S.-made components is a strategic decision that insulates your business from global volatility, ensures compliance with rigorous standards, and supports domestic industry. The American manufacturing revival is here, and it’s more accessible than ever.
Don't let fastener selection be a weak link in your project. Explore our extensive catalog of U.S.-made concrete screws and millions of other industrial components to build a more resilient and reliable supply chain. Secure the parts you need today and manage your budget effectively by applying for Instant Financing at checkout.
If you have specific sourcing questions or need help finding a particular component, our team is ready to help. Are you a U.S. manufacturer committed to quality and excellence? Register as a vendor and join the American manufacturing revival.
Frequently Asked Questions (FAQ)
Q1: Can I reuse concrete screws? A: It is generally not recommended to reuse concrete screws, especially in structural or critical applications. The initial installation process involves the screw cutting its own threads into the concrete. Reusing the screw in the same hole can compromise its holding power, as the threads may not engage as tightly. For maximum safety and reliability, always use a new screw for each installation.
Q2: How close to the edge of the concrete can I install a screw? A: The minimum distance from an unsupported edge of a concrete slab is critical to prevent the concrete from spalling or cracking. A general industry rule of thumb is to maintain a minimum distance of 10 screw diameters from the edge. For a 1/4-inch screw, this would be 2.5 inches. However, you should always consult the specific screw manufacturer's technical data sheet for precise guidance, as this can vary based on the screw design and the concrete's strength.
Q3: What's the difference between a concrete screw and a wedge anchor? A: A concrete screw is a threaded fastener that cuts its own threads into a pre-drilled pilot hole, making it removable. Wedge anchors are a type of expansion anchor. After being inserted into a hole, a nut is tightened, which pulls a clip up a conical section at the bottom, expanding it to wedge tightly against the concrete walls. Wedge anchors are considered permanent and typically offer higher load capacities for heavy-duty structural connections.
Q4: Do I need a hammer drill to install concrete screws? A: Yes, using a hammer drill is essential for properly installing concrete screws. A standard rotary drill lacks the percussive action needed to efficiently drill into hard materials like concrete and masonry. A hammer drill combines rotation with rapid hammer-like blows to pulverize the material, creating a clean, accurately-sized pilot hole. Attempting to use a standard drill will be extremely slow, will quickly burn out the drill bit, and will likely result in an improper hole that compromises the fastener's performance.


