What Size Drill Bit for a #8 Drywall Anchor?
Table of Contents
- Introduction
- The Direct Answer: The Right Drill Bit for a #8 Anchor
- Understanding the Mechanics: Why Precision is Paramount
- A Systems Approach: Matching the Anchor, Screw, and Drill Bit
- Exploring Anchor Types for Professional Applications
- Beyond the Anchor: Considering the Substrate
- The Procurement Professional’s Perspective: From a Single Anchor to a Supply Chain Strategy
- Building America’s Industrial Future, One Component at a Time
- Conclusion
- Frequently Asked Questions (FAQ)
Introduction
Imagine this: a series of newly installed, heavy-duty industrial control panels begin to pull away from the wall just days after installation. The project grinds to a halt, safety protocols are enacted, and a root cause analysis begins. The culprit isn't a faulty panel or a miscalculation in weight distribution; it's a handful of #8 drywall anchors, each installed with a drill bit just 1/16th of an inch too large. This tiny discrepancy, a seemingly minor detail in a complex project, created a catastrophic point of failure, leading to costly rework, project delays, and a significant safety hazard. This scenario, all too common in maintenance, repair, and operations (MRO), underscores a fundamental truth: in the industrial world, precision is not a luxury, it is a requirement.
The question, "What size drill bit for a #8 drywall anchor?" is far more than a simple query for a DIY project. For procurement managers, design engineers, and MRO professionals, it represents a critical data point in a much larger system of reliability, safety, and operational efficiency. The right answer prevents failures, while the wrong one can have cascading consequences that impact budgets and timelines.
This article provides the definitive answer to that question, but we won't stop there. We will delve into the technical reasoning behind the sizing, explore the different types of anchors available for professional use, and discuss best practices for installation. More importantly, we will frame this discussion within the broader context of strategic sourcing and supply chain management, demonstrating how choosing the right component from a trusted source is a cornerstone of industrial excellence. Our goal is to empower you with the knowledge to not only select the correct drill bit but to build more resilient, reliable, and efficient operations from the ground up.
The Direct Answer: The Right Drill Bit for a #8 Anchor
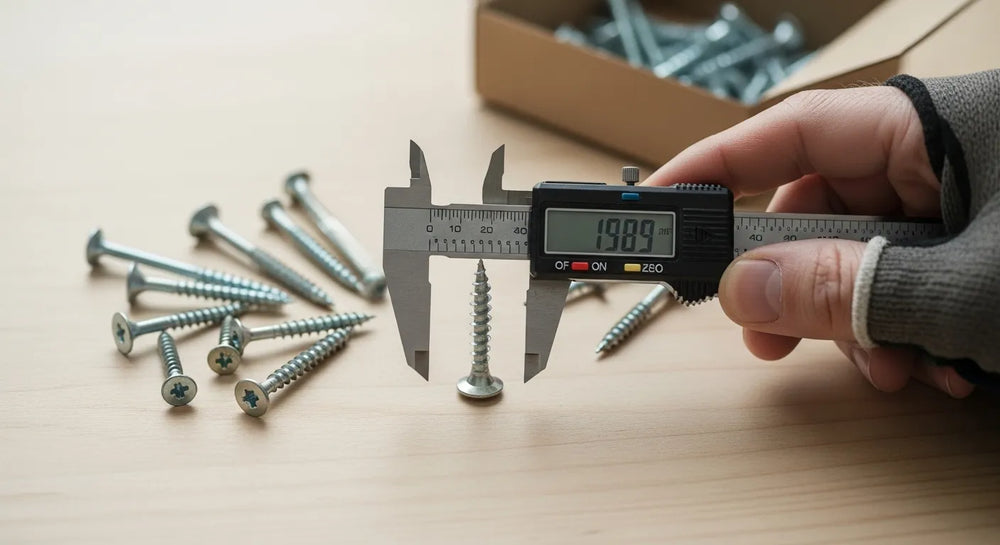
For those seeking an immediate answer for a standard #8 plastic or nylon drywall anchor, the most common and recommended drill bit size is 1/4 inch.
This size is engineered to create a pilot hole that is just tight enough for the anchor's ribs to bite securely into the surrounding drywall without being so tight that the anchor becomes damaged during insertion. It provides the optimal balance, allowing the anchor to be tapped in firmly and then expand properly when the screw is driven, creating the friction and holding power necessary to support the intended load.
However, the single most important rule in professional applications is to always verify the manufacturer's specifications.
Pro Tip: The required drill bit size is almost always printed directly on the anchor's packaging or included on the product's technical data sheet. At Maden.co, we ensure that detailed specifications are readily available on our product pages, removing guesswork and empowering our customers to make precise, informed decisions. Relying on the manufacturer's data is a core tenet of Industrial Excellence and ensures you are adhering to the exact engineering tolerances of the component you are using.
Understanding the Mechanics: Why Precision is Paramount
To truly appreciate why a 1/4-inch bit is the standard for a #8 anchor, it's essential to understand the physics at play. A drywall anchor doesn't function like a nail; it's a mechanical fastener designed to expand and create immense radial pressure against the soft gypsum core of the drywall panel.
The Physics of Expansion and Friction
When you drive a screw into a pre-installed plastic or nylon anchor, the screw's threads force the anchor's split shank to expand outwards. This expansion presses the anchor's body, often featuring aggressive ribs or fins, into the surrounding drywall. This creates a high-friction connection that distributes the load over a wider surface area than a screw alone could achieve. The entire system relies on this precise, controlled expansion.
What Happens with a Drill Bit That's Too Small?
Using a drill bit that is even slightly too small, such as a 7/32-inch bit, will create a pilot hole that is too tight. When you attempt to insert the anchor, you risk several failure modes:
- Anchor Damage: The force required to hammer the anchor in can cause it to bend, buckle, or deform, compromising its structural integrity before it's even set.
- Drywall Blowout: Forcing an oversized object into a small hole can cause the brittle paper and gypsum on the back side of the drywall to fracture and "blow out," creating a weak, crumbling pocket that the anchor cannot grip.
- Incomplete Insertion: The anchor may get stuck before it is fully flush with the wall surface, making it impossible to properly seat the fixture you are mounting.
What Happens with a Drill Bit That's Too Large?
Conversely, using a drill bit that is too large, such as a 9/32-inch bit, is an even more common and insidious mistake. The pilot hole will be too loose, leading to immediate and long-term problems:
- The Spinning Anchor: When you attempt to drive the screw, the entire anchor assembly will spin uselessly in the hole. There isn't enough initial friction to hold the anchor in place while the screw advances and creates expansion.
- Zero Holding Power: Even if you manage to get the screw started, the anchor will not have expanded enough to press firmly against the drywall. The connection will be weak and will fail under a fraction of its rated load.
This delicate balance is why precision is non-negotiable. A 1/4-inch hole provides the perfect "interference fit" for a standard #8 anchor, ensuring a secure installation every time.
A Systems Approach: Matching the Anchor, Screw, and Drill Bit
Experienced professionals know that a fastener is not an isolated component but part of a system. The success of a #8 drywall anchor installation depends on the correct relationship between three distinct elements: the anchor itself, the screw used to expand it, and the drill bit used to create the pilot hole.
A "#8" designation on a drywall anchor refers to the size of the screw it is designed to accept—in this case, a #8 diameter screw. Using a smaller screw (e.g., a #6) will not expand the anchor sufficiently, resulting in poor holding power. Using a larger screw (e.g., a #10) can split the anchor or create too much stress on the drywall, leading to failure.
Therefore, the complete system for this application should be:
- A #8-rated drywall anchor.
- A #8 diameter screw of appropriate length.
- A 1/4-inch drill bit.
Sourcing components where these specifications are clear, consistent, and reliable is a primary challenge for procurement managers. This is a core part of our mission at Maden.co. By connecting buyers with a vast network of over 800+ verified U.S. manufacturers, we ensure that the components you order meet exacting standards. This commitment to Supply Chain Transparency means you can be confident that the Medium Duty Nylon Wall Anchor #8 for Drywall you source today will have the same precise tolerances as the one you order six months from now, ensuring repeatable, reliable results across all your projects.
Exploring Anchor Types for Professional Applications
While the standard #8 anchor is a versatile component, different job requirements may call for different types of anchors. Understanding the options allows MRO buyers and engineers to specify the ideal component for the application, balancing cost, performance, and installation speed.
Standard Ribbed Plastic Anchors: The Workhorse
These are the most common type of drywall anchor, typically made from polyethylene. They are cost-effective and suitable for a wide range of light to medium-duty static applications, such as mounting signage, small cabinets, or wiring conduits. The external ribs are designed to prevent the anchor from spinning during screw installation. For general-purpose facility maintenance, a quality, American-made option like this U.S.-made Ribbed Plastic Anchor provides a reliable and economical solution for countless tasks.
High-Performance Nylon Anchors: Durability Under Stress
For applications requiring greater durability, temperature resistance, or slight flexibility to absorb minor vibrations, nylon anchors are a superior choice. Nylon is a more robust material than standard polyethylene, making it less prone to shearing or becoming brittle over time. This makes it an ideal specification for mounting components in areas with temperature fluctuations, such as near machinery, or for applications where long-term reliability is paramount. The Medium Duty Nylon Wall Anchor #8 for Drywall is an excellent example of a high-quality, U.S.-manufactured component designed for these more demanding scenarios.
Self-Drilling Anchors: The Efficiency Experts
In large-scale projects where installation speed is a critical factor, self-drilling anchors offer a significant advantage. These anchors, often made of nylon or a soft metal like zinc, feature an aggressive, drill-like tip that bores its own hole directly into the drywall. This eliminates the two-step process of drilling a pilot hole and then inserting the anchor, effectively cutting installation time in half. While they are exceptionally efficient, they are best suited for standard drywall and may not be appropriate for plaster or double-layered drywall. A product like the Medium Duty Nylon #6 Self-Drilling Anchor showcases this technology, providing a fast and secure fastening solution that boosts productivity on the job site.
Beyond the Anchor: Considering the Substrate
The material you are drilling into—the substrate—is just as important as the fastener itself. While this article focuses on drywall, professional environments often contain a variety of wall types.
- Standard Drywall (1/2" and 5/8"): This is the ideal substrate for the anchors discussed. The 1/4" drill bit recommendation is based on these standard thicknesses.
- Plaster and Lath: Older buildings often feature plaster walls, which are much harder and more brittle than drywall. Drilling into plaster requires more care to avoid cracking, and standard plastic anchors may not grip as effectively. For these situations, a toggle bolt or molly bolt is often a more reliable solution.
- Double-Layer Drywall: In commercial construction, fire-rated walls may use two layers of 5/8" drywall. This requires longer screws to ensure proper anchor expansion within the wall cavity.
- Concrete and Masonry: Attempting to use a standard drywall anchor in concrete or brick is a guaranteed failure. These substrates require specialized masonry anchors and a hammer drill with a masonry bit.
Recognizing the substrate and selecting the appropriate fastener system is a hallmark of a skilled technician and a well-managed MRO program.
The Procurement Professional’s Perspective: From a Single Anchor to a Supply Chain Strategy
For a business owner or procurement manager, the true cost of a component like a drywall anchor extends far beyond its per-unit price. Adopting a Total Cost of Ownership (TCO) mindset reveals the hidden costs associated with sourcing, rework, and failure.
Total Cost of Ownership (TCO) of a Fastener
A low-quality, inconsistently manufactured anchor that fails under load doesn't just cost the fifty cents you paid for it. The true cost includes:
- Labor Costs: The time spent by technicians to remove the failed anchor, patch the wall, and reinstall a new one.
- Downtime Costs: The operational interruption caused by the failure, which can be substantial in a manufacturing or logistics environment.
- Material Costs: The cost of any equipment or inventory damaged as a result of the failure.
- Safety and Reputational Risk: The immense cost associated with a potential workplace injury or a failure that impacts a customer.
By sourcing high-quality, verified American-made components, you are making a strategic investment in reliability that directly lowers your TCO. This approach mitigates risk and ensures that your operations are built on a foundation of quality.
The Strategic Advantage of American-Made Components
Choosing to source from U.S. manufacturers is a powerful strategy for building a more resilient and transparent supply chain. Our entire business model is built on this principle; you can learn more about our mission to champion American manufacturing here. The benefits are tangible:
- Unwavering Quality Control: American manufacturers are known for adhering to strict quality standards, ensuring dimensional accuracy and material consistency from batch to batch.
- Transparent Sourcing: You know where your components are coming from, eliminating the uncertainty associated with complex and opaque global supply chains.
- Reduced Lead Times: Sourcing domestically can dramatically shorten lead times, allowing for more agile inventory management and quicker project turnarounds.
Streamlining Procurement for Capital Projects
Consider a facility manager tasked with a complete lighting system refit, requiring thousands of fasteners. Managing the capital outlay for such a large-volume purchase can be a challenge. This is where our commitment to Customer Empowerment through Digital Innovation comes into play. We offer a powerful tool to address this directly: Instant Financing. This option, available during the checkout process, allows businesses to procure the necessary materials for large-scale projects immediately while managing cash flow effectively. You can apply for Instant Financing at checkout to streamline your capital-intensive projects, ensuring you have the components you need, right when you need them.
Building America’s Industrial Future, One Component at a Time
Every decision to source a component from a U.S. manufacturer contributes to a larger movement. It strengthens our domestic industrial base, supports skilled labor, and fosters innovation. At Maden.co, we are proud to be at the forefront of this movement. Our platform is more than just a marketplace; it is a thriving ecosystem connecting the nation's best industrial buyers with over 2.5 million products from our growing network of verified American manufacturers. We are proving every day that sourcing domestically is not only possible but also the most efficient, reliable, and strategic choice. America's manufacturing revival is here, and we invite you to be a part of it.
If you are a U.S. manufacturer dedicated to quality and excellence, we want to partner with you. Register as a vendor and join us in democratizing access to American-made industrial products. And if you have complex sourcing needs or questions about finding the right component for your application, our team of experts is ready to assist. Please do not hesitate to get in touch with our team.
Conclusion
The seemingly simple question of what size drill bit to use for a #8 drywall anchor opens the door to a deeper conversation about the importance of precision, quality, and strategic sourcing in the industrial sector. The answer is 1/4 inch, but the underlying principle is to always prioritize accuracy and rely on manufacturer specifications. A single, correctly installed anchor is a testament to professionalism; a thousand correctly installed anchors are the foundation of a safe and efficient facility.
By choosing high-quality, American-made components, you reduce the total cost of ownership, enhance operational resilience, and mitigate the significant risks associated with component failure. This commitment to excellence is the driving force behind a stronger, more competitive American industrial landscape.
We encourage you to explore the vast catalog of U.S.-manufactured products on Maden.co. Discover the strategic advantage of a transparent, reliable supply chain partner and equip your business with the components it needs to thrive. For your next large project or stock replenishment, remember to leverage the power of Instant Financing at checkout to manage your capital with ease and efficiency.
Frequently Asked Questions (FAQ)
1. What happens if I use a drill bit that's too big for my #8 anchor? If the drill bit is too large, the pilot hole will be loose. When you try to insert the screw, the entire anchor will spin in the hole instead of expanding. This results in zero holding power, and the anchor will not be able to support any weight. You will need to remove the anchor and either use a larger anchor or patch the hole and start over in a new location.
2. Can I reuse a drywall anchor? It is strongly advised not to reuse a standard expansion-style drywall anchor. The process of installing the screw and then backing it out deforms the plastic or nylon and compromises its structural integrity. A reused anchor will never achieve the same holding power as a new one and is highly likely to fail. Given their low cost, it is always safer and more reliable to use a new anchor for every installation.
3. Are metal self-drilling anchors better than nylon ones? Not necessarily; it depends on the application. Metal (typically zinc alloy) self-drilling anchors often have higher shear and pull-out strength ratings than their nylon counterparts, making them better for heavier applications. However, nylon anchors are non-corrosive, non-conductive, and can be more forgiving in terms of vibration. For general medium-duty applications, a high-quality nylon self-drilling anchor is often more than sufficient and can be more cost-effective.
4. How do I know the weight limit of a #8 drywall anchor? The weight limit, or holding strength, is determined by the manufacturer and should always be printed on the product packaging or listed in the technical data sheet. The holding power can vary significantly based on the anchor's design, material, and the type and condition of the drywall. It is critical to note that these ratings are typically for static loads (dead weight) and include a safety factor. For dynamic loads or overhead applications, you should consult an engineer and use fasteners specifically designed for those high-risk scenarios.


