What Size Drill Bit for a Drywall Anchor?
Table of Contents
- Introduction
- The Critical Relationship: Drill Bit and Anchor
- Types of Drywall Anchors and Their Drill Bit Requirements
- The Professional's Checklist: How to Guarantee the Right Drill Bit Size
- Sourcing with Confidence: The Maden.co Advantage
- Beyond the Bit: Tools and Techniques for a Professional Installation
- Streamlining Industrial Procurement
- Conclusion
- Frequently Asked Questions (FAQ)
Introduction
An MRO manager gets an urgent work order: new safety compliance signage must be installed throughout the facility by the end of the day. The team grabs a box of anchors, a drill, and a handful of bits. An hour later, half the signs are sagging, pulled from the wall by their own weight. The cause? A simple but critical error: the drill bits used were 1/16 of an inch too large for the anchors. The anchors spun uselessly in their holes, failing to expand and grip. Now, the project is delayed, materials are wasted, and the team has to patch the oversized holes and start over. This scenario, all too common in maintenance, repair, and operations, highlights a fundamental truth: precision matters.
Choosing the correct drill bit for a drywall anchor isn’t just a minor detail; it's the foundation of a secure and reliable installation. In industrial, commercial, and professional settings, the integrity of a single fastener can impact everything from operational safety to project timelines and total cost of ownership. This article provides a definitive guide for procurement professionals, engineers, and technicians on selecting the right drill bit for any drywall anchor application. We will explore the different types of anchors, the precise science behind sizing a pilot hole, and how sourcing high-quality, American-made components from a trusted B2B marketplace like Maden.co can eliminate the variables that lead to failure. Ultimately, matching the right bit to the right anchor is a core principle of industrial excellence, ensuring every installation is secure, efficient, and built to last.
The Critical Relationship: Drill Bit and Anchor
To understand why drill bit size is so crucial, it's important to visualize the mechanics of a drywall anchor. Drywall, a panel made of gypsum plaster pressed between two thick sheets of paper, has very little structural strength on its own. You cannot drive a screw directly into it and expect it to hold any significant weight. A drywall anchor is an intermediary that expands behind or against the gypsum, distributing the load over a wider surface area.
The success of this entire system hinges on the pilot hole created by the drill bit.
- If the hole is too large: The anchor will sit loosely. For an expansion anchor, there won't be enough friction and compression for the sleeve to expand properly. It will spin in place as you attempt to drive the screw, never tightening and offering virtually no holding power. The fixture will fail, often immediately.
- If the hole is too small: You risk damaging both the anchor and the wall. Trying to force a plastic anchor into a tight hole can cause it to bend, break, or deform, compromising its integrity. Forcing it can also cause the gypsum around the hole to crumble or the paper facing to tear, weakening the very material the anchor needs to grip. In some cases, hammering an anchor into a too-small hole can create a bulge or even crack the drywall panel.
For a procurement manager, the consequences extend beyond a single failed sign. Sourcing inconsistent, low-quality fasteners from unreliable supply chains can introduce these problems at scale. A batch of anchors with slight manufacturing variances can render standard drill bit sizes ineffective, leading to widespread rework, project delays, and safety liabilities. This directly impacts the Total Cost of Ownership (TCO). The initial savings on a cheaper component are quickly erased by the increased labor costs, material waste, and potential risks associated with installation failures. This is why supply chain transparency and partnering with verified manufacturers are not just best practices—they are essential strategies for mitigating risk and ensuring operational efficiency.
Types of Drywall Anchors and Their Drill Bit Requirements
The market is filled with various anchor designs, each engineered for different load capacities and installation methods. Selecting the correct drill bit begins with identifying the type of anchor you are using.
Expansion Anchors (Plastic/Nylon)
These are the most common type of anchor for light to medium-duty applications. They typically feature a plastic or nylon sleeve that is split into two or more sections. When a screw is driven into the sleeve, it forces the split sections to expand outward, pressing firmly against the inside of the drywall.
- How They Work: The entire principle is based on friction and compression. The snug fit of the anchor in the pilot hole is non-negotiable.
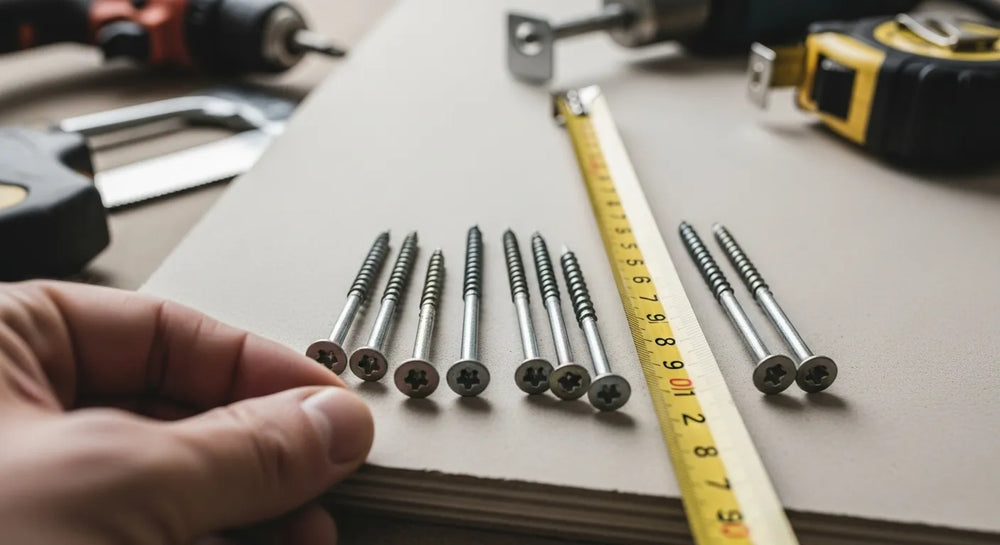
- Drill Bit Sizing: The pilot hole must be the exact same diameter as the anchor's body or shank (the main cylindrical part, not the top lip or collar). The manufacturer’s packaging will almost always specify the required drill bit size (e.g., "Use 1/4" drill bit"). This is the single most reliable source of information. For MRO teams standardizing their toolkits, sourcing a high-quality, American-made fastener like the Ribbed Plastic Anchor ensures that the stated bit size is accurate every time, thanks to stringent manufacturing tolerances. The ribs on the side of such anchors are designed to bite into the drywall to prevent spinning, a feature that is only effective when the pilot hole is correctly sized.
Self-Drilling Anchors (Zip-It®, E-Z Ancor®)
Engineered for speed and convenience, self-drilling anchors have a sharp, auger-like tip and aggressive threads that allow them to be driven directly into drywall using a screwdriver or a drill set to a low speed.
- How They Work: These anchors cut their own threads into the gypsum, essentially creating their own perfectly sized hole as they are installed.
- Drill Bit Sizing: In most cases, no pilot hole is needed. This is their primary advantage, dramatically reducing installation time. However, there is a key exception. In harder materials, such as 5/8" fire-rated Type X drywall or older plaster walls, attempting to drive a self-drilling anchor can sometimes be difficult or may damage the wall surface. In these specific situations, drilling a small pilot hole (e.g., 1/8") can make it much easier to start the anchor and ensure it drives in straight.
- Industrial Application: For an electrical contractor mounting dozens of junction boxes or a maintenance crew installing lightweight conduit, the time saved by eliminating the drilling step is significant. The American-made Medium-Duty Nylon Self-Drilling Drywall Anchor is an ideal choice for these high-volume, efficiency-critical tasks, streamlining operations and reducing labor costs.
Molly Bolts (Pointed and Non-Pointed Sleeve Type Anchors)
Molly bolts are heavy-duty metal anchors that provide exceptional holding power. They consist of a screw pre-inserted into a metal sleeve. When the screw is tightened, it draws the back of the sleeve forward, causing the sides to collapse and expand like a spider's legs behind the drywall.
- How They Work: They create a wide, load-bearing metal brace on the backside of the wall, making them suitable for hanging heavier items like shelving, small cabinets, or commercial displays.
- Drill Bit Sizing: Precision is paramount. The drill bit diameter must match the outside diameter of the molly bolt's cylindrical sleeve. If the hole is too large, the entire mechanism will spin as you try to tighten it. If it’s too small, you won’t be able to insert the anchor. Always refer to the manufacturer's specifications.
Toggle Bolts
For the heaviest applications, toggle bolts are the go-to solution. They consist of a bolt and a spring-loaded, wing-like mechanism (the toggle). The wings are collapsed to pass through a hole in the drywall and then spring open once inside the wall cavity.
- How They Work: Tightening the bolt clamps the toggle against the back of the drywall, distributing the load over a very large area.
- Drill Bit Sizing: The hole for a toggle bolt needs to be significantly larger than the bolt itself. The hole must be wide enough for the entire collapsed toggle mechanism to pass through. This size will be clearly stated on the product packaging and is often much larger than installers anticipate (e.g., a 1/4" toggle bolt may require a 3/4" hole).
- Sourcing Strategy: For a facilities manager or MRO buyer, stocking a full range of fastening solutions is crucial. The ability to source everything from heavy-duty toggle bolts for mounting industrial equipment to a versatile Medium-Duty Nylon Wall Anchor for #8 screws from a single, verified U.S. supply source simplifies procurement and guarantees quality across the board.
The Professional's Checklist: How to Guarantee the Right Drill Bit Size
While different anchors have unique requirements, a systematic approach can prevent nearly all installation errors. Follow this professional checklist for every project.
- Read the Manufacturer's Instructions: This is the golden rule. The company that engineered the anchor knows the precise hole diameter required for optimal performance. The required bit size is almost always printed on the box, bag, or instruction sheet. Sourcing from reputable manufacturers ensures this information is accurate and reliable.
- When in Doubt, Measure: If you have loose anchors with no packaging, don't guess. Use a set of digital or dial calipers to get a precise measurement of the anchor's shank diameter. Match this measurement to your drill bit.
- Perform the "Hold-Up" Test: This is a quick and effective visual confirmation. Hold the drill bit directly in front of the anchor. Looking past the bit, you should be able to see the fins, ribs, or threads of the anchor, but the solid central body of the anchor should be completely hidden behind the bit. If you can see the main body past the edges of the bit, your bit is too small. If there is a large, visible gap, your bit is too large.
- Drill a Test Hole: When working with an unfamiliar anchor or wall material, always perform a test on a scrap piece of drywall. The anchor should fit snugly into the test hole. It may require a gentle tap from a hammer or mallet to seat it fully, but it should not require excessive force. Once inserted, it should not wobble or spin with hand pressure.
- Consider the Wall Material: Standard 1/2" drywall is relatively forgiving. However, older homes may have plaster and lath walls, which are much harder and more brittle. For plaster, it's often wise to start with a drill bit one size smaller than recommended and slowly work your way up to prevent cracking and blowouts.
Sourcing with Confidence: The Maden.co Advantage
The most precise techniques in the world can be undermined by low-quality, inconsistent materials. For a design engineer specifying fasteners for a new product installation or a procurement manager responsible for a multi-site rollout, product variance is a significant risk. An imported anchor marketed for a 1/4" drill bit might have a true diameter of 6.5mm on one production run and 6.2mm on the next. This lack of quality control introduces uncertainty and leads directly to the installation failures discussed earlier.
This is where our mission at Maden.co becomes a strategic advantage for your business. We are dedicated to democratizing access to American manufacturing, connecting industrial buyers with a network of over 800+ verified U.S. manufacturers. Our vision is to prove that American-made components are as accessible and convenient as any global alternative, fueling the manufacturing revival that is happening right here at home.
Our commitment to Digital Innovation and Supply Chain Transparency means that when you source a product like the Ribbed Plastic Anchor through our platform, you get access to detailed specification sheets. You can verify material composition, dimensional tolerances, load ratings, and, critically, the exact required drill bit size before you add it to your cart. This empowers our customers, from MRO buyers to engineers, to make informed decisions and eliminate procurement friction. Our entire business model is built on this principle of trust and quality; you can learn more about our mission to champion American manufacturing here.
Beyond the Bit: Tools and Techniques for a Professional Installation
Achieving a secure fastening involves more than just the right-sized hole. The tools and techniques you use play a significant role in the quality of the final result.
- The Right Drill: A variable-speed drill offers the best control. Start drilling slowly to create a small dimple that prevents the bit from "walking" across the wall surface, then increase the speed. For installing self-drilling anchors, a cordless drill/driver on a low-speed, high-torque setting is ideal.
- High-Quality Drill Bits: Use sharp, high-quality drill bits. A dull bit will tear the drywall's paper facing rather than cutting it cleanly, resulting in a messy hole that can compromise the anchor's grip. Brad-point bits are excellent for this as their sharp center point prevents walking.
- Depth Control: It's important not to drill through the drywall and into a pipe, wire, or stud in the wall cavity. Before drilling, use a stud finder to ensure the area is clear. To control depth, measure the length of your anchor and wrap a piece of painter's tape around your drill bit at that same length. Drill only until the edge of the tape reaches the wall surface.
- Clean and Flush Installation: After drilling, use a utility knife to gently de-burr the edges of the hole, removing any frayed paper. This allows the anchor's collar or lip to sit perfectly flush against the wall for a clean, professional finish. When inserting the anchor, tap it in gently with a rubber mallet or the handle of a screwdriver until its collar is flush with the drywall.
Streamlining Industrial Procurement
Let's consider a practical scenario: a procurement manager for a national retailer is overseeing the outfitting of 50 new stores. Each store requires hundreds of fasteners for shelving, displays, and back-of-house equipment. The risk of receiving a pallet of out-of-spec anchors from an overseas supplier is immense; it could cause cascading delays and budget overruns across the entire project.
This is the precise challenge that a centralized, B2B marketplace for American-made goods solves. By partnering with Maden.co, that manager can place a single order for all the necessary fasteners, confident that every box of Medium-Duty Nylon Self-Drilling Drywall Anchors will meet the exact same quality and dimensional standards. This builds a resilient and predictable supply chain.
Furthermore, we understand that large-scale projects and MRO inventory stocking require significant capital outlay. To support the growth of American businesses, we offer a powerful tool for managing cash flow: Instant Financing. This feature, available during our streamlined checkout process, allows companies to acquire all the materials they need upfront, ensuring projects stay on schedule without straining financial resources. You can apply for Instant Financing at checkout to streamline your capital-intensive projects.
At Maden.co, we are not just a marketplace; we are a platform for growth. We are constantly expanding our network of American innovators and producers. If you are part of this industrial ecosystem, we invite you to join us. Are you a U.S. manufacturer? Register as a vendor and become a part of America's manufacturing revival. For any buyers with specific sourcing needs or questions about setting up a business account, our team is ready to help.
Conclusion
The question of "what size drill bit for a drywall anchor" is far more than a simple query. It represents a commitment to precision, reliability, and professionalism. The correct drill bit ensures a secure installation, prevents material waste, and upholds safety standards. From this single detail, we can see the broader importance of a well-managed supply chain.
The key takeaways are clear:
- The type of anchor dictates the drill bit requirement; there is no one-size-fits-all answer.
- Always default to the manufacturer's specifications for the most accurate sizing.
- Employ professional techniques and quality tools to ensure a clean and secure installation.
- Sourcing high-quality, dimensionally accurate components from verified U.S. manufacturers is the most effective way to eliminate variables and reduce total cost of ownership.
Stop the cycle of procurement headaches and unreliable components that lead to rework and project delays. We invite you to explore the Maden.co catalog of over 2.5 million U.S.-made products. Discover how sourcing American-made fasteners, from light-duty anchors to mission-critical industrial hardware, can enhance the integrity and efficiency of your operations. Empower your business with a resilient supply chain and build with the confidence that comes from quality.
Frequently Asked Questions (FAQ)
Q1: What happens if I use a drill bit that is too big for my drywall anchor? A: A drill bit that is too large creates a hole where the anchor cannot get the necessary friction to grip the drywall. When you attempt to tighten the screw, the entire anchor will spin in the hole. It will fail to expand correctly and will pull out easily under even a light load, making it completely ineffective and unsafe.
Q2: Can I use a regular wood drill bit for drywall? A: Absolutely. Standard twist drill bits, which are commonly used for wood and metal, are perfectly suitable for drilling into drywall. The most important factors are that the bit is sharp to create a clean hole without tearing the paper and that it is the precise diameter required by your specific anchor.
Q3: My anchor packaging is missing. How can I determine the right drill bit size? A: The best method without packaging is to use a digital caliper to measure the diameter of the anchor's main body or shank (not including the collar or any external ribs/threads). Select a drill bit that matches this exact measurement. If you don't have calipers, you can use the "hold-up test": hold the bit in front of the anchor. The bit should completely obscure the solid body of the anchor, but you should still see the anchor's fins or ribs peeking out from behind the bit's edges. When in doubt, start with a bit that you suspect is one size too small and test the fit in a scrap piece of drywall.
Q4: Do self-drilling anchors really not need a pilot hole? A: For standard 1/2-inch drywall, they are designed to be installed without a pilot hole, which is their main advantage. Their sharp tip and aggressive threads drill directly into the gypsum. However, for harder surfaces like 5/8-inch fire-rated drywall, dense plaster, or when installing near a wood stud, drilling a small pilot hole (e.g., 1/8-inch) can ease installation, prevent the anchor's head from stripping, and ensure it drives in straight. The Medium-Duty Nylon Self-Drilling Drywall Anchor is specifically designed to excel in these efficient, no-drill applications on standard drywall.


