Why Drywall Anchors Spin: A Professional Guide
Table of Contents
- Introduction
- The Mechanics of a Secure Installation
- Deconstructing Failure: The Root Causes of a Spinning Anchor
- A Strategic Approach to Anchor Selection and Installation
- The Strategic Advantage of a Reliable Supply Chain
- Conclusion: Securing More Than Just Fixtures
- Frequently Asked Questions
Introduction
A project manager watches as a contractor struggles to mount a series of heavy-duty commercial shelves. An anchor spins uselessly in the wall, threatening to push the entire project timeline back. What seems like a minor hardware issue is now a point of failure, costing valuable time and labor. This scenario is all too common in maintenance, repair, and operations (MRO), where the integrity of a single fastener can impact safety, efficiency, and the bottom line. A spinning drywall anchor isn't just a nuisance; it's a symptom of a deeper problem that could lie in material selection, installation technique, or the quality of the component itself.
In the world of industrial procurement and engineering, we understand that there is no such thing as a minor detail. The reliability of an entire assembly depends on the performance of its smallest parts. This is why we are taking a professional-grade look at a common frustration: the spinning drywall anchor. This article will move beyond simple DIY fixes to provide a comprehensive analysis for MRO buyers, design engineers, and facility managers. We will deconstruct the mechanics of anchor failure, outline a systematic approach to selecting the correct anchor for any application, detail professional installation protocols, and discuss advanced troubleshooting techniques.
Our goal is to empower you with the knowledge to eliminate this point of failure from your operations. By understanding the root causes and implementing best practices, you can ensure every installation is secure, reliable, and efficient, safeguarding your project's integrity and your company's reputation for quality.
The Mechanics of a Secure Installation
Before diagnosing the failure, it's essential to understand the success criteria. A drywall anchor's primary function is to distribute a load over a wider area of the relatively fragile gypsum board. Unlike fastening into a solid wood stud, which provides continuous material for a screw's threads to bite into, drywall is a composite of gypsum plaster pressed between two thick sheets of paper. This structure has excellent compressive strength but very poor shear and tensile strength, making it easy to crumble or tear.
A properly functioning anchor overcomes this weakness through one of several mechanical principles:
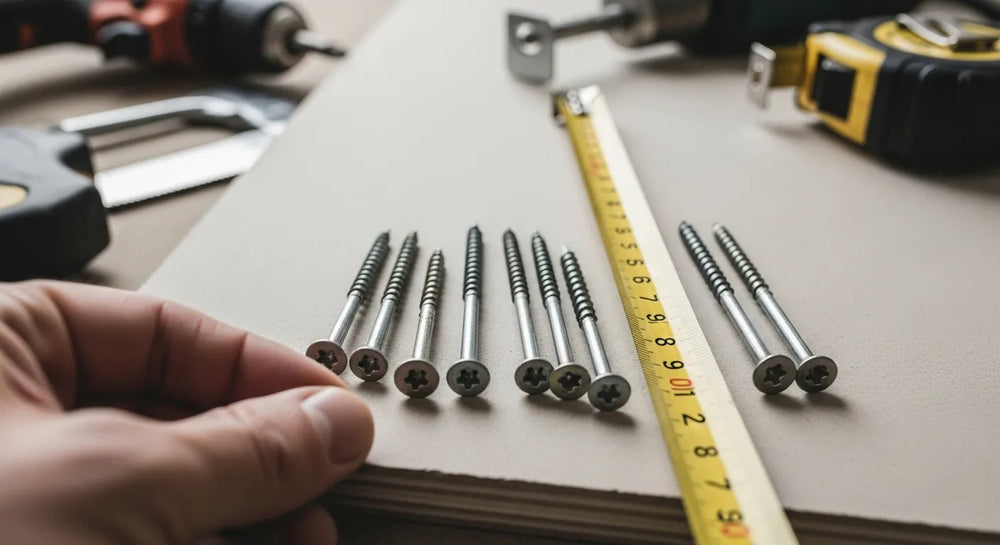
- Friction and Expansion: The most common type of anchor, often a plastic sleeve, is inserted into a precisely drilled hole. As a screw is driven into the anchor, it expands the sleeve, pressing it forcefully against the inside of the hole. This creates immense friction between the anchor and the gypsum, preventing it from pulling out or spinning. The design of a quality Ribbed Plastic Anchor is critical here; the external ribs are engineered to bite into the gypsum, providing anti-rotation resistance from the moment of insertion.
- Keying or Locking: More advanced anchors, like toggle bolts or molly bolts, feature wings or legs that expand behind the drywall. When the screw is tightened, these wings are pulled flush against the back of the wallboard. This creates a mechanical lock, clamping the drywall between the anchor's flange on the outside and the expanded wings on the inside. This method provides significantly higher holding power by distributing the load over a much larger surface area.
- Self-Threading: Some anchors are designed to thread directly into the drywall itself. These often have very coarse, wide threads that carve their own path into the gypsum. A well-designed Medium Duty Nylon Wall Anchor #6 Self-Drilling Drywall Zip-It® combines a sharp, self-drilling tip with aggressive threads to create a secure hold without the need for a pre-drilled hole, significantly speeding up installation in commercial settings.
A spinning anchor is a clear indication that one of these fundamental mechanical principles has failed to engage. The friction is insufficient, the lock has not been set, or the threads have stripped their purchase in the gypsum.
Deconstructing Failure: The Root Causes of a Spinning Anchor
Identifying the precise reason for failure is the first step toward a permanent solution. While it's easy to blame the anchor, the issue often stems from a combination of factors related to preparation, technique, and material quality.
Cause #1: Incorrect Hole Size
This is the most frequent and fundamental error. A hole that is even slightly too large will prevent an expansion-style anchor from generating the necessary friction to grip the wall.
- The Tolerance Trap: In a manufacturing or engineering context, tolerances are everything. The same principle applies here. An anchor designed for a 1/4-inch hole requires precisely that. Using a 9/32-inch drill bit because it's "close enough" creates an oversized void. The anchor’s expansion capability has a defined limit; if the gap is too large, the anchor will expand to its maximum diameter and still be able to spin freely.
- Worn or Poor-Quality Drill Bits: A dull or cheaply made drill bit can create a rough, oversized, or oblong hole instead of a clean, cylindrical one. This "wobble" effect makes it impossible for the anchor to get a consistent grip around its circumference.
- The "Wall-Out" Effect: Pushing too hard while drilling can cause the back paper of the drywall to tear or "blow out," creating a cavern behind the wall. When the anchor is inserted, its back end has nothing to press against, preventing proper expansion and leading to spinning.
Cause #2: Material Mismatch and Drywall Integrity
Not all drywall is created equal, and the condition of the wall is a critical variable. Attempting to install an anchor in compromised or unsuitable drywall is a recipe for failure.
- Old or Crumbly Gypsum: In older buildings, drywall can become brittle. The gypsum core may have lost its cohesive strength, turning to powder under the pressure of an expanding anchor rather than compressing.
- Moisture Damage: Any history of water leaks, even if the surface appears dry, can permanently weaken the gypsum core. The material becomes soft and will not support the force required to set an anchor.
- Multiple Layers or Plaster: In commercial renovations, it's common to find walls with multiple layers of drywall or a skim coat of plaster. Drilling through these dissimilar materials can be challenging, and an anchor designed for a standard 1/2-inch or 5/8-inch board may not be long enough to expand properly behind the full wall thickness.
Cause #3: Operator Error and Improper Technique
The most sophisticated anchor will fail if installed incorrectly. Over-enthusiasm with power tools is a common culprit.
- Over-Torquing the Screw: This is the silent killer of secure installations. The goal is to expand the anchor until it is snug, not to tighten the screw with maximum force. An MRO technician using a high-torque impact driver can easily apply too much rotational force. This doesn't make the anchor tighter; it makes the anchor spin, acting like a rotary file that grinds the surrounding gypsum into dust. The friction is destroyed, and the anchor is left spinning in a self-made oversized hole.
- Improper Insertion: The anchor's flange must sit perfectly flush with the drywall surface. If it's countersunk or left protruding, the screw will not engage at the correct depth, leading to incomplete expansion. Gently tapping the anchor into place with a mallet or the handle of a screwdriver is the professional standard.
- Drilling into a Stud or Obstruction: Hitting a wood stud, metal framing, or pipe behind the drywall will prevent the anchor from being fully inserted. Attempting to force it will damage the anchor and the wall. If a stud is found, the best course of action is to abandon the anchor and use a wood screw directly into the stud for a far superior hold.
Cause #4: Substandard Component Quality
In procurement, focusing solely on unit price can lead to significant downstream costs in the form of rework and failure. Low-quality anchors are a prime example of this false economy.
- Material Brittleness: Cheap plastic anchors can be brittle. Instead of flexing and expanding as designed, they can crack or shatter under the pressure of the screw, especially in colder environments.
- Inconsistent Manufacturing: Poorly molded anchors may have flashing (excess plastic from the molding process) or inconsistent dimensions. These defects can prevent them from being inserted smoothly or expanding evenly.
- Vague or Inaccurate Load Ratings: Reputable manufacturers provide clear, tested load ratings for their products. Unbranded, bulk-packed anchors may have wildly optimistic or entirely fabricated ratings, creating a significant safety risk.
At Maden.co, our mission is to democratize access to high-quality American manufacturing for this very reason. We connect industrial buyers with over 800 verified U.S. manufacturers, giving you access to a catalog of over 2.5 million products whose specifications and material quality you can trust. Sourcing a reliable component like a U.S.-made Medium Duty Nylon Wall Anchor #8 for Drywall ensures consistency and performance, reducing the TCO associated with installation failures and rework.
A Strategic Approach to Anchor Selection and Installation
Eliminating spinning anchors requires a systematic approach that begins long before a drill ever touches a wall. For procurement managers and engineers, this means specifying the right component for the job. For MRO teams, it means executing with precision.
Step 1: Assess the Application and Substrate
First, define the requirements of the installation.
- Load Calculation: What is the total weight of the object being mounted? Is it a static load (like a framed picture) or a dynamic load (like a shelf that will be frequently loaded and unloaded)? Always apply a safety factor of at least 4x for static loads. For example, if an item weighs 20 pounds, select an anchor system rated for at least 80 pounds.
- Wall Inspection: Determine the drywall thickness (typically 1/2" or 5/8"). Use a stud finder to locate studs and map out any potential obstructions like electrical wiring or plumbing. Tap on the wall to listen for changes in sound that might indicate compromised areas.
-
Select the Anchor Type: Based on the load and wall condition, choose the appropriate category of anchor.
- Light Duty (Under 20 lbs): Ribbed plastic expansion anchors are cost-effective and efficient for applications like mounting signage, small controllers, or wiring conduits.
- Medium Duty (20-50 lbs): Self-drilling anchors or high-quality nylon sleeve anchors are excellent choices for shelving, cabinets, and wall-mounted dispensers.
- Heavy Duty (Over 50 lbs): Toggle bolts or molly bolts are required. For critical or overhead applications, fastening to a stud or other structural member is always the preferred method.
Step 2: Adhere to a Professional Installation Protocol
Execute the installation with a focus on precision and control.
- Mark Your Location: Use a level and measuring tape to mark the exact drilling spot with a pencil.
- Select the Correct Drill Bit: Check the anchor's packaging for the specified drill bit size. Do not guess. If the recommendation is a 1/4" bit, use a sharp 1/4" bit.
- Drill with Finesse: Use a drill, not an impact driver. Drill straight into the wall (perpendicular) at a medium speed. Let the bit do the work; excessive force is not needed. To prevent blow-out, you can drill a smaller pilot hole first, then step up to the final size.
- Clean the Hole: After drilling, clear any residual gypsum dust from the hole. A quick puff of air or a small brush works well. This ensures the anchor makes clean contact with solid gypsum.
- Insert the Anchor: Gently tap the anchor into the hole until its flange is perfectly flush with the wall surface. If it requires significant force, the hole is too small. If it's loose, the hole is too big.
- Set the Screw Manually: Begin driving the screw with a manual screwdriver. This allows you to feel the moment the anchor begins to expand and grip the wall. You will feel the resistance increase.
- Final Tightening: Once the anchor is engaged, you can switch to a drill on a low-torque clutch setting for the final turns. Stop immediately when the screw head is snug against the fixture. The goal is "snug," not "stripped."
Step 3: Advanced Recovery and Repair Techniques
Even with careful execution, problems can occur, especially in older buildings. When an anchor spins, do not continue to tighten it. Stop immediately and assess the situation.
-
The Oversized Hole Fix: The simplest fix is to remove the spinning anchor and use the next size up. However, this may require a larger screw that won't fit your fixture. A more professional repair involves filling the hole.
- Remove the failed anchor.
- Fill the hole with a fast-drying spackling compound or wood filler.
- Allow the filler to cure completely as per the manufacturer's instructions.
- Drill a new, correctly sized pilot hole in the center of the cured filler.
- Install the original anchor. The filler provides a solid, dense medium for the anchor to expand into.
-
The "Toothpick Trick" Adaptation: A common DIY trick is to shove toothpicks into the hole. A more robust, professional version of this is to use a small wooden dowel. Coat a dowel of similar diameter to the hole in wood glue and tap it in flush with the wall. Once the glue is dry, you can drill a new pilot hole into the dowel, providing a solid wood-like substrate for the anchor.
The Strategic Advantage of a Reliable Supply Chain
The frustration of a spinning anchor is a microcosm of larger supply chain challenges. A project's success hinges on having the right components, with the right specifications, at the right time. Sourcing from unverified suppliers can introduce defective parts into your workflow, leading to field failures, costly rework, and reputational damage.
This is where our vision for American manufacturing comes into focus. At Maden.co, we believe that sourcing high-quality, U.S.-made components should be as accessible and convenient as any global alternative. Our entire business model is built on this principle; you can learn more about our mission to champion American manufacturing here. By vetting every manufacturer on our platform, we provide the supply chain transparency and industrial excellence that professional buyers demand.
For a procurement manager under pressure to source a wide range of fasteners for an upcoming facility expansion, or an MRO buyer facing an unexpected need for specialty hardware, our platform reduces friction and risk. You can find what you need, verify its specifications, and trust its origin. This commitment to domestic manufacturing strengthens supply chain resilience and supports the industrial base here at home. America's manufacturing revival is here, and it's built on a foundation of quality components.
Furthermore, we understand the financial realities of large-scale procurement. For capital-intensive projects or quarterly inventory stocking, managing cash flow is critical. That's why we offer a strategic advantage at checkout. You can apply for Instant Financing at checkout to streamline your capital-intensive projects, allowing you to acquire the necessary materials without disrupting your operational budget.
This commitment to quality is what drives us, and we are always looking to expand our network of partners who share our values. If you are a U.S. manufacturer producing industrial-grade components and believe in the power of domestic production, we invite you to Register as a vendor and join us in rebuilding America's industrial legacy.
Conclusion: Securing More Than Just Fixtures
A spinning drywall anchor is more than a simple installation problem; it's a failure of a system that involves selection, technique, and component quality. By adopting a professional mindset—understanding the mechanics, specifying the right anchor for the load, executing with precision, and sourcing reliable components—you can eliminate this common point of failure. This meticulous approach ensures not only the physical security of the mounted object but also the financial security of the project by avoiding costly rework and delays.
Don't let a seemingly small hardware issue compromise the integrity of your work. Treat every fastener as a critical component. Explore our extensive catalog of American-made anchors and fasteners to find the precise, high-quality solution your projects demand. Secure your installations with the confidence that comes from using superior components, and empower your procurement process by leveraging the strategic financial tools available on our platform.
Frequently Asked Questions
1. Can I reuse a drywall anchor or its hole? Generally, no. Once an expansion anchor has been set, its fins or ribs have compressed and deformed the surrounding gypsum. Removing it often damages the hole further, making it slightly oversized and compromised. Attempting to install a new anchor in the same hole will almost certainly result in it spinning. The professional standard is to always drill a fresh hole in a new location or to properly patch the old hole before re-drilling.
2. What is the main difference between plastic and metal drywall anchors? The primary differences are load capacity, material properties, and application. Plastic anchors, typically made of nylon or polyethylene, are excellent for light to medium-duty applications. They are non-corrosive and inexpensive. Metal anchors, such as molly bolts or zinc self-drilling anchors, offer significantly higher shear and tensile strength, making them suitable for medium to heavy-duty loads. They provide more rigidity but can be more susceptible to corrosion in damp environments unless properly coated.
3. How do I know the maximum weight my drywall can actually support? The maximum weight is determined by a combination of the anchor's rated capacity, the thickness and condition of the drywall, and the type of load. Drywall itself (typically 1/2" or 5/8") is the weakest link. Always refer to the load ratings provided by the anchor manufacturer, but treat these as ideal-condition maximums. For professional and safety-critical applications, always incorporate a safety factor of at least 4:1 for static loads and higher for dynamic loads (those involving vibration or movement). When in doubt, fasten directly to a wall stud.
4. I'm having trouble sourcing a very specific type of anchor for my project. Can Maden.co help? Absolutely. Our platform is designed to solve exactly these types of procurement challenges. We connect you with a vast network of over 800 verified U.S. manufacturers, offering a deep catalog of standard and specialty industrial components. Instead of spending hours searching multiple supplier websites, you can use our platform to quickly find what you need. If you have specific sourcing questions or are looking for a hard-to-find component, our team is ready to help. Please feel free to contact us for assistance.


