How to Remove Expansion Anchors from Concrete & Walls
Table of Contents
- Introduction
- Understanding Expansion Anchors: Why Removal is a Challenge
- Safety First: Essential Tools and Personal Protective Equipment (PPE)
- Step-by-Step Removal Techniques by Anchor Type
- The "Cut and Patch" Method: A Pragmatic Solution
- Repairing the Aftermath: A Professional Finish
- Strategic Procurement: Building a More Resilient Supply Chain
- Conclusion
- Frequently Asked Questions (FAQ)
Introduction
Picture this: a facility reconfiguration project is underway. New, more efficient machinery is set to arrive, but first, the old equipment footprint must be cleared. The challenge isn't the multi-ton press itself, but the dozen stubborn, half-inch expansion anchors left behind, epoxied in time and concrete. What should be a straightforward task suddenly becomes a roadblock, threatening project timelines and budgets. This scenario is all too familiar for MRO buyers, facility managers, and engineers. Expansion anchors are marvels of mechanical engineering, designed for one primary purpose: permanence. Their ability to securely fasten heavy loads to concrete, brick, or block is a testament to their design, but this very strength makes them notoriously difficult to remove.
Improper removal techniques can lead to significant problems, from cosmetic damage like chipped concrete and broken drywall to more severe structural issues that compromise the integrity of the base material. This not only adds cost in the form of repairs but also consumes valuable time that could be spent on mission-critical operations. Understanding the correct, methodical approach to removing these fasteners is not just a handy skill; it's a core competency in maintaining a dynamic and adaptable industrial environment.
This article provides a detailed, practical guide for removing various types of expansion anchors safely and efficiently. We will explore the mechanics behind these fasteners, outline the essential tools and safety protocols, and provide step-by-step instructions for different anchor types. We will also cover the most effective methods for repairing the surface afterward and discuss how strategic procurement can prevent future removal headaches. The goal is to empower you with the knowledge to tackle this common industrial challenge with confidence, minimizing damage and maximizing efficiency.
Understanding Expansion Anchors: Why Removal is a Challenge
Before you can effectively remove an expansion anchor, you must first understand why it holds so fast. Unlike a simple screw or nail, an expansion anchor works by creating a powerful friction-fit against the interior walls of the hole it occupies. When the anchor is tightened, a mechanism—typically a wedge, cone, or sleeve—is pulled or pushed, forcing the anchor's body to expand outward. This expansion exerts immense pressure on the surrounding concrete, brick, or block, creating a hold that can support thousands of pounds.
This principle of expansion is what makes these fasteners indispensable for securing everything from heavy-duty pallet racking and safety barriers to critical manufacturing equipment. The very design prioritizes load-bearing capacity and resistance to pull-out forces, intentionally making removal a secondary, and often destructive, process.
Common Types of Expansion Anchors
While the principle is similar, the mechanisms vary. Understanding the type of anchor you're dealing with is the first step in planning its removal.
- Wedge Anchors: These are heavy-duty threaded studs with a clip or expander sleeve at the bottom. As you tighten the nut on top, the stud pulls a cone-shaped plug up through the clip, forcing it to expand and wedge itself tightly into the concrete. They are identifiable by the exposed threaded stud and nut.
- Sleeve Anchors: These consist of a bolt or screw that passes through an expansion sleeve. Tightening the bolt pulls a flared, conical nut into the sleeve, causing the sleeve to expand along its length. They are versatile and used in a variety of base materials.
- Drop-In Anchors: These are female-threaded anchors that are designed to sit flush with the concrete surface. After being placed in the drilled hole, a special setting tool is used to drive an internal expander plug downward, flaring the base of the anchor. A separate machine bolt is then threaded into the anchor to fasten the fixture.
- Single and Double Expansion Shield Anchors: These are robust anchors often used for medium-to-heavy-duty applications. A common example, the Zamac Alloy Single Expansion Shield Anchor, features a pre-assembled anchor consisting of a cone and a tubular shield. As the lag screw is tightened, it draws the cone up, expanding the shield against the walls of the hole in the masonry. Their design provides a reliable and distributed hold.
- Hollow Wall Anchors (Toggle Bolts/Molly Bolts): While not typically used in solid concrete, they are common in block walls or drywall. Toggle bolts feature spring-loaded "wings" that spread open inside the hollow cavity, while molly bolts have a sleeve that crumples and expands behind the wall material.
The core challenge is that to remove the anchor, you must somehow reverse this powerful expansion process or destroy the anchor in place without causing collateral damage to the expensive base material.
Safety First: Essential Tools and Personal Protective Equipment (PPE)
Attempting to remove an expansion anchor without the proper safety gear and tools is a recipe for injury and frustration. The forces involved can cause metal shards to fly, and the process often generates significant dust and noise. Before starting any work, ensure you have the following:
Personal Protective Equipment (PPE)
- Safety Glasses or Goggles: This is non-negotiable. Metal fragments, concrete dust, and broken tool bits can cause severe eye injury.
- Heavy-Duty Work Gloves: Protect your hands from sharp metal edges, abrasion, and blisters.
- Hearing Protection: If you are using a hammer drill or angle grinder, earplugs or earmuffs are essential to prevent hearing damage.
- Dust Mask or Respirator: Drilling or grinding concrete releases fine silica dust, which is hazardous to inhale. A NIOSH-approved N95 respirator is recommended.
Essential Tools
- Hammer: A standard claw hammer and a small sledgehammer (or engineer's hammer) are useful.
- Pry Bar & Cat's Paw: For leveraging stubborn anchors out of their holes.
- Wrenches & Socket Set: For removing nuts from wedge and sleeve anchors.
- Pliers: Locking pliers and needle-nose pliers are crucial for gripping and pulling.
- Power Drill: A powerful corded or cordless drill is necessary. A hammer drill is ideal for drilling into concrete, both for installation and removal.
- Drill Bits: A set of high-quality metal drill bits is needed to drill out anchor bodies.
- Angle Grinder: Equipped with a metal cut-off wheel, this is the tool of choice for cutting anchors flush with the surface.
- Reciprocating Saw: A good alternative to an angle grinder, especially in tight spaces, when fitted with a metal-cutting blade.
- Cold Chisel & Punch Set: Essential for driving anchor bodies or collapsing drop-in anchors.
- Shop Vacuum: For cleaning debris from the hole and surrounding area.
Before you begin, always inspect the work area. Be certain there are no live electrical conduits or plumbing lines embedded in the wall or floor where you plan to drill, cut, or hammer.
Step-by-Step Removal Techniques by Anchor Type
With your safety gear on and tools at the ready, you can begin the removal process. The correct method depends entirely on the type of anchor you are facing.
Method 1: Removing Wedge and Sleeve Anchors
These are among the more common types found in industrial settings and thankfully, often the most straightforward to remove if they haven't corroded in place.
- Loosen and Remove the Nut: Using the appropriate wrench or socket, completely remove the nut and washer from the threaded stud of the anchor. If the nut is rusted, apply a penetrating oil and let it sit before attempting removal.
- Disengage the Expansion Mechanism: This is the most critical step. The goal is to knock the wedge or cone at the bottom of the anchor loose. Place the nut back on the stud, threading it on just a few turns to protect the threads. Gently but firmly tap the nut with a hammer. You should feel the stud drive down into the hole. This action pushes the stud down and away from the expansion clip, releasing the pressure.
- Attempt Extraction: Remove the nut again. With locking pliers, get a firm grip on the threaded stud. Try to wiggle the anchor back and forth while pulling upward. In many cases, a properly disengaged anchor will slide out.
- Apply Leverage (If Necessary): If the anchor is still stuck, slide the claw of a hammer or the end of a pry bar under the pliers and use a small block of wood as a fulcrum to protect the surface. Apply steady upward pressure to lever the anchor out.
Method 2: Removing Drop-In Anchors
Drop-in anchors are more challenging because they sit flush or sub-flush with the concrete surface, leaving nothing to grip. Removal here is typically a destructive process.
- Remove the Bolt: First, completely remove the machine bolt or screw that was fastened into the anchor.
- Drill Out the Interior: Select a metal drill bit that is slightly smaller than the inside diameter of the anchor. Carefully drill down into the center of the anchor. The goal is to destroy the internal expander plug that is creating the outward pressure. You will feel a change in resistance as the drill bit breaks through the plug.
- Collapse the Anchor Shell: Take a narrow cold chisel or a sturdy punch and place it against the inner lip of the anchor shell. Strike the chisel with a hammer, driving it inward and downward. Work your way around the circumference of the anchor, collapsing its walls inward and away from the concrete.
- Pry and Extract: Once the shell is sufficiently collapsed, use a screwdriver or needle-nose pliers to pry the remnants of the anchor out of the hole.
Method 3: Removing Hollow Wall Anchors
These are typically found in concrete block (CMU) walls or drywall partitions within an industrial office or control room.
- For Toggle Bolts: This is the simplest removal. As you unscrew the bolt, the spring-loaded wings will be left behind. Simply push the bolt slightly inward until you feel the wings release and fall harmlessly inside the wall cavity. The bolt can then be removed, leaving only a small hole to patch.
- For Molly Bolts: You have two options. If you want to try and salvage the hole for reuse, partially unscrew the bolt (about a quarter-inch). Tap the head of the bolt gently with a hammer. This should flatten the crumpled expansion sleeve behind the wall. You can then wiggle the entire anchor assembly out. More commonly, you can simply drill the head of the anchor off with a metal drill bit, then push the remaining body into the wall cavity.
The "Cut and Patch" Method: A Pragmatic Solution
There are times when a full extraction is either impossible, impractical, or risks causing unacceptable damage to the surrounding surface. A deeply set or corroded wedge anchor may simply refuse to budge. In these situations, the most professional and efficient solution is the "cut and patch" method.
This approach is particularly relevant in large-scale facility updates, such as when you need to relocate or remove extensive safety systems. Imagine decommissioning a series of safety barriers like the Jesco 8 ft Guards Rail Safety Yellow Lift-Out Type. Removing dozens of large-diameter anchors could take days and leave the floor looking like a crater field. A faster, cleaner approach is often preferred.
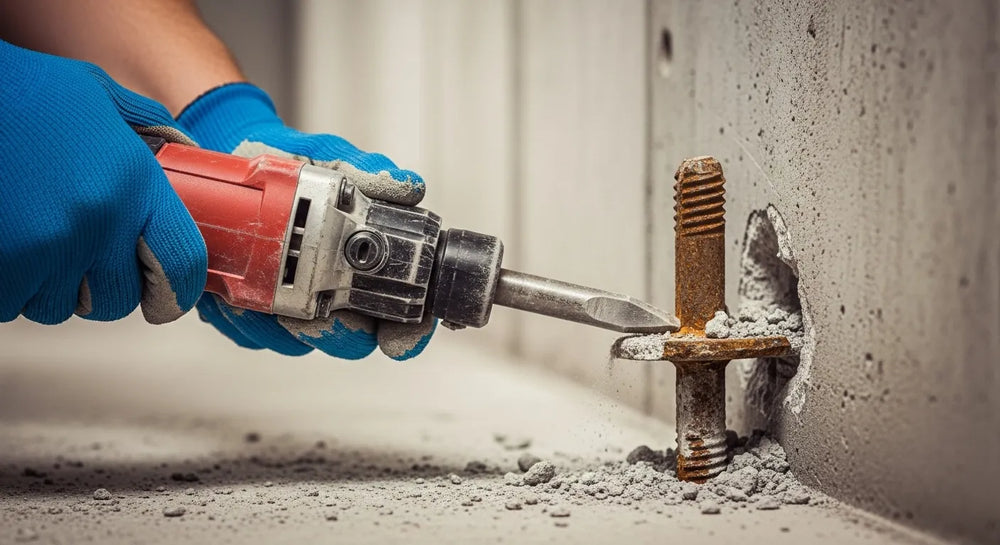
- Cut the Anchor Flush: Using an angle grinder with a metal cut-off wheel, carefully cut the exposed stud or head of the anchor so it is perfectly flush with the concrete or wall surface. Always wear full PPE for this step, as it generates significant sparks and noise. A reciprocating saw with a bimetal blade can also work.
- Drive It Below the Surface: Take a center punch or a pin punch and place it in the middle of the cut-off anchor stud. With a heavy hammer, strike the punch firmly to drive the remainder of the anchor about a quarter-inch below the surface. This creates a small recess for your patching material to adhere to.
- Fill and Finish: Clean the hole thoroughly with a shop vacuum and fill it with an appropriate patching compound. The anchor remains permanently embedded, but it is now invisible and poses no trip hazard or obstruction.
Repairing the Aftermath: A Professional Finish
Whether you've extracted the anchor or cut it flush, the final step is to repair the hole for a clean, professional look. The material you use depends on the surface.
For Concrete Surfaces:
- Clean Thoroughly: Use a wire brush and a shop vacuum to remove every trace of dust and debris from the hole. A clean surface is essential for a strong bond.
- Mix the Patching Compound: For floors and structural walls, a high-strength, fast-setting hydraulic cement or a polymer-modified concrete patching compound is best. Mix a small batch according to the manufacturer's directions until it reaches a peanut-butter-like consistency.
- Apply and Trowel: Moisten the inside of the hole slightly with water to prevent the dry concrete from pulling moisture out of the patch too quickly. Press the compound firmly into the hole using a putty knife or small trowel, ensuring there are no air pockets. Slightly overfill the hole.
- Finish Smooth: Use the edge of the trowel to scrape off the excess material, making the patch perfectly flush with the surrounding concrete. The surface can be smoothed with the trowel or given a light broom finish to match the existing texture.
For Drywall or Plaster Surfaces:
- Clean and Prep: Remove any loose paper or debris around the edge of the hole.
- Apply Spackle: For small holes, use a lightweight spackling compound. Apply it with a flexible putty knife, pressing it into the hole and smoothing the surface.
- Layer and Sand: The spackle will shrink as it dries. Apply a second, thin coat if necessary. Once completely dry, lightly sand the patch with fine-grit sandpaper until it is smooth and flush with the wall.
- Prime and Paint: Wipe away any sanding dust with a damp cloth. Apply a coat of primer over the patch to seal it, then paint it to match the rest of the wall.
Strategic Procurement: Building a More Resilient Supply Chain
Dealing with stubborn anchors underscores a larger point about industrial procurement: the choices made during acquisition have long-term consequences for maintenance, repair, and operations. Sourcing the cheapest available fastener from an unverified overseas supplier can lead to problems with inconsistent material quality, poor performance, and a lack of technical documentation, making both installation and removal a gamble.
This is where a deliberate procurement strategy adds immense value. At Maden.co, our entire mission is built on democratizing access to American manufacturing. We connect industrial buyers with a network of over 800 verified U.S. manufacturers offering more than 2.5 million American-made products. By choosing to source through our platform, you gain:
- Supply Chain Transparency: You know where your components are coming from, ensuring compliance and quality control.
- Industrial Excellence: Access to products made to exacting standards, with reliable specifications and material certifications.
- Customer Empowerment: Our platform reduces procurement friction, allowing you to find, compare, and purchase critical components quickly and efficiently.
For a procurement manager sourcing fasteners for a new installation of a Jesco Guard Rails 10ft Safety Yellow Barrier Rail, having access to U.S.-made anchors with clear technical data sheets is a game-changer. It ensures the installation meets safety standards and provides the MRO team with the information they'll need years down the line. We believe American-made components should be as accessible as any global alternative, and our platform is proof that America's manufacturing revival is here. You can learn more about our mission to champion this revival.
For the American manufacturers who create these high-quality products, we invite you to join our growing network. If your company embodies the principles of industrial excellence and you're ready to reach a dedicated audience of B2B buyers, we encourage you to register as a vendor and become part of the solution.
Moreover, we understand that large-scale projects and MRO needs often come with significant capital outlay. To help businesses manage cash flow effectively, we offer a strategic financial tool directly within our platform. You can apply for Instant Financing at checkout to streamline your capital-intensive projects, allowing you to procure the materials you need today while managing payments over time.
Conclusion
Removing expansion anchors is a task that demands patience, the right tools, and a clear understanding of the mechanics involved. By identifying the anchor type and choosing the correct removal method—whether it's methodical extraction or a pragmatic cut and patch—you can overcome this common industrial challenge without causing costly damage. Always prioritize safety, and take the time to properly repair the surface for a professional and lasting finish.
Ultimately, mastering these MRO skills is just one part of building a more efficient and resilient operation. The other is building a smarter procurement process. By partnering with a marketplace dedicated to American manufacturing, you not only get the high-quality components you need but also contribute to a stronger, more transparent domestic supply chain. If you have specific sourcing questions or need help finding the right component for your next project, our team is ready to help; please feel free to contact us. Explore the catalog, discover the breadth of American-made industrial products available, and see how sourcing domestically can be your competitive advantage.
Frequently Asked Questions (FAQ)
1. Is it always necessary to remove an old expansion anchor? No. If the anchor is not interfering with new installations, creating a trip hazard, or compromising the structure, the "cut and patch" method is often the most time and cost-effective solution. This leaves the body of the anchor embedded but makes the surface safe, smooth, and ready for use.
2. Can I reuse the hole after removing an expansion anchor? It depends on the condition of the hole. If the removal process did not cause any spalling (chipping) and the hole's diameter is not significantly enlarged, you may be able to reuse it with a new, appropriately sized anchor. However, for critical, heavy-load applications, drilling a new hole at least a few inches away is always the safest practice to ensure maximum holding power.
3. What's the biggest mistake people make when removing expansion anchors? The most common and damaging mistake is resorting to brute force—like prying or hammering excessively—before properly disengaging the expansion mechanism. For wedge and sleeve anchors, failing to tap the stud down to release the wedge is the critical misstep. This often results in breaking the anchor off, damaging the concrete, and making the remaining piece even harder to remove.
4. Why source anchors from a U.S. manufacturer? Sourcing fasteners from verified U.S. manufacturers, like those found on the Maden.co platform, provides a higher degree of confidence in the product's quality and consistency. You benefit from clear adherence to industry standards (e.g., ANSI, DIN), traceable material certifications, and a more resilient supply chain. This reduces the risk of premature fastener failure and supports the domestic industrial base.


