Do You Have to Drill a Pilot Hole for Concrete Screws?
Table of Contents
- Introduction
- The Short Answer and The Critical 'Why'
- The High Cost of Cutting Corners: Consequences of Skipping the Pilot Hole
- The Blueprint for Success: A Step-by-Step Guide to Perfect Pilot Holes
- Material Matters: Why Sourcing Quality Fasteners is Non-Negotiable
- Choosing the Right Concrete Screw for the Job
- Empowering Your Procurement Process with Maden.co
- Conclusion
- FAQ
Introduction
Imagine the scene: a critical piece of equipment is being installed on a new concrete floor. The project is on a tight schedule, and the maintenance team is working efficiently. Then, a sharp crack echoes through the facility. A crew member, trying to save a few minutes, drove a concrete screw directly into the slab. The result is a snapped fastener, a web of hairline fractures spreading from the hole, and a project that is now officially delayed. This seemingly small shortcut has just created a significant setback, requiring costly repairs and pushing back the operational timeline. It’s a frustratingly common scenario where a misunderstanding of a fundamental process leads to tangible business consequences.
This situation highlights a crucial question in construction, maintenance, and industrial installations: do you really have to drill a pilot hole for concrete screws? The answer is not just a matter of best practice; it is fundamental to the safety, integrity, and success of the entire application.
In this comprehensive post, we will definitively answer this question and explore the critical science behind it. We will delve into the mechanics of how concrete screws achieve their remarkable holding power, outline the severe consequences of skipping this essential step, and provide a detailed, step-by-step guide to executing the process perfectly. Furthermore, we will connect this technical knowledge to the broader strategic goals of your business, demonstrating how sourcing high-quality, U.S.-made fasteners from a reliable platform like Maden.co directly impacts project efficiency, supply chain resilience, and your total cost of ownership. Our aim is to empower you with the knowledge to ensure that every fastening point is a symbol of strength and reliability, not a potential point of failure.
The Short Answer and The Critical 'Why'
Let's address the core question immediately and without ambiguity. The answer is an unequivocal, absolute yes. You must always drill a properly sized pilot hole before installing any type of concrete screw. There are no shortcuts, no exceptions, and no special types of concrete screws that eliminate this requirement. Understanding why this is a non-negotiable rule is key to appreciating the engineering behind this powerful fastener.
The "Self-Tapping" Misconception
Much of the confusion stems from the term "self-tapping." While concrete screws are indeed self-tapping, this term is often misinterpreted. It does not mean the screw can drill its own hole into a dense material like concrete. Instead, "self-tapping" refers to the screw's ability to cut, or tap, its own mating threads into the walls of a pre-drilled hole. Think of it like a tap used to create threads in metal; the hole must exist first before the threads can be cut. The screw’s hardened, specialized threads are engineered for cutting into masonry, not for displacing it like a drill bit.
The Physics of Fastening: How Concrete Screws Actually Work
Unlike expansion anchors that work by exerting outward force against the sides of the hole, a concrete screw functions through a more elegant mechanical principle. The process relies on a precise interplay of friction and compression.
- Thread Cutting Action: As the screw is driven into the correctly sized pilot hole, its sharp, high-low, or serrated threads bite into the granular structure of the concrete, brick, or block. They carve a perfect, negative impression of the threads into the substrate.
- Mechanical Interlock: This creates a continuous, deep mechanical interlock along the entire embedded length of the fastener. The concrete that has been cut and displaced is compacted into the small voids of the surrounding material, increasing the density and strength of the connection.
- Friction and Clamping Force: The immense surface area of these newly formed threads generates incredible frictional resistance against pull-out forces. As the screw’s head is seated against the fixture, it creates a powerful clamping force, holding the material securely in place.
This entire system is contingent upon one thing: a pilot hole of the exact right diameter and depth. Without it, the physics simply fails, and the fastener cannot perform its intended function. This commitment to precision and performance is a cornerstone of Industrial Excellence, a value we champion by connecting buyers with manufacturers who understand these critical engineering principles.
The High Cost of Cutting Corners: Consequences of Skipping the Pilot Hole
Attempting to drive a concrete screw without a pilot hole is not just bad practice; it's a recipe for immediate and guaranteed failure. The consequences extend far beyond a single broken fastener, impacting project timelines, budgets, and personnel safety. For an MRO buyer needing to quickly mount a new safety barrier in a busy warehouse, the temptation to save five minutes by skipping the drilling step can lead to hours or days of corrective work.
Let’s break down the specific failures that occur:
Immediate Installation Failure
- Extreme Torque and Binding: Concrete is incredibly dense and compressive. Attempting to force a screw's threaded body into it without a pilot hole requires an astronomical amount of torque. The screw will almost instantly bind.
- Cam-Out and Stripped Drives: As the resistance becomes impossible to overcome, the driver bit will "cam out," stripping the screw's drive recess (be it Phillips, Hex, or Torx) and making it impossible to advance or retract.
- Sheared Fasteners: The torsional stress placed on the screw will quickly exceed its material limits, causing it to snap. This often happens just below the head, leaving the body of the screw permanently embedded in the concrete—a far more difficult problem to solve than drilling a hole in the first place.
Catastrophic Substrate Damage
- Spalling and Cracking: The immense pressure exerted by the screw's tip acts like a wedge, forcing the concrete apart. This will cause the surface to spall (chip away) and can easily create large cracks in the slab or block. What was intended to be a small anchor point becomes a major structural defect.
- Blowouts: In block or near an edge, the force can cause a "blowout," where a large chunk of the masonry material breaks away entirely, rendering the location useless for fastening.
Compromised Holding Power and Safety
- Zero Thread Engagement: In the highly unlikely event a screw can be partially driven, it will have done so by pulverizing the concrete rather than cutting clean threads. There will be no mechanical interlock, and therefore, virtually zero pull-out or shear strength. The fastener will be loose and completely unreliable.
- A Latent Safety Hazard: A fixture mounted with such a compromised fastener is a ticking time bomb. It may appear to be secure initially but could fail under a minimal load, leading to property damage, equipment failure, or serious injury.
When you factor in the cost of the wasted fastener, the damaged materials, and the skilled labor required to remediate the mistake, the Total Cost of Ownership (TCO) for this shortcut skyrockets. It's a classic example of how a small investment of time upfront prevents massive expenses and risks down the line.
The Blueprint for Success: A Step-by-Step Guide to Perfect Pilot Holes
Creating the perfect pilot hole is a straightforward process that ensures you get the maximum performance from every concrete screw. Following these steps meticulously guarantees a secure, reliable, and professional-grade installation every time.
Step 1: Selecting the Right Drill and Bit
Your success begins with the right tools. Using inadequate equipment will lead to frustration and poor results.
- The Drill: For drilling into concrete, a standard rotary drill is insufficient. You need a hammer drill or, for more demanding applications and larger holes, a rotary hammer. These tools combine rotation with a rapid hammering action that pulverizes the concrete, allowing the bit's flutes to clear the debris away.
- The Bit: Always use a high-quality carbide-tipped masonry drill bit. Carbide is an extremely hard material designed to withstand the high-impact, abrasive nature of drilling into concrete. Using a standard steel bit will dull it almost instantly.
-
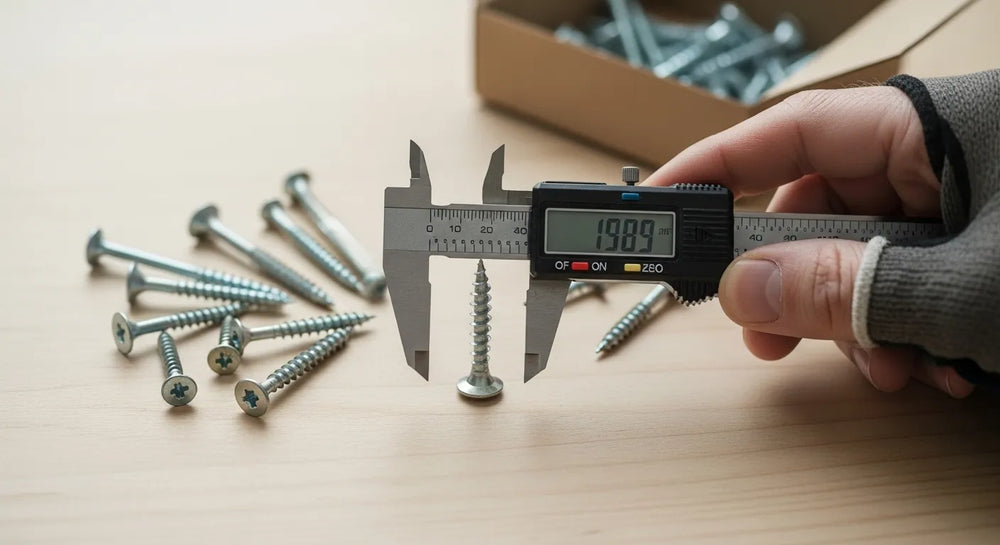
Sizing is Paramount: This is the most critical variable. The pilot hole diameter must precisely match the manufacturer's specifications for the screw you are using. There is no room for guesswork. A hole that is even 1/64" too small will cause the screw to bind or break. A hole that is slightly too large will result in no thread engagement and zero holding power. For instance, a 1/4" diameter screw typically requires a 3/16" pilot hole, and a 3/16" screw requires a 5/32" hole. We embrace Digital Innovation by ensuring that detailed technical specifications for products like these U.S.-made
1/4" x 2-3/4" Flat Head Concrete Screwsare readily available, empowering engineers and buyers to get the sizing right the first time.
Step 2: Drilling to the Correct Depth
The depth of the hole is just as important as its diameter.
- The Rule: The pilot hole must always be deeper than the screw's intended embedment. A good rule of thumb is to drill at least 1/2 inch deeper than the length of the screw that will be in the concrete.
- The Reason: As the screw taps its threads, it generates a significant amount of concrete dust and fine debris. This excess depth creates a crucial reservoir for this debris to collect. If the hole is too shallow, the screw tip will bottom out on this packed debris before reaching its full embedment depth, preventing it from being fully tightened and compromising its clamping force.
- Ensuring Accuracy: Use the adjustable depth stop on your hammer drill for consistent results. If your drill doesn't have one, a piece of painter's tape wrapped around the drill bit serves as an excellent visual depth gauge.
Step 3: The Critical Cleaning Process
This is the most frequently skipped step, and its omission is a primary cause of reduced fastener performance. A dusty hole can reduce a screw's holding power by over 50%.
- The Problem: The fine dust coating the walls of the pilot hole acts as a lubricant and a physical barrier. It prevents the screw's threads from making clean, solid contact with the virgin concrete, resulting in shallow, weak threads.
-
The Solution: The hole must be thoroughly cleaned of all dust and debris. The best method involves a three-part process:
- Blow: Use compressed air or a hand-pump blower to force the loose dust out.
- Brush: Use a nylon or wire brush sized for the hole to scrub the walls and dislodge any packed-in dust.
- Blow Again: Use compressed air one more time to remove the remaining dislodged particles. Repeat this cycle until no more dust is ejected from the hole. A shop vacuum with a narrow crevice tool is also an effective alternative. This meticulous attention to detail is a hallmark of professional work.
Step 4: Driving the Screw
With a perfectly prepared pilot hole, the final step is straightforward.
- Use the Right Driver: An impact driver is often the best tool for installing concrete screws, as its rapid impacts help drive the screw without requiring excessive downward pressure. A standard drill with a clutch setting can also be used.
- Match the Drive Bit: Ensure your driver bit perfectly matches the screw's head (e.g., a #3 Phillips bit for a #3 recess, or the correct size hex driver). A sloppy fit can lead to cam-out.
- Steady and Controlled: Drive the screw steadily until the head is seated firmly against the material being fastened.
- Do Not Over-Torque: It is possible to apply too much torque, which can either strip the threads you just created in the concrete or, in extreme cases, snap the screw. Tighten until it is snug and secure, but avoid the temptation to give it one last, excessive turn.
Material Matters: Why Sourcing Quality Fasteners is Non-Negotiable
The perfect installation technique is only half the battle. The quality of the fastener itself is equally critical. For a design engineer specifying components for a new piece of industrial machinery, the material science behind the screw—its hardness, tensile strength, and corrosion resistance—is just as important as its dimensions.
The Difference of American-Made Steel and Engineering
A high-quality concrete screw is a feat of modern metallurgy. It requires a precise balance of properties: it must be hard enough to cut threads into concrete but ductile enough to resist snapping under torsional stress. This is achieved through sophisticated steel alloys and meticulous heat-treatment processes.
This is where the principle of Supply Chain Transparency becomes a powerful asset. When you source fasteners through Maden.co, you are connecting with a network of over 800 verified U.S. manufacturers who operate under stringent quality control standards. This isn't simply about supporting the domestic economy; it's about gaining access to predictable performance, material traceability, and engineering you can trust. A product like the American-made Steel Blue Ruspert Ceramic Coating Flat Phillips® Drive Concrete Screw is a prime example. Its advanced ceramic coating offers over 1,000 hours of salt spray resistance, making it an ideal, reliable choice for outdoor or corrosive environments—a level of performance born from superior manufacturing processes.
Resilient Supply Chains Start with Domestic Sourcing
The global supply chain disruptions of recent years have taught businesses a hard lesson: the availability of a simple, inexpensive component can halt a multi-million dollar project. The frustration of waiting weeks for a container of fasteners is a real and costly problem. By shifting procurement to domestic sources, businesses can build more resilient, predictable, and shorter supply chains. This reduces lead times, minimizes the risk of receiving counterfeit or out-of-spec products, and strengthens our nation's industrial base. This aligns directly with our core mission: to democratize access to American manufacturing, proving that U.S.-made products are as accessible and convenient as any global alternative. You can learn more about our foundational principles and our vision for the future of American industry by visiting our About Us page.
Choosing the Right Concrete Screw for the Job
Our platform provides access to a vast catalog of fasteners, allowing you to select the perfect screw for any application. Understanding the primary types is key to making the right choice.
Understanding Head Styles and Drive Types
-
Hex Head: Characterized by a washer-head design with an external hex, this is the workhorse for most structural and heavy-duty applications. It allows for high installation torque using standard sockets and wrenches, making it ideal for fastening steel plates, machinery bases, and structural framing. The versatile
Hex Head Concrete Screws 3/16" x 1-3/4"is a staple for MRO and construction professionals due to its reliability and ease of use. - Flat Head (Countersunk): This style features a flat top that sits flush with the surface of the material being fastened when installed in a countersunk hole. It's the ideal choice for applications where a smooth, snag-free finish is required, such as installing door and window frames, electrical junction boxes, or architectural fixtures.
Coatings and Materials
The environment where the fastener will be used dictates the necessary level of corrosion protection.
- Blue Ceramic Coating (Ruspert, Climaseal): This is a multi-layer coating that provides excellent long-term protection against rust and corrosion, making it suitable for exterior use, pressure-treated lumber, and damp indoor environments like warehouses or processing plants.
- Zinc Plating: This is a standard coating that offers good corrosion resistance for dry, interior applications. It is a cost-effective choice for projects that are not exposed to moisture or corrosive chemicals.
Empowering Your Procurement Process with Maden.co
We understand the pressures facing today's industrial buyers. Your goal is to source high-quality, compliant parts quickly and efficiently, all while managing budgets and mitigating supply chain risks. Our entire platform is designed to help you achieve these goals.
From Friction to Flow: Streamlining Your Sourcing
For a procurement manager under pressure to find a specific DIN-compliant fastener from a domestic source, the traditional process of calling multiple distributors can be a major source of friction. Our marketplace centralizes over 2.5 million American-made products, transforming that fragmented search into a streamlined, digital experience. We believe in Customer Empowerment, providing you with powerful search filters, transparent technical data, and direct access to manufacturers to help you make informed decisions in minutes, not days. If you're a U.S. manufacturer producing quality industrial components, we invite you to join our mission. Register as a vendor and become part of America's manufacturing revival.
Strategic Capital Management with Instant Financing
Large projects and even routine MRO often require significant capital outlay for components. To help businesses manage cash flow more effectively, we've integrated a powerful tool directly into our platform. When you're ready to purchase, you can apply for Instant Financing at checkout to streamline your capital-intensive projects. This allows you to acquire all the materials you need upfront while spreading the cost over manageable terms, freeing up operational capital for other critical business needs. It’s more than a payment method; it’s a strategic advantage. Should you have any questions about this feature or need assistance sourcing a hard-to-find part, our dedicated team is here to help. Please feel free to contact us directly.
Conclusion
The answer to whether you must drill a pilot hole for a concrete screw is definitively yes. It is not an optional or time-saving corner to cut; it is the foundational requirement for a safe, strong, and lasting installation. The integrity of the connection relies entirely on the precise interaction between the screw's threads and the clean, correctly-sized walls of the pilot hole. By mastering the simple but critical steps of selecting the right bit, drilling to the proper depth, and meticulously cleaning the hole, you ensure that every fastener you install performs exactly as the engineers designed it to.
This commitment to proper technique goes hand-in-hand with a commitment to quality materials. The reliability, consistency, and strength of American-made fasteners provide the peace of mind that your work will stand the test of time. By building a more resilient domestic supply chain, you not only improve your own operational efficiency but also contribute to a stronger industrial future for our country.
Don't let an avoidable mistake compromise your next project. Explore the extensive catalog of U.S.-made concrete screws and industrial components on Maden.co. Empower your team with the right parts and the right knowledge. America's manufacturing revival is here, and we're making it easier than ever for you to be a part of it.
FAQ
1. What size drill bit do I use for a concrete screw?
The size of the drill bit is determined by the diameter of the screw. You must always follow the manufacturer's specific recommendations for the fastener you are using. However, a common rule of thumb is that the pilot hole is 1/16" smaller than the screw's stated diameter. For example, a 1/4" diameter concrete screw typically requires a 3/16" masonry bit, and a 3/16" diameter screw typically requires a 5/32" bit. Always verify this information on the product's technical data sheet before drilling.
2. Can I reuse a concrete screw?
It is strongly recommended not to reuse concrete screws, especially in critical applications. The first installation cuts a very precise set of threads into the concrete. Removing and reinserting the screw into the same hole can damage these delicate threads and will significantly reduce the fastener's holding power. For maximum safety and reliability, always use a new screw for each installation.
3. How close to the edge of the concrete can I install a screw?
This is known as the "minimum edge distance," and it is crucial for preventing the concrete from cracking or spalling. The exact distance varies based on the screw's diameter, its embedment depth, and the quality (PSI) of the concrete. A conservative general guideline is to maintain a distance of at least 10 times the screw's diameter from any unsupported edge. For a 1/4" screw, this would mean staying at least 2.5 inches away from the edge.
4. Why did my concrete screw break during installation?
Screw breakage is almost always due to improper installation technique. The most common causes are, in order: the pilot hole is too small, forcing the screw to endure excessive torque; the pilot hole is not deep enough, causing the screw to bottom out on debris; the pilot hole was not cleaned properly, which increases friction and resistance; or simply over-torquing the screw with the driver. Using a high-quality, properly heat-treated American-made screw will also significantly reduce the risk of material failure under proper installation conditions.


