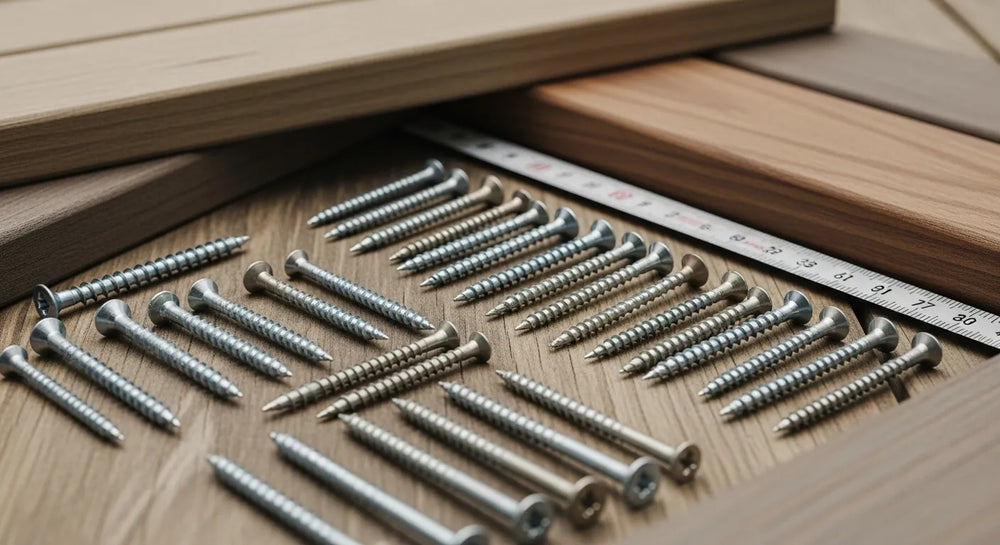
Drilling Drywall Screws: Techniques, Tools & Selection
Table of Contents
- Introduction
- Understanding Drywall and Its Fasteners
- Tools of the Trade: Beyond the Basic Drill
- Pre-Drilling: When and Why (Or Why Not for Drywall)
- The Step-by-Step Drywall Screw Installation Process
- Beyond Basic Installation: Strategic Sourcing for Industrial Applications
- Conclusion
- FAQ
Introduction
In any construction or renovation project, the integrity of a structure often hinges on details that appear deceptively simple. Take, for instance, the seemingly straightforward task of driving a screw into drywall. While it might seem minor, improper installation can lead to a cascade of problems: compromised structural support, visible blemishes that detract from aesthetic quality, costly rework, and ultimately, project delays and budget overruns. For procurement managers, MRO buyers, and design engineers, such seemingly small failures can quickly escalate into significant operational hurdles, impacting everything from manufacturing schedules to facility maintenance.
The goal of this comprehensive guide is to demystify the process of drilling screws into drywall, transforming it from a potential source of frustration into a streamlined, efficient, and reliable task. We'll delve into the essential techniques, the correct tools, and, crucially, the discerning selection of appropriate screws. Beyond the immediate practicalities, we'll explore how choosing the right, high-quality, U.S.-made components for even these basic tasks contributes to overall project excellence, supply chain resilience, and a superior total cost of ownership. This precision in application, backed by quality sourcing, is foundational to industrial excellence and drives America's manufacturing revival.
Understanding Drywall and Its Fasteners
Before any screw meets drywall, it's essential to understand the material itself and why specialized fasteners are necessary. Drywall, also known as plasterboard or gypsum board, is a construction material used to create interior walls and ceilings. It's composed of gypsum plaster pressed between two sheets of thick paper. While relatively sturdy for its intended purpose of creating smooth surfaces, its core is soft and easily damaged by improper fastening techniques or the wrong type of screw.
The Unique Nature of Drywall
The gypsum core of drywall offers a delicate balance: it's strong enough to hold its own weight and support light fixtures or shelving when properly anchored, but it lacks the dense, fibrous structure of wood that provides inherent grip for screws. This is why standard wood screws, with their aggressive threads designed to bore into timber, are generally unsuitable for direct use in drywall. Their larger pitch can easily strip the gypsum, leading to a loose, unstable connection and a torn paper surface.
Why Specialized Drywall Screws Are Critical
Drywall screws are engineered specifically to address the unique properties of gypsum board. They typically feature:
- Sharp, Self-Tapping Points: These allow the screw to penetrate the paper and gypsum quickly without requiring a pre-drilled hole in most drywall applications, though pre-drilling into studs remains essential.
- Aggressive Threads: Designed with a sharper angle and deeper cut than wood screws, these threads create a strong grip within the gypsum and the wood or metal framing behind it.
- Bugle Heads: The characteristic bugle shape of the screw head flares out gently, allowing it to sink slightly into the drywall without tearing the paper. This creates a small "dimple" that can be easily concealed with drywall compound, ensuring a smooth finish.
- Phosphate Coating: Most drywall screws are coated with black phosphate or a similar finish. This coating provides corrosion resistance and helps the screws blend with the gypsum, reducing the likelihood of rust bleeding through the paint or finish over time.
For any MRO buyer or design engineer tasked with ensuring project longevity and structural integrity, understanding these fundamental design elements is paramount. The difference between a generic fastener and a purpose-built drywall screw can significantly impact the durability and finish of a wall, directly influencing maintenance cycles and overall asset value.
Types of Drywall Screws: Coarse vs. Fine Thread
The choice between coarse and fine thread drywall screws depends primarily on the framing material behind the drywall.
Coarse-Thread Drywall Screws
- Characteristics: These screws have widely spaced, aggressive threads.
- Application: Best suited for fastening drywall to wood studs. The coarse threads grip the wood fibers securely, preventing pull-out.
- Maden.co Advantage: When sourcing for projects involving wood framing, procurement managers prioritize fasteners that offer robust hold and consistent quality. Maden.co provides access to a comprehensive selection of American-made coarse-thread drywall screws from verified manufacturers. For instance, for reliable wood-to-drywall applications, consider exploring high-quality options like our 6 x 1-1/4 Coarse Thread Drywall Screws, which are designed for superior grip and durability.
Fine-Thread Drywall Screws
- Characteristics: These screws have more closely spaced, finer threads.
- Application: Ideal for fastening drywall to metal studs (20-25 gauge steel). The finer threads bite into the thin metal without stripping it, creating a strong, secure connection.
- Maden.co Advantage: In modern commercial and industrial constructions, metal framing is common. Sourcing the correct fine-thread screws is crucial to avoid costly stripping and rework. At Maden.co, we simplify this process by connecting you directly with American manufacturers producing fasteners specifically engineered for these demanding applications. For projects requiring precision and strong adhesion to metal studs, our 6 x 1 Fine Thread Drywall Screw represents the kind of specialized, quality U.S.-made components that improve project outcomes.
Versatile Options
Beyond these two primary types, there are also general-purpose drywall screws designed for various applications, offering a balance of features. For adaptable use across a range of projects, a versatile option like the 8 x 4 Drywall Screw can serve as an excellent choice, providing reliable performance for various drywall installation needs. Ensuring you have access to such a diverse range of American-made products from verified sources is central to our mission at Maden.co.
Tools of the Trade: Beyond the Basic Drill
While a drill driver is the primary tool for installing drywall screws, the right equipment, when selected and used correctly, significantly impacts the quality and efficiency of the installation. For a procurement manager, selecting the right tools is as crucial as selecting the right fasteners, as both contribute to project efficiency and long-term cost savings.
1. Drill/Driver Selection
The type of drill or driver you use can make or break your drywall project.
-
Cordless Drill/Driver:
- Pros: Portability, versatility, suitable for most residential and light commercial projects. Modern cordless drills offer impressive power and battery life.
- Cons: Battery drain can be an issue on large jobs; potentially less torque than corded models.
- Key Feature: Look for a drill with an adjustable clutch. This allows you to set the torque, preventing overtightening and stripping screws or tearing the drywall paper. A drill without a clutch is a recipe for frustration and damaged materials.
-
Corded Drill/Driver:
- Pros: Consistent power, no battery limitations, often more robust for continuous, heavy-duty work.
- Cons: Limited by cord length and access to power outlets.
- Key Feature: Similar to cordless, a clutch mechanism is paramount for drywall work.
-
Impact Driver:
- Pros: High torque, excellent for driving long, heavy screws into dense materials. Its impacting action reduces wrist strain.
- Cons: Can be too powerful for drywall if not used with extreme care or without a depth-setting attachment. The lack of a clutch in many models makes it easy to strip screws or damage drywall.
- Recommendation for Drywall: Use an impact driver with a drywall dimpler bit or a dedicated depth-setting nose cone to prevent overtightening. Otherwise, a standard drill/driver with a clutch is generally safer and more precise for drywall.
-
Dedicated Drywall Screw Gun:
- Pros: The ultimate tool for high-volume drywall installation. Features an auto-feed mechanism for collated screws and a precise depth-setting nose cone that disengages once the screw reaches the perfect depth, preventing overtightening. Extremely efficient and produces consistent results.
- Cons: Specialized tool, less versatile than a standard drill, higher upfront cost.
- Ideal for: Professional installers, large commercial projects, and MRO teams responsible for extensive facility renovations where speed and consistency are paramount.
2. Driver Bits
The interface between your drill and the screw is critical.
- Phillips Head (PH2): This is the most common drive type for drywall screws. Ensure you use a high-quality PH2 bit that fits snugly into the screw head to prevent cam-out (the bit slipping out of the screw head), which leads to stripped screws and damaged bits.
- Square Drive (Robertson): Less common for standard drywall screws but offers superior grip and reduces cam-out significantly. If you encounter square-drive drywall screws, use the appropriate Robertson bit.
- Impact-Rated Bits: If using an impact driver, always use impact-rated bits. They are designed to withstand the higher torque and forces generated by impact drivers, preventing premature breakage.
- Magnetic Bit Holders: A magnetic bit holder helps keep the screw attached to the bit, making it easier to start screws with one hand, especially in awkward positions.
3. Specialized Drywall Accessories
These accessories significantly enhance the quality and ease of drywall installation.
- Drywall Dimpler Bit/Depth Setter: This is a crucial accessory, especially if your drill lacks a precise clutch or if you're using an impact driver. A dimpler bit has a built-in stop that allows the screw to sink just below the surface of the drywall, creating a perfect dimple for mudding, without tearing the paper. It ensures consistent depth across all screws.
- Stud Finder: Essential for locating wood or metal framing behind the drywall. Fastening screws directly into drywall without hitting a stud provides minimal holding power. A reliable stud finder helps ensure structural integrity.
- Utility Knife and Straightedge: For precise cutting and scoring of drywall sheets.
- Measuring Tape and Pencil: For accurate layout and marking.
4. Safety Gear
Safety should always be a top priority.
- Eye Protection: Essential to protect against flying dust and screw fragments.
- Gloves: Can protect hands from splinters and abrasions, especially when handling drywall sheets.
For procurement managers and MRO teams, investing in the right American-made tools, alongside quality fasteners, represents a strategic decision. It ensures not only the immediate success of projects but also the long-term reliability of installations and the safety of personnel. This commitment to industrial excellence is a core value at Maden.co, where we facilitate access to products that meet the highest standards.
Pre-Drilling: When and Why (Or Why Not for Drywall)
The concept of pre-drilling is often a point of confusion in fastening applications. For drywall screws specifically, the general rule differs from many other screw applications. Understanding when and why to pre-drill is crucial for both efficiency and the integrity of the installation.
When NOT to Pre-Drill for Drywall Screws
For typical drywall installation into wood studs or light-gauge metal studs, pre-drilling is generally not necessary. Modern drywall screws are designed with sharp, self-tapping points that easily penetrate both the gypsum and the underlying framing material without a pilot hole. In fact, pre-drilling into drywall itself can be counterproductive:
- Weakens the Gypsum: Drilling a pilot hole in the soft gypsum core unnecessarily removes material, potentially weakening the screw's grip and making it more prone to stripping out.
- Extra Step, No Benefit: It adds an unnecessary step to the process, slowing down installation without providing any tangible benefit for the screw's performance in drywall.
When Pre-Drilling IS Necessary or Recommended
While not for the drywall itself, pre-drilling becomes essential in specific scenarios involving the framing or when using certain anchors.
- Dense Wood Studs/Hardwoods: If you're working with exceptionally dense wood studs, engineered lumber, or hardwoods, a small pilot hole in the wood only can prevent the wood from splitting, especially near the ends of studs. The pilot hole should be slightly smaller than the core diameter of the screw.
- Heavy-Gauge Metal Framing: For heavier gauge metal studs (e.g., 18 gauge or thicker, often found in commercial construction), pre-drilling might be required. Standard drywall screws are typically designed for 20-25 gauge metal. For thicker steel, a specialized self-drilling screw (often with a drill bit tip) or a pre-drilled pilot hole using a metal-specific drill bit may be necessary to ensure proper penetration without stripping the screw.
- Anchors for Drywall: When installing anchors (plastic, self-drilling, toggle, molly bolts) into drywall for hanging heavier items, always follow the anchor manufacturer's instructions regarding pre-drilling. Many anchors require a specific size pilot hole to ensure proper expansion and grip.
- Pre-existing Holes: If you are reusing existing holes that have become enlarged or stripped, pre-drilling won't help. In these cases, it's better to repair the hole with drywall patch and then drive a new screw, or move to a different location on the stud.
Selecting the Right Drill Bit for Pre-Drilling (When Needed)
If pre-drilling into wood or metal framing is required:
- For Wood: Use a twist drill bit that is slightly smaller in diameter than the shank (the solid part of the screw beneath the threads) of the screw. The threads need to bite into the wood, so don't use a bit the same size as the screw's outer diameter.
- For Metal: Use a high-speed steel (HSS) drill bit specifically designed for metal. The size should be slightly smaller than the screw's thread diameter for self-tapping screws or according to the fastener manufacturer's recommendation for machine screws.
For procurement professionals, understanding these nuances is critical. Specifying the correct fasteners and tools, including drill bits for specific framing materials, can prevent costly material damage and installation delays. Maden.co's commitment to providing detailed product specifications ensures that you can make informed decisions, securing the right U.S.-made components for every phase of your project.
The Step-by-Step Drywall Screw Installation Process
Executing the drywall screw installation with precision is key to achieving a professional, durable finish. This step-by-step guide is designed to ensure optimal results, reducing the risk of errors that can lead to costly rework.
Step 1: Preparation and Planning
- Safety First: Always don your safety glasses before beginning.
- Locate Studs: Use a reliable stud finder to locate the center of wood or metal studs behind the drywall. Mark these locations lightly with a pencil. Screws should always be driven into framing members, not just the drywall itself, for structural integrity. For ceilings, ensure screws are placed along joists or blocking.
- Mark Screw Placement: For walls, screws are typically placed every 12-16 inches along the studs. For ceilings, this often reduces to 7-8 inches. Maintain a consistent distance from the edges of the drywall sheets (usually 3/8 to 1/2 inch) to prevent crumbling the edge. Stagger screws on adjacent sheets.
- Clear Workspace: Ensure the area is well-lit and free of obstructions.
Step 2: Set Up Your Drill/Driver
- Insert the Correct Bit: Use a high-quality Phillips #2 (PH2) bit, as it's the most common for drywall screws. Ensure it fits snugly into the screw head. If using an impact driver, use an impact-rated bit.
-
Adjust Clutch/Depth Setter:
- For Drills with a Clutch: Set the clutch to a low-to-medium torque setting. Start low and increase gradually until the screw consistently creates a slight dimple without tearing the paper. This is the most critical step to prevent overtightening.
- For Drywall Screw Guns or Dimpler Bits: No clutch adjustment is needed as the tool's nose cone or the dimpler bit's design will automatically stop at the correct depth. This is why these specialized tools are preferred for consistency and speed.
- Attach Screw to Bit: Use a magnetic bit holder or manually hold the screw in place on the bit.
Step 3: Positioning the Screw
- Perpendicular Insertion: Hold the drill and screw absolutely perpendicular to the drywall surface. Driving screws at an angle can cause them to tear the paper, weaken the connection, and make finishing difficult.
- Firm, Steady Pressure: Apply firm but not excessive pressure to the back of the drill. This helps the self-tapping point engage quickly and prevents the screw from "walking" across the surface.
Step 4: Driving the Screw
- Controlled Speed: Start the drill at a slow speed to allow the screw to seat properly, then gradually increase to a moderate, consistent speed. Avoid high speeds initially, which can cause the screw to skip or strip.
- Consistent Pressure: Maintain consistent forward pressure throughout the driving process. This helps the threads engage fully and prevents cam-out.
-
Achieving the Perfect Dimple: The goal is to sink the screw head just below the surface of the drywall, creating a shallow "dimple" without breaking through the paper face. The paper should remain intact, with no fibers torn or frayed around the screw head. This dimple will be filled with joint compound during the finishing stage.
- Too Deep: If the screw head breaks the paper, the holding power is significantly reduced, and the screw may eventually "pop" out.
- Too Shallow: If the screw head is flush or proud of the surface, it will be visible through the finished wall, creating an imperfection.
Step 5: Troubleshooting Common Issues
Even with careful technique, issues can arise. Knowing how to address them quickly is part of industrial excellence.
-
Stripped Screws:
- Cause: Overtightening, insufficient pressure, wrong bit, or hitting something unexpectedly (e.g., old screw).
- Solution: If the screw strips the gypsum, remove it. Move to a new spot a few inches away on the same stud and try again. For holes that are too wide, a small amount of drywall mud can be used to fill, then redrill once dry, though relocating is often best.
-
Torn Paper:
- Cause: Overtightening, angled driving, or insufficient clutch setting.
- Solution: Remove the screw. If the tear is small, apply some drywall compound, let it dry, and then redrill a new screw nearby. If the tear is extensive, you may need to patch the area before proceeding.
-
Screws Popping Out:
- Cause: Not hitting a stud, overtightening (breaking the paper's hold), or insufficient engagement with the framing.
- Solution: Ensure you are hitting a stud. If the paper is broken, remove and reposition. Use longer screws if the framing seems too shallow.
-
Overtightening/Undertightening:
- Overtightening: Screw head sinks too deep, tears paper. Reduce clutch setting or use a dimpler bit.
- Undertightening: Screw head is proud of the surface. Increase pressure slightly or adjust clutch higher until the perfect dimple is achieved.
Mastering these steps ensures that every screw driven into drywall contributes to a robust, long-lasting, and aesthetically pleasing finish. This attention to detail, from tool selection to technique, is a hallmark of the commitment to quality that defines American manufacturing.
Beyond Basic Installation: Strategic Sourcing for Industrial Applications
For procurement managers, MRO buyers, and design engineers, the selection and installation of a drywall screw is rarely an isolated task. It's often part of a larger, more complex project where every component, no matter how small, contributes to the overall success, compliance, and longevity of an industrial asset or facility. This is where strategic sourcing, particularly for U.S.-made products, offers profound advantages.
The Importance of Quality & Compliance
In an industrial context, the true cost of a cheap, low-quality fastener extends far beyond its initial purchase price. Inferior screws can lead to:
- Rework and Delays: Stripped screws, corroded fasteners, or those that fail to meet specified tensile strengths result in wasted labor, material, and critical project delays.
- Structural Compromise: In areas requiring fire ratings, seismic resistance, or specific load-bearing capacities, non-compliant or sub-standard fasteners can jeopardize safety and regulatory adherence.
- Shortened Asset Lifespan: Premature failure of components, even seemingly minor ones, can necessitate early replacement, increasing maintenance costs and reducing the operational life of equipment or infrastructure.
By sourcing high-quality, U.S.-made screws and fasteners, you ensure compliance with critical industry standards (e.g., ASTM standards for fasteners), reduce the likelihood of costly failures, and enhance the overall reliability of your installations. At Maden.co, we connect you with verified American manufacturers who adhere to stringent quality controls, ensuring that every product, from drywall screws to specialized industrial components, meets the highest benchmarks.
Supply Chain Resilience: The Maden.co Advantage
The past few years have underscored the fragility of global supply chains. Over-reliance on foreign suppliers can lead to:
- Extended Lead Times: Geopolitical events, logistical bottlenecks, and distant manufacturing can cause unpredictable and often severe delays.
- Quality Control Issues: Limited oversight of overseas production can result in inconsistent product quality, making it difficult to maintain industrial excellence.
- Increased Geopolitical Risk: Dependence on foreign sources introduces vulnerability to tariffs, trade disputes, and international conflicts.
At Maden.co, our mission is to democratize access to American manufacturing, directly addressing these challenges. By connecting industrial buyers with over 2.5 million American-made products from our network of 800+ verified U.S. manufacturers, we offer a pathway to unparalleled supply chain resilience. Our vision is to become the definitive platform that proves American-made components are as accessible and convenient as any global alternative, driving the manufacturing revival with our tagline: "America's manufacturing revival is here." Our commitment to American Manufacturing Pride, Digital Innovation, and Supply Chain Transparency empowers businesses to build more robust and predictable procurement processes.
Improving Total Cost of Ownership (TCO)
While the unit price of an American-made product might sometimes appear higher than an offshore alternative, considering the Total Cost of Ownership (TCO) reveals a different story:
- Reduced Logistics Costs: Shorter shipping distances mean lower freight costs, faster delivery, and reduced customs complexities.
- Minimized Inventory Holding Costs: Quicker lead times allow for "just-in-time" inventory strategies, reducing the capital tied up in warehousing and carrying excess stock.
- Lower Rework and Warranty Costs: Superior quality components mean fewer failures, less need for repairs, and a reduced burden on warranty claims.
- Enhanced Operational Efficiency: Reliable components contribute to smoother operations, less downtime, and increased productivity.
- Improved Compliance and Reduced Risk: Mitigating regulatory risks and ensuring product integrity protects your brand and avoids costly penalties.
When a procurement manager is under pressure to source a specific, high-quality fastener, or an MRO buyer needs to quickly replace a critical part, the strategic value of an accessible, reliable, and transparent marketplace like Maden.co becomes clear. We don't just offer products; we offer a partnership in building a more efficient and resilient procurement process.
Reducing Procurement Friction with Digital Innovation
Navigating complex supply chains and identifying specific, certified components can be a time-consuming and frustrating endeavor. Maden.co leverages Digital Innovation to streamline this process:
- Vast, Searchable Catalog: Our platform provides easy access to a vast catalog of industrial components, making it simple to find hard-to-source, U.S.-made parts.
- Verified Manufacturers: Every manufacturer on our platform is thoroughly vetted, ensuring that you receive products from reputable and compliant U.S. sources.
- Transparent Information: Detailed product specifications, material certifications, and compliance data are readily available, empowering informed purchasing decisions.
Instant Financing as a Strategic Tool
One of our key differentiators at Maden.co is our Instant Financing option. For businesses, managing cash flow effectively is paramount, especially when facing large-volume purchases or capital-intensive projects. Instant Financing is not merely a payment method; it's a strategic tool designed to:
- Improve Cash Flow Management: Allows businesses to acquire necessary components without immediately depleting working capital.
- Facilitate Larger Purchases: Empowers procurement teams to make bulk purchases, taking advantage of economies of scale, even when immediate funds are constrained.
- Accelerate Project Timelines: By removing financial roadblocks, projects can proceed without delay, ensuring timelines are met and operational continuity is maintained.
This feature, available during the checkout process, empowers procurement managers and business owners to make strategic decisions that align with their financial objectives while still securing the highest quality American-made products. You can apply for Instant Financing at checkout to streamline your capital-intensive projects and ensure your business always has access to the materials it needs.
For specific sourcing questions or to discuss how Maden.co can support your unique procurement challenges, our dedicated team is always ready to help. You can easily reach out to us through our Contact Us page.
Conclusion
The successful installation of a drywall screw, while seemingly minor, is a microcosm of effective industrial procurement: it demands the right tools, the correct technique, and above all, the highest quality components. From selecting the appropriate coarse- or fine-thread screw to setting the perfect dimple with a specialized screw gun, precision and quality are non-negotiable for project longevity and aesthetic integrity.
But the implications extend far beyond a single fastener. Choosing to source these vital components from American manufacturers provides businesses with not just a superior product, but also a more resilient supply chain, reduced total cost of ownership, and a tangible contribution to the nation's industrial strength. This commitment to American Manufacturing Pride is more than a value; it's a strategic advantage.
At Maden.co, we are dedicated to fostering this advantage. We connect industrial buyers with an expansive network of verified U.S. manufacturers, making it simpler than ever to access the 2.5 million+ American-made products necessary for your operations. Whether you're an MRO buyer needing to restock, a design engineer specifying a component, or a business owner investing in facility upgrades, we are your partner in building a future rooted in quality and efficiency.
Don't let procurement friction or supply chain vulnerabilities hinder your progress. Explore our vast catalog of American-made industrial components today and experience the difference that quality, transparency, and innovation can make for your business. Leverage our Instant Financing option at checkout to manage your capital effectively and empower your next project with the reliability of U.S.-made products. Join the manufacturing revival – it starts with smarter sourcing.
FAQ
Q1: Can I use wood screws in drywall?
While technically possible to drive a wood screw into drywall, it is strongly advised against. Wood screws have coarser threads designed to bite deeply into wood fibers, which are too aggressive for the soft gypsum core of drywall. Using wood screws will likely strip out the gypsum, create a weak hold, tear the paper surface excessively, and result in a loose fastener that cannot support weight effectively. Always use specialized drywall screws for proper installation.
Q2: What's the difference between coarse and fine thread drywall screws?
The primary difference lies in their application:
- Coarse-thread drywall screws have widely spaced, aggressive threads designed to grip securely into wood studs. They are ideal for fastening drywall to wood framing.
- Fine-thread drywall screws have more closely spaced, finer threads. These are specifically engineered to bite into and hold securely in light-gauge metal studs (typically 20-25 gauge) without stripping the thin metal.
Choosing the correct thread type based on your framing material is crucial for a strong, lasting connection.
Q3: Do I need to pre-drill for drywall screws?
Generally, no, you do not need to pre-drill for drywall screws when fastening into standard wood or light-gauge metal studs. Modern drywall screws are self-tapping and designed to penetrate both the drywall and the framing directly. Pre-drilling into the drywall itself can actually weaken the gypsum core. However, pre-drilling may be necessary for very dense hardwoods, heavy-gauge metal framing, or when installing specific types of drywall anchors, in which case you would follow the manufacturer's instructions for the framing material or anchor.
Q4: How do I prevent stripping drywall screws?
Preventing stripped drywall screws involves a combination of technique and proper tool setup:
- Use a Clutch-Equipped Drill: Set the clutch to a low-to-medium torque setting. This prevents overtightening by stopping the drill once sufficient resistance is met.
- Employ a Dimpler Bit/Depth Setter: This accessory ensures the screw head consistently sinks to the perfect depth without tearing the paper or stripping.
- Apply Consistent Pressure: Maintain firm, steady pressure on the drill throughout the driving process to keep the bit engaged with the screw head.
- Hold Perpendicular: Always drive the screw straight, perpendicular to the drywall surface, to ensure the threads engage evenly.
- Use the Correct Bit: Ensure your Phillips #2 (PH2) bit is in good condition and fits snugly into the screw head to prevent cam-out.


