How to Put a Screw in Drywall Without a Drill
Table of Contents
- Introduction
- Understanding Drywall and Fastener Compatibility
- Essential Tools for Manual Screw Insertion
- Step-by-Step Guide to Manual Drywall Screw Installation
- Choosing the Right Drywall Screw: Lengths and Applications
- When to Consider Drywall Anchors (Even Without a Drill)
- Broader Implications for Industrial Procurement and Supply Chain Resilience
- Conclusion
- FAQ
Introduction
Imagine the scenario: a critical fixture needs to be secured, a temporary sign mounted, or a quick repair made to a partition wall in a commercial facility. The immediate need for a robust fastening solution is clear, but the power drill is nowhere in sight, the battery is dead, or the noise would disrupt ongoing operations. This seemingly simple predicament – the need to secure a screw into drywall without the convenience of a power tool – is a common challenge that extends beyond the typical DIY project. For procurement managers, MRO buyers, and design engineers, understanding the nuances of such basic fastening techniques, even manual ones, underscores a deeper principle: the importance of having the right hardware and the knowledge to apply it, regardless of the tools at hand.
In this comprehensive guide, we will delve into the practical methodologies for manually inserting screws into drywall, exploring the specific types of fasteners best suited for this task, the preparatory steps involved, and the precise techniques to ensure a secure and lasting hold. Beyond the immediate how-to, we will connect this fundamental skill to the broader implications for industrial procurement, emphasizing the value of selecting high-quality, American-made components and the efficiency benefits of a streamlined sourcing process. Our goal is to equip you with not only the technical know-how but also the strategic insights that reinforce the critical role of superior hardware in every operation.
Understanding Drywall and Fastener Compatibility
Before attempting to insert any screw, it's crucial to understand the material you're working with: drywall. Also known as plasterboard or gypsum board, drywall is composed of a gypsum plaster core pressed between two sheets of heavy paper. Its inherent softness and tendency to crumble under pressure make it distinctly different from wood or metal studs. This characteristic necessitates specific types of fasteners and careful application techniques, particularly when a power drill isn't available to provide consistent torque and speed.
Why Drywall Requires Specific Screws
Standard wood or machine screws are not ideally suited for drywall. Their sharper points and thread patterns are designed to bite into dense materials, which can easily tear the paper facing and pulverize the gypsum core of drywall. This leads to stripped holes, loose fasteners, and compromised holding power. The key to successful drywall fastening, especially without a drill, lies in selecting screws specifically engineered for this material.
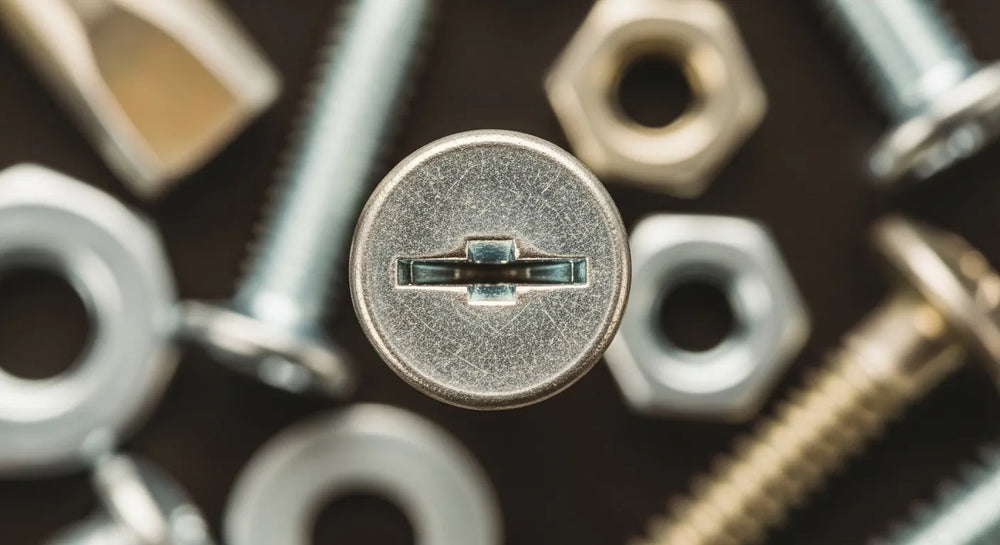
The Anatomy of a Drywall Screw
Drywall screws are distinct for several reasons:
- Sharp, Pointed Tip: Designed to penetrate the paper facing of the drywall without requiring a pilot hole (in most cases, particularly when using a drill). For manual insertion, a very small pilot can be beneficial, as we'll discuss.
- Coarse Threading: Unlike fine-threaded screws, coarse threads have wider gaps between their spirals. These larger threads create a strong grip within the soft gypsum, providing maximum holding power without stripping the material. This is paramount for manual application where control over speed and pressure is more challenging.
- Bugle Head: The distinctive bugle-shaped head tapers smoothly, allowing the screw to sit flush with or slightly below the drywall surface without tearing the paper. This conical shape helps distribute the pressure evenly, preventing damage to the drywall surface, which is critical for a smooth finish.
- Phosphate Coating: Most drywall screws are coated in black phosphate for corrosion resistance. While not as robust as galvanized or stainless steel in high-moisture environments, this coating is generally sufficient for interior applications, protecting against rust stains that can bleed through paint.
At Maden.co, we understand the critical importance of selecting the right fastener for every application. Our extensive catalog includes a wide array of U.S.-manufactured screws designed for optimal performance in various materials. For example, for general drywall applications requiring robust manual insertion, our 6 x 1-1/4 coarse thread drywall screws are an excellent choice, engineered to provide superior holding power.
Essential Tools for Manual Screw Insertion
While the primary goal is to install a screw without a power drill, that doesn't mean a complete absence of tools. The right manual tools can make a significant difference in ease, efficiency, and the quality of the finished result.
The Right Screwdriver
The most crucial tool for this task is a high-quality screwdriver. The type will depend on the screw head:
- Phillips Head: The most common type for drywall screws, characterized by a cross-shaped recess. Ensure the screwdriver tip (e.g., #2 Phillips) matches the screw head precisely to prevent cam-out (the driver slipping out of the screw head).
- Square Drive (Robertson): Increasingly popular in construction for their superior grip, reducing cam-out. If using square drive screws, a matching square drive bit or screwdriver is essential.
- Flathead: Less common for drywall screws due to their tendency to slip, but if a flathead screw is necessary for a specific application, ensure the driver tip fits snugly across the slot.
Invest in screwdrivers with comfortable, ergonomic handles that provide good grip, allowing you to exert consistent downward pressure and rotational force. A magnetic tip can also be a significant advantage, holding the screw securely in place as you start driving it.
Auxiliary Tools for Preparation
Even without a drill, some preparation can significantly ease the process and improve the outcome:
- Awl or Nail: A sharp awl or a small finishing nail can be used to create a shallow pilot dimple or a very small pilot hole. This initial indentation helps guide the screw and prevents it from wandering, especially when starting manually.
- Utility Knife or Drywall Saw: If you need to attach something heavy that might require a drywall anchor, a utility knife might be needed to cut an opening, though for simple screws, this isn't necessary.
- Pencil and Measuring Tape: For marking the exact location where the screw needs to be inserted. Precision is key, even for quick fixes.
- Stud Finder (Optional but Recommended): While the goal is often to place a screw directly into drywall, knowing if a stud is present is always beneficial. Screwing into a stud will provide significantly more holding power than screwing into drywall alone. If you hit a stud, the manual insertion will be much more challenging, and a drill would be ideal, but it's not impossible with significant effort.
Step-by-Step Guide to Manual Drywall Screw Installation
Executing the process correctly is paramount to achieving a secure hold without damaging the drywall or stripping the screw head.
Step 1: Mark the Location
Use a pencil to precisely mark the spot where the screw needs to go. For multiple screws, measure carefully to ensure proper spacing and alignment. This might seem trivial, but a well-placed mark prevents unnecessary damage from multiple attempts.
Step 2: Create a Pilot Dimple (Optional, but Recommended)
For manual insertion, especially with longer or thicker screws like our robust 8 x 4 drywall screw, creating a small pilot dimple or very shallow hole can be highly beneficial. Use a sharp awl, a small finishing nail, or even the tip of the chosen drywall screw itself (carefully twisting with pressure) to create a starter point. This initial indentation serves as a guide, preventing the screw from "walking" across the drywall surface as you begin to turn it. The goal is just a dimple, not a deep hole that would compromise the gypsum core's ability to grip the screw threads.
Step 3: Position the Screw and Screwdriver
Place the tip of the drywall screw directly into the pilot dimple. Then, align the appropriate screwdriver tip with the screw head, ensuring a snug, firm fit. This is where a magnetic screwdriver can be invaluable, holding the screw in place.
Step 4: Apply Downward Pressure and Initial Rotation
This is the most critical step for manual insertion. Lean into the screwdriver, applying steady, firm downward pressure perpendicular to the drywall surface. Simultaneously, begin to rotate the screwdriver clockwise.
- Steady Pressure: Consistent downward force is essential to keep the screw engaged with the drywall and prevent the screwdriver from camming out.
- Controlled Rotation: Start with slow, deliberate turns. You should feel the screw begin to bite into the gypsum core. As it starts to thread, you can increase your rotational speed, but always maintain that steady downward pressure.
Step 5: Drive the Screw Fully
Continue turning the screw clockwise, maintaining consistent pressure. The coarse threads of the drywall screw will progressively cut into the gypsum.
- Keep it Straight: Ensure the screwdriver remains perpendicular to the wall. If the screw goes in at an angle, it won't hold as securely and can weaken the drywall around it.
- Listen and Feel: You'll feel the resistance increase as the screw penetrates further. As the bugle head approaches the surface, the resistance will become very firm.
- Countersink Properly: The bugle head is designed to sink slightly below the surface of the paper facing, creating a small indentation. This is known as countersinking. The goal is to get the screw head flush or slightly below the surface without tearing the paper or crushing the gypsum excessively. Stop turning as soon as the head is flush or just slightly recessed. Overtightening will strip the threads in the drywall, causing the screw to lose its grip and potentially creating a crater in the wall.
Step 6: Test the Hold
Once the screw is fully inserted, gently try to wiggle it. It should feel secure and show no signs of looseness. If it wiggles, it might be stripped, indicating either over-tightening or insufficient grip. In such a case, you may need to remove it, assess the damage, and reinsert it in a slightly different spot, perhaps using a larger diameter screw or considering a drywall anchor.
Choosing the Right Drywall Screw: Lengths and Applications
While all drywall screws share common characteristics, their lengths and sometimes thread types (though coarse is standard for drywall) dictate their optimal use. Understanding these distinctions is crucial for proper procurement and application, even for seemingly simple tasks.
Standard Coarse Thread Drywall Screws
These are your workhorses for attaching drywall panels to wood studs or for general fastening within drywall.
- Short Screws (e.g., 1-inch to 1-1/4 inch): Ideal for attaching a single layer of standard 1/2-inch or 5/8-inch drywall to a wood stud. For manual insertion into drywall without hitting a stud, a 1-1/4 inch screw provides sufficient purchase for lightweight items. Our 6 x 1-1/4 coarse thread drywall screws are excellent for these applications, offering dependable holding power.
- Medium Screws (e.g., 1-5/8 inch to 2 inch): Used for attaching two layers of drywall, or for thicker drywall panels. If you need to secure a slightly heavier item directly into drywall without hitting a stud, a 1-5/8 inch coarse thread screw might offer a bit more purchase.
- Longer Screws (e.g., 3 inch to 4 inch): Reserved for specialized applications like attaching furring strips or multiple layers of drywall, especially when securing through existing drywall into a stud. For scenarios requiring maximum grip, such as securing thicker fixtures, our 8 x 4 drywall screw provides exceptional length and strength.
Fine Thread Drywall Screws (for Metal Studs, but relevant contextually)
While the primary focus of this guide is manual insertion into drywall without a drill (which almost always implies coarse-thread screws for gypsum), it's important for procurement professionals to be aware of the full spectrum of drywall fasteners. Fine-thread drywall screws are specifically designed for attaching drywall to metal studs. Their tighter thread pattern is better suited to bite into and hold thin gauge metal without stripping. Attempting to use fine-thread screws in gypsum drywall, especially manually, would result in poor holding power and easy stripping. However, understanding the distinctions helps in choosing the correct fastener for all drywall-related projects, demonstrating comprehensive expertise. For instance, if a project involves composite materials or specific types of thin panels alongside traditional drywall, a fine thread might be considered. For projects requiring specific fine-thread fasteners, such as our 6 x 1 fine thread drywall screw, sourcing from verified U.S. manufacturers ensures material consistency and adherence to crucial specifications.
The Role of Fastener Quality in Industrial Settings
For MRO buyers and procurement managers, the choice of fastener is never trivial. Even for a task as seemingly simple as manually inserting a screw, the quality of the screw directly impacts the integrity and longevity of the application. Low-quality screws can:
- Strip Easily: Compromising both the screw head and the drywall material.
- Break During Installation: Leading to wasted time and materials.
- Corrode Prematurely: Causing aesthetic issues and potential structural weakening.
- Fail to Meet Specifications: Leading to compliance issues in regulated industries.
This is why at Maden.co, our mission is to democratize access to American manufacturing, connecting industrial buyers with over 2.5 million American-made products from our network of 800+ verified U.S. manufacturers. We believe that American manufacturing pride translates directly into industrial excellence and supply chain transparency, ensuring that every component, down to the smallest screw, meets stringent quality standards.
When to Consider Drywall Anchors (Even Without a Drill)
Despite the best manual techniques and the highest quality coarse-thread screws, there are inherent limitations to how much weight a screw can hold in drywall alone. For anything beyond lightweight items (e.g., small pictures, very light wall decor), a drywall anchor is indispensable. Even without a power drill, many types of anchors can be installed manually.
Types of Manually Installable Drywall Anchors:
- Self-Drilling (Self-Tapping) Anchors: These are often made of nylon or metal and have a sharp, threaded tip. They can be screwed directly into the drywall using a Phillips head screwdriver, much like a screw. Once fully inserted, a screw is then driven into the anchor. They are suitable for light to medium loads.
- Plastic Expansion Anchors: These require a pilot hole. While a drill is typically used, a small pilot hole can be carefully created using an awl or a small nail by wiggling it to widen the hole to the appropriate diameter (often 1/4 inch). The plastic anchor is then pushed into the hole, and a screw is driven into it, causing it to expand and grip the drywall.
- Toggle Bolts (Butterfly Anchors): These offer significant holding power. They require a larger hole, which again can be made manually with a utility knife or small drywall saw if absolutely necessary, but this is a more arduous process without a drill. Once the hole is made, the toggle bolt wings are inserted and expand behind the drywall, distributing the load over a larger area. These are usually for heavier items.
Understanding when to choose an anchor over a standalone screw, and knowing which anchors can be installed manually, is a key part of informed procurement. It ensures that the installed fixture will be secure and reliable, preventing costly failures and rework.
Broader Implications for Industrial Procurement and Supply Chain Resilience
While the focus of this article is a specific, seemingly minor fastening technique, the principles discussed resonate deeply with the challenges faced by procurement managers, MRO buyers, and design engineers daily. The need for reliable, high-quality components, readily accessible, and delivered with efficiency, is universal.
The Value of Verified U.S. Manufacturing
In an era of unpredictable global supply chains, the ability to source critical components from domestic suppliers offers unparalleled advantages:
- Reduced Lead Times: Shorter geographical distances inherently mean faster delivery.
- Enhanced Quality Control: U.S. manufacturers adhere to stringent quality standards, reducing defects and ensuring consistency.
- Supply Chain Resilience: Mitigating risks associated with international shipping delays, geopolitical issues, and fluctuating tariffs.
- Compliance with Standards: Easier verification of adherence to critical industry standards (e.g., DIN, NPT).
For a procurement manager under pressure to source a specific DIN 931 compliant hex cap screw, a design engineer needing specific material certifications for a new prototype, or an MRO buyer facing an unexpected equipment breakdown, the ability to quickly find and finance a verified, U.S.-made part is a game-changer. This is the core of what we do at Maden.co. We provide a platform where you can discover over 2.5 million U.S.-made products from our network, all vetted and verified. Our vision is to become the definitive platform that proves American-made components are as accessible and convenient as any global alternative, driving the manufacturing revival with our tagline: "America's manufacturing revival is here."
Optimizing Total Cost of Ownership (TCO)
Sourcing through a platform like Maden.co contributes to a lower Total Cost of Ownership (TCO) not just through competitive pricing, but through a reduction in hidden costs:
- Reduced Risk of Defects: High-quality American-made parts minimize rework and warranty claims.
- Improved Efficiency: Our digital platform reduces procurement friction, saving valuable time for your purchasing teams.
- Enhanced Reliability: Secure components lead to longer equipment lifespans and less downtime.
- Simplified Compliance: Easier access to certifications and material data.
These benefits far outweigh any perceived upfront cost savings from lower-quality, internationally sourced alternatives, especially when considering the long-term operational impact. Our entire business model is built on this principle; you can learn more about our mission to champion American manufacturing here.
Streamlining Procurement with Digital Innovation
At Maden.co, we embrace digital innovation to make industrial procurement smarter and more efficient. Our platform offers intuitive search functionalities, detailed product specifications, and direct connections to manufacturers. This empowers buyers to quickly locate the exact components they need, compare options, and make informed decisions, whether they are looking for specialized fasteners, complex machined parts, or everyday MRO supplies.
Furthermore, we understand that large-volume purchases often require flexible financial solutions. That's why we offer Instant Financing options, available during the checkout process. This strategic tool allows procurement managers and business owners to manage cash flow effectively and make larger-volume purchases without immediate capital strain, ensuring projects stay on track and operations remain uninterrupted.
Conclusion
The ability to put a screw in drywall without a drill, while a seemingly minor skill, highlights a profound truth in industrial procurement: preparedness, knowledge of materials, and the right quality components are paramount, regardless of the tools at hand. By understanding the specific properties of drywall, selecting appropriate coarse-thread screws, utilizing proper manual techniques, and knowing when to employ anchors, professionals can ensure secure and reliable fastenings even in challenging circumstances.
For procurement managers, MRO buyers, and design engineers, this granular attention to detail extends to every aspect of sourcing. Partnering with verified U.S. manufacturers through a platform like Maden.co ensures access to the highest quality, American-made components that contribute to supply chain resilience, reduced TCO, and industrial excellence. We are dedicated to providing the tools and resources necessary to make sourcing simpler, more transparent, and more reliable.
Don't let unexpected challenges or limited tools hinder your progress. Explore our vast catalog of U.S.-made industrial products today and discover the difference that quality and efficiency can make. Whether you're in search of specific fasteners, industrial hardware, or specialized components, our platform is designed to connect you with exactly what you need. If you have specific sourcing questions, our team is ready to help; simply contact us for expert assistance. You can apply for Instant Financing at checkout to streamline your capital-intensive projects, ensuring your operations never miss a beat. Join us in driving America's manufacturing revival by sourcing American-made. Are you a U.S. manufacturer producing quality fasteners or other industrial components? Register as a vendor and join the American manufacturing revival to expand your reach.
FAQ
Q1: Can I use any type of screw in drywall without a drill?
A1: No, it's highly recommended to use coarse-thread drywall screws. These screws are specifically designed with wider threads and a bugle head to grip the soft gypsum core of drywall effectively and sit flush without tearing the paper. Standard wood or machine screws will likely strip the hole and provide poor holding power, especially when inserted manually.
Q2: What's the best way to start a pilot hole manually without a drill?
A2: For manual screw insertion into drywall, you don't typically need a deep pilot hole. Instead, create a small "pilot dimple" or indentation using a sharp awl, a small finishing nail, or even the tip of the chosen drywall screw itself. This dimple helps guide the screw and prevents it from wandering when you start turning it, making the manual process much easier and more precise.
Q3: How do I prevent stripping the screw or damaging the drywall when inserting manually?
A3: The key is to apply steady, firm downward pressure while rotating the screwdriver, ensuring the screwdriver tip fits snugly into the screw head to prevent cam-out. Drive the screw until the bugle head is just flush with or slightly below the drywall surface. Stop immediately once this is achieved. Overtightening will strip the threads in the soft gypsum, causing the screw to lose its grip and potentially create a crater in the wall.
Q4: When should I consider using a drywall anchor instead of just a screw in drywall?
A4: You should always consider a drywall anchor for anything beyond very lightweight items (e.g., small pictures, decorative plaques). A standalone screw in drywall has limited holding power. For medium to heavy items like shelves, mirrors, or curtain rods, an anchor distributes the weight over a larger area, providing a much more secure and reliable attachment. Many types of anchors, such as self-drilling anchors, can also be installed manually with just a screwdriver.


