Drywall Screw Spacing: Essential Fastening Guide
Table of Contents
- Introduction
- The Unseen Strength: Why Drywall Fastening Matters More Than You Think
- Understanding Drywall and Its Installation Fundamentals
- The Core Question: How Far Apart Screws Drywall?
- The Science Behind Drywall Screw Spacing
- Choosing the Right Drywall Screws for Optimal Performance
- Best Practices for Drywall Fastening
- Advanced Considerations for Professional Procurement and Installation
- Common Mistakes to Avoid in Drywall Fastening
- The Maden.co Advantage for Industrial Buyers
- Conclusion
- FAQ
Introduction
Imagine a construction project, meticulously planned and executed, only to discover unsightly cracks, bowing panels, or worse, a structural failure just months after completion. This isn't just a minor cosmetic flaw; it represents significant rework, material waste, compromised safety, and a direct hit to project budgets and reputations. Often, the root cause isn't a faulty panel or a weak stud, but a seemingly minor detail: improper drywall screw spacing. For procurement managers, MRO buyers, and design engineers, understanding the nuances of how far apart screws drywall is not merely a technicality; it's a critical element in ensuring the long-term integrity, compliance, and overall success of any construction or renovation project. This comprehensive guide will delve into the precise standards, best practices, and strategic considerations for drywall fastening, highlighting how informed procurement of quality, American-made fasteners through platforms like Maden.co can fundamentally impact a project's durability and cost-effectiveness. Our purpose is to equip you with the knowledge to make superior fastening decisions, recognizing that every screw plays a vital role in building lasting quality.
The Unseen Strength: Why Drywall Fastening Matters More Than You Think
While drywall often serves as the aesthetic canvas of an interior, its functionality extends far beyond visual appeal. Properly installed drywall contributes significantly to a building's structural integrity, offers critical soundproofing qualities, and plays a crucial role in fire resistance, acting as a passive fire barrier. The fasteners used to secure these panels are the silent workhorses, distributing stress, holding materials firmly in place, and absorbing the subtle shifts and movements that occur within a structure over time.
Ignoring the recommended guidelines for drywall screw spacing can lead to a cascade of costly problems. Visible issues like "nail pops" or "screw pops"—where the fastener head protrudes due to movement or improper installation—are common indicators of underlying problems. More severe consequences include sagging panels, hairline cracks that spiderweb across walls and ceilings, or even entire sections of drywall detaching from the framing. Beyond the immediate repair costs, these failures can compromise the building's fire rating, diminish its sound attenuation properties, and in extreme cases, raise safety concerns. For a business, this translates into expensive callbacks, reputation damage, and significant project delays that erode profitability. Understanding these risks underscores the paramount importance of meticulous fastening and highlights why investing in high-quality, reliable fasteners from trusted sources is a strategic procurement decision.
Understanding Drywall and Its Installation Fundamentals
Before delving into the specifics of screw spacing, it's essential to appreciate the material itself and the environment it's installed within. Drywall, also known as plasterboard or gypsum board, is a panel made of gypsum plaster pressed between two thick sheets of paper. Its composition makes it relatively easy to cut, install, and finish, but also dictates specific fastening requirements.
Types of Drywall and Their Impact on Fastening
Not all drywall is created equal, and different types may subtly influence fastening considerations, particularly concerning their density and intended application:
- Standard Drywall: The most common type, typically 1/2-inch or 5/8-inch thick, used for general wall and ceiling applications. Fastening principles discussed here apply primarily to this type.
- Moisture-Resistant Drywall (Greenboard/Purple Board): Designed for high-humidity areas like bathrooms and laundries. While more resistant to moisture, it still requires proper fastening to studs and should not be used in direct water exposure.
- Fire-Rated Drywall (Type X or Type C): Contains special additives (like glass fibers) to enhance its fire resistance. This denser material often comes in 5/8-inch thickness and is crucial for meeting building codes in specific areas. Its increased density means that the right screw length and type are paramount for secure attachment.
- Soundproof Drywall (QuietRock, SoundBreak): Features a viscoelastic layer or additional gypsum layers to dampen sound. These panels are heavier and may require slightly more robust fastening schedules or longer screws to ensure secure installation, especially in ceiling applications.
- Impact-Resistant Drywall: Engineered to withstand more wear and tear, often found in high-traffic commercial spaces. Similar to fire-rated or soundproof variants, its enhanced durability often translates to increased density, requiring careful fastener selection.
Framing Materials: Wood vs. Metal Studs
The type of framing material – wood or metal – significantly dictates the kind of screw required:
- Wood Studs: The most traditional framing material. Wood studs are forgiving, allowing for some flexibility in screw placement, though precision remains key. They typically pair best with coarse-thread drywall screws that grip the wood fibers effectively.
- Metal Studs: Increasingly common in commercial construction due to their consistency, fire resistance, and cost-effectiveness. Metal studs require fine-thread drywall screws, designed to tap into the thinner gauge metal without stripping. Self-tapping screws are particularly useful for quicker, more secure attachment to metal. The rigidity of metal studs also means that precise screw depth is even more critical to avoid crushing the drywall paper.
Essential Tools for Drywall Installation
Beyond the fasteners themselves, the right tools are indispensable for correct installation and screw placement:
- Drywall Screw Gun (or specialized drill): Crucial for driving screws to the correct depth without stripping the head or tearing the drywall paper. Many feature an adjustable clutch to prevent over-driving.
- Stud Finder: Essential for accurately locating framing members behind the drywall, ensuring screws hit their mark and provide secure anchorage.
- T-Square and Utility Knife: For precise cutting and sizing of drywall panels.
- Measuring Tape: For accurate layout and spacing of screws.
- Chalk Line: Useful for marking stud locations across larger panels, especially on ceilings.
Having the correct tools and understanding the nuances of different drywall types and framing materials sets the stage for answering the central question of this guide: how far apart screws drywall for optimal results. It also underscores why procuring the right fasteners—matched precisely to these variables—is a foundational step in quality construction.
The Core Question: How Far Apart Screws Drywall?
The spacing of drywall screws is not arbitrary; it's a carefully determined standard based on engineering principles to ensure the drywall remains securely attached, resisting gravity, building movement, and daily wear and tear. While specific local building codes should always be consulted, general industry standards provide a reliable baseline.
General Guidelines: Walls vs. Ceilings
A primary distinction in screw spacing involves whether you are fastening drywall to a wall or a ceiling. Ceilings generally require closer screw spacing due to the constant downward pull of gravity and the higher risk of sagging.
-
For Walls:
- Field of the Board: Screws are typically spaced 12 to 16 inches (30-40 cm) apart along the studs in the main body of the drywall sheet. The most common recommendation is 16 inches on center, aligning with standard stud spacing.
- Edges and Ends: Along the edges and ends of the drywall sheet (where two panels meet on a stud), screws should be spaced more closely, usually 8 inches (20 cm) apart. This tighter spacing at seams prevents movement and cracking, providing a solid base for taping and finishing.
- Corners: When fastening drywall to an inside or outside corner, screws should be placed approximately 3/8 to 1/2 inch (1-1.3 cm) from the edge of the drywall panel. This prevents edge crumbling during installation and ensures the fastener bites securely into the framing without weakening the gypsum core.
- Perimeter Screws: For the perimeter of a room where drywall meets an adjacent wall, ceiling, or floor, screws should be placed on every stud, maintaining the 12-16 inch spacing, but ensuring the first and last screw are within 8 inches of the panel's edge.
-
For Ceilings:
- Field of the Board: Due to the increased stress from gravity, screws in the main body of ceiling drywall should be spaced more closely, typically 7 inches (18 cm) apart along the ceiling joists.
- Edges and Ends: Similar to walls, edges and ends of ceiling drywall panels require closer spacing, usually 7 inches (18 cm) apart as well, to prevent sagging and ensure strong seams.
- Why the Difference? Gravity exerts constant downward pressure on ceiling drywall, making it more prone to sagging and eventual failure if not adequately supported. Tighter screw spacing distributes this load more evenly and provides enhanced resistance to deflection.
Double Layer Drywall: Enhanced Performance and Fastening
For enhanced fire resistance, soundproofing, or impact resistance, double-layer drywall installations are common. This involves applying a second layer of drywall over the first, typically with staggered seams.
- First Layer: Fastened with standard spacing (e.g., 16 inches on walls, 7 inches on ceilings) using screws long enough to penetrate the first layer and into the stud.
- Second Layer: Fastened with screws that pass through both layers and into the stud. These screws will need to be significantly longer. The spacing for the second layer can be similar to the first, but often the screws are offset or staggered relative to the first layer's screws to improve overall holding power and reduce stress concentrations. An adhesive is frequently used between the two layers to further enhance bonding and performance.
Factors Influencing Spacing Decisions
While the above guidelines provide a strong foundation, several project-specific factors can influence or necessitate adjustments to standard screw spacing:
- Drywall Thickness: Thicker drywall (e.g., 5/8-inch Type X) is heavier and inherently more rigid. While it resists sagging better, it still requires proper spacing to ensure adequate support. Thinner drywall (e.g., 1/4-inch or 3/8-inch) used for curved surfaces or as a base layer for other finishes might require closer spacing due to its flexibility.
- Stud Material: As discussed, wood vs. metal studs influences screw type more than spacing, but the rigidity of metal framing can sometimes tolerate slightly wider spacing if the screws are perfectly driven and the panel is well-supported. However, adhering to standard spacing remains the safest bet.
-
Intended Use of the Space:
- High-Traffic Areas: Commercial corridors, schools, or hospitals may benefit from slightly tighter spacing to resist impact damage and general wear.
- Areas Requiring Enhanced Soundproofing: While specialized drywall is key, tighter screw spacing, combined with resilient channels or acoustic caulk, can further improve performance by reducing vibrational transfer.
- Fire-Rated Assemblies: Building codes for fire-rated walls and ceilings will often specify minimum fastener spacing and specific screw types to meet stringent fire resistance ratings. Compliance here is non-negotiable.
- Ceilings with Heavy Fixtures: If a ceiling is expected to support heavy light fixtures, ceiling fans, or other attachments, ensuring very secure fastening with tight spacing is crucial.
Understanding these variables ensures that fastening decisions are not just by-the-book but are tailored to the specific demands and performance requirements of each unique project. For the design engineer, this knowledge ensures structural integrity; for the procurement manager, it means sourcing fasteners that match these precise specifications for long-term reliability.
The Science Behind Drywall Screw Spacing
The recommended screw spacing is not arbitrary; it's rooted in the physics of materials and structural mechanics. Understanding these principles helps in appreciating why adherence to guidelines is so critical for the longevity and performance of drywall installations.
Stress Distribution: Preventing Bowing and Sagging
When a sheet of drywall is fastened to framing, the screws bear the weight of the panel and resist forces that try to pull it away from the studs. If screws are too far apart, the unsupported sections of the drywall panel between fasteners become susceptible to bowing (on walls) or sagging (on ceilings). Gravity constantly pulls downwards on ceiling panels, and temperature/humidity fluctuations can cause subtle movements in wall panels. Closer screw spacing ensures that the load is distributed over a greater number of points, reducing the stress on any single fastener or section of the drywall. This even distribution is fundamental to maintaining a flat, stable surface that can be finished smoothly and resist cracking.
Shear Strength and Pull-Out Resistance
Drywall screws primarily resist two types of forces:
- Shear Strength: The resistance to forces acting parallel to the fastener, trying to slice or "shear" the screw. While screws are not typically designed for primary shear loads in drywall, this force can come into play with heavy impacts or significant panel movement.
- Pull-Out Resistance: The resistance to forces acting perpendicular to the fastener, trying to pull the screw head through the drywall or pull the threaded shaft out of the stud. This is the primary force drywall screws are designed to counter, especially on ceilings.
The design of a drywall screw, particularly its bugle head and aggressive threads, is optimized for pull-out resistance. However, this resistance is only effective if the screw is properly embedded in a sound substrate (the stud) and doesn't tear through the gypsum core. Incorrect spacing, over-driving, or using the wrong screw type compromises this resistance, leading to premature failure.
Moisture and Thermal Expansion: Accommodating Movement
Buildings are not static; they breathe. Changes in temperature and humidity cause building materials, including wood studs and even drywall itself, to expand and contract. This subtle movement, if not properly accommodated, can exert significant stress on the drywall fasteners and panels.
- Thermal Expansion: Drywall expands slightly when warm and contracts when cool. If screws are too widely spaced, this movement can concentrate stress, leading to cracking, especially at seams.
- Moisture Absorption: Wood studs absorb and release moisture, causing them to swell and shrink. If the drywall is rigidly fixed without sufficient points of attachment, the movement of the stud can cause the drywall to flex and potentially crack or cause fasteners to pop.
Proper screw spacing, combined with the slight flexibility of drywall itself, allows the entire assembly to accommodate these minor movements without localized stress points leading to damage. This scientific understanding reinforces that optimal screw spacing is not just about holding panels up, but about enabling the entire wall or ceiling system to function resiliently over time.
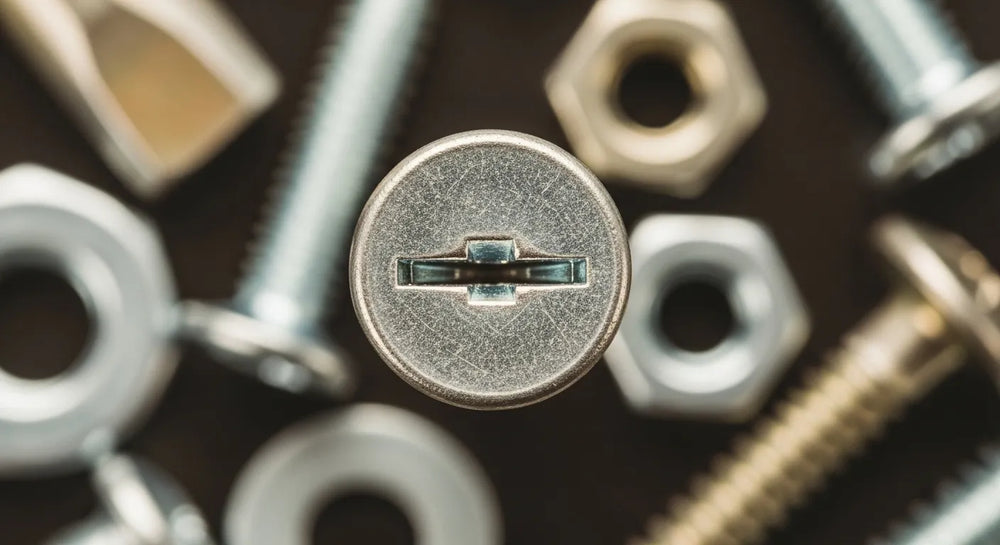
Choosing the Right Drywall Screws for Optimal Performance
Selecting the correct drywall screw is just as critical as its spacing. The market offers various types, lengths, and gauges, each designed for specific applications. Using the wrong screw can undermine even the most meticulous installation. For a procurement manager sourcing materials, the devil is often in these details.
Types of Screws: Matching to Substrate
- Coarse-Thread Drywall Screws: These are the most common type for fastening drywall to wood studs. Their aggressive threads provide superior grip in the wood fibers, minimizing stripping and ensuring strong pull-out resistance. We offer a robust selection of fasteners for diverse needs. For example, our 6 x 1-1/4 Coarse Thread Drywall Screws are an excellent choice for securely fastening standard 1/2-inch or 5/8-inch drywall to wood framing, providing reliable, American-made performance.
- Fine-Thread Drywall Screws: Designed specifically for attaching drywall to metal studs. Their finer, closer threads are better suited to tap into thinner gauge metal without stripping the threads in the stud itself. The precise engineering of these screws ensures a secure, durable connection in commercial and residential applications where metal framing is prevalent. Our 6 x 1 Fine Thread Drywall Screw is a prime example of a specialized fastener engineered for optimal performance with metal studs, reflecting our commitment to industrial excellence.
- Self-Tapping Drywall Screws: A variant often found in fine-thread screws, these have a sharper point that helps them pierce metal studs without the need for a pre-drilled pilot hole, speeding up installation.
- Multi-Purpose Drywall Screws: Some screws are designed with a hybrid thread pattern suitable for both wood and light-gauge metal studs. However, for critical applications, specific coarse or fine-thread screws often provide superior performance. Consider our versatile 8 x 4 Drywall Screw, which offers excellent general-purpose fastening capabilities for various drywall applications, embodying the quality and reliability expected from U.S.-manufactured components.
Length and Gauge: Matching Drywall Thickness
The length of the screw is paramount. It must be long enough to pass through the drywall board and penetrate the framing stud by at least 5/8 inch to 3/4 inch for secure anchorage.
- 1/2-inch Drywall: Typically requires 1-1/4 inch or 1-3/8 inch screws for wood studs, or 1-inch to 1-1/4 inch for metal studs.
- 5/8-inch Drywall: Requires 1-5/8 inch screws for wood studs, or 1-1/4 inch to 1-1/2 inch for metal studs.
- Double Layer Drywall (two 1/2-inch sheets): Would require screws that are approximately 2 inches to 2-1/4 inches long to pass through both layers and into the stud.
The gauge (diameter) of the screw, commonly #6 or #8, also affects its strength and pull-out resistance. A #8 screw is thicker and offers greater strength than a #6.
Corrosion Resistance: Long-Term Durability
Most drywall screws are coated with a black phosphate finish, which offers some corrosion resistance and helps the screw accept paint and joint compound. For moisture-prone areas (like bathrooms or exterior sheathing applications), specialized corrosion-resistant screws (e.g., galvanized or polymer-coated) might be necessary to prevent rust stains from bleeding through the finished surface and compromising the fastener's integrity.
Head Types: The Bugle Advantage
Almost all drywall screws feature a "bugle head." This conical shape allows the screw to seat flush with or just below the drywall surface without tearing the paper facing, creating a smooth depression that can be easily filled with joint compound. This is a crucial design feature for a professional finish.
For design engineers creating specifications or procurement managers placing orders, the precise selection of these fastener characteristics directly impacts project quality, efficiency, and long-term durability. Sourcing through a platform like Maden.co, where detailed product specifications are readily available for verified U.S. manufacturers, simplifies this critical decision-making process.
Best Practices for Drywall Fastening
Optimal screw spacing is only part of the equation. Even the best fasteners, procured from the most reliable sources, can fail if not installed correctly. Adhering to best practices ensures maximum holding power, a smooth finish, and prevents costly re-work.
Start from the Center, Work Outwards
When fastening a drywall sheet, begin by placing a screw in the center of the panel, then work outwards towards the edges. This technique helps to "float" the panel, ensuring it lies flat against the framing and prevents buckling or bowing. As you work towards the edges, ensure the panel remains tight against the studs.
Proper Depth Setting: The Dimple, Not the Tear
The most critical aspect of driving a drywall screw is achieving the correct depth:
- The Goal: The screw head should create a slight "dimple" in the drywall surface, just below the paper, without tearing through the paper facing. The paper facing provides much of the screw's holding power.
- Over-Driving: Driving the screw too deep will tear the paper, significantly reducing the screw's pull-out resistance and creating an unstable embedment. This is a common cause of "screw pops" later on.
- Under-Driving: Leaving the screw head proud of the surface makes finishing difficult and can lead to bumps or imperfections that show through paint.
- Tools: A drywall screw gun with an adjustable clutch or depth-setting nose is invaluable for consistently achieving the perfect depth.
Avoiding "Nail Pops" and "Screw Pops"
"Pops" occur when the fastener head protrudes from the finished surface, breaking through the joint compound and paint. This is typically due to:
- Over-driving: As mentioned, tearing the paper weakens the bond.
- Under-driving: The screw was never flush to begin with.
- Framing Movement: Most commonly, the wood framing swells and shrinks due to moisture changes, pushing the screw head out or pulling the drywall away from the fastener. This is especially prevalent if the wood was not properly acclimated or has a high moisture content.
- Insufficient Fastening: Too few screws allow the drywall to move independently of the framing.
Solutions involve correct depth setting, using screws with aggressive threads, ensuring dry and stable framing, and proper screw spacing to distribute forces evenly.
Using Adhesives in Conjunction with Screws
For enhanced bonding, especially on ceilings or in high-stress areas, construction adhesive can be applied to the framing before the drywall sheet is installed. The adhesive provides immediate grab and long-term bonding, while the screws hold the panel in place until the adhesive cures. This combination significantly increases the overall strength and rigidity of the drywall installation, reducing the likelihood of pops and cracks.
Edge Fastening: Crucial for Strong Seams
The edges and ends of drywall panels are where seams occur, and these are often the weakest points. Tighter screw spacing (e.g., 8 inches on walls, 7 inches on ceilings) along these edges is critical. Ensure that screws are placed far enough from the edge (3/8 to 1/2 inch) to prevent crumbling, but close enough to capture the edge firmly. Proper edge fastening provides a stable substrate for joint compound and tape, minimizing cracking.
Locating Studs Accurately
Missing the stud with a screw is a wasted fastener and creates a weak point. Always use a reliable stud finder or measure precisely from a known corner or reference point to locate the center of the studs and joists. Marking the stud centers with a chalk line before starting can dramatically increase fastening accuracy and efficiency.
Adhering to these best practices ensures that the quality fasteners you source deliver their intended performance, contributing to a structurally sound and aesthetically pleasing finish. This attention to detail reflects Maden.co's core value of Industrial Excellence, demonstrating that superior results are achieved through both quality materials and skilled application.
Advanced Considerations for Professional Procurement and Installation
For professionals in procurement, MRO, and engineering, the act of drywall fastening extends beyond simply putting screws in. It involves strategic decisions that impact regulatory compliance, supply chain stability, and overall project economics. At Maden.co, our mission is to democratize access to American manufacturing, ensuring that industrial buyers have the resources to make these advanced considerations practical realities.
Compliance and Standards: The Non-Negotiables
Every construction project is subject to a myriad of building codes, safety regulations, and industry standards (e.g., ASTM, DIN, NPT). For drywall installations, this includes specific requirements for:
- Fire-Rated Assemblies: If a wall or ceiling is part of a fire-rated assembly, the type of drywall, its thickness, the framing material, and the fastener spacing and type are often explicitly mandated by code. Deviation can lead to serious safety risks and legal liabilities.
- Structural Integrity: Codes dictate minimum fastening requirements to ensure walls and ceilings can withstand normal loads and potential seismic activity in certain regions.
- Sound Transmission Class (STC) Ratings: In commercial or multi-family residential projects, specific STC ratings may be required, which can influence drywall layering and, consequently, fastening strategies.
For procurement managers, this translates into a demand for components with documented quality and certifications. Sourcing fasteners from verified U.S. manufacturers provides transparency and often simplifies compliance, as these manufacturers are typically well-versed in domestic standards.
Supply Chain Resilience: The Value of U.S.-Made Fasteners
Recent global events have underscored the vulnerability of extended supply chains. Relying solely on overseas manufacturing can lead to unpredictable lead times, fluctuating quality, and geopolitical risks that directly impact project schedules and budgets. This is where the strategic advantage of American manufacturing shines.
At Maden.co, our mission is clear: we believe America's manufacturing revival is here. We are dedicated to proving that American-made components are as accessible and convenient as any global alternative. We connect industrial buyers with over 2.5 million American-made products from our network of 800+ verified U.S. manufacturers. This commitment to American Manufacturing Pride is not just a slogan; it's a strategic imperative for building resilient and efficient supply chains.
The benefits of sourcing U.S.-made fasteners are manifold:
- Reduced Lead Times: Shorter shipping distances mean faster delivery and less risk of delays.
- Consistent Quality: U.S. manufacturers often adhere to stringent quality control standards, ensuring consistency in product performance.
- Ethical Sourcing and Labor Practices: Support for domestic industries aligns with corporate social responsibility goals.
- Simplified Communication and Support: Direct access to manufacturers facilitates quicker problem-solving and technical assistance.
- Economic Impact: Investing in American-made products strengthens local economies and supports skilled labor.
Our platform is built on values of Digital Innovation, Supply Chain Transparency, Industrial Excellence, and Customer Empowerment, all designed to make domestic sourcing not just viable, but preferable. Learn more about our mission to champion American manufacturing here.
Total Cost of Ownership (TCO) in Fastener Procurement
When procuring fasteners, focusing solely on the unit price can be a costly mistake. A more holistic approach involves considering the Total Cost of Ownership (TCO). This includes:
- Initial Purchase Price: The direct cost of the screws.
- Shipping and Logistics Costs: Especially relevant for international sourcing.
- Labor Costs for Installation: Efficient, high-quality fasteners reduce installation time.
- Costs of Failure and Rework: If fasteners fail prematurely, the cost of repair, replacement, and associated labor can quickly eclipse initial savings.
- Project Delays and Penalties: Failures can lead to missed deadlines and contractual penalties.
- Reputational Damage: Compromised project quality negatively impacts future business.
Investing in quality, American-made fasteners, though potentially a higher upfront cost per unit, can dramatically reduce TCO by minimizing failures, speeding up installation, and ensuring long-term durability. Maden.co positions itself as a strategic partner in this regard, helping businesses improve TCO, ensure compliance with critical industry standards, enhance supply chain resilience, and reduce procurement friction by partnering with verified U.S. manufacturers.
Strategic Sourcing on Maden.co
For a procurement manager under pressure to source a specific DIN 931 compliant hex cap screw, a design engineer needing specific material certifications for a new prototype, or an MRO buyer facing an unexpected equipment breakdown, the ability to quickly find and finance a verified, U.S.-made part is a game-changer. Our platform offers:
- Vast Catalog: Access to millions of U.S.-made products.
- Verified Manufacturers: Trust in the source and quality of components.
- Ease of Discovery: Intuitive search and filtering tools to find hard-to-find components.
- Instant Financing: A key differentiator. This feature allows procurement managers and business owners to manage cash flow effectively and make larger-volume purchases without immediate capital outlay. You can apply for Instant Financing at checkout to streamline your capital-intensive projects, turning a logistical challenge into a strategic financial advantage.
We continuously strive to empower our customers by providing unparalleled access to the best of American manufacturing. Are you a U.S. manufacturer? Register as a vendor and join the American manufacturing revival.
Common Mistakes to Avoid in Drywall Fastening
Even with the best intentions and quality materials, mistakes can happen. Being aware of these common pitfalls can help professionals ensure a flawless drywall installation.
- Over-driving or Under-driving Screws: As discussed, this is perhaps the most prevalent error. Over-driving rips the paper, compromising holding power, while under-driving leaves proud screw heads that are difficult to finish seamlessly. Always use a proper drywall screw gun with a clutch or depth setter.
- Incorrect Spacing: Too wide a spacing leads to sagging and pops; too tight can weaken the gypsum core, especially near edges. Adhere to recommended guidelines for walls (12-16 inches) and ceilings (7 inches), with tighter spacing at edges.
- Using the Wrong Type of Screw: Employing coarse-thread screws for metal studs will result in stripped holes and loose panels. Using fine-thread screws for wood studs will lack adequate grip. Always match the screw type to the framing material. Remember our 6 x 1 Fine Thread Drywall Screw for metal and 6 x 1-1/4 Coarse Thread Drywall Screws for wood.
- Missing the Stud: A screw that doesn't penetrate the framing provides no holding power and is essentially a wasted fastener. Always use a stud finder and mark your lines accurately.
- Not Using Enough Fasteners: Skimping on screws to save time or cost is a false economy. The integrity of the entire drywall system relies on sufficient, evenly distributed fasteners. This includes ensuring our reliable 8 x 4 Drywall Screw is used generously where needed.
- Placing Screws Too Close to the Edge: Screws placed too close to the edge (less than 3/8 inch to 1/2 inch) can cause the drywall to crumble and the screw to lose its grip.
Avoiding these common errors requires attention to detail, proper training, and reliable tools. For procurement, it means ensuring that the right types and quantities of fasteners are consistently available, supporting the execution of best practices on every job site.
The Maden.co Advantage for Industrial Buyers
Understanding the intricacies of "how far apart screws drywall" is a testament to the fact that even seemingly small components play monumental roles in the success and longevity of industrial projects. At Maden.co, we grasp this deeply. Our entire platform is engineered to connect industrial buyers – from procurement managers and MRO specialists to design engineers and business owners – with a readily accessible, vast network of U.S.-manufactured components, including the essential fasteners discussed today.
We stand as America's premier B2B marketplace for U.S.-manufactured products, providing the reliability, quality, and supply chain transparency that modern industries demand. Our vision is to drive America's manufacturing revival by ensuring that American-made excellence is not just a preference, but a practical and convenient choice. Whether you need a specific coarse-thread screw for wood framing, a fine-thread option for metal studs, or a versatile general-purpose fastener, our comprehensive catalog is designed to meet your precise requirements with unparalleled efficiency. Start exploring the diverse range of U.S.-made products available on Maden.co today.
We are more than just a marketplace; we are a strategic partner committed to your operational excellence. For any specific sourcing questions or to discuss how our platform can integrate seamlessly into your procurement workflows, our expert team is always ready to assist. If you have specific sourcing questions, our team is ready to help.
Conclusion
The question of "how far apart screws drywall" might seem simple, yet its implications are profound for the integrity, safety, and cost-effectiveness of any construction or renovation project. From understanding the nuanced requirements for walls versus ceilings to selecting the precise screw type for different framing materials, every decision contributes to the overall resilience of the structure. Proper screw spacing, combined with the right fasteners and diligent installation practices, prevents costly rework, ensures compliance with critical building codes, and ultimately delivers a durable, high-quality finish.
For procurement professionals, this translates into a mandate for strategic sourcing. Choosing quality, American-made fasteners from verified manufacturers not only guarantees superior performance but also fortifies your supply chain against disruptions, supports domestic industries, and optimizes your Total Cost of Ownership. Maden.co is dedicated to being your indispensable partner in this endeavor. We empower you to easily access over 2.5 million American-made products, ensuring that your projects are built on a foundation of trust and industrial excellence. We are proud to facilitate the connection between discerning buyers and the robust capabilities of American manufacturing, fostering a future where quality and accessibility go hand-in-hand. We encourage you to explore our expansive catalog of U.S.-made fasteners and other industrial components. Revolutionize your procurement process and leverage the strategic advantage of Instant Financing at checkout to manage your capital-intensive projects with unprecedented flexibility and efficiency.
FAQ
Q1: What happens if I don't use enough screws when installing drywall?
A1: Not using enough screws can lead to several problems, most notably drywall sagging, especially on ceilings where gravity is a constant force. Insufficient fasteners also increase the risk of "screw pops" as the panel flexes, and can compromise the structural integrity, soundproofing, and fire resistance ratings of the wall or ceiling assembly. Proper spacing ensures even weight distribution and secure attachment.
Q2: Can I use nails instead of screws for drywall installation?
A2: While drywall nails were historically used, modern construction overwhelmingly favors drywall screws. Screws provide significantly greater holding power and pull-out resistance compared to nails, especially as buildings settle and materials expand/contract. Nails are much more prone to "nail pops" and offer a less secure, less durable installation. For professional results and long-term stability, screws are the superior choice.
Q3: Is screw spacing different for fire-rated drywall (Type X)?
A3: Generally, the screw spacing guidelines for fire-rated (Type X) drywall are similar to standard drywall, with 12-16 inches for walls and 7 inches for ceilings. However, specific fire-rated assemblies might have more stringent requirements outlined in building codes or manufacturer specifications. It's crucial to consult local building codes and the drywall manufacturer's installation instructions for any fire-rated system to ensure full compliance and maintain the fire rating.
Q4: How do I prevent "screw pops" in my drywall?
A4: Preventing "screw pops" involves several best practices:
- Proper Driving Depth: Use a drywall screw gun to drive screws just below the surface, creating a dimple without tearing the paper.
- Correct Screw Type and Length: Ensure the screw is appropriate for the framing material (coarse-thread for wood, fine-thread for metal) and long enough to adequately penetrate the stud.
- Optimal Spacing: Adhere to recommended screw spacing to distribute stress evenly.
- Dry Framing: Ensure wood framing is properly acclimated and dry to minimize movement due to moisture changes.
- Use Adhesive: Applying construction adhesive to the framing members can provide additional bonding and reduce movement between the drywall and studs.


