Screwing Drywall Edges: Optimal Distance for Strength and Finish
Table of Contents
- Introduction
- The Criticality of Drywall Screw Placement
- Standard Recommendations: How Close is Too Close?
- Factors Influencing Optimal Edge Distance
- Practical Scenarios and Solutions
- The Maden.co Advantage: Empowering Your Procurement
- Conclusion
- Frequently Asked Questions (FAQ)
Introduction
In construction, the smallest details often dictate the largest outcomes. A perfectly installed drywall sheet is not merely about fastening it to the studs; it’s about understanding the nuances of material science, structural integrity, and finishing aesthetics. One common oversight that can lead to significant problems down the line, from unsightly cracks to compromised structural integrity, is incorrect screw placement, particularly around the edges of a drywall panel. Ignoring the optimal distance when driving screws near a drywall edge can turn a professional installation into a frustrating, flaw-ridden headache. This post aims to demystify the critical practice of properly screwing drywall edges. We will explore the industry standards, the underlying factors that influence optimal screw placement, practical techniques to ensure a flawless finish, and how sourcing the right, American-made materials can drastically impact your project's success.
The Criticality of Drywall Screw Placement
The integrity of any drywall installation hinges on proper fastening. While the general pattern of screws across the board is important, the placement of screws near the edges carries unique significance.
Why Edge Distance Matters
When you drive a screw into drywall too close to its edge, you risk several immediate and long-term issues:
- Crumbling and Blowout: Drywall is essentially a gypsum core sandwiched between paper layers. The edges, especially cut edges, are inherently weaker than the field of the board. Screwing too close can cause the gypsum to crumble and the paper to tear, resulting in a "blowout" where the screw fails to hold, or creates a visible imperfection that is difficult to conceal.
- Compromised Fastening: A screw that isn't properly embedded in solid gypsum and securely anchored to the framing material (wood or metal stud) offers little to no holding power. This can lead to loose panels, bulging, or even the eventual detachment of the drywall sheet, especially in high-traffic areas or those subject to vibrations.
- Finishing Challenges: Even if a screw doesn't cause an immediate blowout, an edge that's been weakened by overly close screw placement will be prone to cracking during taping and mudding. These imperfections are notoriously difficult to hide, often requiring extensive rework and compromising the smooth, uniform appearance that professional finishes demand. These are not merely cosmetic issues; they are indicators of compromised structural adherence that can manifest years after installation.
The Science Behind Drywall Integrity
Understanding drywall's composition helps explain why edge distance is so crucial. The gypsum core provides the bulk and rigidity, while the paper facing contributes significantly to tensile strength and holds the screw head securely. When a screw is driven, its threads grip the gypsum, and its head compresses the paper facing, creating a strong bond.
However, gypsum is a relatively soft, brittle material. Near an edge, the gypsum has less surrounding material to distribute the stress of the screw's entry and the subsequent pressure it exerts. The paper facing also terminates at the edge, reducing its reinforcing effect. This makes the edges particularly vulnerable to fracture and deformation if the screw's force is not properly managed and distanced. This vulnerability is why relying on high-quality, consistently manufactured American-made products from suppliers available on Maden.co can make a substantial difference in avoiding these challenges. For a foundational understanding of our commitment to quality, you can learn more about our mission to champion American manufacturing here.
Standard Recommendations: How Close is Too Close?
Industry best practices and building codes provide clear guidelines to prevent the aforementioned problems. Adhering to these recommendations is not just about avoiding immediate failure; it’s about ensuring the longevity and structural soundness of the entire assembly.
General Industry Guidelines
For most standard drywall installations, a general rule of thumb suggests that screws should be placed no closer than 3/8 inch to 1/2 inch (approximately 10 to 13 mm) from the factory-cut, tapered edge of the drywall panel. This distance allows sufficient gypsum material to remain intact around the screw, preventing blowout and providing a solid anchor point.
However, this recommendation applies primarily to factory edges. When dealing with cut edges—those created on-site by scoring and snapping a board—the drywall's integrity is inherently weaker. For cut edges, it is often recommended to increase this minimum distance to at least 1/2 inch to 5/8 inch (approximately 13 to 16 mm). This additional buffer helps account for the disrupted paper facing and the less precise, sometimes crumbly nature of a hand-cut edge.
Understanding Different Edge Types
The distinction between factory and cut edges is critical for screw placement:
- Factory (Tapered) Edges: These are the long edges of a standard drywall sheet that are slightly recessed (tapered) to accommodate joint compound and tape, creating a smooth finish. They are reinforced by the full paper facing and are generally stronger and more consistent, offering more forgiveness for screw placement within the recommended range.
- Cut (Butt) Edges: These are the shorter ends of a drywall sheet, or any edge created by cutting the board to size. These edges lack the factory taper and often have a more fragile, exposed gypsum core and a disrupted paper facing. They are much more prone to crumbling and require extra care and a greater distance from screws. When two cut edges meet, they form a "butt joint," which can be challenging to finish seamlessly without proper screw placement and sometimes additional backing.
Code Compliance and Best Practices
Always consult local building codes and the specific recommendations from drywall manufacturers. Building codes often specify minimum fastening schedules, including screw spacing and edge distances, to ensure fire resistance, shear strength, and overall structural integrity. Adherence to these codes is non-negotiable for project approval and safety. For instance, specific fire-rated drywall (Type X or C) might have particular fastening requirements that differ from standard gypsum board.
Best practices also extend beyond just distance. They include:
- Proper Screw Type: Using the correct drywall screws (e.g., coarse thread for wood studs, fine thread for metal studs).
- Correct Length: Ensuring the screw penetrates the framing material by at least 5/8 inch for wood and 3/8 inch for metal.
- Controlled Driving: Using a screw gun with a depth-setting clutch to prevent over-driving (breaking the paper face) or under-driving (leaving the screw head proud).
For a procurement manager under pressure to source a specific DIN-compliant hex cap screw, a design engineer needing specific material certifications for a new prototype, or an MRO buyer facing an unexpected equipment breakdown, the ability to quickly find and finance a verified, U.S.-made part is a game-changer. This same principle applies to drywall screws; the right part from a reliable source is essential.
Factors Influencing Optimal Edge Distance
While general guidelines exist, several factors can influence the ideal screw placement near drywall edges. A thorough understanding of these variables allows for more precise and resilient installations.
Drywall Thickness and Type
The thickness and specific type of drywall significantly impact how much force the board can withstand at its edges.
- 1/2-inch Drywall: This is the most common thickness for walls and ceilings. Its gypsum core is sturdy enough for most applications, but careful edge screw placement remains crucial due to its relatively modest thickness.
- 5/8-inch Drywall: Often used for fire-rated assemblies (Type X or C) or where increased rigidity is desired, 5/8-inch drywall offers greater strength. While thicker, it doesn't grant license to ignore edge distance rules entirely; the additional thickness provides a slightly larger margin for error but the same principles of gypsum fragility apply.
- Specialty Drywall: Moisture-resistant (green board), abuse-resistant, or sound-dampening drywall types may have different core densities or additives. These variations can affect how the gypsum reacts to screw penetration, though standard edge distance rules usually still apply as a baseline.
Screw Type and Length
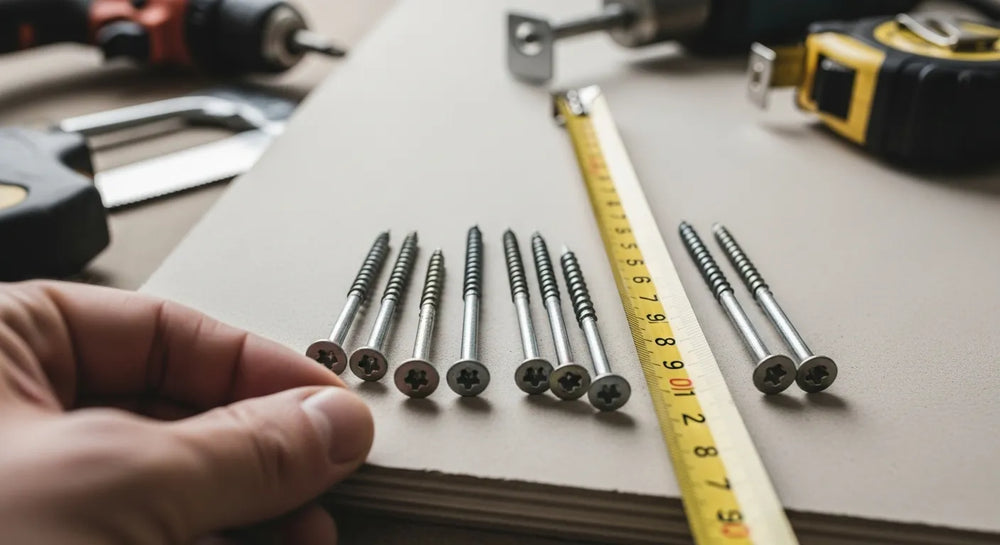
The choice of drywall screw is paramount. The type and length must be appropriate for both the drywall thickness and the framing material.
- Coarse Thread Drywall Screws: These are designed with aggressive threads that grip well into wood studs. They are the most common type for residential construction. When working with wood framing, a reliable supply of 6 x 1-1/4 coarse thread drywall screws ensures a strong connection, providing ample embedment into the wood to prevent pull-out, even when placed carefully near an edge.
- Fine Thread Drywall Screws: Featuring finer, more closely spaced threads, these screws are specifically engineered for use with metal studs. The finer threads create a more secure purchase in the thinner gauge steel without stripping the material. For securing drywall to metal framing, sourcing the appropriate 6 x 1 fine thread drywall screw is critical to maintaining fastener integrity and preventing costly reworks.
- Self-Drilling Screws: Some screws for metal studs are self-drilling, eliminating the need for pilot holes. While convenient, the initial drilling action still requires careful aim near edges.
- Screw Length: As a rule, screws should penetrate the framing material by at least 5/8 inch (16mm) for wood studs and 3/8 inch (10mm) for metal studs, beyond the thickness of the drywall. For example, installing 1/2-inch drywall on wood studs would typically require 1-1/4 inch or 1-5/8 inch screws. If you’re dealing with thicker boards or specific structural requirements, a robust option like the 8 x 4 drywall screw might be necessary to ensure maximum holding power and prevent future issues. We ensure access to a comprehensive range of American-made fastening solutions on Maden.co.
Framing Material
The material of the framing (wood or metal) directly affects how the screw engages and the necessary driving technique.
- Wood Studs: Wood provides a forgiving medium for coarse-thread screws. However, knots or exceptionally dense wood can deflect screws or make driving difficult, potentially leading to off-center placement near edges. The resilience of wood allows for minor repositioning, but repeated attempts to drive screws too close to the drywall edge will still result in damage.
- Metal Studs: Metal studs, typically light-gauge steel, require fine-thread screws. Driving screws into metal studs requires more precision, as the screw must cut into the metal without stripping the threads. Deviating too close to a drywall edge when working with metal can lead to both drywall damage and stripped metal, significantly weakening the attachment. The rigidity of metal offers less room for error.
Tools and Techniques
The tools used and the skill of the installer play a significant role in successful edge screw placement.
- Screw Guns with Depth Settings: A quality screw gun equipped with an adjustable depth clutch is indispensable. This feature ensures that screws are consistently driven to the correct depth—just below the surface of the paper facing, creating a slight dimple without tearing the paper or breaking the gypsum core. This precision is especially vital near edges.
- Proper Driving Technique: Screws should always be driven perpendicular to the drywall surface. Driving at an angle can cause the screw head to tear the paper, weaken the gypsum, or not properly seat, particularly along a vulnerable edge. Consistent, firm pressure, combined with proper tool settings, prevents over-driving or under-driving, which are common causes of damage near edges.
- Avoiding Overdriving: Overdriving a screw breaks the paper face and pulverizes the gypsum core, severely compromising its holding power. This is even more detrimental near an edge, where the weakened gypsum has less surrounding material to support it. A blown-out screw near an edge is functionally useless and often requires repair or repositioning.
Environmental Conditions
Environmental factors, though often overlooked, can impact drywall's performance and susceptibility to damage during fastening.
- Temperature and Humidity: Extremely cold or dry conditions can make drywall more brittle, increasing the risk of crumbling at the edges. Conversely, very high humidity can slightly soften the board, potentially affecting screw grip. It’s ideal to install drywall in conditions that mimic the final interior environment.
- Pre-existing Damage: Even minor damage to drywall edges from transport or handling can predispose them to blowouts when screws are driven nearby. Always inspect boards before installation and prioritize placing screws in pristine areas.
At Maden.co, we are dedicated to ensuring that industrial buyers have access to high-quality, verified American-made products that meet stringent industry standards. Our network of 800+ U.S. manufacturers provides over 2.5 million products, offering the reliability and consistency needed for critical applications, from construction materials to complex industrial components. This commitment to industrial excellence and supply chain transparency ensures that you can always find the right product for the job, minimizing the risks associated with material inconsistencies.
Practical Scenarios and Solutions
Even with the best planning, practical challenges arise during drywall installation. Knowing how to troubleshoot common issues, especially around edges, can save time and materials.
When Drywall Edges are Compromised
Despite careful handling, drywall edges can sometimes sustain minor damage.
- Minor Damage (Fraying, Small Cracks): If the damage is minimal and localized, it may be possible to work around it. Shift the screw placement slightly away from the damaged area, adhering to the maximum practical distance while still ensuring the screw hits the stud. For very small surface imperfections, a dab of joint compound might be enough to reinforce the area before taping.
- Major Damage (Large Crumbles, Significant Tears): If an edge is extensively damaged, trying to fasten through it is a futile effort that will compromise the entire panel's stability. In such cases, the best solution is to cut off the damaged section cleanly and create a new, fresh edge. This might mean the panel is slightly shorter, requiring careful adjustment or the addition of backing material if it no longer reaches a stud.
Reinforcing Weak Edges
Sometimes, you encounter situations where a drywall edge needs extra support, such as at a butt joint or when a panel ends shy of a stud.
- Backing Strips (Furring Strips): For butt joints where two cut edges meet between studs, or an edge doesn't align perfectly with framing, installing a backing strip (a piece of wood or metal fastened between the studs) provides a solid surface for both edges to be screwed into. This dramatically increases the stability of the joint and reduces the likelihood of cracking.
- Adhesives: In conjunction with screws, construction adhesive can provide an additional layer of fastening, particularly useful for edges that might be slightly compromised or for maximizing bond strength in areas prone to movement. Apply a continuous bead of adhesive to the framing before setting the drywall panel.
- Clip Systems: For advanced drywall systems, specialized clips can be used to join and reinforce butt joints, offering a more robust alternative to traditional backing.
Addressing Common Edge Screw Mistakes
Mistakes happen, but understanding how to address them quickly is key to maintaining project efficiency.
- Blowouts: If a screw creates a blowout, it means the gypsum has crumbled and the screw has no purchase.
- Solution: Remove the screw. Assess the damage. If minor, move the screw at least 1/2 inch away from the blowout and re-drive it. If the damage is significant, you may need to patch the area with setting-type joint compound before re-screwing, or even cut out the damaged section and patch it with new drywall.
- Stripping: If the screw spins endlessly without tightening, it means it has stripped either the drywall's gypsum or the framing material.
- Solution: Remove the screw. If the gypsum is stripped, follow the blowout solution. If the stud is stripped (common with metal studs or soft wood), you'll need to move the screw to a fresh spot on the stud or use a slightly larger diameter screw, ensuring it doesn't violate edge distance.
- Visible Screw Heads (Under-driving): Screw heads that aren't properly dimpled below the surface will telegraph through joint compound, creating unsightly bumps.
- Solution: Gently drive the screw slightly deeper using a depth-setting screw gun. Be careful not to over-drive it. If the screw is already near an edge, further driving risks a blowout.
- Over-driving: If the screw tears the paper face and pulverizes the gypsum below, its holding power is compromised.
- Solution: Remove the screw. If the damage is extensive, patch the area and reposition the screw. If the damage is minor but the screw isn't holding, you might try repositioning it slightly.
The strategic value of sourcing quality components cannot be overstated. Inferior screws that strip easily, inconsistent drywall boards that crumble readily, or components that don't meet certified standards can lead to significant project delays, increased labor costs, and compromised final quality. By focusing on verified U.S.-made products, businesses can significantly improve their Total Cost of Ownership (TCO), ensure compliance with critical industry standards, enhance supply chain resilience, and reduce procurement friction.
The Maden.co Advantage: Empowering Your Procurement
At Maden.co, we are dedicated to streamlining the procurement process by connecting industrial buyers with an unparalleled network of American manufacturers. Our mission is to democratize access to American manufacturing, making it as convenient and reliable as any alternative.
Access to Verified American Manufacturing
We proudly host over 2.5 million U.S.-made products from our network of 800+ verified U.S. manufacturers. This extensive catalog ensures that procurement managers, MRO buyers, and design engineers can find precisely the components they need, from specialized drywall fasteners to heavy-duty industrial machinery parts. Our commitment to American Manufacturing Pride means you're not just buying a product; you're investing in quality, reliability, and the revival of domestic industry.
Our platform eliminates the guesswork from sourcing. Each manufacturer and product listed on Maden.co undergoes a rigorous verification process, guaranteeing adherence to industrial excellence and ensuring supply chain transparency. This directly translates to fewer headaches on your project site, as you can trust the quality and consistency of the components you receive.
Streamlined Sourcing and Digital Innovation
Imagine needing a specific type of drywall screw, or a hard-to-find industrial fastener, and being able to locate it instantly from a verified U.S. supplier. Our digital marketplace leverages cutting-edge technology to offer an intuitive and efficient sourcing experience. We are committed to Digital Innovation, constantly enhancing our platform to provide detailed product specifications, easy search functionality, and a seamless purchasing process. This means less time wasted on searching and more time focused on your core business operations. If you have specific sourcing questions, our team is ready to help; simply reach out to us here.
Financial Flexibility for Strategic Projects
For businesses tackling large-scale construction or industrial projects, managing cash flow is paramount. That's why Maden.co offers "Instant Financing" as a strategic tool to empower our customers. This feature allows procurement managers and business owners to make larger-volume purchases without immediate upfront capital strain, helping them manage their working capital more effectively. Instant Financing is not just a payment option; it's a strategic enabler for growth and efficiency, allowing you to secure the necessary materials when you need them, without compromising your financial liquidity. You can apply for Instant Financing at checkout to streamline your capital-intensive projects.
Partnering for Long-Term Success
Our vision extends beyond mere transactions. We aim to become the definitive platform that proves American-made components are not only accessible but also the strategic choice for building more resilient, efficient, and cost-effective supply chains. By partnering with Maden.co, you're not just acquiring parts; you're investing in a more robust future for your business and contributing to America's manufacturing revival. Our tagline, "America's manufacturing revival is here," reflects this unwavering commitment.
We believe in Customer Empowerment, providing you with the tools, resources, and access to ensure your projects succeed. For qualified U.S. manufacturers, Maden.co also offers an unparalleled opportunity to connect with industrial buyers across the nation. Are you a U.S. manufacturer? Register as a vendor and join the American manufacturing revival, expanding your reach and contributing to a stronger domestic supply chain.
Conclusion
Understanding "how close to the edge of drywall can you screw" is more than a technical detail—it's a foundational principle for achieving durable, high-quality finishes in any construction project. By adhering to industry recommendations, appreciating the nuances of drywall types and framing materials, and utilizing proper tools and techniques, professionals can prevent common issues like crumbling, blowouts, and unsightly imperfections. The seemingly small decision of screw placement significantly impacts the overall integrity and longevity of a drywall installation, affecting everything from structural stability to the ease of finishing.
Crucially, the success of these techniques is profoundly enhanced by the quality of the materials used. Sourcing reliable, high-performing drywall screws and components is not just a preference but a necessity for minimizing risks and maximizing efficiency. We invite you to explore the extensive catalog of Maden.co for your next project. Discover over 2.5 million verified, American-made products designed to meet the highest standards of industrial excellence. From specialized drywall fasteners like our 6 x 1-1/4 coarse thread drywall screws, 8 x 4 drywall screw, and 6 x 1 fine thread drywall screw, to a vast array of other critical components, we are your strategic partner in building more resilient and efficient supply chains. Leverage our Instant Financing option at checkout to manage your cash flow effectively and ensure your capital-intensive projects proceed without interruption. Make the smart choice for quality, reliability, and American manufacturing.
Frequently Asked Questions (FAQ)
Q1: What is the absolute minimum distance I can screw from the edge of a drywall panel?
A1: For factory-tapered edges, the absolute minimum is generally 3/8 inch (10 mm). For cut edges, which are weaker, it's safer to maintain at least 1/2 inch (13 mm) to 5/8 inch (16 mm) to prevent crumbling and ensure proper screw engagement. Always aim for consistency and slightly more distance when possible.
Q2: Why is it worse to screw too close to a cut edge than a factory edge?
A2: Factory edges are more robust because they have a continuous paper facing and a consistent gypsum core, often slightly tapered for finishing. Cut edges have exposed, potentially crumbly gypsum and a disrupted paper facing, making them significantly weaker and more prone to blowout or damage when a screw is driven too close.
Q3: What happens if I accidentally overdrive a screw near a drywall edge?
A3: Overdriving a screw near an edge means the screw head breaks through the paper face and pulverizes the gypsum core beneath it. This severely compromises the screw's holding power and can lead to a "blowout," where the screw won't hold the drywall securely. The best practice is to remove the overdriven screw, assess the damage, and either patch the area or move the screw to a new, undamaged spot at the correct distance and depth.
Q4: Can I use construction adhesive to help secure drywall edges if I'm worried about screw placement?
A4: Yes, construction adhesive can be an excellent supplementary fastening method, especially for edges that might be slightly compromised or at butt joints. Applying a continuous bead of adhesive to the framing before screwing the drywall panel in place creates a stronger bond and reduces the reliance solely on screws, thereby offering additional reinforcement and mitigating some risks associated with edge screw placement.


