Efficiently Remove a Broken Screw From Metal
Table of Contents
- Understanding the Challenge: Why Screws Break
- Essential Preparations: Safety First & Tooling Up
- Method 1: The Non-Destructive Approach (When the Head is Still Accessible)
- Method 2: The Destructive Approach (When the Head is Gone)
- Advanced Techniques for Stubborn Cases
- Prevention is Key: Best Practices in Fastener Selection & Installation
- Integrating Maden.co for Proactive Procurement
- FAQ
Imagine a critical production line grinding to a halt, or a vital piece of MRO equipment rendered unusable, all because of a seemingly minor culprit: a broken screw. For procurement managers, MRO buyers, and design engineers, such incidents are not just inconveniences; they represent costly downtime, jeopardized project timelines, and unexpected budget overruns. The integrity of your machinery and the efficiency of your operations often hinge on components as small as a fastener. When one fails, and its broken remains are stubbornly lodged in metal, a swift and correct removal becomes paramount. This comprehensive guide will equip you with the knowledge and techniques to effectively tackle even the most challenging broken screw scenarios, from preventive measures and essential toolkits to advanced extraction methods. Our aim is to demystify this common industrial headache, reduce your total cost of ownership (TCO) by minimizing damage and delays, and underscore the value of precision and quality in every component you source. By understanding these processes, you'll be better prepared to maintain operational continuity, protect your assets, and appreciate the strategic importance of reliable, American-made fasteners in your supply chain.
Understanding the Challenge: Why Screws Break
Before diving into solutions, it's crucial to understand why screws break in the first place. This knowledge not only aids in successful removal but, more importantly, informs prevention strategies that save valuable resources and ensure industrial excellence.
Common Causes of Fastener Failure
Screws, despite their apparent simplicity, are subjected to a range of forces and environmental conditions that can lead to failure. The most common culprits include:
- Overtorquing: Applying excessive rotational force during installation or removal is a leading cause. This can shear the screw head clean off or twist the shank, especially with smaller fasteners or those made from softer metals.
- Material Fatigue: Repeated stress cycles, vibrations, or dynamic loads can cause microscopic cracks to propagate over time, eventually leading to a sudden and catastrophic failure. This is particularly prevalent in machinery subject to continuous operation.
- Corrosion: Exposure to moisture, chemicals, or harsh environments can lead to rust and other forms of corrosion, weakening the screw material. Corroded threads can also seize, making removal difficult and increasing the likelihood of breakage when force is applied.
- Incorrect Fastener Type or Size: Using a screw that is too small, made of an unsuitable material, or has an inappropriate thread pitch for the application's load or material can result in premature failure. This often happens when substitute parts are used in a pinch, rather than sourcing the precise, specification-compliant component.
- Improper Pilot Hole: A pilot hole that is too small can lead to excessive stress on the screw during insertion, increasing the risk of stripping or shearing. Conversely, a hole that is too large reduces thread engagement, leading to loosening and potential fatigue.
- Misalignment: When a screw is driven in at an angle or cross-threaded, it creates uneven stress distribution, which can deform the threads or cause the screw to snap.
- Tool Wear and Misuse: Worn-out screwdriver bits or driver heads that don't properly engage the screw head can strip the drive recess, leading to rounding and an inability to turn the screw, often forcing increased torque attempts that result in breakage.
Impact on Operations and Total Cost of Ownership (TCO)
A broken screw is rarely an isolated incident. Its implications ripple through an operation, impacting efficiency, safety, and ultimately, the bottom line:
- Downtime and Production Loss: The most immediate and tangible consequence is the halt of machinery or an entire production line, directly impacting output and delivery schedules. The cost of idle labor and missed production targets can quickly escalate.
- Increased Labor and Repair Costs: Removing a broken screw can be time-consuming and labor-intensive, often requiring specialized tools and skilled technicians. If the extraction goes wrong, it can lead to further damage to the parent material, necessitating more extensive and costly repairs, such as re-drilling, tapping, or even component replacement.
- Safety Hazards: Compromised structural integrity due to a failed fastener can create unsafe working conditions or lead to equipment malfunction, posing risks to personnel and other assets.
- Supply Chain Disruptions: If the broken screw is part of a critical assembly, the inability to replace it quickly can lead to delays in subsequent stages of production or final product delivery, affecting customer satisfaction and overall supply chain resilience.
- Negative Impact on Total Cost of Ownership (TCO): While the initial cost of a fastener may seem negligible, its failure can trigger a cascade of expenses—downtime, labor, repair parts, and potential collateral damage—that far outweigh any initial savings from sourcing lower-quality or unverified components. Investing in high-quality, reliable fasteners from trusted sources is a strategic decision that reduces TCO in the long run.
At Maden.co, we understand these challenges intimately. Our mission is to democratize access to American manufacturing, ensuring that procurement managers and MRO buyers can easily source the highest quality, U.S.-made components. We believe that by providing access to over 2.5 million American-made products from our network of 800+ verified U.S. manufacturers, we not only prevent issues like broken screws but also empower businesses to build more resilient and efficient supply chains, ultimately driving America's manufacturing revival.
Essential Preparations: Safety First & Tooling Up
Approaching a broken screw removal without proper preparation can turn a minor issue into a major headache, potentially damaging the workpiece further or causing injury. Thorough preparation, encompassing safety and the right toolkit, is paramount.
Prioritizing Safety
Before any tool touches metal, prioritize safety:
- Personal Protective Equipment (PPE): Always wear safety glasses to protect against flying debris, especially when drilling or using rotary tools. Gloves can protect hands from sharp edges, chemicals, and heat.
- Power Disconnection: If working on machinery, ensure all power sources are disconnected and locked out. Unexpected activation can lead to severe injury.
- Ventilation: If using chemicals (like penetrating oils) or generating fumes (from drilling or welding), ensure adequate ventilation in the workspace.
- Fire Safety: Keep a fire extinguisher handy, particularly if using heat, grinding, or welding techniques.
- Stability: Secure the workpiece firmly in a vise or with clamps to prevent movement during drilling or extraction, which could lead to tool slippage and injury.
Initial Assessment: The Foundation of Success
A quick assessment of the situation can guide your choice of extraction method:
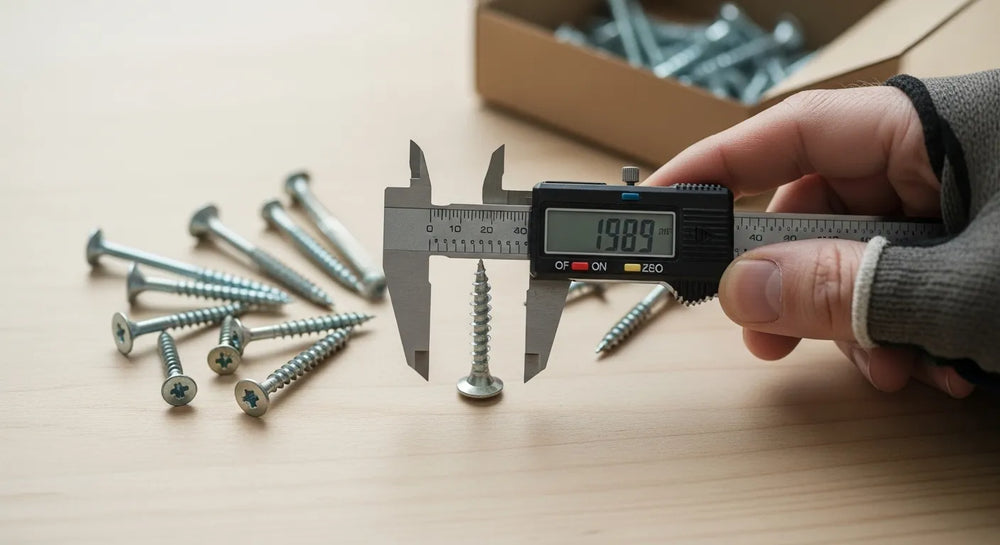
- Screw Type and Material: Is it a machine screw, self-tapping screw, or something else? What material is it made from (steel, stainless steel, brass, aluminum)? This influences how easily it can be drilled or cut. For example, a specialized Hi-Lo Double Lead Thread Self-Tapping Sheet Metal Screw will behave differently than a standard machine screw when broken. Knowing the screw's original specifications can provide valuable insight.
- Parent Material: What is the screw lodged in? Soft aluminum, hard steel, cast iron? The parent material's hardness dictates drilling speeds and the risk of damaging the threads or the surrounding material.
- Breakage Point: Is the screw head completely gone, or is there a small stub protruding? Is the break flush with the surface, recessed, or is there still some purchase for a gripping tool?
- Corrosion/Seizing: Does the screw appear rusted or seized? This will dictate the need for penetrating oils and potentially heat.
- Space Constraints: How much room do you have to work around the broken screw? Tight spaces may limit your tool choices.
The Essential Toolkit
Having the right tools at hand minimizes frustration and maximizes success. A well-stocked industrial toolkit should include:
- Penetrating Oil: A high-quality penetrating oil is invaluable for loosening seized or corroded threads. Apply generously and allow sufficient time to work (even overnight for stubborn cases).
- Pliers and Vise Grips: For screws with some exposed shank. Vise grips offer superior clamping force.
- Hammer and Center Punch: For marking the exact center of the broken screw, preventing drill bit walk.
- Drill (Corded or Cordless): A good quality drill with variable speed control is essential. For particularly hard fasteners, a drill press can offer greater precision and control.
-
Drill Bits:
- Standard HSS (High-Speed Steel) Bits: For general drilling.
- Cobalt Bits: For harder metals and stainless steel, offering greater heat resistance and durability.
- Left-Hand (Reverse) Drill Bits: These are crucial. They drill in a counter-clockwise direction, often catching the broken screw and backing it out as you drill, preventing further tightening.
- Screw Extractors (Easy-Outs): These specialized tools are designed to grip the inside of a drilled hole in a broken screw and turn it counter-clockwise. They come in various sizes and styles (spiral-fluted or straight-fluted).
- Taps and Dies: If threads are damaged during extraction, a tap can clean or recut internal threads, and a die can repair external threads on bolts (though not directly relevant for broken screws in metal, tapping is key for repair).
- Rotary Tool (Dremel-style) with Cutting Discs: Useful for creating new slots in broken screw stubs or grinding down flush surfaces.
- Files and Grinding Wheels: For smoothing surfaces or preparing a stubborn stub for welding.
- Heat Gun/Propane Torch: For applying controlled heat to expand the parent metal around the screw, helping to break the bond.
- Welder (MIG/TIG/Stick): For advanced techniques like welding a nut onto a broken stud. Requires expertise.
Having access to a comprehensive range of these tools, coupled with a deep understanding of their application, significantly enhances your ability to address broken fasteners efficiently. At Maden.co, we continually strive to empower our customers by providing access to American-made tools and components that meet rigorous industrial standards, minimizing the likelihood of needing these extraction methods in the first place through quality sourcing.
Method 1: The Non-Destructive Approach (When the Head is Still Accessible)
When a screw breaks, but a portion of the head or shank remains above the surface, you often have options that don't involve drilling. These "non-destructive" methods aim to grip and turn the remaining part of the screw, preserving the original threads and reducing the risk of further damage to the workpiece.
A. Gripping & Turning Techniques
These methods are ideal when there's enough material protruding to get a firm hold:
-
Vise Grips or Locking Pliers: These are your go-to tools for this scenario. Clamp the vise grips firmly onto the exposed portion of the screw head or shank. The key is to apply maximum clamping pressure.
- Technique: Ensure the jaws are perpendicular to the screw's axis for the best grip. Rock the screw back and forth slightly before attempting to turn it counter-clockwise. This can help break any rust or thread locker.
- Enhancement: If the grip slips, try roughing up the surface of the screw with a file or a small grinding wheel to give the vise grips more purchase.
-
Rubber Band or Cloth for Extra Grip: For slightly rounded heads that still offer some engagement, a piece of rubber (like from an old inner tube or a wide rubber band) placed over the screw head before inserting a screwdriver can provide crucial friction.
- Technique: Press down firmly on the screwdriver, pushing through the rubber, and attempt to turn. This works best for screws that are not severely seized.
-
Impact Driver (Manual or Powered): A manual impact driver, struck with a hammer, imparts both rotational force and a downward blow. This combination can shock seized threads loose and help the bit bite into a damaged screw head. Powered impact drivers use rapid, high-torque pulses that are often effective for stubborn fasteners.
- Technique: Select the correct bit for the screw head. For a manual impact driver, place the bit squarely in the screw head, twist the driver to engage the internal spring, and strike the back with a hammer while maintaining downward pressure. For a powered impact driver, ensure the tool is set to reverse and apply steady pressure.
B. Creating a New Slot or Drive
If the original drive (Phillips, Torx, Hex) is stripped or the head is too damaged for standard tools, creating a new drive slot can be effective:
-
Dremel/Rotary Tool with Cutting Disc: This is an excellent tool for precision work. Attach a thin cutting disc to your rotary tool.
- Technique: Carefully cut a straight slot across the diameter of the screw head (if it's flat) or across the exposed stub. The slot should be deep enough to allow a flathead screwdriver to seat firmly. Once the slot is cut, use a sturdy flathead screwdriver, applying significant downward pressure, and turn counter-clockwise.
- Hacksaw Blade: In situations where a rotary tool isn't available or the screw head is large enough, a hacksaw blade (removed from its frame for better maneuverability) can be used to manually cut a slot. This requires more patience and a steady hand.
-
Using a Flathead Screwdriver with a Hammer (Percussive Method): For very stubborn screws with a small amount of material protruding, you can try to "hammer" a new slot.
- Technique: Select a sturdy flathead screwdriver with a tip slightly narrower than the screw's diameter. Place the tip across the screw head, and gently tap the back of the screwdriver with a hammer, attempting to create an indentation or a shallow slot. Once an indentation is made, you can use the screwdriver to turn the screw. This method carries a risk of damaging the screw head further or slipping, so proceed with caution.
C. Heat & Cold Application
Thermal manipulation can be incredibly effective in breaking the bond of rust, thread locker, or simply expanding/contracting metals to loosen a seized screw.
-
Heat Application (Expansion): Heating the parent material around the broken screw causes it to expand. This slight expansion can break the bond of rust or thread locker, creating a tiny gap for penetrating oil to seep in.
- Tools: A heat gun is ideal for controlled, localized heat. A propane torch can also be used, but with extreme caution to avoid overheating or damaging the surrounding material, especially with sensitive components. A soldering iron can also be used to apply concentrated heat directly to the screw itself, transferring heat through the fastener to the surrounding metal.
- Technique: Apply heat to the area around the broken screw, not directly to the screw itself initially. Heat for a minute or two, then immediately apply penetrating oil. The oil will be drawn into the newly created micro-gaps by capillary action. Allow it to cool, then reapply heat and oil several times. Once cooled, attempt to extract using one of the gripping or slot-creation methods.
-
Cold Application (Contraction): Freezing the screw can cause it to contract slightly, potentially breaking its bond with the surrounding metal.
- Tools: Dry ice or specialized freeze sprays are suitable.
- Technique: Apply the cold agent directly to the broken screw, ensuring the surrounding material is not frozen if possible. The rapid contraction of the screw can sometimes be enough to loosen it. This is often less effective than heat for general corrosion but can be useful with certain thread lockers or when working with materials sensitive to heat.
These non-destructive methods are always the preferred first step, as they minimize the risk of damaging the component or requiring more complex repairs. Success with these techniques often depends on the initial assessment and patient application of the chosen method. For quality fasteners that resist breaking in the first place, consider durable options like the Steel Zinc Plated Type A Pan Slot Drive Self-Tapping Sheet Metal Screw or the Steel Zinc Plated Type A Truss Square Drive Self-Tapping Sheet Metal Screw available on Maden.co, ensuring you have the right fit for your application.
Method 2: The Destructive Approach (When the Head is Gone)
When the screw head is completely sheared off, flush with or below the surface, non-destructive gripping methods are no longer viable. This calls for a "destructive" approach, which involves drilling into the broken screw to create a purchase point for extraction. This method requires precision and the right tools to avoid further damage to the parent material.
A. Center Punch & Drill: Precision is Paramount
The cornerstone of successful destructive extraction is precise drilling. Any deviation can damage the threads of the parent material, making the situation much worse.
- Center Punching: Before drilling, use a sharp center punch and a hammer to create a small, deep indentation exactly in the center of the broken screw. This dimple will guide your drill bit and prevent it from "walking" off-center, which can quickly ruin the hole and damage the surrounding material.
-
Pilot Hole with Left-Hand Drill Bits: This is a critical step.
- Choosing the Bit: Select a drill bit that is smaller than the diameter of the broken screw's core (the part without threads). This ensures you don't damage the existing threads in the parent material. Often, a set of screw extractors will specify the correct drill bit size for each extractor.
- Left-Hand Bits are Key: Whenever possible, use a left-hand (reverse thread) drill bit. These bits cut in a counter-clockwise direction. As you drill, there's a chance the bit will bite into the broken screw and, because it's turning counter-clockwise, it may actually unscrew the broken fastener right out, saving you from needing an extractor.
- Drilling Technique: Start with a small, slow drill speed. Apply steady, firm pressure. Use cutting oil, especially for harder metals, to reduce friction, dissipate heat, and prolong drill bit life. Regularly clear chips from the hole. Maintain a perfectly perpendicular angle to the surface; a drill guide or drill press can be invaluable here.
B. Screw Extractors (Easy-Outs): The Next Step
If the left-hand drill bit doesn't extract the screw, the pilot hole you've created is now ready for a screw extractor.
-
Types of Extractors:
- Spiral Fluted Extractors: These are the most common type, resembling a reverse-threaded tapered screw. As they are turned counter-clockwise into the drilled hole, their tapered, spiral flutes wedge into the metal, creating immense grip.
- Straight Fluted (Square) Extractors: These have a square or multi-sided profile. A pilot hole is drilled, and the extractor is hammered into the hole to create a secure, non-slip fit. Then, it's turned counter-clockwise with a tap wrench. These are often preferred for larger, tougher screws, as they are less prone to expanding the screw and seizing it further, or breaking off themselves.
- Choosing the Right Size: Select an extractor that matches the size of your drilled pilot hole, typically specified on the extractor set. Using an extractor that's too small might not provide enough grip, and one that's too large won't fit or might expand the screw, jamming it tighter.
-
Proper Insertion and Rotation:
- Spiral Extractors: Insert the spiral extractor into the drilled hole. Using a tap wrench or an adjustable wrench, slowly turn the extractor counter-clockwise. Apply firm, steady, downward pressure initially to ensure it bites. As it turns, the extractor will wedge itself tighter into the broken screw, eventually providing enough torque to unscrew it.
- Straight Fluted Extractors: Gently tap the extractor into the drilled hole until it seats firmly. Do not force it too hard, as this can cause the screw to expand and seize. Once seated, use a tap wrench to turn it counter-clockwise.
- Caution Against Breaking the Extractor: Screw extractors are made from hardened steel, but they are brittle. If you apply too much force, especially to a heavily seized screw, the extractor can snap inside the hole. This creates a far more difficult problem, as the extractor material is often harder than the broken screw itself, making it nearly impossible to drill out. If the screw doesn't budge with moderate force, stop and reconsider your approach, potentially reapplying penetrating oil and heat, or moving to more advanced techniques. Patience is critical.
C. Tapping & Retapping (When Extraction Fails or Threads are Damaged)
If extraction attempts fail, or if the original threads in the parent material are damaged, you may need to escalate to removing the entire screw material and repairing the hole.
- Drilling Out Entirely: This involves drilling out the broken screw completely, using a drill bit the same size as the minor diameter of the screw's threads, or even slightly larger. The goal is to remove all remnants of the broken screw, leaving a clean, but potentially oversized, hole. For example, if you're dealing with a common Steel Zinc Plated Type A Pan Slot Drive Self-Tapping Sheet Metal Screw, you'd need to find the appropriate drill size to remove its threaded core without further compromising the surrounding material.
-
Using a Tap to Re-thread the Hole: Once the broken screw material is removed, the hole will likely be slightly oversized or have damaged threads. A tap is used to cut new, clean threads into this hole. You might either re-tap to the original screw size if minimal damage occurred, or more commonly, tap to a larger size to accommodate a new, larger fastener.
- Technique: Select the correct tap size for the desired new thread. Use a tap handle to slowly and carefully turn the tap into the hole, applying cutting oil. Turn a quarter turn, then back off a half turn to clear chips and prevent binding. Repeat until the new threads are fully cut.
-
Heli-Coils or Thread Inserts for Larger Repairs: If the hole is significantly damaged or you need to maintain the original fastener size, a thread repair insert (like a Heli-Coil or similar brand) is an excellent solution.
- Technique: After drilling out the broken screw, you drill the hole to a specific, larger size (as specified by the insert manufacturer), then tap this new, larger hole with a special tap provided in the repair kit. Finally, the coiled thread insert is screwed into this newly tapped hole, providing new, strong threads of the original size. This method restores the hole's integrity without requiring an oversized fastener.
These destructive methods, while more involved, provide robust solutions for even the most stubborn broken screws. They are often essential in MRO contexts where equipment longevity and component compatibility are critical. By providing access to high-quality American-made fasteners and tools, Maden.co champions Industrial Excellence, helping ensure that when repairs are necessary, they are durable and reliable.
Advanced Techniques for Stubborn Cases
Some broken screws defy conventional extraction methods. For these truly stubborn situations, more advanced techniques, often requiring specialized tools and skills, become necessary. These are typically reserved for industrial settings where the value of the component or machine outweighs the complexity of the repair.
A. Welding a Nut: Heat and Torque Combined
This method is particularly effective for broken screws or studs that are flush with or slightly protruding from the surface. The heat from welding also helps to break the bond of rust or thread locker.
- When to Use: Ideal for steel or iron screws embedded in steel or iron workpieces. Not suitable for aluminum or other materials that don't weld well or are sensitive to heat.
- Requires: A MIG, TIG, or stick welder and associated safety gear (welding helmet, gloves). This technique requires welding expertise to avoid damaging the surrounding material.
-
Technique:
- Prepare the Surface: Ensure the area around the broken screw is clean of oil, paint, or rust.
- Select a Nut: Choose a hex nut that is slightly larger than the diameter of the broken screw.
- Position and Weld: Place the nut over the broken screw stub. Carefully weld the inside diameter of the nut to the broken screw stub. Focus the weld bead on the broken screw, minimizing contact with the parent material. The heat generated during welding can help expand the broken screw, loosening its grip.
- Cooling and Extraction: Allow the weld to cool completely. The cooling process causes the newly welded assembly to contract. Once cool, use a wrench to turn the nut counter-clockwise. The combination of the weld's strong grip and the thermal shock often allows the screw to break free. You might also be able to apply some penetrating oil into the hot joint before it cools completely to aid penetration.
B. Chemical Solutions: Targeted Corrosion Removal
While penetrating oils are a first line of defense, some situations call for more potent chemical intervention.
- Stronger Penetrating Oils/Rust Removers: For extremely corroded screws, specialized rust removers containing phosphoric acid or other active ingredients can dissolve rust more aggressively than standard penetrating oils.
-
Acetone and Automatic Transmission Fluid (ATF) Mix: A common, highly effective DIY concoction for seized fasteners is a 50/50 mix of acetone and ATF. Acetone acts as a powerful solvent and carrier, while ATF provides lubrication.
- Technique: Apply the mixture to the broken screw and allow it to penetrate for several hours, or even overnight, reapplying periodically. Ensure good ventilation and wear appropriate PPE (gloves, safety glasses) as acetone is highly flammable and irritating.
- Professional Chemical Solutions: In industrial settings, there are specialized chemical agents designed for breaking down specific types of thread lockers or corrosion. Always consult product data sheets for proper application and safety precautions.
C. EDM (Electrical Discharge Machining): The Last Resort
For the most intractable broken fasteners, particularly those made of extremely hard materials (like broken drill bits or extractors) or in critical, high-value components where no damage to the surrounding material is acceptable, Electrical Discharge Machining (EDM) is the ultimate solution.
- What it is: EDM is a non-contact machining process that uses electrical discharges (sparks) to erode material. A precisely shaped electrode is used to vaporize the broken fastener material without touching the surrounding workpiece.
- When to Use: When all other methods have failed, especially if a hardened extractor has broken inside the hole, making drilling impossible. It's often employed in precision manufacturing, aerospace, and specialized MRO.
-
Advantages:
- No contact force, so no stress is applied to the workpiece.
- Can cut through extremely hard materials, regardless of their hardness.
- High precision, leaving the original threads of the hole completely intact.
-
Disadvantages:
- Highly specialized equipment and trained operators are required.
- Can be a slow process.
- Expensive, making it a last resort for high-value components.
While these advanced techniques address the most challenging scenarios, the ideal approach is to prevent such failures from occurring. This underscores our commitment at Maden.co to Digital Innovation in supply chain management, enabling proactive sourcing of quality components that meet exact specifications, thereby reducing the need for heroic repair efforts.
Prevention is Key: Best Practices in Fastener Selection & Installation
While mastering extraction techniques is vital, the most effective strategy against broken screws is prevention. By adopting best practices in fastener selection and installation, businesses can drastically reduce instances of failure, enhancing operational reliability and lowering TCO. This aligns perfectly with Maden.co's core values of Industrial Excellence and Supply Chain Transparency.
A. Choosing the Right Fastener: The First Line of Defense
The right fastener for the job is not just about size; it encompasses material, strength, and design.
-
Material Compatibility:
- Stainless Steel: Excellent corrosion resistance, good strength. Often used in environments exposed to moisture or chemicals.
- Carbon Steel: High strength, but often requires plating (like zinc or black oxide) for corrosion protection. Common in structural applications. For robust general-purpose needs, consider a Steel Zinc Plated Type A Truss Square Drive Self-Tapping Sheet Metal Screw which offers both strength and basic corrosion resistance.
- Brass/Bronze: Good electrical conductivity and corrosion resistance, but lower strength. Used where magnetism is a concern or in decorative applications.
- Aluminum: Lightweight, good corrosion resistance in certain environments, but lower strength.
- Tensile Strength & Shear Strength: Fasteners are designed to withstand specific loads. Tensile strength measures resistance to pulling forces, while shear strength measures resistance to forces parallel to the fastener's axis. Always select a fastener with strength ratings appropriate for the applied loads in your application. Over-specifying can sometimes be costly, but under-specifying is an invitation for failure.
-
Thread Type and Pitch:
- Coarse Thread: More resistant to stripping and quicker to install, but lower shear strength.
- Fine Thread: Higher shear strength, more precise adjustments, but more prone to cross-threading.
- Self-Tapping Threads: Designed to create their own threads in a pilot hole. A Hi-Lo Double Lead Thread Self-Tapping Sheet Metal Screw, for instance, offers improved thread engagement and reduced drive torque, minimizing the chance of breaking during installation. Always match the thread type to the application material and required performance.
- Industry Standards & Compliance (DIN, NPT): Sourcing fasteners that adhere to established industry standards like DIN (German Institute for Standardization) or NPT (National Pipe Taper) ensures compatibility, quality, and performance predictability. This is particularly crucial for design engineers who rely on precise specifications.
B. Proper Installation Techniques: Ensuring Longevity
Even the highest quality fastener can fail if improperly installed.
- Torque Specifications & Torque Wrenches: The most critical aspect of installation. Overtorquing is a primary cause of screw breakage, while undertorquing can lead to loosening and fatigue. Always adhere to manufacturer-specified torque values. Use a calibrated torque wrench for critical applications to ensure consistent and accurate tightening.
- Pilot Hole Drilling: For screws that require pilot holes, ensure the hole diameter is correct for the specific fastener and material. Too small increases stress and risk of breakage; too large reduces thread engagement and holding power. Drill perpendicular to the surface.
- Lubrication (Anti-Seize): For applications where screws are exposed to corrosion, high temperatures, or dissimilar metals (which can cause galvanic corrosion), apply anti-seize compound to the threads. This prevents seizing, makes future removal easier, and reduces the likelihood of breakage during extraction.
- Correct Driver Type and Size: Always use the correct screwdriver bit or socket for the fastener head. A worn or ill-fitting bit can strip the drive recess, leading to rounding and eventual breakage if forced.
C. The Maden.co Advantage: Sourcing American-Made Quality
At Maden.co, our mission is to simplify the procurement process while elevating the standard of industrial components. We believe that by democratizing access to American manufacturing, we empower businesses to prevent fastener failures and build robust supply chains.
- Ensuring Compliance & Quality: We pride ourselves on offering products that meet rigorous industry standards. When you source through us, you're not just buying a part; you're investing in a component from a verified U.S. manufacturer that meets critical specifications. This commitment to quality and transparency helps procurement managers minimize risks associated with substandard parts.
- Vast Catalog & Ease of Access: With access to over 2.5 million American-made products from our network of 800+ verified U.S. manufacturers, our platform makes it easy to find the exact, specification-compliant fastener you need. Whether it's a specific material, thread type, or strength rating, we strive to make American-made components as accessible and convenient as any global alternative. We understand that finding hard-to-source components can be a major pain point, and our platform is designed to alleviate that procurement friction.
- Reducing Procurement Friction & Improving TCO: By consolidating your sourcing to a trusted platform like Maden.co, you streamline your procurement process, reduce lead times for American-made products, and gain confidence in the quality of your components. This directly translates to reduced downtime, fewer failures, and a lower Total Cost of Ownership for your industrial operations. Our values of American Manufacturing Pride, Digital Innovation, Supply Chain Transparency, Industrial Excellence, and Customer Empowerment are embedded in every aspect of our service.
- Partner with Us: Are you a U.S. manufacturer producing high-quality fasteners or other industrial components? We invite you to expand your reach and join our growing network. Register as a vendor and join the American manufacturing revival. Together, we can strengthen the domestic supply chain and bring unparalleled quality to industrial buyers across the nation.
By integrating these best practices and leveraging the strategic advantages of sourcing through Maden.co, businesses can move beyond reactive repairs to proactive prevention, ensuring the longevity and reliability of their critical equipment.
Integrating Maden.co for Proactive Procurement
The journey from a broken screw to a seamlessly operating production line highlights the critical importance of both effective problem-solving and proactive, strategic procurement. At Maden.co, our mission extends beyond merely connecting buyers with products; we aim to be a strategic partner in fostering a more resilient, efficient, and domestically focused industrial supply chain.
By emphasizing the selection of high-quality, American-made fasteners and providing unparalleled access to a vast catalog of over 2.5 million products from 800+ verified U.S. manufacturers, we equip procurement managers and MRO buyers with the tools to significantly reduce the incidence of component failures, including frustrating broken screws. Our platform is built on the principles of American Manufacturing Pride, Digital Innovation, Supply Chain Transparency, Industrial Excellence, and Customer Empowerment. We envision becoming the definitive platform that proves American-made components are not just alternatives but the superior choice, driving our nation's manufacturing revival.
From the common Steel Zinc Plated Type A Pan Slot Drive Self-Tapping Sheet Metal Screw to specialized Hi-Lo Double Lead Thread Self-Tapping Sheet Metal Screw, and the robust Steel Zinc Plated Type A Truss Square Drive Self-Tapping Sheet Metal Screw, our comprehensive catalog ensures you can find the precise, compliant components needed for your operations. By sourcing through Maden.co, you reduce procurement friction, enhance supply chain resilience, and contribute directly to improving your Total Cost of Ownership.
Beyond product access, we understand that large-volume purchases or unexpected equipment breakdowns can strain cash flow. That's why we offer a crucial differentiator: Instant Financing at checkout. This feature is not just a payment method; it's a strategic financial tool designed to empower businesses. It allows procurement managers and business owners to manage capital more effectively, making larger-volume or urgent purchases without immediate upfront expenditure. You can apply for Instant Financing at checkout to streamline your capital-intensive projects and maintain operational continuity.
Don't let a broken screw derail your operations or compromise your assets. Equip yourself with the knowledge to handle these challenges and, more importantly, proactively prevent them by choosing quality, American-made components. Explore our extensive catalog today and discover how Maden.co can become your trusted partner in building a more reliable and efficient procurement process. If you have specific sourcing questions, our team is ready to help; feel free to contact us.
FAQ
Q1: What is the most common reason screws break during removal?
A1: Overtorquing during initial installation is a very common cause, as it can weaken the screw and make it brittle. However, during removal, the most frequent reason is often corrosion or thread locker seizing the screw, requiring excessive force that then shears the screw head or shank. Using an ill-fitting driver bit can also strip the screw head, leading to further attempts that result in breakage.
Q2: Can I use super glue or epoxy to attach something to a broken screw to turn it out?
A2: While tempting for small, lightly seized screws, this method is generally not recommended for industrial applications. Super glue or epoxy typically do not provide sufficient tensile or shear strength to withstand the torque required to remove a seized screw, especially in metal. The adhesive bond is likely to break before the screw loosens, leaving you with an even messier problem and potentially hardening the broken screw's surface, making subsequent drilling more difficult.
Q3: How do I prevent damaging the surrounding material when drilling out a broken screw?
A3: Precision is key. Always start with a center punch to create an accurate guide for your drill bit. Use a drill bit that is smaller than the core diameter of the broken screw, ensuring you don't touch the existing threads in the parent material. Maintain a slow drill speed and firm, steady pressure, keeping the drill perfectly perpendicular to the surface. Using a drill guide or a drill press offers much greater control and significantly reduces the risk of damaging the workpiece.
Q4: Is it always necessary to use left-hand drill bits for broken screw extraction?
A4: While not strictly necessary in every case, left-hand (reverse thread) drill bits are highly recommended. They drill in a counter-clockwise direction, which is the loosening direction for standard right-hand threaded screws. This means there's a good chance the drill bit will catch the broken screw and spin it right out, saving you the step of using an extractor. If a left-hand bit doesn't work, it still creates a perfect pilot hole for a screw extractor.


