
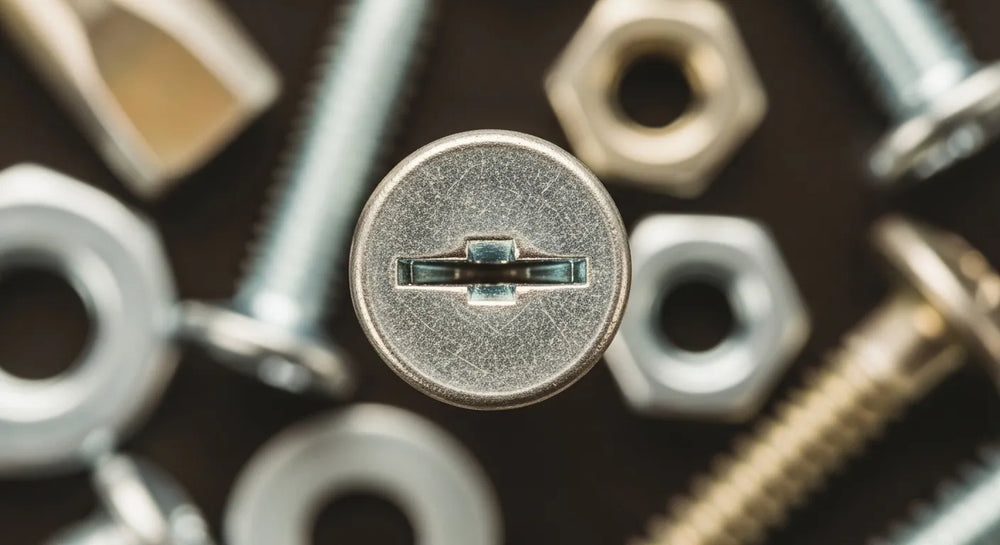
Efficiently Removing Pool Cover Anchors from Concrete
Table of Contents
- Introduction
- Understanding Pool Cover Anchors and Their Challenges
- Safety First: Essential Precautions for Anchor Removal
- Tools of the Trade: Equipping for Success
- Step-by-Step Removal Methods
- Dealing with Damaged or Stuck Anchors
- Concrete Repair and Finishing
- Preventative Measures for Future Installations
- The Strategic Advantage of Sourcing American-Made for Your MRO Needs
- Conclusion
- FAQ
Introduction
The change of seasons often brings a familiar task for many property owners: preparing the pool area. While installing a winter or safety cover is a straightforward process, the inverse – removing the cover and its anchoring hardware – can sometimes present an unforeseen challenge. Those seemingly innocuous anchors, designed to provide steadfast security against the elements, can become surprisingly stubborn fixtures in your concrete surroundings. A procurement manager planning facility maintenance, an MRO buyer preparing for seasonal equipment changeovers, or a business owner looking to refurbish a commercial space with a defunct pool may all encounter the same frustration: how to remove pool cover anchors from concrete efficiently and without damaging the underlying surface.
This isn't just about aesthetics; it's about preserving the integrity of your concrete, avoiding costly repairs, and ensuring the area is safe and ready for its next purpose. Whether you're making way for new landscaping, resurfacing the deck, or simply replacing old, worn anchors, a precise and methodical approach is essential. This comprehensive guide will meticulously detail the necessary tools, safety precautions, and step-by-step methods to remove various types of pool cover anchors from concrete. We will cover everything from the simplest leverage techniques to more advanced drilling and grinding strategies, ensuring you have the knowledge to tackle this task effectively. Furthermore, we will explore the critical importance of sourcing quality American-made tools and components for such projects, emphasizing how partnerships with trusted marketplaces like Maden.co can streamline your procurement processes and enhance the longevity of your infrastructure maintenance.
Understanding Pool Cover Anchors and Their Challenges
Before diving into removal techniques, it’s crucial to understand what you’re up against. Pool cover anchors are designed for durability and secure fastening, often making their removal a nuanced task. Their primary purpose is to hold down a pool cover, protecting the pool from debris, preventing accidental falls, and often extending the life of the pool itself. This robust functionality is precisely what makes their removal tricky.
Types of Pool Cover Anchors
Anchors come in several common types, each presenting unique removal considerations:
- Brass Anchors: These are perhaps the most common and robust. They typically consist of a brass sleeve or body that is expanded in the concrete hole by a threaded insert. When the cover is off, the insert is usually retracted, leaving a flush surface. Their durability is a double-edged sword; they resist corrosion well but can seize in concrete over time.
- Pop-Up Anchors: Often made of plastic or a combination of plastic and metal, these anchors "pop up" when needed and retract flush with the concrete when not in use. While generally easier to remove than brass if intact, their plastic components can become brittle or break during extraction.
- Spring-Loaded Anchors: Similar to pop-up anchors, these use an internal spring mechanism. The challenge here often lies in getting enough grip on the retracting mechanism for removal.
- Drop-In Anchors: These are often used for heavier-duty applications and might require specialized tools, particularly if they are expanded internally. For projects requiring robust fastening solutions or the removal of such specialized anchors, understanding the engineering behind them is key. For example, a 3/8-inch Inside Thread Sanko Drop-In Concrete Anchor indicates a precise standard for installation and, by extension, removal. Sourcing the right tools that adhere to these industrial specifications is paramount.
Why Anchors Become Difficult to Remove
Several factors contribute to anchors becoming stubborn:
- Corrosion and Oxidation: Over time, especially with exposure to pool chemicals and the elements, metal anchors can corrode or oxidize, bonding more firmly with the concrete.
- Concrete Expansion and Contraction: Seasonal temperature fluctuations cause concrete to expand and contract, potentially seizing the anchor in place.
- Improper Installation: If an anchor was installed incorrectly, it might be difficult to extract without damaging the surrounding concrete.
- Material Degradation: Plastic anchors, in particular, can degrade due to UV exposure and chemical interaction, becoming brittle and prone to breaking during removal attempts.
Understanding these challenges helps in anticipating the difficulty of the task and in selecting the appropriate tools and methods. It reinforces the need for thoughtful procurement, where reliable, high-quality, American-made products from platforms like Maden.co provide the assurance that the tools you select are up to the task. Our mission at Maden.co is to democratize access to American manufacturing, ensuring that industrial buyers have access to precisely the right components for their exacting needs.
Safety First: Essential Precautions for Anchor Removal
Working with concrete and power tools demands a rigorous adherence to safety protocols. Neglecting these precautions can lead to serious injuries or irreversible damage to property. This isn't merely a suggestion; it’s an absolute necessity for any MRO buyer or procurement manager overseeing a project of this nature.
Personal Protective Equipment (PPE)
Always start by donning the correct PPE:
- Eye Protection: Safety glasses or goggles are non-negotiable. Concrete dust and flying debris are major hazards.
- Hearing Protection: If using power tools like drills, grinders, or jackhammers, earmuffs or earplugs are essential to prevent hearing damage.
- Gloves: Heavy-duty work gloves protect hands from abrasions, cuts, and chemical exposure (from concrete dust or cleaning agents).
- Dust Mask/Respirator: Concrete dust contains crystalline silica, which can cause serious lung disease if inhaled over time. A P100 respirator is recommended.
- Long Sleeves and Pants: Protect skin from flying debris, scrapes, and concrete burns.
- Steel-Toe Boots: Protect feet from falling tools or concrete fragments.
Site Assessment and Preparation
Before beginning any work, thoroughly assess and prepare the area:
- Clear the Area: Remove any furniture, planters, pool equipment, or anything else that could be damaged or obstruct your work.
- Identify Utilities: Ensure no underground pipes, electrical conduits, or irrigation lines are in the immediate vicinity of your work. While most anchors are shallow, it's always prudent to confirm.
- Contain Debris: Lay down tarps or plastic sheeting around the work area to catch concrete dust and debris, simplifying cleanup and protecting adjacent surfaces.
- Secure the Work Area: If working in a public or high-traffic area, clearly mark off the work zone to prevent unauthorized access.
Power Tool Safety
When utilizing power tools, a few critical points must be observed:
- Read Manuals: Always read and understand the operating manual for any power tool before use.
- Inspect Tools: Before each use, inspect power tools for damaged cords, loose connections, or malfunctioning parts. Never use a damaged tool.
- Proper Grip and Stance: Maintain a firm grip on tools and a stable stance to prevent loss of control.
- Ventilation: If working in an enclosed or semi-enclosed area, ensure adequate ventilation to dissipate dust and fumes.
By prioritizing safety, you not only protect yourself and your team but also uphold the highest standards of industrial excellence, a core value we champion at Maden.co.
Tools of the Trade: Equipping for Success
The right tools are half the battle in any industrial task. For removing pool cover anchors, a combination of manual and power tools will likely be necessary, depending on the anchor type and its stubbornness. Sourcing these tools from verified U.S. manufacturers not only ensures quality and durability but also contributes to the resilience of your supply chain. At Maden.co, we offer a vast catalog of industrial components and tools, connecting you directly with the manufacturers who adhere to stringent American quality standards.
Essential Manual Tools
- Pliers/Vise Grips: For gripping the anchor tightly, especially if it has a small lip or head.
- Screwdrivers: Flathead screwdrivers can be used to pry or chip away concrete around the anchor.
- Hammers (Rubber Mallet & Ball-Peen): A rubber mallet can be useful for gently tapping around the anchor to loosen it, while a ball-peen hammer is good for striking chisels.
- Cold Chisels: Essential for carefully chipping away concrete around the anchor without damaging the main structure.
- Pry Bar/Crowbar: Provides leverage for stubborn anchors.
- Wire Brush: For cleaning out debris from holes.
Specialized Removal Tools (Crucial for Efficiency)
For the most effective and least damaging removal, specialized tools are often invaluable. These tools are engineered specifically for the task, embodying the kind of industrial excellence we promote. For instance, consider specific anchor chucks designed to extract various concrete anchors with minimal effort.
-
Anchor Chucks: These specialized tools are designed to grip and extract concrete anchors with a rotating or pulling motion. They are particularly effective for brass anchors, allowing for a cleaner removal.
- For a highly specialized and robust solution, a 1-Headed Concrete Anchor Shear Connector Chuck can provide the necessary grip and leverage for challenging anchors.
- Often, a versatile solution is preferred. A Concrete Anchor Shear Connector Chuck Set provides multiple chuck sizes to handle a variety of anchor dimensions, ensuring you're prepared for any anchor type you encounter.
- Tap and Die Sets (for re-threading): If you plan to reinstall new anchors in the same holes, a tap might be needed to clean up internal threads.
Power Tools
-
Rotary Hammer Drill: Indispensable for drilling into concrete. Ensure it has a hammer-only setting for chipping and a rotation-with-hammer setting for drilling.
- SDS-Plus or SDS-Max Drill Bits: Designed specifically for rotary hammer drills, these bits are extremely durable and efficient for concrete.
- Angle Grinder (with diamond cup wheel): For grinding down anchors flush with the concrete surface or for extensive concrete surface preparation. A diamond cup wheel is highly effective for removing material quickly.
- Shop-Vac/Industrial Vacuum: Crucial for dust control and cleaning up concrete debris. Look for models with HEPA filters for fine dust.
Concrete Repair and Finishing Materials
- Concrete Patching Compound: Fast-setting, non-shrink grout or epoxy-based patch for filling holes.
- Trowel/Float: For smoothing and finishing concrete patches.
- Concrete Sealer: To protect newly repaired areas and match the existing finish.
- Wire Brush/Chisel: For cleaning out holes before patching.
Procuring these high-quality, U.S.-made tools and materials through a transparent marketplace like Maden.co ensures that your investment supports American manufacturing pride and provides you with reliable equipment that meets rigorous standards. Our platform offers access to millions of products, making it easier for procurement managers to find exactly what they need, from specialized anchor chucks to robust drill bits, all from verified domestic sources.
Step-by-Step Removal Methods
The approach you take will depend largely on the type of anchor, its condition, and how firmly it’s embedded. We will detail several methods, starting with less invasive techniques and progressing to more aggressive ones.
Method 1: The Leverage and Extraction Approach (Best for Brass or Intact Anchors)
This method aims to pull the anchor out cleanly, often the preferred approach to minimize concrete damage.
-
Preparation is Key:
- Thoroughly clean around the anchor. Use a stiff brush or an air compressor to remove dirt, debris, and loose concrete that might obstruct your grip or obscure the anchor's edges.
- Apply a penetrating oil around the anchor's base. Allow it to sit for 15-30 minutes to seep into any gaps and help loosen corrosion.
-
Gripping the Anchor:
- If the anchor has an internal thread, try screwing a bolt into it. Once the bolt is tight, you can use the bolt head as a point of leverage.
- For anchors with a slight lip or an exposed edge, use strong pliers or vise grips to get a firm, unyielding hold. Lock the vise grips tightly onto the anchor.
-
Applying Leverage:
- Place a small piece of wood or a metal plate next to the anchor to act as a fulcrum. This protects the concrete deck from being marred by your pry bar.
- Using a pry bar or the claw of a hammer, carefully apply upward pressure against the fulcrum, attempting to lift the anchor. Work slowly and incrementally, wiggling the anchor slightly to break any bond with the concrete.
- If you're using an inserted bolt, you might be able to create a small "puller" by using a washer and nut, gradually tightening the nut to pull the bolt and anchor upwards.
-
Extracting the Anchor:
- Once the anchor begins to move, continue to apply steady, upward pressure. Sometimes, a series of gentle taps with a rubber mallet around the anchor can help further loosen it.
- Once it's loose enough, you should be able to pull it out by hand or with pliers.
-
Initial Hole Cleaning:
- Use a wire brush and vacuum to clean out the hole immediately after removal.
Method 2: Precision Drilling and Chipping (For Stubborn Brass or Plastic Anchors)
When leverage isn't enough, or if the anchor is brass and seems fused, drilling can be an effective next step. This is where the reliability of U.S.-made drill bits and chucks becomes evident.
-
Mark and Protect:
- If the anchor is brass and recessed, you may need to carefully chip away a tiny bit of concrete around the top edge with a cold chisel and hammer to expose more of the brass.
- Protect the surrounding concrete with duct tape or a sacrificial piece of material to prevent accidental drill damage.
-
Drill Bit Selection:
- For brass anchors, choose a drill bit slightly smaller than the internal diameter of the anchor (if hollow) or a bit designed for metal if drilling through solid brass. A masonry bit with a diameter slightly larger than the inner barrel of the anchor but smaller than its outer rim can also be used to destroy the inner core.
- For plastic anchors, use a standard drill bit that matches the anchor's inner diameter.
-
Drilling Technique (Brass Anchors):
- Using a rotary hammer drill (on rotation-only or hammer-drill setting, depending on the anchor's density), carefully drill down the center of the anchor. The goal is to weaken the anchor's structure, not to widen the concrete hole.
- Drill several small holes around the inside perimeter of the brass anchor if it's solid, or simply drill through the center if it's hollow. This weakens the anchor.
- Once weakened, use a cold chisel and hammer to carefully collapse the anchor inward, then pry out the pieces.
-
Drilling Technique (Plastic Anchors):
- Drill directly through the center of the plastic anchor. The heat from the drill bit will often melt and break up the plastic, making it easier to remove.
- Once drilled, use a pick or a small screwdriver to clean out the plastic residue.
-
Clean Out Debris:
- Use a shop-vac to thoroughly clean out all drilled and chipped debris from the hole.
Method 3: Grinding and Patching (For Flush, Permanent Removal)
This method is used when anchors cannot be extracted and need to be removed completely flush with the concrete surface, often in preparation for a new surface treatment. This is a more aggressive method and requires careful handling of power tools.
- Safety First: Re-emphasize PPE, especially eye and hearing protection, and a high-quality dust mask/respirator due to significant dust generation.
-
Tool Setup:
- Attach a diamond cup wheel to your angle grinder.
- Ensure the grinder is securely held and that you have a stable stance.
-
Grinding Technique:
- Carefully position the grinder over the anchor. With a steady hand, begin to grind the anchor down. The goal is to remove the anchor material until it is flush, or even slightly recessed, below the concrete surface.
- Move the grinder in small, controlled passes. Avoid pressing down too hard, which can cause gouging.
- Periodically stop to check your progress and allow the grinder to cool.
- This method generates significant dust; ensure your shop-vac is nearby to capture as much as possible, or have an assistant ready with a vacuum hose.
- Edge Feathering: Once the anchor is ground down, you may need to feather the edges of the surrounding concrete slightly to create a smooth transition for patching.
- Thorough Cleaning: After grinding, use a wire brush and industrial vacuum to meticulously clean the area, removing all dust and debris, which is crucial for good patch adhesion.
Method 4: Specialized Anchor Removal Tools
These tools are designed to simplify the extraction of specific anchor types, showcasing the benefits of purpose-built industrial equipment.
-
Anchor Chucks: As mentioned previously, specialized anchor chucks are designed to fit into or over the specific head of a concrete anchor. They typically attach to a drill or an impact driver.
- Using an 1-Headed Concrete Anchor Shear Connector Chuck, you can securely grip the anchor. Once engaged, the chuck allows for a controlled rotation or extraction force that twists the anchor free from its concrete bond. This method significantly reduces the risk of concrete damage.
- For varied anchor sizes common in industrial and MRO settings, a Concrete Anchor Shear Connector Chuck Set is an invaluable investment. Such sets provide the versatility to handle different anchor types efficiently, ensuring that a procurement manager has the right tool for every scenario. This foresight in tool procurement not only saves time but also prevents the need for improvising, which can lead to costly mistakes.
- Expansion Anchor Extractors: Some tools are designed to grip the internal threads of an expansion anchor and provide a controlled pulling force to extract them.
These specialized tools embody the digital innovation and industrial excellence that Maden.co champions. By providing direct access to such highly effective, American-made solutions, we empower MRO buyers and design engineers to perform their tasks with greater precision and efficiency.
Dealing with Damaged or Stuck Anchors
Sometimes, despite your best efforts, an anchor might break, strip, or simply refuse to budge. This requires a shift in strategy.
- Broken Brass Anchors: If a brass anchor breaks flush with the concrete, you'll likely need to resort to Method 3 (Grinding and Patching) to remove the remaining material, or carefully drill out the center and chip away the fragments.
-
Stripped Internal Threads: If the internal threads of an anchor are stripped, making it impossible to insert a bolt for leverage, you can try:
- Using a screw extractor kit.
- Carefully drilling out the center as in Method 2.
- Resorting to grinding if extraction fails.
- Heavily Corroded Anchors: For anchors that seem permanently bonded due to corrosion, a combination of penetrating oil, heat (from a heat gun, carefully applied), and then rapid cooling (with a can of compressed air inverted for a burst of super-cold) might help break the bond through thermal shock before attempting leverage again.
Concrete Repair and Finishing
Once the anchors are removed, you'll be left with holes that need to be filled and finished to restore the concrete's appearance and structural integrity. This step is critical for a professional outcome.
-
Thorough Cleaning of Holes:
- Using a wire brush, chisel, and a powerful shop-vac, meticulously clean out each hole. Remove all loose debris, dust, and any remaining anchor fragments. A clean surface is paramount for proper adhesion of the patching compound.
- For very fine dust, you might even consider rinsing the holes with water, then allowing them to dry completely (use a fan or air compressor to speed drying).
-
Choosing the Right Patching Compound:
- Epoxy-based patch: Excellent for durability, chemical resistance, and strong adhesion. Ideal for areas subjected to heavy traffic or chemical exposure.
- Cement-based patching compound (non-shrink grout): Good for general repairs, easy to work with, and expands slightly to fill the void completely. Choose a fast-setting variety for quicker project completion.
- Self-leveling compounds: If the area needs a perfectly flush finish and the holes are relatively shallow.
- Consider color matching. Many patching compounds come in standard gray, but you might need to tint them or choose a specific shade to blend with your existing concrete.
-
Mixing the Patching Compound:
- Follow the manufacturer’s instructions precisely. Incorrect mixing ratios can compromise the strength and setting time of the patch.
- Mix only as much as you can use within the working time, especially with fast-setting compounds.
-
Application Techniques:
- Pre-wetting: For cement-based patches, slightly dampen the concrete around the hole (but not standing water) to prevent the dry concrete from drawing moisture out of the patch too quickly, which can lead to cracking.
- Firm Application: Press the patching compound firmly into the hole, ensuring there are no air voids. Overfill slightly.
- Leveling: Use a trowel or float to smooth the patch flush with the surrounding concrete surface. For a textured finish, you might use a sponge or stiff brush after the initial set.
- Curing: Follow the manufacturer's curing instructions. This often involves keeping the patch damp for several days to allow for proper hydration and strength development.
-
Matching the Existing Concrete Finish:
- Achieving a seamless blend requires attention to detail. If the surrounding concrete is textured, try to replicate that texture on the patch.
- Once cured, applying a concrete sealer to the entire area can help unify the appearance and protect both the original concrete and the new patches.
This meticulous approach to concrete repair reflects our value of industrial excellence. It ensures that the work done today provides lasting results, maintaining the aesthetic and structural integrity of your facilities.
Preventative Measures for Future Installations
While anchor removal can be challenging, thoughtful installation can significantly ease future maintenance. For procurement managers and MRO buyers, specifying components that consider end-of-life or future serviceability is a smart, long-term strategy.
- Use Quality, Compatible Anchors: Invest in U.S.-made anchors known for their durability and ease of removal. Look for brass or stainless steel anchors designed for minimal seizing. At Maden.co, we connect you with manufacturers providing precisely these types of robust, compliant products.
- Proper Hole Preparation: Ensure drill holes are clean and correctly sized. Oversized or undersized holes can lead to anchors that are either loose or prone to breaking during removal.
- Sleeves and Lubrication: For certain types of anchors, using plastic or silicone sleeves during installation can act as a barrier, preventing direct contact between the anchor and concrete, thereby reducing corrosion and seizing. A thin layer of waterproof grease on the anchor threads can also assist.
- Consider Anchor Design: Some modern anchor designs feature integrated removal mechanisms or are designed to be less prone to seizing. Specify these for new installations.
- Regular Maintenance: Periodically inspect and clean around your pool cover anchors. Early detection of corrosion or damage can prevent future extraction headaches.
By integrating these preventative measures into your standard operating procedures, you embody the principles of proactive maintenance and long-term asset management.
The Strategic Advantage of Sourcing American-Made for Your MRO Needs
The task of removing pool cover anchors, while seemingly minor, underscores a broader truth in industrial procurement: the quality of your tools and components directly impacts project efficiency, longevity, and overall cost. This is precisely why our mission at Maden.co is to democratize access to American manufacturing, empowering businesses to make smarter, more resilient sourcing decisions.
Connecting with a Network of Verified U.S. Manufacturers
When you're searching for specialized tools like anchor chucks or high-grade concrete repair materials, the ability to quickly locate and procure them from trusted sources is invaluable. We proudly connect industrial buyers with over 2.5 million American-made products from our network of 800+ verified U.S. manufacturers. This extensive network means that whether you need a specific type of anchor, a specialized drill bit, or a high-performance patching compound, you can find it with confidence.
Ensuring Quality and Compliance
Sourcing American-made isn't just a preference; it’s a strategic decision rooted in our core values of American Manufacturing Pride and Industrial Excellence. U.S. manufacturers adhere to some of the world's most stringent quality control standards, ensuring that the products you receive – from basic fasteners to complex machinery components – meet or exceed industry specifications (e.g., DIN, NPT). This commitment to quality translates into tools that perform reliably and materials that last, reducing rework and improving your total cost of ownership (TCO). For instance, when you need a 3/8-inch Inside Thread Sanko Drop-In Concrete Anchor, knowing it comes from a verified U.S. manufacturer ensures consistent quality that foreign alternatives might not offer.
Boosting Supply Chain Resilience
In today's dynamic global economy, supply chain resilience is paramount. Relying on domestic sources minimizes geopolitical risks, reduces lead times, and provides greater transparency into the manufacturing process. By choosing American-made through Maden.co, you strengthen your supply chain against disruptions, ensuring that critical MRO components are available when you need them most. This embodies our commitment to Supply Chain Transparency.
Leveraging Digital Innovation for Customer Empowerment
At Maden.co, we believe in Customer Empowerment through Digital Innovation. Our platform is designed to simplify the procurement process, making it as convenient and accessible as possible. For a procurement manager under pressure to source a specific tool, a design engineer needing specific material certifications, or an MRO buyer facing an unexpected equipment breakdown, the ability to quickly find and finance a verified, U.S.-made part is a game-changer. Our intuitive interface allows you to navigate our vast catalog with ease, ensuring that finding the right product – whether it's an 1-Headed Concrete Anchor Shear Connector Chuck or a Concrete Anchor Shear Connector Chuck Set – is a seamless experience.
A key differentiator we offer is Instant Financing. This feature allows procurement managers and business owners to manage cash flow effectively and make larger-volume purchases without immediate capital outlay. You can apply for Instant Financing at checkout to streamline your capital-intensive projects, ensuring your operations aren't hampered by financial constraints. This strategic tool enables businesses to maintain efficiency and seize opportunities, reinforcing our role as a strategic partner in building a more reliable and efficient procurement process.
We are not just a marketplace; we are the definitive platform proving that American-made components are as accessible and convenient as any global alternative. Our vision is clear: "America's manufacturing revival is here." We invite qualified U.S. manufacturers to join our expanding network and become part of this powerful movement. Are you a U.S. manufacturer? Register as a vendor and join the American manufacturing revival. You can learn more about our mission to champion American manufacturing and our commitment to industrial excellence by visiting our About Us page. If you have specific sourcing questions, our team is ready to help; feel free to contact us.
Conclusion
Removing pool cover anchors from concrete, while potentially daunting, is a manageable task with the right approach, tools, and safety precautions. By understanding the types of anchors, preparing meticulously, and employing the correct techniques—whether it's strategic leverage, precision drilling, or careful grinding—you can achieve a clean, professional result without damaging your valuable concrete surfaces. The subsequent repair and finishing steps are equally critical to restore the area's aesthetic appeal and structural integrity, setting the stage for future use or new installations.
The success of such projects, from seasonal maintenance to large-scale facility upgrades, hinges on reliable procurement. At Maden.co, we are committed to providing industrial buyers with unparalleled access to quality, American-made products. By choosing to source through our marketplace, you're not just buying tools and materials; you're investing in supply chain resilience, supporting American manufacturing pride, and ensuring industrial excellence in every aspect of your operations. Our platform simplifies the complex world of industrial procurement, offering a vast catalog of verified products and innovative solutions like Instant Financing, designed to empower your business.
Don't let procurement challenges impede your progress. Explore the extensive catalog of U.S.-made tools and components on Maden.co today. Find the precise products you need, streamline your purchasing with our Instant Financing option available at checkout, and join us in driving America's manufacturing revival forward. Your next project's success starts with smarter sourcing.
FAQ
Q1: What is the most common type of pool cover anchor and why is it difficult to remove?
A1: The most common type of pool cover anchor is made of brass. They are difficult to remove primarily due to corrosion and oxidation over time, which causes them to bond firmly with the concrete. Additionally, concrete's natural expansion and contraction with temperature changes can seize these anchors in place, making simple extraction challenging without the right tools or techniques.
Q2: Can I remove pool cover anchors without damaging my concrete deck?
A2: Yes, it is possible to remove pool cover anchors without damaging your concrete deck, but it requires patience, the right tools, and careful technique. Methods like the leverage and extraction approach using specialized anchor chucks, or precision drilling followed by careful chipping, are designed to minimize damage. The key is to work slowly, use appropriate fulcrums to protect the concrete, and choose tools specifically designed for anchor removal, such as those available on Maden.co.
Q3: What kind of concrete patching compound should I use after removing anchors?
A3: For filling holes left by removed anchors, an epoxy-based patch or a high-strength, non-shrink cement-based patching compound is generally recommended. Epoxy offers superior durability and chemical resistance, while cement-based options are versatile and easy to work with. Always ensure the compound is suitable for exterior use and follow the manufacturer's mixing and curing instructions precisely for the best results and a seamless finish.
Q4: How does Maden.co help with sourcing specialized tools for anchor removal and concrete repair?
A4: Maden.co democratizes access to American manufacturing, connecting industrial buyers with over 2.5 million U.S.-made products from verified manufacturers. For tasks like anchor removal and concrete repair, this means you can easily find high-quality, specialized tools such as anchor chucks, robust drill bits, and durable patching compounds. Sourcing through Maden.co ensures you get reliable, compliant products, enhancing your supply chain resilience and reducing procurement friction, all while offering strategic benefits like Instant Financing at checkout for managing capital-intensive projects.


