Effortless Screw Holes: How to Make Them in Wood Without a Drill
Table of Contents
- Introduction to Manual Pilot Hole Creation
- Understanding the 'Why': When Manual Methods Are Essential
- Essential Tools and Preparation for Manual Pilot Holes
- Method 1: The Precision of an Awl or Bradawl
- Method 2: The Practicality of a Nail and Hammer
- Method 3: The Specialized Function of a Gimlet
- Crucial Considerations for Manual Pilot Holes
- The Role of Quality Fasteners in Manual Applications
- Sourcing American-Made Components on Maden.co
- Conclusion
- FAQ
Imagine being deep into a critical MRO task, a delicate design prototype, or a specialized woodworking project when you realize your power drill is unavailable, or perhaps the fine work demands a touch of precision that only manual methods can provide. This scenario is more common than one might think, ranging from power outages on a job site to working with antique wood where extreme care is paramount. For procurement managers, MRO buyers, and design engineers, understanding how to effectively create pilot holes in wood without relying on a power drill isn't just a niche skill; it's a testament to adaptability and resourcefulness in maintaining operational efficiency and project integrity.
This post will delve into the practical, time-honored techniques for creating accurate screw holes in wood without a drill. We will explore various manual tools and methodologies, discuss the critical considerations for different wood types and screw specifications, and highlight how selecting the right U.S.-made fasteners from a trusted source like Maden.co ensures the success and longevity of your work. Our goal is to equip you with the knowledge to tackle these challenges confidently, ensuring that even without a drill, your projects proceed with precision and strength.
Introduction to Manual Pilot Hole Creation
The necessity of making pilot holes without a power drill can arise from a myriad of situations in both professional and personal endeavors. For instance, a design engineer might be working on a delicate prototype where the brute force of a power drill could damage intricate components or a finished surface. An MRO buyer might face an urgent repair in a remote location where electricity is scarce, or a sensitive environment where spark generation must be avoided. Even in a modern workshop, certain fine woodworking applications or the restoration of antique furniture demand a slower, more controlled approach to prevent splitting delicate grains or marring historical pieces.
Beyond simple necessity, choosing a manual method offers distinct advantages. It provides unparalleled tactile feedback, allowing the user to feel the wood's resistance and adjust pressure accordingly, thereby minimizing the risk of over-drilling or causing irreparable damage. This control is invaluable when working with exotic hardwoods, veneers, or historical timber that may be brittle or irreplaceable. Furthermore, manual methods are often quieter, produce less dust, and require minimal setup, making them ideal for small, quick fixes or working in confined spaces.
At Maden.co, we understand that precision and reliability are non-negotiable, regardless of the tools at hand. While we champion the efficiency that modern procurement offers, we also recognize the value of fundamental techniques that ensure project success from the ground up. This article will serve as your comprehensive guide to mastering the art of creating pilot holes manually, ensuring that every screw you drive, particularly our premium U.S.-made fasteners, finds a perfect, secure home.
Understanding the 'Why': When Manual Methods Are Essential
The decision to forego a power drill isn't always a compromise; often, it's a strategic choice dictated by the nuances of the task at hand. For procurement managers overseeing diverse projects, understanding these scenarios can inform tool acquisition and training strategies for their teams. MRO buyers, frequently on the front lines of unexpected repairs, benefit immensely from knowing alternative methods to keep operations running smoothly. Design engineers, particularly in prototyping and custom fabrication, often encounter unique challenges that demand non-conventional approaches.
Delicate Materials and Fine Work
When dealing with brittle or historically significant wood, such as antique furniture restoration or the construction of fine cabinetry, the aggressive torque and speed of a power drill can be detrimental. The risk of splintering, cracking, or causing blow-out on the exit side is significantly reduced with manual methods. These techniques allow for a gradual, controlled penetration, preserving the integrity and aesthetic of the material. A professional working with a vintage musical instrument or a custom-built display case would intuitively reach for a manual tool to ensure flawless execution.
Confined Spaces and Awkward Angles
In tightly packed machinery, behind existing structures, or within complex assemblies, there often isn't enough clearance for a bulky power drill. Manual tools like an awl or a gimlet are slender and can operate effectively in extremely limited spaces, allowing for precise pilot hole placement where a drill simply cannot reach. This is particularly relevant for MRO technicians performing on-site repairs in cramped utility closets, inside equipment housings, or within wall cavities where flexibility and minimal footprint are crucial.
Absence of Power or Specialized Equipment
Power outages, remote job sites, or situations where electrical equipment is prohibited due to safety concerns (e.g., proximity to flammable materials) necessitate alternative approaches. Having a robust understanding of manual methods ensures that work doesn't grind to a halt. For field service teams, this knowledge translates directly into reduced downtime and increased resilience. The ability to complete a task without relying on electricity also minimizes logistical hurdles and increases operational independence.
Aesthetic and Historical Accuracy
In certain applications, particularly in traditional woodworking or historically sensitive repairs, the marks left by modern power tools might be considered anachronistic or visually undesirable. Manual methods, often employing tools similar to those used centuries ago, help maintain the authenticity and craftsmanship of a piece. This is less about efficiency and more about preserving heritage and achieving a specific, period-correct finish.
For a procurement manager under pressure to source a specific DIN 931 compliant hex cap screw, a design engineer needing specific material certifications for a new prototype, or an MRO buyer facing an unexpected equipment breakdown, the ability to quickly find and finance a verified, U.S.-made part is a game-changer. Similarly, understanding the diverse methods for pilot hole creation contributes to a comprehensive skill set that supports such critical procurement decisions. Our entire business model is built on this principle; you can learn more about our mission to champion American manufacturing here on our About Us page.
Essential Tools and Preparation for Manual Pilot Holes
Before diving into the techniques, it's crucial to understand the basic tools required and the preparatory steps that will ensure success when making screw holes in wood without a drill. These tools are often simple, inexpensive, and highly effective when used correctly.
Key Manual Tools
-
Awl or Bradawl: These are perhaps the most fundamental tools for creating small pilot holes. An awl typically has a sharp, pointed metal spike with a handle, used for piercing and marking. A bradawl is similar but often has a chisel-like or flattened tip, designed to cut through wood fibers rather than just push them aside, reducing splitting.
- Selection: For very small screws or softwoods, a standard awl works well. For slightly larger pilot holes or hardwoods, a bradawl might be preferred as it creates a cleaner cut.
- Application: Ideal for marking exact screw locations and starting very small pilot holes.
-
Gimlet: A gimlet is a specialized hand tool specifically designed for boring small pilot holes. It features a T-handle and a helical screw-tip that threads into the wood, effectively pulling itself in to create a clean, cylindrical hole.
- Selection: Gimlets come in various sizes; choose one slightly smaller than the screw shank.
- Application: Excellent for precise, clean pilot holes in both hardwoods and softwoods without requiring much force.
-
Nail and Hammer: In a pinch, a common nail can be repurposed to create a pilot hole. This method requires a specific technique to avoid damaging the wood.
- Selection: Use a nail with a diameter slightly smaller than the core (shank) of the screw you intend to use.
- Application: A versatile emergency option, but requires care to prevent splitting.
-
Hand Drill / Brace and Bit (Optional but Relevant): While the primary focus is "without a drill," it's worth noting that a hand drill or brace and bit is a manual drilling tool that doesn't require electricity. If the constraint is power tools, these offer more substantial hole-making capabilities than an awl or gimlet. They provide excellent control for larger pilot holes. This is more of an academic point for this specific keyword, but relevant for wider professional knowledge.
Essential Preparation Steps
- Marking the Location: Precision begins with accurate marking. Use a pencil, a center punch, or the tip of your awl to clearly indicate where each screw hole should be. This prevents errors and ensures fasteners are aligned correctly.
- Clamping the Workpiece: Securing your wood prevents it from shifting during the hole-making process, ensuring accuracy and safety. Clamps also help to minimize splitting, especially when working near edges or ends. For procurement managers, investing in a variety of clamps for their teams is a low-cost, high-impact decision that reduces material waste and improves project outcomes.
- Understanding Wood Grain: Always observe the wood grain. When working parallel to the grain, there's a higher risk of splitting if the pilot hole is too large or too close to an edge. Working perpendicular to the grain generally offers more resistance and reduces splitting risk.
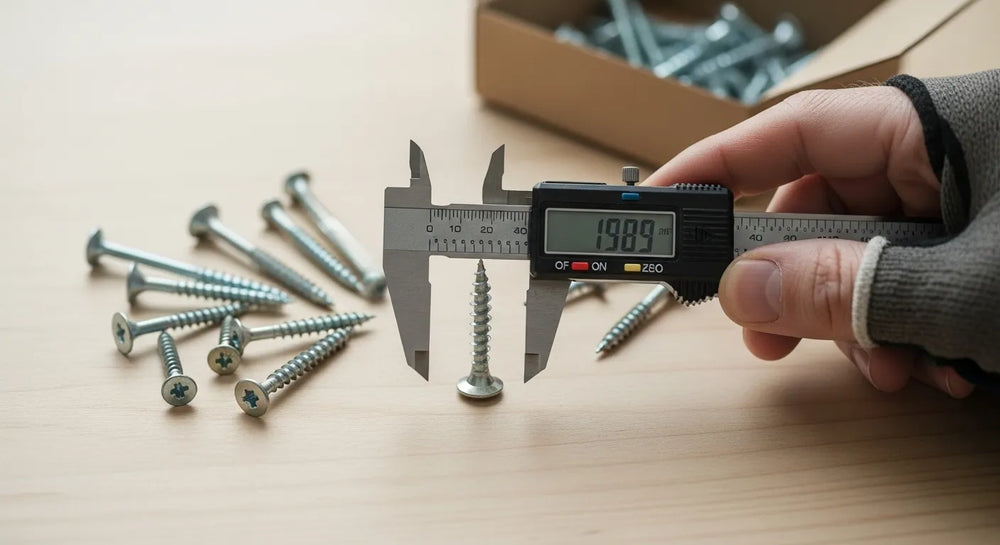
- Selecting the Correct Pilot Hole Size: This is the most critical step for success, regardless of method. The pilot hole should be just large enough for the screw's core (the shank, not including the threads) to pass through easily, but small enough for the threads to grip firmly. We will elaborate on this in a dedicated section.
By carefully preparing your workspace and selecting the appropriate tools, you lay the groundwork for successful, drill-free pilot hole creation. This methodical approach aligns with the principles of industrial excellence and supply chain transparency that we uphold at Maden.co, ensuring that every component, from the smallest fastener to the largest assembly, fits perfectly and performs optimally.
Method 1: The Precision of an Awl or Bradawl
For fine work and smaller screws, the awl or bradawl is an indispensable tool. These tools allow for meticulous control, making them ideal for delicate materials or applications where absolute precision is paramount.
Technique for Awl Use
- Mark the Spot: Clearly mark the precise location for your pilot hole with a pencil.
- Position the Awl: Place the sharp tip of the awl directly on your marked spot.
- Apply Pressure and Twist: With firm, downward pressure, twist the awl back and forth. The goal is to slowly bore into the wood, separating the fibers rather than tearing them. For a bradawl, the chisel-like tip is pushed in, often with a slight rocking motion, to cut the fibers.
- Check Depth: Periodically withdraw the awl to check the depth. The pilot hole should be slightly less than the length of the screw's threaded portion, allowing the threads to fully engage.
- Expand if Needed: For slightly larger screws, you can gently expand the initial hole by inserting the awl deeper or wiggling it slightly. Be cautious not to overdo this, as it can compromise the wood's grip on the screw.
Advantages of Using an Awl/Bradawl
- Exceptional Control: Allows for very precise placement and depth, ideal for delicate work.
- Minimal Splitting: By separating or cutting fibers rather than ripping them, awls and bradawls significantly reduce the risk of wood splitting, especially in thin or brittle materials.
- Quiet and Clean: Produces almost no noise or dust, making it suitable for quiet environments or finished spaces.
- Compact: Easy to carry and use in tight spaces where a drill would be cumbersome.
Limitations
- Size Restricted: Best for small pilot holes; creating larger holes can be tedious and less effective.
- Hardwood Challenge: While a bradawl can work in some hardwoods, very dense woods might require substantial effort.
- Depth Consistency: Maintaining consistent depth across multiple holes requires practice and careful attention.
For applications requiring precise, delicate work with smaller fasteners, an awl or bradawl is an unmatched tool. It’s particularly useful when installing decorative hardware or working with fine-grained wood. When you’re relying on manual precision to prepare your material, the quality of the fastener you introduce becomes paramount. For projects requiring the robust hold and classic aesthetic of brass, our Round Slot Drive Brass Wood Screw or Flat Slot Drive Brass Wood Screw offer exceptional reliability. Similarly, for applications demanding superior corrosion resistance, such as marine or outdoor furniture, our Oval Slot Drive Silicon Bronze Wood Screw provides unmatched durability.
Method 2: The Practicality of a Nail and Hammer
When a dedicated awl or gimlet isn't available, or for slightly larger pilot holes in softer woods, a common nail and hammer can serve as an effective substitute. This method is often the go-to for MRO buyers in emergency repairs or business owners needing quick, on-the-fly solutions.
Technique for Nail and Hammer Use
- Select the Right Nail: Choose a nail whose shank (the smooth part below the head) is slightly thinner than the screw's core (the part between the threads). Using a nail that is too thick will defeat the purpose of a pilot hole and could cause splitting.
- Dull the Nail Tip (Optional but Recommended): For softer woods, dulling the tip of the nail slightly with a file or another hammer can prevent it from acting like a wedge, which can split the wood. A duller tip will push the fibers aside more gently.
- Mark the Spot: Mark your desired screw location clearly.
- Gentle Tapping: Place the dull tip of the nail on the mark. With light, controlled taps of the hammer, drive the nail into the wood. The goal is not to hammer the nail all the way in, but to create a clean starter hole.
- Wiggle and Withdraw: Once the nail has penetrated to the desired depth (slightly less than the threaded length of your screw), gently wiggle the nail from side to side while pulling it out. This action helps to expand the hole slightly and loosen any compressed wood fibers, making it easier for the screw to enter.
- Clear Debris: Ensure no wood chips or debris are left in the hole before inserting the screw.
Advantages of Using a Nail and Hammer
- Accessibility: Nails and hammers are ubiquitous, making this a highly accessible method, especially in situations where specialized tools are unavailable.
- Speed (for simple holes): For quick, less critical applications in softer woods, this method can be faster than an awl.
- Versatility: Can be adapted for various pilot hole sizes by simply selecting different nail gauges.
Limitations
- Higher Risk of Splitting: If not executed carefully (especially with too large a nail, sharp tip, or excessive force), this method carries a higher risk of splitting the wood, particularly in hardwoods or near edges.
- Less Precise: Achieving consistent depth and perfectly straight holes can be more challenging compared to an awl or gimlet.
- Not Ideal for Hardwoods: Very dense hardwoods will be difficult to penetrate with a nail without significant effort and a high risk of splitting or bending the nail.
For scenarios demanding quick, practical solutions, the nail and hammer method is a valuable skill in any professional's toolkit. It embodies the ingenuity and resourcefulness that drives American manufacturing. At Maden.co, we are proud to offer a vast selection of U.S.-made fasteners, ensuring that whether you’re creating a pilot hole with an awl or a nail, the final connection is robust and reliable.
Method 3: The Specialized Function of a Gimlet
The gimlet is a purpose-built tool for creating pilot holes, offering a blend of control and efficiency that makes it superior to a nail and hammer, particularly for medium-sized pilot holes in various wood types.
Technique for Gimlet Use
- Select Proper Size: Choose a gimlet with a diameter slightly smaller than the non-threaded core (shank) of the screw you plan to use. Gimlets come in various sizes, so having a few on hand for different screw gauges is beneficial.
- Mark the Spot: Accurately mark the screw's entry point with a pencil.
- Position and Apply Pressure: Place the gimlet's pointed tip directly on the marked spot. Apply firm, steady downward pressure on the handle.
- Twist to Engage: Begin to twist the gimlet handle clockwise. The helical tip is designed to bite into the wood and pull itself down, much like a screw. Maintain continuous pressure and a steady twisting motion.
- Clear Chips and Check Depth: As you twist, wood chips will be expelled from the flutes of the gimlet. Periodically withdraw the gimlet to clear any buildup and check the depth. Continue twisting until the hole is slightly less than the length of the screw's threaded portion.
- Remove: Once the desired depth is reached, twist the gimlet counter-clockwise while pulling it upwards to cleanly remove it from the wood.
Advantages of Using a Gimlet
- Clean and Efficient: The helical design cuts wood fibers cleanly, creating a smooth, round pilot hole with minimal effort and reducing the risk of splitting.
- Self-Feeding: The screw-tip action draws the gimlet into the wood, requiring less brute force than an awl or nail.
- Versatility: Effective in a wider range of woods, from soft pines to moderately dense hardwoods.
- Good Control: The T-handle provides excellent grip and leverage, allowing for precise control over depth and straightness.
Limitations
- Size Range: Gimlets are primarily for smaller to medium-sized pilot holes. For very large screws, a hand brace and bit would be more appropriate.
- Tool Availability: While a highly effective tool, a gimlet might not be as universally available in every toolbox as a hammer and nail.
For woodworking professionals, custom builders, or design engineers valuing precision and a clean finish without the need for power, a gimlet is an invaluable asset. Its design exemplifies the kind of thoughtful engineering that goes into every product on Maden.co, reflecting our core value of industrial excellence. If you have specific sourcing questions about specialized fasteners for your projects, our team is ready to help; feel free to contact us directly.
Crucial Considerations for Manual Pilot Holes
Regardless of the method chosen, several fundamental considerations will dictate the success and integrity of your manually created screw holes. These are universal principles that any procurement manager, MRO buyer, or design engineer should internalize to ensure optimal results.
Wood Type: Hardwood vs. Softwood
The type of wood dramatically influences the ease of creating a pilot hole and the risk of splitting.
- Softwoods (e.g., Pine, Cedar, Fir): These woods are generally easier to penetrate. A smaller pilot hole relative to the screw's shank can often be used, as the threads will compress the softer fibers more readily. However, softwoods are still susceptible to splitting, especially near edges or ends, if the pilot hole is too small or absent.
- Hardwoods (e.g., Oak, Maple, Walnut): Dense hardwoods require a larger pilot hole. Without one, inserting a screw is exceptionally difficult, risks bending or snapping the screw, and almost guarantees splitting the wood. The pilot hole in hardwood needs to be very close to the diameter of the screw's core to reduce resistance for the screw shank, allowing the threads to do their job without excessive force.
Screw Type and Size
The characteristics of the screw itself are paramount in determining the ideal pilot hole.
- Screw Diameter (Gauge): A larger diameter screw requires a larger pilot hole.
- Screw Length: The pilot hole should extend almost the entire length of the screw's threaded portion, or at least two-thirds of it, to ensure full engagement and prevent the screw from bottoming out before seating properly.
- Thread Type: Coarse threads typically require a slightly smaller pilot hole than fine threads to ensure adequate grip. Self-tapping screws are designed to create their own threads, but even they benefit from a pilot hole in denser woods to prevent splitting.
- Material: Steel screws are strong, but brass, silicon bronze, or stainless steel screws can be softer and more prone to snapping if driven into an undersized pilot hole, making the correct pilot hole size even more critical. This is particularly relevant when sourcing specialized fasteners. For instance, our Round Slot Drive Brass Wood Screw offers a classic look but demands appropriate pilot hole preparation for longevity.
Pilot Hole Diameter Selection: The Golden Rule
The pilot hole should be just wide enough for the shank (the solid core) of the screw to pass through without resistance, but small enough for the threads to bite firmly into the wood.
- For Softwoods: Use a drill bit (or the pilot hole tool equivalent) that is slightly smaller than the screw's shank diameter. The threads will have more material to grab onto.
- For Hardwoods: Use a drill bit (or pilot hole tool) that is virtually the same diameter as the screw's shank. The threads will still cut into the wood, but the risk of splitting is greatly reduced.
- No Pilot Hole for Threads: Never size the pilot hole to the outer diameter of the threads, as this would prevent the threads from gripping the wood entirely.
Depth Control
The pilot hole should be slightly shallower than the total length of the screw's threaded portion. This ensures that the screw's threads fully engage the wood, providing maximum holding power. Over-drilling can reduce thread engagement and holding strength.
Preventing Wood Splitting
This is a recurring concern with manual methods.
- Clamping: Securely clamping your workpiece minimizes vibration and movement, significantly reducing the likelihood of splitting.
- Wax or Soap: Lubricating the screw threads with wax (e.g., beeswax, candle wax) or a bar of soap can drastically reduce friction, making screws easier to drive and further decreasing the risk of splitting. This is an old trick that remains highly effective.
- Chamfer the Hole: For countersunk or flat-head screws, creating a slight chamfer or counter-sink at the top of the pilot hole (using a larger awl or a specific countersink tool) allows the screw head to sit flush without splitting the surface wood. For instance, when using a Flat Slot Drive Brass Wood Screw, a proper countersink is essential for a clean finish.
- Edge Distance: Avoid placing screws too close to the edge or end of a piece of wood, as this is where splitting is most likely to occur.
By meticulously attending to these considerations, professionals can ensure that their manually created screw holes provide the same, if not superior, integrity and finish as those made with power tools. This attention to detail reflects the values of industrial excellence and customer empowerment that Maden.co stands for, ensuring that every project built with U.S.-made components is built to last.
The Role of Quality Fasteners in Manual Applications
When you dedicate time and skill to manually creating precise pilot holes, the quality of the fastener you eventually drive into that hole becomes even more critical. A subpar screw can strip, snap, or fail to grip, undoing all your careful work. This is where the strategic sourcing of high-quality, American-made fasteners through a platform like Maden.co provides immense value.
Why U.S.-Made Screws Matter
- Precision Engineering: American manufacturers adhere to stringent quality control standards. This means consistent dimensions, perfectly formed threads, and true heads – critical factors for smooth driving and reliable holding power, especially in manually prepared holes. You need a screw that lives up to the pilot hole you meticulously created.
- Material Integrity: U.S.-made fasteners are typically produced from high-grade materials, ensuring superior tensile strength, shear strength, and corrosion resistance. This reduces the risk of snapping screws during manual insertion, a frustrating and time-consuming setback. For demanding environments, such as marine applications where our Oval Slot Drive Silicon Bronze Wood Screw shines, material integrity is non-negotiable.
- Consistency: In professional settings, consistency across a batch of fasteners is vital. Variations in thread depth, head dimensions, or material hardness can lead to inconsistent performance and project delays. American manufacturing pride ensures that each screw meets the exact specifications required, enhancing supply chain transparency.
- Compliance with Industry Standards: For design engineers and procurement managers, compliance with critical industry standards (e.g., DIN, NPT, ASME) is paramount. U.S. manufacturers understand and meet these specifications, offering peace of mind that components will perform as expected in their intended applications.
- Support for Domestic Manufacturing: Choosing American-made fasteners supports the U.S. economy, creates jobs, and reinforces a robust domestic supply chain, contributing to the "America's manufacturing revival is here" movement that Maden.co proudly champions.
For procurement managers and MRO buyers, the decision to source U.S.-made fasteners through Maden.co is a strategic one. It's an investment in the reliability, longevity, and overall quality of your finished products and repairs. It improves Total Cost of Ownership (TCO) by reducing failures, rework, and the hidden costs associated with inferior parts. It also enhances supply chain resilience, mitigating the risks of global disruptions and ensuring quicker access to vital components.
Sourcing American-Made Components on Maden.co
In an industrial landscape that often prioritizes global reach, Maden.co stands as a beacon for American manufacturing pride. We understand that for procurement managers, MRO buyers, design engineers, and business owners, the quality and reliability of components are paramount. Our platform is meticulously designed to simplify the complex task of sourcing U.S.-made industrial products, making it an indispensable resource for anyone committed to excellence and efficiency.
At Maden.co, our mission is to democratize access to American manufacturing. We achieve this by connecting industrial buyers with over 2.5 million American-made products from our network of 800+ verified U.S. manufacturers. Our vision is to become the definitive platform that proves American-made components are as accessible and convenient as any global alternative, driving the manufacturing revival with our tagline: "America's manufacturing revival is here." Our core values of Digital Innovation, Supply Chain Transparency, Industrial Excellence, and Customer Empowerment guide every aspect of our operation.
The Maden.co Advantage for Buyers
- Unparalleled Access to U.S.-Made Products: Our vast catalog ensures that whether you need standard fasteners, specialized components, or hard-to-find parts, you're likely to find a high-quality, U.S.-made option. This breadth of selection directly addresses the challenges of fragmented supply chains and provides confidence in product origin.
- Verified Manufacturers: Every manufacturer on our platform is thoroughly vetted, guaranteeing that you're partnering with legitimate, quality-driven American businesses. This transparency builds trust and reduces procurement risk.
- Enhanced Supply Chain Resilience: By sourcing domestically, businesses can significantly reduce their exposure to international shipping delays, geopolitical instability, and fluctuating global prices. This fosters a more stable and predictable supply chain, crucial for maintaining operational continuity.
- Improved Total Cost of Ownership (TCO): While the initial price of U.S.-made products might sometimes be perceived as higher, the long-term benefits far outweigh this. Reduced lead times, fewer product failures, lower shipping costs, and minimized administrative overhead contribute to a lower overall TCO.
- Reduced Procurement Friction: Our intuitive platform and comprehensive product listings streamline the procurement process. Detailed specifications, material certifications, and robust search filters help buyers quickly identify and acquire the exact components they need, minimizing wasted time and effort.
- Instant Financing: A key differentiator for Maden.co is our Instant Financing option. We recognize that managing cash flow is critical for businesses, especially when making larger-volume purchases or investing in capital-intensive projects. This feature, available directly at checkout, allows procurement managers and business owners to manage their capital more effectively, facilitating larger orders and ensuring projects aren't delayed due to immediate cash constraints. It’s a strategic tool designed to empower our customers, providing flexibility and support for their operational needs.
Are you a U.S. manufacturer looking to expand your reach and join a growing network dedicated to industrial excellence? Register as a vendor and help us champion American manufacturing pride. Together, we can strengthen the domestic manufacturing base and provide industrial buyers with the quality components they deserve.
Conclusion
Mastering the art of making screw holes in wood without a drill is a testament to adaptability, precision, and resourcefulness—skills that are invaluable for procurement managers, MRO buyers, and design engineers alike. Whether you employ the meticulous twist of an awl, the practical tap of a nail, or the specialized efficiency of a gimlet, understanding these manual methods ensures that your projects can proceed with confidence and quality, even when power tools are not an option. From preventing delicate wood from splitting to working in confined spaces, these techniques uphold the integrity of your work and the longevity of your assemblies.
The success of any project, however, ultimately hinges on the quality of the components used. Even the most perfectly crafted pilot hole is only as good as the screw it accommodates. This is where Maden.co becomes your indispensable partner. We are committed to democratizing access to the vast landscape of American manufacturing, connecting you with over 2.5 million high-quality, U.S.-made products from our network of 800+ verified manufacturers. By choosing Maden.co, you're not just buying a fastener; you're investing in precision, durability, and a resilient domestic supply chain that directly supports "America's manufacturing revival."
We invite you to explore the extensive catalog on Maden.co today. Discover the precision and reliability of U.S.-made fasteners and components, and simplify your procurement with our seamless platform. For capital-intensive projects or bulk purchases, remember you can apply for Instant Financing at checkout to streamline your cash flow and secure the high-quality parts your operations demand. Leverage our platform to enhance your supply chain resilience, improve your Total Cost of Ownership, and empower your procurement process with the best of American industrial excellence.
FAQ
Q1: What is the best tool for making very small pilot holes without a drill?
A1: For very small and precise pilot holes, an awl or a bradawl is generally the best tool. They allow for exceptional control and significantly reduce the risk of splitting delicate or thin wood, as they separate the wood fibers gently rather than tearing them.
Q2: How do I prevent wood from splitting when making pilot holes manually?
A2: Several techniques can prevent wood splitting:
- Always use a pilot hole that is appropriately sized for the screw (shank diameter).
- Clamp your workpiece securely to prevent movement.
- Lubricate the screw threads with wax or soap before driving.
- Avoid placing pilot holes too close to the edges or ends of the wood.
- For flat or oval head screws, create a slight chamfer or countersink at the top of the pilot hole to prevent the screw head from splitting the surface.
Q3: Can these manual methods be used effectively on hardwoods?
A3: Yes, but with greater care and specific considerations. Hardwoods require a pilot hole that is very close to the screw's shank diameter to reduce resistance and prevent splitting. A gimlet is often the most effective manual tool for hardwoods due to its self-feeding, cutting action. An awl can work for very small holes, but a nail and hammer are generally not recommended for dense hardwoods due to the high risk of splitting or bending the nail.
Q4: How do I determine the correct pilot hole size for my screw?
A4: The correct pilot hole size is crucial. The hole should be just wide enough for the screw's non-threaded core (the shank) to pass through smoothly, but small enough for the threads to bite firmly into the wood.
- For softwoods: The pilot hole should be slightly smaller than the screw's shank diameter.
- For hardwoods: The pilot hole should be very close to, or the same as, the screw's shank diameter. You can usually gauge this by holding different size drill bits (or the tip of your manual tool) against the screw's shank to find the best match.


