How to Fix a Drywall Anchor for a Lasting Repair
Table of Contents
- Introduction
- Understanding the Root Cause: Why Drywall Anchors Fail
- A Step-by-Step Guide to a Professional Drywall Anchor Repair
- Prevention is the Best Fix: Selecting the Right American-Made Anchor
- The Strategic Advantage of Sourcing Through Maden.co
- Conclusion: Build, Repair, and Procure with Confidence
- Frequently Asked Questions (FAQ)
Introduction
It’s a scenario familiar to every facility manager, maintenance professional, and business owner: a securely mounted shelf begins to sag, a heavy framed picture tilts precariously, or a piece of wall-mounted equipment comes loose. The culprit is almost always the same—a failed drywall anchor. That small, seemingly insignificant component has pulled away from the wall, leaving behind an ugly, enlarged hole and a significant problem. While it may seem like a minor annoyance, a failed anchor can represent a safety hazard, potential equipment damage, and operational downtime.
Simply patching the hole and trying again isn't a sustainable solution. The cycle of repair and failure points to a deeper issue, one that often lies in the initial selection and quality of the hardware itself. This article moves beyond temporary fixes to provide a professional, step-by-step guide on how to properly fix a failed drywall anchor for a secure, long-lasting hold. We will explore the root causes of anchor failure, detail the correct repair procedures for various levels of damage, and, most importantly, explain how to select the right American-made hardware to prevent these issues from recurring.
Our goal is to empower you not just with repair skills, but with a procurement strategy that prioritizes reliability and reduces the Total Cost of Ownership (TCO) associated with maintenance and repairs. By understanding the fundamentals of a proper fix and the value of quality components, you can ensure the integrity and safety of your commercial, industrial, or office spaces.
Understanding the Root Cause: Why Drywall Anchors Fail
Before you can implement a permanent solution, you must first diagnose the problem. A drywall anchor doesn't fail without reason. Understanding the cause is the critical first step in preventing a repeat performance. In a professional setting, where fixtures may support valuable equipment or be located in high-traffic areas, these failures can have consequences far beyond a simple cosmetic issue.
The Overloading Problem
The most common cause of failure is exceeding the anchor's load-bearing capacity. Every anchor is rated for a specific maximum weight, and this rating is often based on ideal conditions—perfectly installed in 1/2-inch or 5/8-inch drywall. Hanging an item that is even slightly too heavy, or an item whose weight is leveraged away from the wall (like a deep shelf), creates constant tension that the anchor was not designed to withstand. Over time, this tension will cause the anchor to pull out, taking a chunk of the fragile drywall with it. For maintenance and repair operations (MRO) buyers, this highlights the importance of matching the anchor's technical specifications to the application's demands, not just choosing a generic part from a bin.
Improper Installation Techniques
The second leading cause is incorrect installation. Even the highest quality anchor will fail if not installed according to the manufacturer's directions. Common installation errors include:
- Incorrect Pilot Hole Size: Drilling a pilot hole that is too large will prevent the anchor from gripping the drywall securely. It will spin in place or pull out with minimal force. A hole that is too small can damage the anchor during insertion or crack the surrounding drywall.
- Over-tightening the Screw: When the screw is driven too far or with too much torque, it can strip the inside of a plastic anchor, rendering it useless. For some anchor types, over-tightening can flare the back of the anchor too aggressively, compromising the integrity of the drywall itself.
- Under-tightening the Screw: An under-tightened screw fails to properly expand the anchor behind the drywall. Without this expansion, the anchor has no holding power and is merely sitting in the hole.
- Forcing the Anchor: Hammering an anchor that is meant to be drilled or screwed into place can damage both the component and the wall, leading to an insecure fit from the very start.
Using the Wrong Type of Anchor
The world of industrial fasteners is vast, and drywall anchors are no exception. There is no one-size-fits-all solution. Using a light-duty ribbed plastic anchor for a medium-weight application is a recipe for failure. Conversely, using an unnecessarily heavy-duty toggle bolt for a lightweight picture frame is inefficient. Each design serves a specific purpose, from simple expansion anchors for light loads to self-drilling and toggle-style anchors for more demanding applications. A procurement strategy that prioritizes the right part for the job, rather than just the cheapest or most available, is fundamental to long-term facility maintenance.
Low-Quality Materials and Manufacturing
In the pursuit of lower upfront costs, many organizations inadvertently source low-quality, often imported, hardware. These components can suffer from inconsistent manufacturing, inferior materials (like brittle plastic or soft metal), and a lack of stringent quality control. Such an anchor may look identical to a high-quality counterpart, but it will lack the durability and reliability needed for a professional environment. This is a core reason why at Maden.co, we are dedicated to connecting businesses with a vast catalog of U.S.-manufactured products. Sourcing domestically from our network of over 800 verified American manufacturers provides a level of quality assurance and material transparency that is essential for critical applications. Our mission is to democratize access to these superior components, making it easier than ever to build a resilient and reliable supply chain. You can learn more about our mission to champion American manufacturing here.
A Step-by-Step Guide to a Professional Drywall Anchor Repair
Once you've identified the likely cause of failure, you can proceed with the repair. The method will vary slightly depending on the extent of the damage to the drywall.
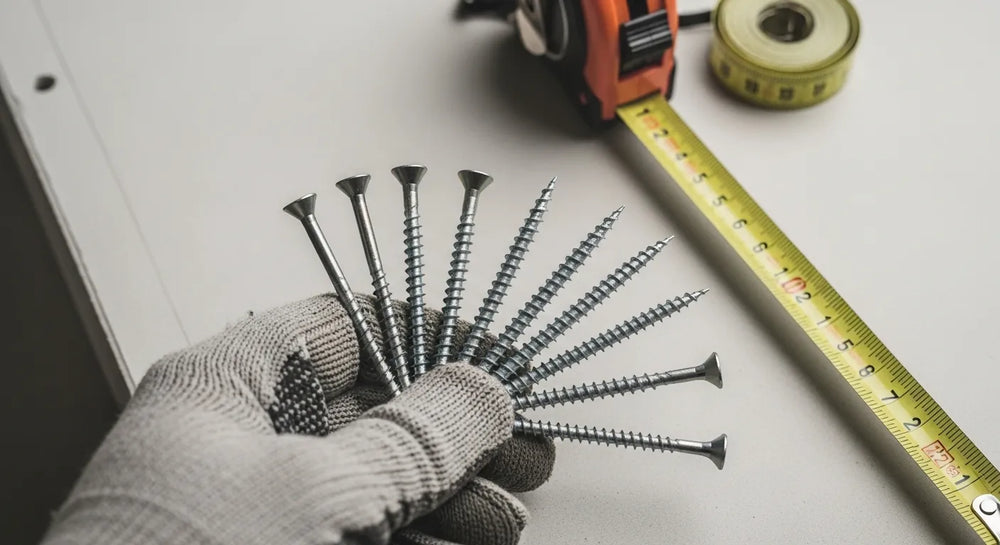
Step 1: Gather Your Tools and Materials
Having the right tools on hand makes the job faster, safer, and more professional. Before you begin, assemble the following:
- Safety Glasses: Always protect your eyes from dust and debris.
- Screwdriver or Drill: To remove the old screw and install the new one.
- Pliers: Needle-nose pliers are useful for removing the old anchor.
- Utility Knife: For cleaning up the edges of the damaged hole.
- Spackling Compound or Joint Compound: For filling the hole. For faster repairs, a quick-drying spackle is ideal.
- Putty Knife: A flexible 1-inch or 2-inch knife is perfect for applying spackle.
- Sandpaper: A small piece of fine-grit sandpaper (120-220 grit) for a smooth finish.
- Primer and Paint: To match the existing wall color for a seamless repair.
- A New, High-Quality Drywall Anchor: This is the most critical component. Select an anchor appropriate for the weight of the object you intend to hang.
Step 2: Remove the Old Anchor and Prepare the Hole
Carefully remove the screw from the failed anchor. Then, using pliers, gently pull the anchor out of the wall. If it breaks or won't come out easily, you can often push it through into the wall cavity. Don't worry about leaving it behind the wall.
Next, use your utility knife to clean up the hole. Trim away any loose paper or crumbled bits of drywall, creating a clean, stable edge. This ensures the spackling compound will adhere properly. Wipe away any dust with a clean cloth.
Step 3: Repairing the Wall Damage
The goal of this step is to create a solid, new surface for your replacement anchor.
For Minor Damage (Slightly Enlarged Hole)
If the hole is only slightly larger than the original anchor, you might be able to use a slightly larger anchor to get a snug fit. However, the best practice is always to fill the hole and start fresh.
- Apply Spackle: Using your putty knife, press the spackling compound firmly into the hole. Apply enough pressure to ensure the hole is completely filled. It’s better to slightly overfill the hole, as the compound will shrink a bit as it dries.
- Smooth the Surface: Scrape the putty knife across the patch to create a smooth, flat surface that is flush with the wall.
- Dry and Sand: Allow the spackle to dry completely, following the manufacturer's recommended time. Once dry, lightly sand the area until it is perfectly smooth and level with the surrounding wall.
- Prime and Paint: For a professional finish, apply a coat of primer to the patched area, followed by a coat of paint to match the wall.
For Major Damage (Large Hole or Crumbled Drywall)
If the anchor pulled out a significant chunk of drywall, a simple spackle fill won't be strong enough. You may need to use a drywall patch.
- Create a Clean Area: Use your utility knife to cut a clean square or rectangle around the damaged area.
- Apply a Patch: Use a self-adhesive mesh drywall patch or a "California patch" (a piece of new drywall) to cover the hole.
- Apply Joint Compound: Apply thin layers of joint compound over the patch, feathering the edges outward with each coat to blend it into the wall. You will likely need two to three coats, with drying and light sanding between each.
- Finish: Once the final coat is dry and sanded smooth, prime and paint the area.
Step 4: Installing the New Anchor for Maximum Hold
This is where your repair culminates. A perfectly patched wall is useless if you install another inadequate anchor.
- Choose a New Location (Recommended): Whenever possible, install the new anchor at least a few inches away from the repaired spot. The patched area, while strong, may not have the same structural integrity as the original, untouched drywall.
- Drill a New Pilot Hole: If you must use the same spot, ensure your patch is fully cured (wait at least 24 hours). Select the correct drill bit size for your new anchor—this information is always included in the product specifications. Drill a clean, straight hole.
- Install the New Anchor: Follow the specific instructions for your chosen anchor. This is not the time to rush. Ensure it is seated flush and securely against the wall. For example, a quality nylon anchor should tap in snugly and not spin.
- Hang Your Item: Drive the screw into the anchor until it feels snug. You should feel it tighten firmly. Do not over-torque.
Prevention is the Best Fix: Selecting the Right American-Made Anchor
The most effective way to fix a failed drywall anchor is to prevent the failure in the first place. This requires a strategic shift in procurement—from focusing solely on upfront cost to prioritizing quality, performance, and Total Cost of Ownership. A failed anchor that costs pennies can lead to hours of labor for repairs, potential damage to expensive equipment, and safety risks.
At Maden.co, our vision is to be the definitive platform that proves American-made components are as accessible and convenient as any global alternative. We are driving the manufacturing revival with our core values of American Manufacturing Pride, Digital Innovation, and Supply Chain Transparency. When you source from our marketplace, you're not just buying a part; you're investing in reliability.
Let's explore some high-quality anchor options and their ideal applications:
For Light-Duty General Use: Ribbed Plastic Anchors
These are the workhorses for many light-duty applications like hanging clocks, small pictures, or smoke detectors. The ribs are designed to prevent the anchor from spinning in the hole as the screw is driven in, providing a more secure grip than smooth-sided anchors.
Pro-Tip: When installing these, ensure the pilot hole is the exact right size. A snug fit is crucial for the ribs to engage effectively with the drywall. A high-quality, USA-made option like this Ribbed Plastic Anchor is manufactured with consistent tolerances and durable plastic that resists cracking during installation.
For Efficient Medium-Duty Installation: Self-Drilling Anchors
For a maintenance team under pressure, efficiency is key. Self-drilling anchors are a game-changer. They feature a sharp, aggressive tip that bores its own hole into the drywall, eliminating the need for pre-drilling. This saves a significant amount of time, especially on projects requiring dozens of anchor points. They offer substantially more holding power than standard ribbed anchors, making them suitable for shelving, curtain rods, and heavier wall decor.
For a procurement manager looking to equip their team for speed and reliability, stocking a U.S.-made anchor like the Medium Duty Nylon Wall Anchor #6 Self-Drilling Drywall Zip-It® is a strategic move. Its robust nylon construction provides excellent strength and durability, reducing the likelihood of callbacks for failed fixtures.
For Versatile Medium-Duty Applications: Nylon Wall Anchors
High-quality nylon anchors offer a superb balance of strength, flexibility, and durability. Unlike brittle plastics, nylon can conform slightly to imperfections in the drywall and is less likely to crack under stress or over time. These are excellent choices for mounting everything from bathroom fixtures and mirrors to small cabinets and equipment brackets.
The Medium Duty Nylon Wall Anchor #8 for Drywall is a prime example of a component engineered for industrial excellence. Sourced from a verified U.S. manufacturer on our platform, it provides the predictable performance and material quality that professionals demand. This isn't just a fastener; it's a small piece of a much larger strategy to ensure facility integrity and operational continuity.
The Strategic Advantage of Sourcing Through Maden.co
For the procurement manager under pressure to source a specific DIN-compliant fastener, a design engineer needing material certifications for a prototype, or an MRO buyer facing an unexpected equipment breakdown, the ability to quickly find and finance a verified, U.S.-made part is a game-changer. Our platform is built to eliminate procurement friction and empower American businesses.
We understand that managing cash flow is critical. That's why we offer a strategic tool to help. For larger MRO supply orders or capital-intensive projects, you can use our Instant Financing option during the checkout process. This allows you to secure the high-quality components you need to prevent failures without disrupting your budget. You can apply for Instant Financing at checkout to streamline your capital-intensive projects.
Our commitment extends to the manufacturers who are the backbone of our economy. By providing a modern, digital marketplace, we empower them to reach a wider audience of industrial buyers. Are you a U.S. manufacturer looking to grow your business? Register as a vendor and join the American manufacturing revival. If you have specific sourcing questions or need help finding a hard-to-source component, our team is ready to help.
Conclusion: Build, Repair, and Procure with Confidence
Fixing a failed drywall anchor is more than just a simple repair; it's an opportunity to upgrade your standards and improve your operational resilience. The process is straightforward: properly remove the old hardware, meticulously repair the wall surface to create a solid foundation, and, most critically, install a new, high-quality anchor that is correctly rated for the intended load.
The key takeaway is that the most enduring fix is prevention. This starts with a conscious decision to move away from sourcing cheap, unreliable components and toward building a supply chain founded on quality and trust. By choosing American-made fasteners from verified manufacturers, you are not just ensuring a secure hold; you are investing in safety, reducing future maintenance costs, and supporting the domestic industrial base.
Explore the extensive Maden.co catalog today to find the reliable, U.S.-made anchors and fasteners your projects demand. Equip your team with components you can trust and build with the confidence that comes from using the best.
Frequently Asked Questions (FAQ)
1. Can I reuse the same hole for a new drywall anchor? Generally, it is not recommended. The original hole has been compromised, and the surrounding drywall is weakened. The most reliable and professional repair involves filling the old hole completely with spackling compound, letting it cure, and then drilling a new pilot hole for the new anchor, ideally a few inches away from the original spot.
2. What is the most common mistake when installing a drywall anchor? The most frequent error is a mismatch between the anchor type and the weight of the object being hung. Using a light-duty anchor for a medium- or heavy-duty application is the primary cause of failures. It is essential to always check the weight capacity specifications of the anchor, which are provided on the packaging or on the product detail page, and compare it to the weight of your item.
3. How do I know the weight capacity of a specific anchor? The load capacity is a critical piece of technical data determined by the manufacturer through testing. This information should always be available on the product's packaging or its online specification sheet. On Maden.co, we ensure that detailed technical specifications, including load ratings where applicable, are clearly listed to empower buyers to make informed decisions. Never "guess" the capacity.
4. Why should my business choose U.S.-made anchors for facility maintenance? Choosing U.S.-made anchors provides several strategic advantages. It ensures superior quality control and material traceability, leading to more reliable and consistent performance. This reduces the risk of failures, which in turn lowers the Total Cost of Ownership by minimizing labor for re-work and potential damage from falling fixtures. Furthermore, it supports domestic supply chains, ensuring greater availability and resilience against global disruptions.


