How to Properly Drill Screws into Concrete
Table of Contents
- Introduction
- The Foundation: Understanding Concrete and Fastener Selection
- Gearing Up: Essential Tools and Safety Equipment
- The 6-Step Professional Installation Process
- Avoiding Common Pitfalls and Troubleshooting
- Building Resilient Operations with American Manufacturing
- Conclusion
- Frequently Asked Questions
Introduction
A loose machine anchor on a factory floor, a wobbly support bracket in a warehouse, a structural connection that fails under load—these are not just minor inconveniences; they are significant safety risks and costly project failures. All too often, the root cause is a fastener that failed to properly grip the concrete base. While seemingly straightforward, the process of drilling and securing screws into concrete is a precise science where a single misstep can compromise the integrity of the entire installation. The difference between a connection that lasts for decades and one that fails prematurely lies in the details: the quality of the fastener, the choice of tools, and the adherence to a meticulous installation process.
This article is designed for the professionals who can’t afford failure—the MRO buyers, procurement managers, and design engineers who understand that structural reliability begins with the smallest components. We will move beyond basic instructions to provide an in-depth, professional-grade guide on how to drill and install concrete screws for a secure, lasting hold. We will cover the critical nuances of selecting the right American-made fastener, preparing the substrate, and executing a flawless installation. Our thesis is simple yet crucial: mastering the correct technique for anchoring into concrete is fundamental for operational safety and project longevity, and it all starts with sourcing high-quality, domestically manufactured components from a trusted B2B marketplace like Maden.co.
The Foundation: Understanding Concrete and Fastener Selection
Before a single hole is drilled, it's essential to understand the material you're working with and the fastener designed to conquer it. Concrete is a composite material, incredibly strong under compression but relatively weak under tension. This characteristic dictates why specific anchoring methods are required. Unlike wood or metal, you cannot simply drive a standard screw into concrete and expect it to hold.
The Science Behind Concrete Screws
Concrete screws, often known by brand names like Tapcon®, are a marvel of industrial engineering. They are specifically designed to tap—or cut—their own threads directly into concrete, brick, or block. This is achieved through a combination of specialized thread design and hardened steel construction.
- Hardened Steel Body: The screw must be harder than the material it's penetrating to effectively cut threads without deforming or breaking.
- High-Low Thread Pattern: Many concrete screws feature a patented thread design with alternating high and low threads. This allows the screw to cut into the material while providing space for displaced dust and debris, resulting in a more secure grip and easier installation.
- Corrosion-Resistant Coatings: Given the environments where concrete anchors are used—from damp basements to exterior facades—a protective coating is non-negotiable.
The reliability of these features is directly tied to the quality of manufacturing. This is a core reason we are committed to American manufacturing. Sourcing from our network of over 800 verified U.S. manufacturers ensures that the fasteners you procure meet stringent quality control standards, providing confidence that the material specifications and performance ratings are accurate and dependable. Our mission is to democratize access to these high-quality components, proving that sourcing American-made is both a strategic and convenient choice.
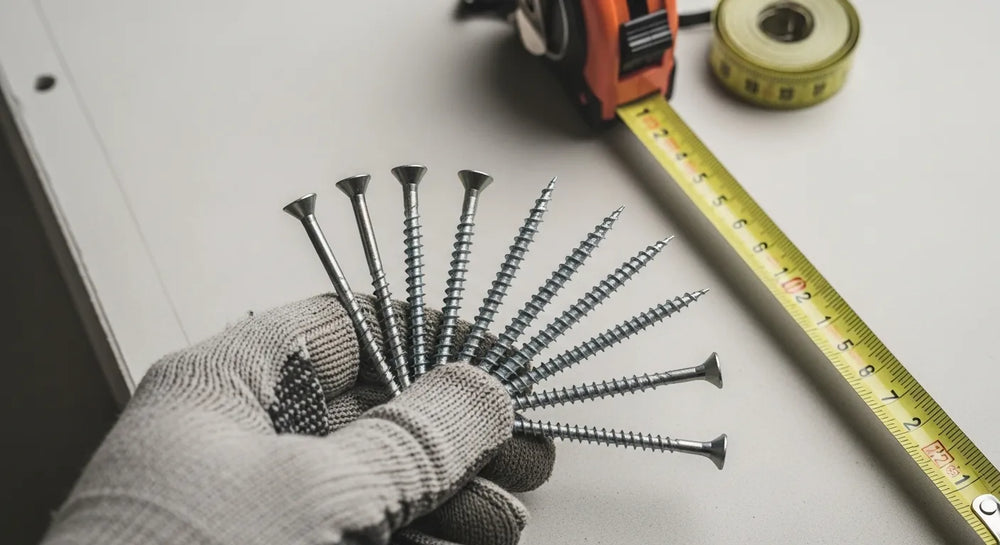
Choosing the Right Screw for the Job
Not all concrete screws are created equal. The selection process must account for the load requirements, the fixture being attached, and the surrounding environment.
Head Style
- Hex Head: This is the most common style, offering excellent driving torque with a standard socket wrench or impact driver. They are ideal for applications where the head will remain exposed, such as mounting machinery, racking, or support brackets. For general-purpose applications requiring a strong, reliable hold, a fastener like these U.S.-made Hex Head Concrete Screws is a versatile and dependable choice.
- Flat Head (Countersunk): When a flush finish is required for aesthetic reasons or to prevent a trip hazard, a flat head screw is the solution. These are commonly used for securing door frames, window sills, and metal tracks to concrete floors. For an MRO buyer needing to install floor plates or thresholds where a smooth surface is critical, sourcing high-quality, American-made 1/4" x 2-3/4" Flat Head Concrete Screws ensures both a secure fit and a safe, professional finish.
Material and Coating
- Carbon Steel: The standard for most indoor, dry applications. These screws are heat-treated for maximum hardness.
- Stainless Steel: For applications in corrosive environments, such as chemical plants, coastal areas, or food processing facilities, stainless steel offers superior rust resistance.
- Specialized Coatings: For a balance of strength and corrosion resistance, advanced coatings are often the best solution. Coatings like Blue Ruspert provide a multi-layer barrier against moisture and chemicals, offering thousands of hours of salt spray resistance. For a design engineer specifying fasteners for an outdoor installation or a water treatment facility, a product like the Steel Blue Ruspert Ceramic Coating Flat Phillips® Drive Concrete Screw is a superior choice, providing the longevity and reliability demanded by harsh environments.
Selecting the correct fastener is the first step in mitigating risk. By leveraging a platform dedicated to supply chain transparency, you can easily access the detailed specifications, material certifications, and performance data needed to make an informed procurement decision.
Gearing Up: Essential Tools and Safety Equipment
Using the wrong tools to install a concrete screw is like using the wrong tool for any precision task—it leads to poor results, wasted materials, and potential safety hazards. Assembling the correct toolkit is non-negotiable for a professional installation.
The Power Trio: Drill, Bit, and Driver
-
The Drill: Hammer Drill or Rotary Hammer: A standard rotary drill will not suffice. The rotational force needs to be combined with a percussive (hammering) action to efficiently pulverize the concrete and clear debris.
- Hammer Drill: Uses a mechanical clutch system to create a rapid, high-frequency hammering action. It's excellent for drilling smaller diameter holes (typically up to 1/2 inch) in brick, block, and light-duty concrete.
- Rotary Hammer: Employs a more powerful electro-pneumatic piston mechanism to create a slower, harder-hitting impact. This is the required tool for drilling larger diameter holes or for working with dense, high-strength concrete. It makes the work significantly faster and puts less strain on the operator.
-
The Drill Bit: Carbide-Tipped Masonry Bit: The drill bit must be specifically designed for masonry. These bits feature a hardened carbide tip that can withstand the abrasive nature of concrete. Crucially, you must use the exact diameter bit specified by the screw manufacturer. An ANSI-compliant bit ensures the diameter tolerance is correct for the screw you are using. Using a bit that is even 1/64" too large will result in a failed connection.
-
The Driver: Impact Driver or Torque Wrench: While a screw can be driven with a standard socket wrench, an impact driver greatly speeds up the process. However, for critical applications where precise clamping force is required, a torque wrench is essential to avoid over-tightening.
Personal Protective Equipment (PPE)
Drilling concrete creates crystalline silica dust, a known carcinogen, and sends sharp debris flying. Safety is paramount.
- Eye Protection: ANSI-rated safety glasses or goggles are mandatory.
- Respiratory Protection: A P95 or N95-rated dust mask or respirator is critical to prevent inhalation of harmful silica dust.
- Hearing Protection: Hammer drills and rotary hammers operate at high decibel levels, requiring earplugs or earmuffs.
- Gloves: Heavy-duty work gloves protect hands from abrasion and sharp edges.
Ancillary Tools for a Professional Job
- Hole Cleaning Tools: A wire brush and a source of compressed air or a high-powered shop vacuum are not optional—they are essential for proper installation.
- Measuring and Marking: A tape measure and a permanent marker or carpenter's pencil ensure accurate placement.
- Drill Depth Stop: Most professional drills come with an adjustable depth rod. If not, a piece of tape wrapped around the bit can serve as a visual guide.
At Maden.co, we champion the value of industrial excellence. This means not only providing access to superior components but also empowering our customers with the knowledge to use them correctly. A high-quality American-made fastener deserves a professional installation process.
The 6-Step Professional Installation Process
With the right fastener selected and the proper tools at hand, you can now proceed with the installation. Follow these steps meticulously to ensure maximum holding power and a secure connection every time.
Step 1: Precisely Mark Your Location
Accuracy starts here. Use your tape measure and marker to pinpoint the exact location for the screw. Pay close attention to two critical factors:
- Edge Distance: The distance from the center of the hole to the nearest unsupported edge of the concrete. As a general rule, this should be at least 10 times the diameter of the fastener to prevent the concrete from spalling or breaking out.
- Spacing: The distance between adjacent fasteners. To achieve full load capacity for each screw, maintain a spacing of at least 10-15 fastener diameters. Consult the manufacturer's technical data sheet for specific recommendations for your chosen screw.
Step 2: Select the Correct Drill Bit Diameter
This is a critical point of failure for many installations. Refer to the packaging or technical specifications for the concrete screw you are using. It will explicitly state the required bit diameter. For a 1/4" diameter concrete screw, you will typically use a 3/16" diameter bit. For a 3/16" screw, you'll use a 5/32" bit. The hole must be smaller than the screw to allow the threads to bite into the concrete.
Step 3: Set the Correct Drilling Depth
The pilot hole must be deeper than the intended screw embedment. This provides a space for any residual dust and debris to settle without preventing the screw from reaching its full depth. A good rule of thumb is to drill the hole at least 1/2" to 1" deeper than the screw will penetrate the concrete.
Calculation: (Fixture Thickness) + (Minimum Screw Embedment) + (1/2" Extra Depth) = Total Drilling Depth
Set the depth stop on your drill or wrap a piece of electrical tape around your drill bit at the measured depth to serve as a clear visual indicator. Minimum embedment is typically 1", with a maximum of 1-3/4". Deeper embedment does not necessarily increase pull-out strength and can make installation more difficult.
Step 4: Drill the Pilot Hole
Ensure your drill is set to the "hammer" function. Hold the drill perfectly perpendicular (90 degrees) to the concrete surface. Applying firm, steady pressure, begin drilling. Let the tool do the work; do not force it. Drill until you reach your pre-set depth stop or tape marker. Periodically retract the bit slightly while drilling to help clear dust from the flutes.
Step 5: Clean the Hole—The Most Critical Step
This is the single most overlooked step in the installation process, and it is the most common cause of anchor failure. A hole filled with concrete dust prevents the screw's threads from making full, solid contact with the base material. This can reduce the fastener's ultimate holding power by 50% or more.
Follow this two-part cleaning process:
- Blow: Using oil-free compressed air or a shop vacuum, thoroughly clear all dust and debris from the hole.
- Brush: Use a properly sized wire brush to scrub the inside walls of the hole. This dislodges any remaining compacted dust.
- Blow Again: Repeat the blowing/vacuuming process to remove the dust loosened by the brush.
For critical applications, repeat this cycle until no more dust emerges from the hole. A clean hole is the key to a strong connection.
Step 6: Drive the Screw
Position your fixture over the clean pilot hole. Insert the tip of the concrete screw and begin driving it with your impact driver or wrench. Drive the screw steadily and continuously until the head is seated firmly against the fixture.
Warning: Do not over-tighten. The goal is to have the screw snug and secure. Over-torquing can strip the threads you just cut into the concrete or, in a worst-case scenario, shear the head off the screw. If using a torque wrench, tighten to the manufacturer's specified torque value.
Avoiding Common Pitfalls and Troubleshooting
Even with the best instructions, issues can arise. Understanding common mistakes helps prevent them, and knowing how to troubleshoot saves time and frustration.
Common Installation Mistakes
- Using a Regular Drill: A non-hammer drill will barely scratch the surface of cured concrete and will burn out the motor.
- Incorrect Hole Size: A hole that is too large means the screw will spin and never tighten. A hole that is too small will prevent the screw from entering or cause it to snap under the high torque required to drive it.
- Drilling Too Shallow: The screw will bottom out before the head is flush with the fixture, leaving the connection loose.
- Ignoring Hole Cleaning: As detailed above, this drastically compromises the fastener's performance and is a sign of unprofessional work.
- Drilling into Rebar: If you hit something that stops the drill's progress completely, you've likely hit steel rebar. Do not try to force it. Relocate your hole at least a few inches away.
Troubleshooting Guide
- Screw spins but won't tighten: The hole was likely drilled too large, or the threads have been stripped by over-torquing. You must abandon the hole, drill a new one, or use a larger diameter screw.
- Screw is extremely difficult to drive or stops: The pilot hole may be too small, too shallow, or not cleaned properly. Remove the screw, verify the bit size, re-drill to the correct depth, and meticulously clean the hole before trying again.
- The head of the screw snaps off: This is almost always caused by over-torquing or a pilot hole that is too small, putting immense stress on the fastener.
For professionals whose reputations depend on the quality of their work, avoiding these issues is key. This is where partnering with a reliable supplier makes a tangible difference. When you source through our marketplace, you’re not just buying a product; you’re investing in the assurance that comes with verified, high-quality, American-made components. If you have specific sourcing questions for a hard-to-find component, our team is ready to help.
Building Resilient Operations with American Manufacturing
In today's complex industrial landscape, procurement decisions extend beyond simple unit cost. The total cost of ownership (TCO) and supply chain resilience are paramount. A failed fastener leads to rework, project delays, and potential liability—all of which carry significant costs. Sourcing dependable, domestically manufactured concrete screws reduces this risk.
This philosophy is the bedrock of our business. We built Maden.co to be the definitive platform that proves American-made components are as accessible and convenient as any global alternative. Our commitment is to fueling America's manufacturing revival by connecting industrial buyers directly with the source. You can learn more about our mission to champion American manufacturing here.
For U.S. manufacturers producing high-quality fasteners and industrial components, partnering with us is a direct path to reaching engaged professional buyers who value quality and reliability. Are you a U.S. manufacturer? Register as a vendor and join the American manufacturing revival.
Conclusion
Drilling and setting a screw in concrete is a task that demands precision, the right tools, and high-quality materials. From understanding the substrate to the final turn of the wrench, each step is integral to creating a secure and lasting connection. By following the professional-grade process outlined above—Select, Drill, Clean, and Drive—you can ensure the structural integrity and safety of every anchor you install.
The most fundamental decision, however, is made long before you step onto the job site. It’s the choice to invest in quality. By choosing verified, U.S.-made fasteners, you are not just buying a screw; you are procuring peace of mind, reducing your project's total cost of ownership, and contributing to a more resilient domestic supply chain.
When your next project demands an uncompromising connection to concrete, explore our extensive catalog of American-made fasteners. Find the exact hex head, flat head, or coated concrete screws you need and empower your business with the strength and reliability of American manufacturing. To help manage cash flow for larger projects, you can apply for Instant Financing at checkout to streamline your capital-intensive projects.
Frequently Asked Questions
1. Can I reuse a concrete screw? It is strongly recommended not to reuse concrete screws. The screw's specialized threads are designed to cut into the concrete one time. Removing and re-installing it, even in the same hole, can damage the threads and significantly reduce its holding power, leading to a potentially unsafe connection.
2. What is the main difference between a hammer drill and a rotary hammer? The primary difference lies in their mechanism and power. A hammer drill uses a mechanical clutch to create a high-speed, vibrating percussion action, which is suitable for smaller holes in lighter materials like brick or block. A rotary hammer uses a more powerful piston mechanism (like a small jackhammer) to deliver a slower, harder-hitting impact, making it far more effective for drilling larger holes in dense, cured concrete.
3. How deep should a concrete screw be embedded into the concrete? Always follow the manufacturer's technical data sheet for specific embedment depths. As a general guideline, the minimum embedment depth for a concrete screw is 1 inch, and the maximum is typically 1-3/4 inches. Embedding the screw deeper than the recommended maximum does not increase its pull-out strength and can make it more difficult to install correctly.
4. Why is cleaning the drilled hole so important for concrete screws? Cleaning the hole is arguably the most critical step for ensuring the screw's rated holding power. When you drill, you pulverize the concrete, creating a significant amount of fine dust. If this dust is left in the hole, it acts as a barrier between the screw's threads and the solid concrete base material. This prevents the threads from fully engaging and cutting into the concrete, which can reduce the fastener's pull-out strength by 50% or more.


