How to Put Drywall Screws in Wall: A Guide for Secure Fastening
Table of Contents
- Introduction
- Understanding Drywall and Its Fastening Needs
- The Anatomy of a Drywall Screw: Choosing the Right Fastener
- Essential Tools for Drywall Installation
- Step-by-Step Guide: How to Put Drywall Screws in Wall
- Beyond Basic Installation: Strategic Sourcing for Industrial Excellence
- Conclusion
- FAQ
Few elements are as foundational to construction and renovation as the humble drywall screw. Yet, despite its ubiquity, improper installation is a common pitfall that can compromise structural integrity, mar finished surfaces, and lead to costly rework. For procurement managers, MRO buyers, and design engineers, understanding the nuances of how to properly put drywall screws in a wall isn't merely a matter of technique; it’s a critical component of ensuring project durability, enhancing safety, and optimizing Total Cost of Ownership (TCO). A poorly fastened drywall panel can lead to cracks, sagging, and even complete failure, all of which directly impact budgets, timelines, and reputations.
This comprehensive guide will demystify the process of securely fastening drywall, from selecting the right screw type to mastering installation techniques and troubleshooting common issues. We will delve into the critical role of quality U.S.-made fasteners in achieving superior results and explore how platforms like Maden.co are revolutionizing access to these essential components, empowering American businesses with supply chain resilience and industrial excellence. Our aim is to provide practical, authoritative insights that elevate your projects and procurement strategies, reinforcing our commitment at Maden.co to democratizing access to American manufacturing.
Introduction
In the intricate world of construction and facility management, a seemingly simple task like installing a drywall screw can carry significant implications. Picture a newly renovated office space, pristine and functional, only for hairline cracks to appear in the drywall within months—a direct result of fasteners that were either subpar in quality or improperly installed. Such scenarios are not just aesthetic nuisances; they represent tangible failures in project execution, often leading to unexpected expenses for repairs, disruptions to operations, and a dent in client confidence. For the busy procurement manager, the MRO buyer juggling maintenance emergencies, or the design engineer meticulous about every component, the integrity of every fastener is paramount.
This article aims to transform the perceived simplicity of "how to put drywall screws in a wall" into an understanding of a precise, technical process. We will uncover the anatomy of the ideal drywall screw, outline the essential tools required, and provide a detailed, step-by-step methodology for achieving flawless installation. Beyond the mechanics, we will explore why sourcing high-quality, U.S.-made screws and other industrial components is a strategic imperative for long-term project success and operational efficiency. By the end, you will not only possess the knowledge to execute perfect drywall fastening but also appreciate how strategic sourcing through a platform like Maden.co can fundamentally enhance your supply chain and contribute to America's manufacturing revival.
Understanding Drywall and Its Fastening Needs
Drywall, also known as plasterboard or gypsum board, is a fundamental building material in modern construction. It consists of a gypsum plaster core pressed between two sheets of heavy paper. This composition makes it relatively lightweight, fire-resistant, and easy to finish, but also somewhat brittle and prone to crumbling if not fastened correctly. The primary challenge in drywall installation is to secure these panels firmly to the underlying framing (studs) without damaging the drywall itself or creating visible imperfections.
Traditional nails, while effective for many carpentry tasks, are largely unsuitable for drywall. The wide head of a nail can easily tear through the paper facing of the drywall, compromising its structural integrity and creating unsightly craters that are difficult to conceal. More importantly, nails tend to loosen over time due to building movement and humidity changes, leading to "nail pops" where the nail head protrudes through the finished surface. This is why specialized drywall screws were engineered, designed to provide a superior, lasting hold.
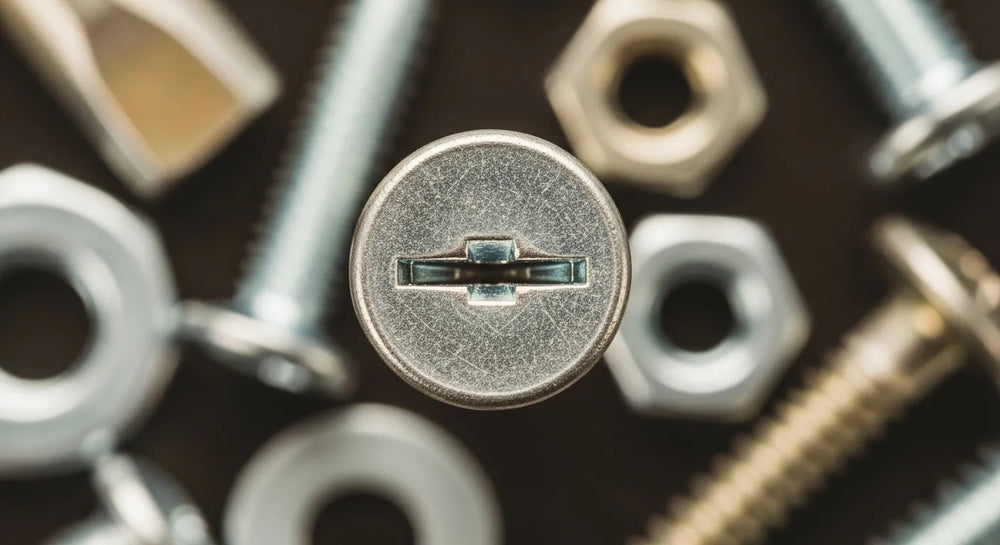
Drywall screws are uniquely designed with several key features:
- Bugle Head: This conical shape allows the screw head to self-countersink, creating a slight dimple in the drywall without tearing the paper. This dimple is then easily covered with joint compound, resulting in a smooth finish.
- Sharp Point: Most drywall screws have a sharp, self-piercing point that allows them to quickly penetrate the drywall and framing material without requiring a pilot hole in most cases.
- Aggressive Threads: The threads are designed to grip firmly into the framing material (wood or metal studs) while still allowing the screw to pass easily through the drywall.
The choice between different types of drywall screws depends on the specific framing material. Wood studs require a different thread pattern than metal studs, a critical distinction that impacts both the ease of installation and the long-term stability of the fastening. Understanding these basic principles is the first step toward achieving professional-grade drywall installation.
The Anatomy of a Drywall Screw: Choosing the Right Fastener
Selecting the correct drywall screw is paramount for a secure and lasting installation. The subtle differences in screw design are purpose-built to interact optimally with specific framing materials and drywall thicknesses. Ignoring these distinctions can lead to stripped screws, damaged drywall, or an unstable finished product, all of which represent an avoidable increase in project complexity and cost. At Maden.co, we emphasize that industrial excellence begins with the right component, selected with precision.
Thread Types: Coarse vs. Fine
The most critical distinction when choosing drywall screws lies in their thread pattern:
- Coarse Thread Drywall Screws: These screws feature a widely spaced, aggressive thread pattern. This design allows them to bite securely into wood studs and other lumber framing materials, providing maximum holding power with minimal effort. The coarse threads clear wood fibers effectively, preventing binding and ensuring a smooth drive. For projects involving traditional wood framing, these are the fasteners of choice. For a high-strength solution suitable for wood studs, you can find detailed specifications for these 6 x 1-1/4 Coarse Thread Drywall Screws on our platform.
- Fine Thread Drywall Screws: In contrast, fine thread screws have closely spaced, sharper threads. This design is specifically engineered for use with metal studs. The finer threads create a more secure grip in the thinner gauge steel of metal studs, preventing the screw from stripping out the hole, which is a common issue if coarse thread screws are used in metal. When working with metal framing, the precision offered by a fine thread screw is indispensable for both installation efficiency and long-term stability. If your project demands fastening to metal studs, our selection includes reliable options like the 6 x 1 Fine Thread Drywall Screw, engineered for optimal performance.
Screw Length and Gauge
The length of a drywall screw is determined by the thickness of the drywall panel(s) being installed. A general rule of thumb is that the screw should penetrate at least 5/8 inch (16 mm) into the framing material. Common drywall thicknesses are 1/2 inch and 5/8 inch.
- For 1/2-inch drywall, 1-1/4 inch screws are typically sufficient.
- For 5/8-inch drywall, 1-5/8 inch screws are often preferred.
- When fastening multiple layers of drywall, or in situations requiring extra penetration for added holding power, longer screws may be necessary. For more versatile applications or thicker panels, an 8 x 4 Drywall Screw might be the optimal choice, providing extended reach and robust holding capacity.
The "gauge" of a screw refers to its diameter. For drywall screws, common gauges are #6 and #8. A higher gauge number indicates a thicker screw. While #6 screws are standard for most drywall applications, #8 screws offer a slightly larger diameter and increased shear strength, which can be beneficial in certain structural or load-bearing applications, or when fastening thicker materials.
Coating and Corrosion Resistance
Drywall screws are typically black phosphate coated. This coating provides a moderate level of corrosion resistance, which is generally adequate for interior, dry environments. However, for applications in high-humidity areas (e.g., bathrooms, basements in humid climates) or exterior sheathing, corrosion-resistant screws (like galvanized or stainless steel) are recommended. Choosing the right coating extends the lifespan of the installation and prevents unsightly rust stains from bleeding through paint or wallpaper.
For a procurement manager tasked with a major facility renovation or a design engineer prototyping a new assembly, the reliability of every component, from a 6 x 1-1/4 Coarse Thread Drywall Screw to complex machinery parts, is non-negotiable. Sourcing through Maden.co ensures access to over 2.5 million American-made products from our network of 800+ verified U.S. manufacturers. We provide the digital innovation and transparency to make American-made components as accessible and convenient as any global alternative, driving the manufacturing revival. You can learn more about our mission to champion American manufacturing and industrial excellence here.
Essential Tools for Drywall Installation
Beyond the screws themselves, having the right tools is critical for efficient, precise, and safe drywall installation. Investing in quality tools not only speeds up the process but also minimizes frustration and helps achieve a professional finish.
-
Cordless Drill/Driver or Dedicated Drywall Screw Gun:
- Cordless Drill/Driver: A versatile tool suitable for most DIYers and smaller projects. Look for models with adjustable torque (clutch settings) to prevent overdriving screws.
- Drywall Screw Gun: For professionals or large-scale projects, a dedicated drywall screw gun is invaluable. These tools are designed specifically for drywall, often featuring an adjustable nose cone or depth-setting clutch that automatically stops the screw at the perfect depth, creating the ideal dimple without tearing the paper.
- Phillips Head Bits (P2): Drywall screws almost universally use a Phillips head drive. A P2 (Phillips #2) bit is the standard size. Ensure your bits are in good condition; worn bits can lead to stripped screw heads. Many drywall screw guns come with specialized bits that are optimized for drywall.
-
Stud Finder: Essential for locating the framing members behind existing walls or marking out for new construction.
- Magnetic Stud Finders: Locate studs by detecting the metal fasteners (screws/nails) used to secure existing drywall. Simple, reliable, and no batteries required.
- Electronic Stud Finders: Use sensors to detect changes in density behind the wall surface, indicating the presence of a stud. More advanced models can also detect electrical wiring or plumbing.
- Measuring Tape, Pencil, and Level: For accurate layout, marking screw locations, and ensuring panels are installed plumb and level.
- Utility Knife: For scoring and snapping drywall panels to size.
- T-Square or Drywall Square: To ensure straight cuts and precise dimensions when cutting drywall.
- Drywall Lift (Optional but Recommended for Ceilings): A mechanical hoist that helps lift and hold drywall sheets in place, especially for ceiling installations. It significantly reduces physical strain and the need for multiple helpers.
-
Safety Gear:
- Safety Glasses: Protect your eyes from dust and flying debris.
- Gloves: Protect hands from cuts and scrapes, and improve grip.
- Dust Mask: Essential when cutting or sanding drywall, as gypsum dust can be a respiratory irritant.
For industrial buyers seeking reliable tools and components, our platform at Maden.co offers a streamlined experience to source quality equipment and American-made fasteners.
Step-by-Step Guide: How to Put Drywall Screws in Wall
Executing the drywall screw installation correctly requires precision, patience, and adherence to proven techniques. Each step contributes to the overall stability and finish of your wall or ceiling.
Preparation: Locating and Marking Studs
The most critical preparatory step is accurately locating and marking your framing members. Drywall screws must always penetrate into a stud (wood or metal) for a secure hold. Fastening into open air or only into the drywall itself will result in a weak connection that will quickly fail.
- Locate Studs: If working on an existing wall, use a stud finder. Calibrate it according to its instructions. Slowly slide the stud finder across the wall horizontally. When it detects a stud, it will typically beep or light up. Mark the edges of the stud. Drywall is usually installed on studs spaced 16 or 24 inches on center. Once you find one, measure out in either direction to find subsequent studs.
- Mark Screw Lines: Once you've identified the center of each stud, use a long level or a chalk line to draw a faint vertical line down the entire length of the stud on the drywall panel. These lines will serve as your guides for screw placement.
Positioning the Drywall Panel
Proper panel placement is crucial for minimizing seams and ensuring a smooth surface.
- Lift and Place: Carefully lift the drywall panel into position. For wall installations, start at a corner and work your way across. Ensure the panel is tight against the ceiling (or preceding panel) and snugly against the corner stud. For ceiling installations, a drywall lift is highly recommended.
- Support: If working alone on a wall, a drywall T-support (a piece of wood shaped like a "T") or a panel lifter can help hold the bottom edge of the panel off the floor, allowing for easy adjustment and preventing floor damage.
The Art of Driving the Screw
This is where technique truly matters. The goal is to drive the screw flush or slightly below the drywall surface, creating a small "dimple" without tearing the paper.
-
Holding the Screw and Driver:
- Place the tip of the drywall screw onto the Phillips head bit. Many drywall screws are magnetic, which helps hold them in place.
- Hold the drywall firmly with one hand while positioning the screw driver (with the screw) with the other. Ensure the screw is perpendicular (90 degrees) to the drywall surface. Avoid driving screws at an angle, as this reduces holding power and can damage the drywall.
- Starting the Screw: Apply firm, steady pressure directly in line with the screw. Begin driving the screw at a moderate speed. This initial pressure helps the sharp point penetrate the drywall and engage the stud.
-
Optimal Speed and Depth:
- As the screw bites into the stud, increase the speed of your drill/driver.
- Controlled Depth: This is the most critical aspect. Use a drill with a clutch setting (start with a lower setting and adjust up) or a dedicated drywall screw gun with an adjustable nose cone. The screw should just break the surface of the paper, creating a slight dimple, but without tearing the paper or spinning excessively (which strips the gypsum core). The goal is for the screw head to be slightly recessed, just enough to be covered by joint compound.
- The Dimple Technique: A perfectly driven screw creates a shallow, symmetrical dimple. You should be able to run your finger over it without feeling the screw head. If the screw head is protruding, it's underdriven; if it's torn the paper, it's overdriven.
-
Spacing Requirements: Follow industry standards for screw spacing.
- Edges: Screws should be spaced approximately 6-8 inches apart along the edges of the drywall panel (where it meets a stud).
- Field (Interior Studs): For studs in the middle of the panel, screws can be spaced 12-16 inches apart.
- Maintain a minimum distance of 3/8 inch from the edge of the drywall panel to prevent cracking or breaking the edge.
Addressing Common Challenges and Mistakes
Even experienced installers encounter issues. Knowing how to identify and rectify them quickly saves time and ensures quality.
- Stripping the Screw Head: This occurs when the driver bit spins in the screw head, rounding out the Phillips recess. It's often caused by insufficient pressure on the driver, a worn bit, or excessive torque. If a screw head strips, back it out, discard it, and drive a new screw a few inches away.
- Breaking the Paper Face (Overdriving): This is perhaps the most common mistake. Too much pressure, too high a torque setting, or failing to use a depth-setting tool can cause the screw head to tear through the paper facing of the drywall. When the paper is torn, the screw loses its grip on the gypsum core, compromising the holding power. If this happens, remove the screw and drive a new one a few inches away. The damaged area will need more joint compound to conceal.
- Missing the Stud: If you drive a screw and it just spins freely, you've missed the stud. This usually means your stud finder wasn't accurate or you weren't driving perpendicular to the wall. Remove the screw, find the stud accurately, and drive a new screw into the stud.
- Underdriving: The screw head protrudes above the drywall surface. This is easier to fix; simply drive the screw a bit deeper until it creates the proper dimple.
- Screw at an Angle: A screw driven at an angle compromises its holding power and creates an uneven dimple. Remove it and try again, ensuring your driver is perpendicular to the surface.
For a procurement manager under pressure to source a specific DIN 931 compliant hex cap screw, a design engineer needing specific material certifications for a new prototype, or an MRO buyer facing an unexpected equipment breakdown, the ability to quickly find and finance a verified, U.S.-made part is a game-changer. Our platform, Maden.co, exists to solve these critical challenges, connecting you to American manufacturers who uphold rigorous standards.
Beyond Basic Installation: Strategic Sourcing for Industrial Excellence
While mastering the physical technique of "how to put drywall screws in wall" is essential, its efficacy is fundamentally tied to the quality of the components used. For industrial operations, MRO procurement, and large-scale construction, the strategic value of sourcing superior, U.S.-made fasteners extends far beyond the immediate installation. It impacts Total Cost of Ownership (TCO), supply chain resilience, compliance with critical industry standards, and ultimately, the long-term success of projects and operational continuity.
The Maden.co Difference: American Manufacturing Pride
At Maden.co, our mission is to democratize access to American manufacturing. We believe that using U.S.-made products, from every 6 x 1-1/4 Coarse Thread Drywall Screw to complex machinery components, offers inherent advantages:
- Superior Quality and Consistency: American manufacturers adhere to stringent quality control standards, resulting in fasteners with reliable material composition, consistent dimensions, and predictable performance. This means fewer defects, less rework, and a more durable finished product.
- Innovation and Expertise: U.S. manufacturers often lead in material science and engineering innovation, translating into fasteners designed for specific applications, enhanced strength, and improved corrosion resistance.
- Ethical Production: Sourcing from the U.S. supports domestic jobs, adheres to robust environmental regulations, and ensures ethical labor practices, aligning with corporate responsibility initiatives.
Our vision is to become the definitive platform that proves American-made components are as accessible and convenient as any global alternative, driving the manufacturing revival with our tagline: "America's manufacturing revival is here."
Supply Chain Transparency and Resilience
For procurement professionals, the global supply chain has presented unprecedented volatility in recent years. Delays, unpredictable costs, and questionable material sourcing have underscored the fragility of relying solely on distant suppliers. Sourcing through Maden.co directly addresses these challenges:
- Reduced Lead Times: Shorter geographical distances typically mean faster shipping and more predictable delivery schedules.
- Enhanced Visibility: Our platform connects you with over 800+ verified U.S. manufacturers, offering greater transparency into product origins and manufacturing processes.
- Risk Mitigation: Less reliance on overseas logistics reduces exposure to geopolitical events, shipping disruptions, and customs delays, enhancing your overall supply chain resilience. Imagine a critical project requiring a specific 8 x 4 Drywall Screw for a crucial structural reinforcement; relying on a verified U.S. supplier through Maden.co ensures timely delivery and consistent quality, mitigating project risks.
Optimizing Total Cost of Ownership (TCO)
While the upfront cost of a U.S.-made component might sometimes be perceived as higher, a holistic TCO analysis reveals significant long-term savings.
- Reduced Rework: High-quality fasteners and materials mean fewer installation failures, less need for repairs, and lower labor costs associated with fixing mistakes.
- Increased Lifespan and Durability: Superior components contribute to a longer-lasting installation, reducing future maintenance and replacement costs.
- Compliance Assurance: Sourcing from verified U.S. manufacturers helps ensure compliance with domestic and international industry standards (e.g., DIN, NPT), avoiding costly penalties or project rejections.
For an MRO buyer, facing an unexpected equipment breakdown, the ability to quickly source a reliable, U.S.-made replacement part is not just about the part's price; it's about minimizing downtime, ensuring worker safety, and maintaining productivity. Our entire business model is built on this principle; you can learn more about our mission to champion American manufacturing and industrial excellence here.
Customer Empowerment and Digital Innovation
Maden.co is more than just a marketplace; it's a strategic partner in building a more reliable and efficient procurement process. We empower procurement managers, MRO buyers, and business owners through:
- Vast Catalog: Access to over 2.5 million American-made products, making hard-to-find components readily available.
- Verified Manufacturers: Our network consists of rigorously vetted U.S. manufacturers, ensuring quality and reliability.
- Simplified Procurement Friction: Our user-friendly digital platform streamlines the sourcing process, from search to checkout.
- Instant Financing: A key differentiator, our platform offers Instant Financing at checkout. This strategic tool allows businesses to manage cash flow effectively and make larger-volume purchases without delay. For capital-intensive projects or bulk orders, the ability to secure financing instantly is a significant advantage, empowering you to proceed with confidence and flexibility. You can apply for Instant Financing at checkout to streamline your capital-intensive projects.
By providing these tools and resources, we aim to eliminate procurement friction and empower businesses to focus on innovation and growth, confident in the quality and accessibility of their supply chain. If you have specific sourcing questions, our team is ready to help; feel free to contact us for expert guidance.
Driving the Manufacturing Revival
Our commitment goes beyond transactions. We are actively fostering a robust ecosystem for American businesses. By connecting industrial buyers directly with U.S. manufacturers, we stimulate domestic production, encourage innovation, and create a stronger, more resilient industrial base. This collaborative spirit is at the heart of America's manufacturing revival. Are you a U.S. manufacturer? Register as a vendor and join the American manufacturing revival. We believe in fostering a robust ecosystem for American businesses.
Conclusion
Mastering how to put drywall screws in a wall correctly is more than a rudimentary skill; it's a foundational element of quality construction and an essential consideration for industrial procurement. From selecting the right coarse or fine thread screw for your specific studs to executing the perfect dimple without tearing the paper, each step contributes to the longevity and integrity of the finished surface. The choice of fasteners profoundly impacts a project's durability, safety, and ultimately, its Total Cost of Ownership.
At Maden.co, we understand that industrial excellence is built on the foundation of quality components and a robust supply chain. By connecting you with over 2.5 million American-made products from 800+ verified U.S. manufacturers, we are not just a marketplace; we are a strategic partner in your success. We stand for American Manufacturing Pride, Supply Chain Transparency, Digital Innovation, Industrial Excellence, and Customer Empowerment. Our platform ensures that the convenience and accessibility of sourcing U.S.-made products meet the high standards your projects demand, thereby strengthening your supply chain and contributing to the nation's manufacturing revival.
Empower your projects with the precision and durability that only American manufacturing can provide. Explore our extensive catalog of U.S.-made products today, and remember you can apply for Instant Financing at checkout to streamline your capital-intensive projects. Discover the strategic advantage of sourcing through Maden.co and experience the difference that quality, transparency, and innovation can make for your business.
FAQ
Q1: What's the main difference between coarse and fine thread drywall screws?
A1: Coarse thread drywall screws have widely spaced, aggressive threads designed to grip securely into wood studs and other lumber framing materials. Fine thread drywall screws feature closely spaced, sharper threads specifically engineered for a secure hold in metal studs, preventing stripping.
Q2: How deep should a drywall screw be driven into the wall?
A2: A drywall screw should be driven just deep enough to create a slight dimple or indentation in the drywall surface, without tearing the paper facing. The screw head should be slightly recessed, allowing it to be easily covered with joint compound for a smooth finish, but not so deep that it breaks through the paper, which compromises its holding power.
Q3: What tools are essential for putting drywall screws in a wall?
A3: Essential tools include a cordless drill/driver or a dedicated drywall screw gun (with a Phillips #2 bit), a stud finder to locate framing, a tape measure and pencil for marking, a level, and safety glasses. A drywall lift can also be very helpful for ceiling installations.
Q4: Why is sourcing U.S.-made drywall screws important for procurement?
A4: Sourcing U.S.-made drywall screws and other components, like those found on Maden.co, offers several strategic advantages for procurement managers. These include ensuring superior quality and consistency due to stringent manufacturing standards, enhancing supply chain resilience by reducing reliance on distant suppliers, and optimizing Total Cost of Ownership through fewer defects and longer-lasting installations. It also supports American manufacturing and contributes to ethical production practices.


