Mastering Drywall Screw Placement for Robust Industrial and Commercial Builds
Table of Contents
- Introduction
- The Foundation: Understanding Drywall and Its Fasteners
- Essential Tools and Preparations for Professional Drywall Installation
- The Art of Placement: Step-by-Step Guide to Driving Drywall Screws
- Common Pitfalls in Drywall Screw Placement and How to Avoid Them
- The Strategic Advantage of Quality Sourcing for Drywall Fasteners in B2B Environments
- Maden.co: Your Strategic Partner for American Manufacturing Excellence
- Conclusion
- Frequently Asked Questions (FAQ)
The integrity of any structure, whether a commercial office building, an industrial facility, or a multi-unit residential complex, often hinges on the quality and precision of its foundational elements. Among these, the seemingly simple act of attaching drywall is critical, influencing everything from acoustic performance to fire resistance ratings. For procurement managers, MRO buyers, and design engineers, ensuring that every component, down to the drywall screw, meets exacting standards is not merely about construction; it's about minimizing lifecycle costs, enhancing safety, and guaranteeing project longevity. A poorly placed or inferior screw can lead to costly rework, schedule delays, and compromised structural integrity.
At Maden.co, we understand that true industrial excellence begins with reliable components. Our mission is to democratize access to American manufacturing, providing unparalleled access to the very best U.S.-made products. This article will delve into the critical techniques and considerations for placing drywall screws effectively and efficiently, moving beyond basic DIY tips to address the meticulous demands of professional-grade construction and MRO applications. We'll explore the strategic importance of choosing the right fasteners, the proper installation methods, and how sourcing through a trusted platform can elevate your project outcomes. We aim to equip you with the knowledge to ensure every drywall installation is not just completed, but perfected, aligning with the standards of quality and resilience that drive America's manufacturing revival.
Introduction
In the demanding world of industrial construction, facility maintenance, and product design, precision is paramount. While the act of installing drywall might seem straightforward, the correct placement of drywall screws is a nuanced skill that directly impacts the durability, finish, and safety compliance of a structure. Stripped screw heads, cracked drywall, or fasteners that miss their mark are not just minor inconveniences; they represent significant hidden costs in labor, materials, and potential project delays. For a procurement manager under pressure to source specific, compliant fasteners, a design engineer needing materials with certified performance, or an MRO buyer facing an unexpected facility repair, the reliability of every component is non-negotiable. The challenge isn't just how to place drywall screws, but how to ensure that the entire fastening process supports the long-term operational integrity and cost-efficiency of the asset.
This comprehensive guide is crafted to provide a deep dive into the art and science of drywall screw placement. We will move beyond superficial instructions to cover everything from selecting the correct screw type for specific applications to mastering the techniques that prevent common errors. Our focus will extend to the broader implications for industrial and commercial projects, emphasizing the strategic value of quality, U.S.-made fasteners. By understanding these principles, you can significantly enhance project quality, reduce rework, and streamline your procurement processes. We believe that by championing American Manufacturing Pride and Digital Innovation, we can empower our customers to achieve Industrial Excellence, and this commitment begins with ensuring every component, including the humble drywall screw, meets the highest possible standards.
The Foundation: Understanding Drywall and Its Fasteners
Before diving into the mechanics of screw placement, it's essential to grasp the nature of the materials involved. Drywall, also known as plasterboard or gypsum board, is a panel made of gypsum plaster pressed between two sheets of thick paper. It's widely used for interior walls and ceilings due to its fire resistance, sound attenuation properties, and ease of installation compared to traditional plaster. However, its relatively brittle nature requires specific fastening techniques and specialized screws to prevent damage and ensure a secure hold.
Types of Drywall and Their Characteristics
Understanding the different types of drywall is crucial as it can influence screw selection and installation approach:
- Standard Drywall: The most common type, typically 1/2-inch or 5/8-inch thick, used for general interior applications.
- Moisture-Resistant Drywall (Green Board): Contains additives to resist moisture, suitable for bathrooms, kitchens, and utility rooms. While not waterproof, it offers enhanced protection against humidity.
- Fire-Resistant Drywall (Type X): Thicker, denser gypsum core fortified with glass fibers to improve fire resistance, often required in commercial buildings and multi-family dwellings to meet stringent fire codes.
- Soundproof Drywall: Laminated with gypsum layers and other materials to enhance acoustic dampening, ideal for office spaces, recording studios, or any area requiring noise control.
- Impact-Resistant Drywall: Features a denser core or fiberglass mesh for increased durability, often specified in high-traffic commercial areas.
Each type presents unique characteristics, but the core principle of fastening remains consistent: secure attachment to framing without compromising the board's integrity.
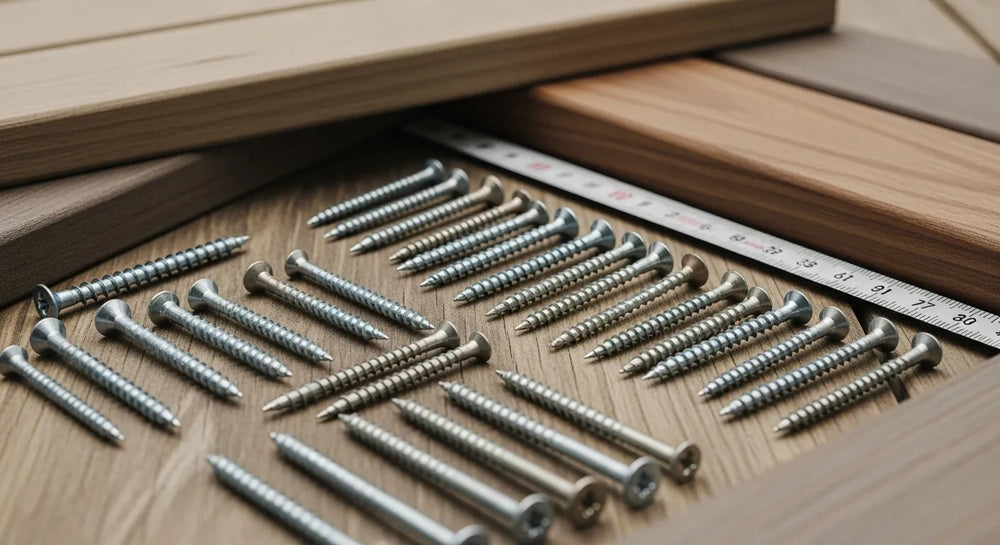
The Anatomy of a Drywall Screw
Drywall screws are purpose-built fasteners designed to penetrate gypsum board and wood or metal framing without pre-drilling. Their distinct features include:
- Bugle Head: This conical, trumpet-shaped head countersinks itself into the drywall paper without tearing it, creating a slight depression that can be easily filled with joint compound, ensuring a smooth finish. This design is critical for achieving a level surface after finishing.
- Sharp Point: Designed for quick penetration into drywall and framing materials, eliminating the need for pilot holes in most applications.
- Phosphate Coating: A common black phosphate coating helps prevent corrosion and allows joint compound to adhere better. Some screws also feature a zinc coating for enhanced corrosion resistance.
Choosing the Right Drywall Screw for the Job
The selection of the correct drywall screw is a critical decision, directly impacting the durability and integrity of the installation. This is where precision in procurement and attention to material specifications become paramount.
Thread Types: Coarse vs. Fine
The most significant distinction lies in the thread type:
- Coarse-Thread Drywall Screws: These screws feature widely spaced, aggressive threads that are ideal for gripping into wood studs and ceiling joists. The coarse threads prevent the screw from stripping out of softer wood fibers, providing a strong, reliable hold. They are the go-to choice for fastening drywall to wood framing. For projects requiring robust and reliable coarse-thread fasteners, you might consider options like the 6 x 1-1/4 Coarse Thread Drywall Screws available through our platform, ensuring they meet the stringent demands of professional installation.
- Fine-Thread Drywall Screws: With threads spaced more closely together, these screws are specifically designed for fastening drywall to light-gauge metal studs (typically 25-gauge or thinner). The finer threads create a more secure grip in the thinner metal, preventing stripping that can occur with coarse threads. Using a fine-thread screw for metal studs ensures a tight, long-lasting connection. For applications involving metal framing, the 6 x 1 Fine Thread Drywall Screw is an excellent example of a precision-engineered component designed for superior performance.
Length and Gauge Considerations
The length and gauge (diameter) of the drywall screw are equally important for proper engagement and structural integrity:
- Length: The screw must be long enough to penetrate through the drywall and into the framing material by at least 5/8 inch for wood and 3/8 inch for metal. Common lengths for single-layer drywall are 1-1/4 inch for 1/2-inch board on wood studs, and 1 inch for 1/2-inch board on metal studs. For thicker drywall or multiple layers, longer screws (e.g., 1-5/8 inch or 2-inch) are necessary. For instance, an 8 x 4 Drywall Screw would be suited for specific applications requiring greater penetration or fastening thicker materials, emphasizing the need for precise specification based on project needs.
- Gauge: While less varied than length, common gauges are #6 or #8. A higher gauge number indicates a thicker screw, offering greater shear strength and pull-out resistance, which can be critical in high-stress applications or for fastening heavier boards.
When sourcing, whether it's for an extensive commercial build or a critical MRO task, the ability to quickly and reliably access a diverse range of high-quality, U.S.-made drywall screws is paramount. Our platform, Maden.co, serves as a direct conduit to over 2.5 million American-made products from our network of 800+ verified U.S. manufacturers, ensuring that procurement managers can always find the precise fastener needed to meet project specifications and uphold the highest standards of Industrial Excellence.
Essential Tools and Preparations for Professional Drywall Installation
Beyond merely having the right screws, successful drywall installation demands the correct tools and meticulous preparation. These elements are crucial for efficiency, quality, and preventing costly errors in commercial and industrial settings.
Indispensable Tools for Drywall Screw Placement
-
Cordless Drill/Driver or Drywall Screw Gun:
- Cordless Drill/Driver: A powerful cordless drill with adjustable clutch settings is sufficient for most jobs. The clutch allows you to control the torque, preventing overdriving screws and stripping heads.
- Drywall Screw Gun (Dedicated): For large-scale projects, a dedicated drywall screw gun is highly recommended. These specialized tools feature an automatic clutch that disengages once the screw head is perfectly dimpled into the drywall, preventing over-penetration without requiring precise trigger control from the user. Many also have depth-sensing noses for consistent screw depth.
- Phillips Head Bit (PH2): This is the standard bit size for most drywall screws. Ensure you have high-quality, magnetic bits that resist cam-out (stripping the screw head).
- Stud Finder: Essential for locating wood or metal framing behind existing walls or for accurately marking new framing. Electronic stud finders are common, but magnetic ones can also locate fasteners in studs.
- Measuring Tape and Pencil: For accurate layout, marking screw lines, and cutting drywall sheets.
- Utility Knife: For scoring and snapping drywall sheets, creating clean edges.
- Drywall T-Square or Straightedge: Critical for making straight, precise cuts on drywall sheets.
- Drywall Lift (Optional but Recommended for Ceilings/High Walls): Mechanically lifts and holds drywall sheets in place, significantly reducing labor and improving accuracy for overhead installations.
- Safety Gear: Safety glasses are non-negotiable to protect against flying debris. Gloves can protect hands from cuts from drywall edges or screws.
Precision Preparation: Laying the Groundwork for Success
Thorough preparation is the bedrock of a flawless drywall installation, minimizing errors and maximizing efficiency, particularly in large-scale commercial applications.
1. Locating and Marking Framing
- Existing Walls: Use a stud finder to accurately locate the center of each stud or joist. Mark these lines on the drywall sheet or the adjacent framing.
- New Construction: Ensure all framing is properly installed, plumb, and level. Mark stud centers directly onto the floor and ceiling plates, and then transfer these lines up the walls. This provides clear targets for screw placement.
- Planning Screw Pattern: Pre-plan your screw pattern. Screws should be spaced approximately 16 inches apart along studs for walls and 12 inches apart for ceilings, or as per local building codes. Screws along the edges of the drywall sheet should be placed 3/8 to 1/2 inch from the edge.
2. Cutting and Fitting Drywall Sheets
- Accurate Measurements: Measure each section precisely. "Measure twice, cut once" is a mantra for a reason.
- Scoring and Snapping: Use a utility knife and a T-square to score the paper face of the drywall. Snap the board along the score line, then cut through the paper backing on the other side.
- Fitting: Dry-fit each sheet before fastening to ensure a snug, gap-free fit. Leave a small gap (1/8 inch) between sheets and between the drywall and the floor to allow for building movement and aid in finishing.
3. Handling Drywall Panels
- Drywall sheets are heavy and cumbersome. Always carry them vertically to prevent snapping. For large sheets, two people are ideal.
- For ceilings, a drywall lift dramatically simplifies the process, ensuring consistent alignment and reducing physical strain.
By investing in quality U.S.-made tools and meticulously preparing the workspace, you set the stage for a superior installation. Maden.co not only supplies the fasteners but champions the entire ecosystem of American Manufacturing Pride, ensuring that every tool and material sourced meets the exacting demands of Industrial Excellence.
The Art of Placement: Step-by-Step Guide to Driving Drywall Screws
The actual process of driving drywall screws requires a balance of technique, control, and precision. It's not just about speed, but about achieving consistent, secure fasteners that contribute to a high-quality finish and structural integrity.
1. Positioning the Drywall Sheet
With framing marked and sheets cut, the next step is to accurately position the drywall:
- Vertical Alignment: For walls, start by placing the first sheet tightly against the ceiling or the adjacent sheet. Ensure it's plumb.
- Butt Joints: When joining sheets, ensure that butt joints (where the factory-tapered edges meet) are centered on a stud or joist.
- Ceilings: For ceiling installations, a drywall lift is invaluable. Position the sheet firmly against the joists, ensuring a slight gap around the perimeter.
2. Choosing the Right Screw and Driver Setting
- Verify Screw Type: Double-check that you are using coarse-thread screws for wood studs/joists and fine-thread screws for metal studs. Using the wrong type will lead to stripped fasteners and compromised hold.
-
Set Driver Clutch/Depth Setter:
- Cordless Drill/Driver: Adjust the clutch to a low-to-medium setting. You want just enough torque to dimple the screw head below the drywall surface without tearing the paper. It may require some trial and error on a scrap piece.
- Drywall Screw Gun: These tools are designed with an automatic clutch or depth-sensing nose. Simply set the depth adjustment to achieve the desired dimple.
3. Mastering the Driving Technique
This is the most critical step for a professional finish:
- Apply Consistent Pressure: Place the screw on the Phillips head bit. Position the screw firmly against the drywall, directly over the center of a stud. Apply firm, steady pressure, ensuring the screw is perpendicular (90 degrees) to the drywall surface.
- Start Slow, Finish Steady: Begin driving the screw at a slow speed to prevent it from wandering. Once the screw engages, increase speed, maintaining consistent pressure.
- Achieve the Perfect Dimple: Drive the screw until the bugle head just breaks the paper surface and creates a slight dimple, without tearing the paper or breaking through the gypsum core. The screw head should be flush or slightly recessed below the surface, ready for joint compound. This is crucial for a smooth finished wall; an overdriven screw weakens the hold and can crack the board, while an underdriven screw protrudes and creates a bump.
- Avoid Angling: Always drive screws straight. Angling screws reduces their holding power and can easily tear the drywall paper.
4. Screw Spacing and Pattern
Adhering to proper screw spacing is vital for the structural integrity of the drywall:
- Wall Studs: Space screws approximately 16 inches apart along studs.
- Ceiling Joists: Space screws approximately 12 inches apart along joists, as ceilings require more support.
- Edges: Place screws 3/8 to 1/2 inch from the edge of the drywall sheet, never closer than 3/8 inch to prevent crumbling. These screws should also be along a stud.
- Field Screws: In the field of the drywall sheet (not along the edges), screws can be spaced in a grid pattern following the studs, typically 16 inches vertically and 16 inches horizontally.
- Corners and Double Rows: For increased strength at corners or where fire-rated assemblies are required, some codes may call for screws to be offset in double rows along edges (e.g., 7 inches apart with a second row 1-1/2 inches from the edge).
5. Handling Inside and Outside Corners
- Inside Corners: The drywall sheets should meet without screws directly in the corner. Screws should be placed on the nearest stud, typically 7-8 inches from the corner, providing sufficient support without creating excessive stress points.
- Outside Corners: Use corner bead to protect the edge. Fasten the drywall sheets up to the edge of the corner framing. The corner bead will then be fastened over the drywall.
6. Rectifying Common Mistakes
Even experienced installers encounter minor issues. The key is knowing how to correct them:
- Stripped Screw Heads: If a screw head strips, do not try to re-drive it. Remove it with a screw extractor or pliers, then drive a new screw a few inches away.
- Overdriven Screws: If you accidentally tear the paper or break through the gypsum, remove the screw and drive a new one a few inches away. The damaged area should be patched later.
- Underdriven Screws: Simply drive the screw in a bit further until it creates the proper dimple.
- Missing the Stud: If you drive a screw and feel no resistance, it likely missed the stud. Remove it, and drive a new screw into the correct location. Patch the missed hole.
By meticulously following these steps and leveraging the appropriate tools, professionals can ensure every drywall installation is robust, smooth, and ready for a perfect finish. Sourcing U.S.-made drywall screws from Maden.co provides the foundational quality needed to achieve these superior results consistently.
Common Pitfalls in Drywall Screw Placement and How to Avoid Them
Even with the right tools and a solid understanding of the basics, certain mistakes are common during drywall installation. Identifying and avoiding these pitfalls can save significant time, material, and rework costs, especially in large-scale commercial or industrial projects where efficiency and precision are paramount.
1. Stripping Screw Heads (Cam-Out)
The Problem: The Phillips head recess becomes rounded or damaged, making it impossible to drive or remove the screw. This usually happens when the driver bit slips out of the screw head. The Solution:
- Use the Right Bit: Always use a fresh, high-quality PH2 Phillips head bit. Worn bits are prone to stripping.
- Apply Consistent Pressure: Maintain firm, steady, and straight pressure on the driver.
- Control RPMs: Start slowly to engage the screw, then increase speed, but avoid excessive speed that can cause the bit to slip.
- Depth Setter/Clutch: Use a drywall screw gun with a depth setter or correctly set the clutch on a cordless drill to prevent over-torquing.
2. Overdriving Screws
The Problem: The screw head penetrates too far into the drywall, tearing the paper and crushing the gypsum core. This significantly weakens the screw's holding power and creates an unsightly crater that is difficult to finish smoothly. It can also lead to "popped" screws later as the drywall shifts. The Solution:
- Proper Clutch/Depth Setting: This is the primary defense. The goal is to create a slight dimple without breaking the paper.
- Practice: On a scrap piece of drywall, practice until you can consistently achieve the perfect dimple.
- Visual Inspection: Regularly inspect driven screws to ensure they are perfectly recessed.
3. Underdriving Screws
The Problem: The screw head is not flush with or slightly below the drywall surface, leaving a protrusion. This creates bumps that will show through joint compound and paint, ruining the smooth finish. The Solution:
- Sufficient Torque: Ensure your drill or screw gun has enough power, and the clutch is set high enough to recess the screw without stripping.
- Consistent Pressure: Ensure you apply enough pressure to allow the screw to fully engage and recess.
- Re-drive if Necessary: If a screw is underdriven, simply apply more pressure and finish driving it until it's properly dimpled.
4. Missing the Stud or Joist
The Problem: The screw penetrates the drywall but does not hit the framing material, leaving it with no secure anchor. This results in a weak point, potential drywall sag, and wasted screws. The Solution:
- Accurate Stud Marking: Use a reliable stud finder and mark all stud/joist centers clearly.
- Snap Chalk Lines: For long runs, snap chalk lines down the center of each stud for precise visual guidance.
- Listen and Feel: You should feel resistance and hear the screw engaging the wood or metal. If it goes in too easily, you likely missed.
- Immediate Correction: If you miss, remove the screw, and drive a new one a few inches away into the marked stud. Patch the missed hole.
5. Using the Wrong Screw Type
The Problem: Using coarse-thread screws for metal studs or fine-thread screws for wood studs. This leads to poor holding power, stripped fasteners, and instability. The Solution:
- Identify Framing: Clearly identify whether the framing is wood or metal before starting.
- Label Screws: Keep coarse-thread and fine-thread screws in separate, clearly labeled bins.
- Standardize Procurement: Establish clear procurement guidelines to ensure the correct fastener types are ordered and supplied for specific projects. Our platform, Maden.co, offers a streamlined way to filter and source specific screw types, such as 6 x 1-1/4 Coarse Thread Drywall Screws or 6 x 1 Fine Thread Drywall Screw, directly from verified U.S. manufacturers, minimizing ordering errors.
6. Incorrect Screw Spacing and Edge Placement
The Problem: Screws are spaced too far apart, leading to drywall sag or bowing. Screws placed too close to the edge can cause the drywall to crumble or crack. The Solution:
- Follow Code: Adhere to local building codes for screw spacing (e.g., 16 inches for walls, 12 inches for ceilings).
- Measure and Mark: Use a measuring tape to accurately mark screw locations.
- Edge Distance: Maintain a consistent 3/8 to 1/2 inch distance from the edge of the drywall.
Avoiding these common pitfalls requires a combination of proper technique, vigilant observation, and the use of high-quality, purpose-specific materials. For procurement managers and MRO buyers, the strategic advantage lies in ensuring that all fasteners, from the smallest screw to the largest bolt, are sourced for reliability and performance. This is why Maden.co focuses on providing access to verified U.S. manufacturers, ensuring that every product you procure contributes to Industrial Excellence and minimizes the hidden costs associated with subpar components.
The Strategic Advantage of Quality Sourcing for Drywall Fasteners in B2B Environments
For industrial buyers, MRO professionals, and design engineers, the choice of a drywall screw extends far beyond its immediate function. It's a strategic decision that impacts Total Cost of Ownership (TCO), supply chain resilience, compliance, and ultimately, project success. Sourcing through Maden.co offers distinct advantages that align with these critical business objectives.
Beyond the DIY: Industrial Scale and Standards
In commercial construction, facility maintenance, or prototyping new designs, the volume, consistency, and performance requirements for fasteners are vastly different from a home improvement project.
- High-Volume Procurement: Businesses require large quantities of fasteners delivered reliably and consistently.
- Performance Specifications: Fasteners must meet specific load-bearing, shear strength, and pull-out resistance requirements.
- Compliance: Adherence to building codes, industry standards (e.g., ASTM, DIN), and safety regulations is non-negotiable.
For a procurement manager under pressure to source a specific DIN 931 compliant hex cap screw, a design engineer needing specific material certifications for a new prototype, or an MRO buyer facing an unexpected equipment breakdown, the ability to quickly find and finance a verified, U.S.-made part is a game-changer. This same principle applies to drywall screws in a commercial setting; their seemingly simple nature belies their critical role in the overall project's integrity.
Reducing Total Cost of Ownership (TCO) with Quality Fasteners
While a cheaper, imported screw might seem appealing upfront, the true cost often emerges later:
- Reduced Rework: High-quality, U.S.-made screws, like the options found on Maden.co such as the 8 x 4 Drywall Screw, are consistently manufactured to precise specifications. This consistency reduces stripping, breaking, or premature failure, which in turn minimizes expensive rework, material waste, and labor hours.
- Enhanced Durability: Superior materials and manufacturing processes mean fasteners maintain their hold over time, preventing common issues like "nail pops" (screw pops) and drywall sagging, extending the lifespan of the installation.
- Faster Installation: Reliable screws drive smoothly and consistently, speeding up the installation process and contributing to project deadlines.
- Fewer Callbacks: Durable installations lead to fewer warranty claims and post-completion repairs, protecting your business's reputation and bottom line.
By focusing on the strategic business value of our platform, Maden.co ensures that buyers are investing in long-term savings and reliability, not just a lower sticker price.
Building Supply Chain Resilience with American Manufacturing
The past few years have highlighted the vulnerabilities of global supply chains. Sourcing U.S.-made products offers a robust solution:
- Reduced Lead Times: Shorter shipping distances mean faster delivery and better inventory management.
- Greater Transparency: Direct access to U.S. manufacturers provides clearer insight into production processes, material sourcing, and quality control.
- Consistent Availability: Less reliance on international logistics mitigates risks from geopolitical events, natural disasters, or port delays.
- Economic Impact: Investing in American-made products supports domestic industries, creates jobs, and strengthens the national manufacturing base. At Maden.co, our vision is to become the definitive platform that proves American-made components are as accessible and convenient as any global alternative, driving the manufacturing revival.
Compliance and Industrial Excellence
For many projects, specific certifications and compliance standards are mandatory.
- Meeting Industry Standards: U.S. manufacturers are generally subject to stringent quality control and regulatory oversight, ensuring fasteners meet critical industry standards (e.g., ASTM for materials, UL for fire safety).
- Traceability: Many U.S. manufacturers offer better traceability of materials and production batches, which is invaluable for quality audits and regulatory compliance.
- Customer Empowerment: Maden.co empowers buyers with the confidence that they are procuring products that adhere to the highest standards, ensuring peace of mind and project integrity.
Digital Innovation in Procurement: Streamlining Your Workflow
Maden.co's platform represents Digital Innovation applied to industrial procurement:
- Vast Catalog: Access to over 2.5 million U.S.-made products, simplifying the search for even hard-to-find components.
- Verified Manufacturers: Our network of 800+ verified U.S. manufacturers ensures quality and reliability.
- Reduced Procurement Friction: Our intuitive interface and powerful search capabilities make finding and ordering parts incredibly efficient, saving valuable time for procurement teams.
- Instant Financing: A key differentiator, our Instant Financing option, available at checkout, allows businesses to manage cash flow effectively and make larger-volume purchases without tying up immediate capital. This strategic tool enables procurement managers to secure necessary materials for capital-intensive projects without delay, ensuring project continuity.
By partnering with Maden.co, businesses are not just buying parts; they are investing in a strategic advantage that enhances project quality, bolsters supply chain resilience, and streamlines the entire procurement process, all while championing American Manufacturing Pride. Our entire business model is built on this principle; you can learn more about our mission to champion American manufacturing here.
Maden.co: Your Strategic Partner for American Manufacturing Excellence
In every industrial, commercial, or MRO project, the quality of components dictates the quality of the outcome. From the largest structural beam to the smallest drywall screw, each element plays a critical role in ensuring durability, safety, and long-term performance. At Maden.co, we are committed to being more than just a marketplace; we are a strategic partner in your pursuit of Industrial Excellence, empowering your procurement processes with unparalleled access to the best American-made products.
Our platform is meticulously designed to support procurement managers, MRO buyers, design engineers, and business owners in navigating the complexities of industrial sourcing. We stand by our core values of American Manufacturing Pride, Digital Innovation, Supply Chain Transparency, Industrial Excellence, and Customer Empowerment. This means we don't just list products; we verify our network of over 800 U.S. manufacturers, ensuring that the 2.5 million+ products available on our site meet the rigorous standards you demand.
When you choose Maden.co, you're not merely purchasing a product; you're securing a reliable, U.S.-made component that contributes to a more resilient supply chain, reduces your Total Cost of Ownership, and ensures compliance with critical industry standards. You're actively participating in "America's manufacturing revival is here." We eliminate procurement friction, allowing you to quickly find and procure everything from specialized fasteners to complex machinery components with confidence.
A key differentiator that further streamlines your capital-intensive projects is our Instant Financing option. This feature, accessible during the checkout process, provides businesses with the flexibility to manage cash flow effectively and make larger-volume purchases without delay. It’s a powerful tool designed to support your procurement strategy, ensuring that access to necessary materials never bottlenecks your operations. If you have specific sourcing questions, our team is ready to help you navigate our vast catalog and leverage our platform's full potential.
Conclusion
Mastering the art of drywall screw placement is a fundamental skill that underpins the quality and longevity of any construction or renovation project. For industrial and commercial applications, this skill, coupled with the strategic procurement of high-quality, U.S.-made fasteners, translates directly into enhanced project outcomes, reduced long-term costs, and a more resilient operational framework. We’ve explored the nuances of screw types, the precision required for proper installation, and how avoiding common pitfalls can save significant resources. The takeaway is clear: investing in the right materials and techniques from the outset is an investment in the future reliability and success of your assets.
At Maden.co, we simplify this crucial procurement process by connecting you directly with the verified U.S. manufacturers who produce the superior components you need. From robust 6 x 1-1/4 Coarse Thread Drywall Screws to precision 6 x 1 Fine Thread Drywall Screws, and even specialized 8 x 4 Drywall Screw options, our marketplace is your definitive source for American-made industrial excellence. Our commitment to Digital Innovation and Supply Chain Transparency ensures that finding and purchasing critical parts is efficient, reliable, and entirely transparent.
We urge you to explore the extensive catalog of American-made products available on Maden.co today. Empower your business with the quality, reliability, and strategic advantages that only U.S. manufacturing can provide. For U.S. manufacturers, we invite you to be part of this movement; register as a vendor and join the American manufacturing revival. As you plan your next major project or address an urgent MRO need, remember that you can apply for Instant Financing at checkout to streamline your capital-intensive projects, ensuring that vital components are always within reach. Let Maden.co be your partner in building a future defined by quality and resilience.
Frequently Asked Questions (FAQ)
Q1: What is the primary difference between coarse-thread and fine-thread drywall screws?
A1: Coarse-thread drywall screws have wider, more aggressive threads designed for superior grip in wood studs and joists, preventing stripping. Fine-thread drywall screws feature more closely spaced threads, specifically engineered for secure fastening into light-gauge metal studs without stripping, making them the ideal choice for metal framing.
Q2: How do I prevent overdriving or underdriving drywall screws?
A2: To prevent overdriving, use a drywall screw gun with an automatic clutch or depth-sensing nose, or carefully adjust the clutch on a cordless drill to create a slight dimple without tearing the drywall paper. For underdriven screws, simply apply a bit more consistent pressure and drive the screw until it's properly recessed just below the surface. Practice on a scrap piece of drywall can significantly improve consistency.
Q3: What is the recommended spacing for drywall screws on walls and ceilings?
A3: For walls, screws should typically be spaced approximately 16 inches apart along the studs. For ceilings, which require more support, the recommended spacing is generally 12 inches along the joists. Additionally, screws along the edges of the drywall sheet should be placed 3/8 to 1/2 inch from the edge, never closer, to prevent crumbling and ensure a strong hold. Always refer to local building codes for specific requirements.
Q4: How does Maden.co's Instant Financing option benefit procurement managers?
A4: Maden.co's Instant Financing, available at checkout, is a strategic tool that allows procurement managers and business owners to effectively manage cash flow and facilitate larger-volume purchases. It enables businesses to acquire necessary materials for capital-intensive projects without tying up immediate capital, ensuring project continuity and allowing for strategic inventory management, thus streamlining the overall procurement process.


