How to Remove Concrete Sleeve Anchors
Table of Contents
- Introduction
- Understanding Concrete Sleeve Anchors and Their Construction
- Why Removal Becomes Necessary: Common Scenarios
- Safety First: Essential Precautions for Anchor Removal
- Tools and Materials for Anchor Removal
- Methods for Removing Concrete Sleeve Anchors
- Post-Removal Considerations and Repair
- Strategic Sourcing and the Maden.co Advantage
- Conclusion
- Frequently Asked Questions (FAQ)
Imagine a critical renovation project halted. The timeline is tight, the budget is fixed, and a crucial piece of equipment or structure needs to be installed where an old, stubborn concrete sleeve anchor currently resides. This isn't just an inconvenience; it's a direct threat to project completion and operational efficiency. For procurement managers, MRO buyers, and design engineers, such unforeseen obstacles underscore the critical need for not only robust initial installation but also effective, reliable removal strategies for various fastening systems. This post will serve as your definitive guide to understanding and executing the removal of concrete sleeve anchors, offering practical methods, essential tools, and critical safety considerations, all while highlighting how strategic sourcing of U.S.-made tools and components through a platform like Maden.co can streamline your entire project lifecycle.
Introduction
In the world of construction, industrial maintenance, and structural engineering, concrete sleeve anchors are ubiquitous. Renowned for their strength and reliability, these mechanical fasteners securely attach fixtures to concrete, block, or brick substrates. They are workhorses, critical for everything from mounting heavy machinery to securing structural elements. However, their very strength—the expansive force that locks them firmly into place—can become a significant challenge when the time comes for removal. Whether it's due to facility upgrades, structural modifications, anchor damage, or simply aesthetic requirements for a cleaner surface, the need to extract these anchors arises frequently. The objective of this comprehensive guide is to demystify the process of concrete sleeve anchor removal, providing clear, actionable steps and expert insights to ensure a successful and safe outcome, minimizing disruption and maximizing productivity for your operations.
Understanding Concrete Sleeve Anchors and Their Construction
Before diving into removal, it's essential to understand what a concrete sleeve anchor is and how it functions. A sleeve anchor typically consists of a threaded bolt or stud, a metal sleeve, a nut, and a washer. When the nut is tightened, it pulls the tapered end of the bolt into the sleeve, causing the sleeve to expand outwards against the walls of the drilled hole in the concrete. This expansion creates a secure, frictional grip that resists pull-out forces. They are available in various materials, including carbon steel (often zinc-plated for corrosion resistance) and stainless steel for outdoor or corrosive environments. Their design makes them excellent for through-fastening applications where the fixture can be put in place and then the anchor installed through it.
The effectiveness of a sleeve anchor is directly tied to the integrity of its components and the quality of the installation. A properly installed anchor provides formidable holding power, but this also means removal can be a complex task, often requiring more than brute force. The methods we will discuss are tailored to address the inherent challenges posed by this design.
Why Removal Becomes Necessary: Common Scenarios
The need to remove concrete sleeve anchors isn't always about failure; it's often a natural part of a facility's evolution or maintenance cycle. Understanding these scenarios can help anticipate and plan for removal, integrating it into your project management strategy.
- Renovations and Remodeling: Perhaps the most common reason. As facilities are updated, walls reconfigured, or equipment repositioned, existing anchors become obsolete and must be removed to prepare the surface for new installations or finishes.
- Equipment Upgrades or Relocation: Industrial machinery often relies on heavy-duty anchoring. When a machine is replaced or moved, its anchors must go, leaving the base ready for new equipment or repairs.
- Damaged or Failed Anchors: Although robust, anchors can sometimes be damaged due to excessive load, improper installation, or material fatigue. Removing a compromised anchor is crucial for safety and to prevent future issues.
- Structural Modifications: Changes to a building's structure may require the removal of anchors that are no longer serving a purpose or are in the way of new structural elements.
- Aesthetic Reasons: For finished surfaces, exposed anchor heads can be unsightly. Removal and proper patching can create a clean, uniform look.
- Compliance and Safety: In some cases, regulatory changes or safety audits might necessitate the removal of certain types of anchors or the replacement of old installations with new, compliant ones.
For a procurement manager under pressure to source the right tools for a dismantling project, a design engineer needing specific removal accessories for a renovation plan, or an MRO buyer facing an unexpected equipment breakdown requiring anchor replacement, the ability to quickly find and finance a verified, U.S.-made part or tool is a game-changer. Our mission at Maden.co is to democratize access to American manufacturing, ensuring you have the necessary resources at your fingertips, thereby enhancing supply chain resilience and reducing procurement friction.
Safety First: Essential Precautions for Anchor Removal
Before any tools touch the concrete, safety must be paramount. Working with power tools and concrete poses several hazards, and proper precautions can prevent injury.
-
Personal Protective Equipment (PPE):
- Eye Protection: Safety glasses or goggles are non-negotiable to protect against flying debris.
- Hearing Protection: Grinders, rotary hammers, and other power tools generate significant noise.
- Respiratory Protection: Concrete dust contains crystalline silica, which can be harmful if inhaled. A respirator (N95 or higher) is essential, especially when drilling or grinding.
- Hand Protection: Heavy-duty gloves protect against cuts, abrasions, and vibrations.
- Foot Protection: Steel-toe boots can prevent injury from dropped tools or falling debris.
-
Site Assessment:
- Identify Utilities: Before drilling or cutting into concrete, always verify the absence of electrical conduits, water pipes, gas lines, or other utilities within the concrete slab or wall. Ground-penetrating radar (GPR) or consultation with building plans is crucial.
- Ventilation: Ensure adequate ventilation, especially when generating dust or using chemical agents.
- Clear Work Area: Remove any obstructions and ensure stable footing.
-
Tool Safety:
- Inspect Tools: Before use, check all power tools for damaged cords, guards, or accessories.
- Proper Use: Operate tools according to manufacturer instructions.
- Secure Workpiece: If possible, secure the concrete element to prevent movement.
By prioritizing safety, you protect your team and ensure a smooth workflow.
Tools and Materials for Anchor Removal
The tools required will vary based on the anchor type, its depth, accessibility, and the desired finish. A well-stocked toolkit can tackle most scenarios.
-
Cutting Tools:
- Angle Grinder: Equipped with a metal cutting wheel, ideal for cutting flush.
- Hacksaw or Reciprocating Saw: Useful for anchors in awkward positions or when power tools are not feasible.
- Bolt Cutters: For smaller diameter anchors or exposed threaded rods.
-
Drilling/Extraction Tools:
- Rotary Hammer Drill: Essential for drilling into concrete, especially for anchors that need to be drilled out.
- Carbide-Tipped Drill Bits: Various sizes will be needed, often larger than the original anchor diameter.
- Cold Chisel and Hammer/Mallet: For breaking away concrete around the anchor or for driving it further in.
- Pry Bar or Crowbar: For leverage, especially if the anchor head is slightly proud.
- Vise Grips or Pliers: For gripping and twisting exposed anchor parts.
- Specialized Anchor Extractors: Though less common for sleeve anchors, some specific tools exist. For heavy-duty concrete work, specialized chucks are invaluable. For example, a high-quality 1-Headed Concrete Anchor Shear Connector Chuck can be critical for efficient and precise work when dealing with the remnants of stubborn anchors or preparing new holes.
-
Finishing/Repair Materials:
- Wire Brush: For cleaning the area.
- Shop Vacuum: For dust removal.
- Concrete Patching Compound or Non-Shrink Grout: For repairing holes after removal.
- Trowel or Putty Knife: For applying patching material.
Sourcing these tools and materials from verified U.S. manufacturers is a cornerstone of industrial excellence, a core value at Maden.co. We connect you with over 2.5 million American-made products from our network of 800+ verified U.S. manufacturers, ensuring you receive components that meet rigorous industry standards and contribute to the strength of the domestic supply chain. Our entire business model is built on this principle; you can learn more about our mission to champion American manufacturing here.
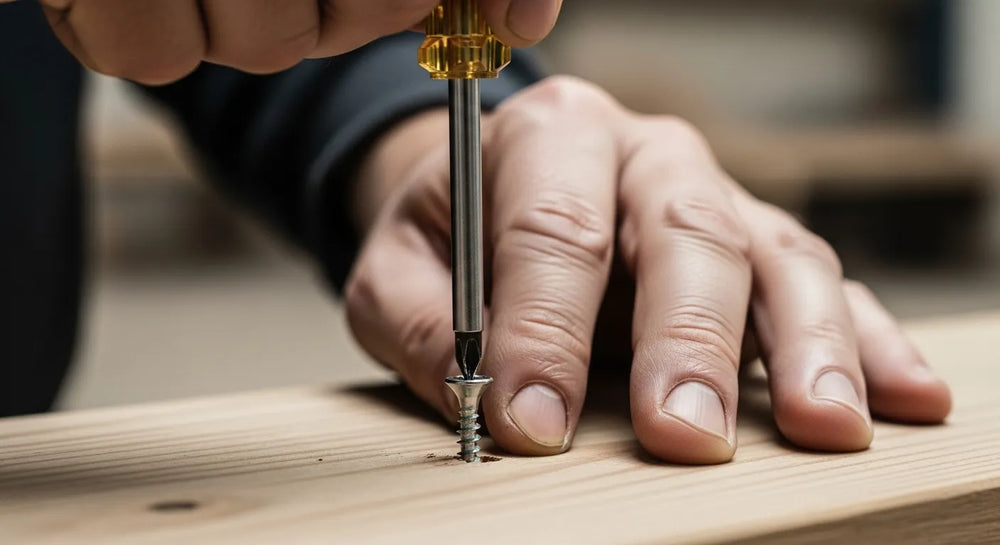
Methods for Removing Concrete Sleeve Anchors
The approach to removing a concrete sleeve anchor largely depends on whether you need to extract the entire anchor or simply eliminate its protrusion from the surface.
Method 1: Partial Removal (Cutting Flush)
This is the most common and often simplest method when the aesthetic finish is paramount, and the entire anchor doesn't need to be extracted. It’s ideal when the anchor is no longer needed but its complete removal would cause too much damage to the surrounding concrete.
When to Use:
- When a smooth surface is required (e.g., for new flooring, wall finishes, or painting).
- When complete extraction is overly difficult or risks significant damage to the concrete.
- When the anchor can be cut below the surface.
Step-by-Step Process:
- Prepare the Area: Clear debris, ensure adequate lighting, and don your PPE.
- Unthread and Remove Nut/Washer: If accessible, remove the nut and washer from the anchor.
- Attempt to Drive In: For sleeve anchors, sometimes a sharp hammer blow directly on the exposed threaded rod can drive the entire anchor slightly deeper into the concrete. This creates a recess, making it easier to cut flush or slightly below the surface.
-
Cut the Anchor:
- Angle Grinder: This is usually the fastest and most effective method. Attach a metal cutting wheel. Position the grinder to cut the anchor shank flush with or slightly below the concrete surface. Use steady pressure and allow the tool to do the work. Be mindful of sparks and heat.
- Hacksaw or Reciprocating Saw: If an angle grinder isn't suitable (e.g., in confined spaces or where sparks are a concern), a hacksaw with a bi-metal blade or a reciprocating saw with a metal-cutting blade can be used. This will be slower but offers more control in tight spots.
- Clean and Inspect: Use a wire brush to remove any metal burrs or concrete dust. Ensure the anchor is cut flush or recessed.
- Patch the Hole: If the anchor is recessed, fill the small indentation with concrete patching compound or non-shrink grout. Smooth it flush with the surrounding surface. For procurement managers, sourcing reliable patching compounds, along with specific concrete anchors like the BN Products 3/8 Inch Inside Thread Sanko Drop-In Concrete Anchor for subsequent re-anchoring needs, is crucial for project continuity.
Method 2: Full Removal (Extraction)
This method is more involved and aims to remove the entire anchor, leaving a clean hole that can potentially be reused or more thoroughly repaired.
When to Use:
- When the concrete hole needs to be reused for a new, identically sized anchor.
- When the anchor is damaged and could compromise the concrete if left in place.
- When a perfectly clean, unblemished surface is required, without any embedded metal.
- When the anchor is loose or easily accessible.
Challenges: Full extraction can be difficult because the expansion mechanism is designed to grip the concrete tightly. This process often involves drilling or prying, which can risk damaging the surrounding concrete if not done carefully.
Techniques for Full Extraction:
Technique A: Drilling it Out
This is the most common method for full removal, particularly for stubborn anchors.
- Remove Nut/Washer and Cut Flush (Optional): If the nut and washer are still on, remove them. If the anchor head is badly damaged or proud, you might cut it flush first to make drilling easier.
- Select Drill Bit: Choose a carbide-tipped masonry drill bit that is slightly larger in diameter than the sleeve of the anchor, but smaller than the overall expanded diameter. The goal is to drill away the concrete around the sleeve without damaging the surrounding material excessively. Alternatively, some professionals prefer to use a bit that matches the original drill size of the anchor to drill out the internal bolt first, which may release the sleeve's tension.
-
Drill Around/Through the Anchor:
- Surrounding Method: Using a rotary hammer drill, carefully drill a series of holes around the perimeter of the anchor's sleeve. The idea is to break the bond between the anchor and the concrete. Once the bond is weakened, you might be able to twist or pry the anchor out.
- Through the Core (for specific types): For some anchors, particularly those with a hollow core or thinner internal bolts, you might be able to drill directly down the center of the anchor with a bit slightly larger than its internal bolt. This can shatter the internal mechanism and release the sleeve.
- Pry or Twist Out: Once the concrete bond is compromised or the internal structure is drilled away, use pliers, vise grips, or a pry bar to twist and pull the anchor out. You might need to gently tap with a hammer to loosen it further. For MRO teams, having access to comprehensive tool kits, such as a Concrete Anchor Shear Connector Chuck Set, can be invaluable for these types of precise removal tasks, ensuring you have the right components for the job.
- Clean the Hole: Use a shop vacuum to remove dust and debris from the hole.
Technique B: Prying/Hammering (if anchor is proud or slightly loose)
If the anchor head is exposed and not too deeply set, or if it's already a bit loose, you might be able to pry it out.
- Remove Nut and Washer: If still present.
- Apply Lubricant (Optional): A penetrating oil can sometimes help loosen the grip, especially if the anchor has been exposed to the elements.
- Pry with Leverage: Use a sturdy pry bar. Place the tip under the anchor head and apply leverage. You may need to hammer the anchor sideways slightly to break its grip.
- Twist with Vise Grips: Once slightly lifted, use strong vise grips to grab the anchor and twist it back and forth while pulling upwards.
Technique C: Using Specialized Anchor Extractors (Less common for sleeve anchors)
While more common for wedge anchors or specific drop-in anchors, specialized extraction tools exist. These typically grip the internal bolt or the sleeve and allow for controlled pulling or twisting. Research specific tools for your anchor type if other methods prove too destructive.
Method 3: Chemical Removal (Limited Application)
For certain types of anchors or specific situations, chemical concrete removers might be considered, though this is less common for sleeve anchors themselves, and more for removing the concrete around them.
When to Use:
- Only for specific types of anchors where the chemical can effectively dissolve the surrounding concrete or corrode the anchor material (rare for steel sleeve anchors in solid concrete).
- In situations where mechanical removal is impossible or highly undesirable due to vibration or noise restrictions.
Considerations:
- Safety: Chemical removers are typically highly corrosive acids. Extreme caution, comprehensive PPE, and excellent ventilation are mandatory. Follow manufacturer instructions precisely.
- Effectiveness: May not be effective against solid steel anchors. More likely to degrade the concrete bond or certain types of anchor materials.
- Disposal: Proper disposal of chemical waste is critical.
This method is generally a last resort and should only be attempted by experienced professionals with full understanding of the chemicals involved.
Method 4: Drilling and Filling (Concealment, not true removal)
Sometimes, rather than fully removing a very stubborn anchor that is deeply embedded and not causing structural issues, it's more practical to conceal it. This isn't removal but a finishing technique.
- Cut Anchor Flush/Recessed: Use an angle grinder to cut the anchor shank flush with, or preferably slightly below, the concrete surface.
- Clean the Area: Remove all dust and debris.
- Fill with Patching Compound: Fill the hole and the recessed anchor with a high-quality, non-shrink concrete patching compound or epoxy grout. Ensure it's flush with the surrounding concrete.
- Cure and Finish: Allow the patch to cure completely, then sand or grind if necessary for a smooth finish that blends with the existing surface.
This approach is particularly suitable for situations where the anchor's presence won't interfere with new installations and a clean aesthetic is the primary goal.
Post-Removal Considerations and Repair
Once the concrete sleeve anchors are successfully removed, the job isn't quite done. Proper repair of the concrete surface is essential for both aesthetics and structural integrity, especially if the hole is not being immediately reused.
- Clean the Hole Thoroughly: Use a wire brush to remove any loose concrete, rust, or debris from inside the hole. A shop vacuum is excellent for removing dust.
- Prepare the Surface: Ensure the area around the hole is clean and free of oils or contaminants that could affect the patching compound's adhesion.
-
Choose the Right Patching Material:
- Concrete Patching Compound: For general repairs, a good quality concrete patching compound that matches the existing concrete color and texture as closely as possible is ideal. Non-shrink grout is excellent for deeper holes.
- Epoxy Mortar: For areas requiring high strength or chemical resistance, epoxy mortar can be a superior choice.
-
Apply Patching Material:
- Mix the patching compound according to manufacturer instructions.
- Force the compound into the hole, ensuring it completely fills any voids.
- Overfill slightly, then use a trowel or putty knife to scrape it flush with the surrounding concrete surface.
- Feather the edges to blend seamlessly with the existing concrete.
- Cure Properly: Allow the patching material to cure for the recommended time, protecting it from moisture or extreme temperatures if necessary. Proper curing is critical for achieving maximum strength and durability.
- Finishing Touches: Once cured, you can sand, grind, or even paint the patched area to match the surrounding surface, if desired.
For businesses looking to quickly procure these finishing materials, along with any replacement anchors or related tools, Maden.co offers unparalleled access. Our platform is a hub for industrial buyers to efficiently locate and purchase American-made products, simplifying your procurement process. If you have specific sourcing questions, our team is ready to help; feel free to contact us for expert assistance.
Strategic Sourcing and the Maden.co Advantage
Successfully navigating complex projects like concrete anchor removal and subsequent repairs requires more than just knowing how to do the job; it demands reliable access to high-quality tools and materials. This is where strategic sourcing plays a pivotal role, and it's precisely where Maden.co offers a distinct advantage.
At Maden.co, our core values revolve around American Manufacturing Pride, Digital Innovation, Supply Chain Transparency, Industrial Excellence, and Customer Empowerment. We understand the critical importance of these elements for procurement managers, MRO buyers, and design engineers. When you source through us, you're not just buying a product; you're investing in:
- Supply Chain Resilience: By choosing U.S.-made products, you reduce reliance on complex global supply chains, mitigating risks associated with international shipping delays, geopolitical instability, and fluctuating import costs. This strengthens your operational continuity.
- Unwavering Quality and Compliance: American manufacturers adhere to stringent quality controls and often meet or exceed industry standards like DIN, NPT, and others. This ensures the tools and components you procure are reliable, durable, and fit for purpose, reducing the total cost of ownership (TCO) by minimizing failures and rework.
- Transparency and Traceability: Our platform prioritizes connecting you directly with verified U.S. manufacturers. This transparency means you know exactly where your products come from, facilitating easier compliance audits and material certifications.
- Efficiency and Ease of Procurement: Our user-friendly B2B marketplace simplifies the search for over 2.5 million American-made industrial products. What might take days of calls and emails can be accomplished in minutes on Maden.co, reducing procurement friction and freeing up your team's valuable time.
- Customer Empowerment: We equip you with the tools and information to make informed decisions. For capital-intensive projects, our "Instant Financing" option available at checkout allows procurement managers and business owners to manage cash flow effectively and make larger-volume purchases without delay. This strategic financial tool is a key differentiator, enabling your projects to stay on schedule and within budget.
For a procurement manager under pressure to source a specific DIN 931 compliant hex cap screw, a design engineer needing specific material certifications for a new prototype, or an MRO buyer facing an unexpected equipment breakdown, the ability to quickly find and finance a verified, U.S.-made part is a game-changer. We are dedicated to providing the definitive platform that proves American-made components are as accessible and convenient as any global alternative, driving the manufacturing revival. America's manufacturing revival is here. Are you a U.S. manufacturer? Register as a vendor and join the American manufacturing revival.
Conclusion
The removal of concrete sleeve anchors, while seemingly a straightforward task, often requires a nuanced understanding of their design, careful planning, and the right tools and techniques. From simply cutting flush to performing a full extraction and patching, each method serves a specific purpose, tailored to the project's demands. Prioritizing safety, selecting appropriate tools, and meticulously repairing the concrete are all critical steps for a successful outcome.
In an industrial landscape where efficiency, reliability, and domestic supply chain strength are paramount, sourcing your tools, fasteners, and repair materials from trusted U.S. manufacturers is not merely a preference—it's a strategic imperative. Maden.co stands as America's premier B2B marketplace, designed to simplify this process for you. By connecting industrial buyers with a vast network of verified U.S. manufacturers, we ensure you have immediate access to the high-quality, American-made products you need to keep your operations running smoothly.
Don't let procurement hurdles delay your next project. Explore our extensive catalog of American-made industrial supplies today, including specialized tools and components for every phase of your project. You can apply for Instant Financing at checkout to streamline your capital-intensive projects and ensure your business always has the resources it needs.
Frequently Asked Questions (FAQ)
Q1: Is it always necessary to fully remove a concrete sleeve anchor?
A1: No, it's not always necessary. If the anchor is no longer needed and a smooth surface is desired, cutting the anchor flush with or slightly below the concrete surface and then patching the hole is often sufficient and less destructive than full extraction. Full removal is typically reserved for situations where the hole needs to be reused or a completely anchor-free concrete surface is required.
Q2: What are the biggest risks when removing concrete sleeve anchors?
A2: The biggest risks include damaging surrounding utilities (electrical conduits, pipes) embedded in the concrete, causing structural damage to the concrete itself during aggressive removal, and personal injury from power tools or flying debris. Always perform a thorough site assessment, confirm utility locations, and wear appropriate personal protective equipment (PPE).
Q3: Can I reuse the hole after removing a concrete sleeve anchor?
A3: Yes, often you can. If the anchor was fully extracted without significant damage to the concrete hole, and the hole's integrity is still good, it can potentially be reused. However, it's crucial to thoroughly clean the hole and inspect it for any cracks or irregularities before installing a new anchor. Sometimes, a slightly larger anchor or an epoxy-based anchoring system might be a better choice for reuse to ensure secure fastening.
Q4: What should I use to patch the hole after anchor removal?
A4: For general repairs, a high-quality, non-shrink concrete patching compound or cementitious grout is ideal. Choose a product that closely matches the existing concrete's color and texture for aesthetic blending. For areas requiring greater strength or chemical resistance, an epoxy mortar or a specialized repair resin might be more appropriate. Always ensure the hole is clean and free of debris before applying any patching material for optimal adhesion and durability.


