Mastering Drywall Screws: A Guide to Proper Installation
Table of Contents
- Introduction
- Understanding Drywall and Fasteners: The Foundation of a Flawless Finish
- Essential Tools for Drywall Screw Installation
- Preparing for Installation: Setting the Stage for Success
- The Step-by-Step Process: How to Put Drywall Screws Effectively
- Advanced Techniques and Best Practices
- Sourcing American-Made Drywall Screws: A Strategic Advantage with Maden.co
- Conclusion
- FAQ
Introduction
In construction and renovation, the integrity of a finished wall can often be the make-or-break element for project timelines and client satisfaction. A smooth, secure drywall installation is not just about aesthetics; it's about structural stability, long-term durability, and ultimately, the reputation of your work. Yet, despite its seeming simplicity, the process of properly installing drywall screws is frequently underestimated, leading to frustrating issues like popped fasteners, uneven surfaces, and compromised structural integrity. These seemingly minor imperfections can cascade into significant delays and costly rework, eating into project budgets and straining client relationships.
For procurement managers overseeing large-scale construction projects, MRO buyers responsible for facility maintenance, or design engineers specifying materials for new builds, ensuring every component, down to the humble drywall screw, meets exacting standards is paramount. It’s about more than just buying a fastener; it’s about sourcing the right component, understanding its correct application, and recognizing the strategic value of quality. This comprehensive guide delves into the essential techniques and best practices for how to put drywall screws effectively, ensuring a flawless finish and a secure installation. We will explore everything from selecting the correct screw type and utilizing the right tools to mastering the driving technique and understanding optimal spacing. Beyond the technical how-to, we will also illuminate the strategic advantages of sourcing high-quality, American-made drywall screws, highlighting how this choice contributes to a more resilient, transparent, and ultimately more successful project outcome.
Understanding Drywall and Fasteners: The Foundation of a Flawless Finish
Before diving into the mechanics of screw installation, it's crucial to understand the material we're working with and why specific fasteners are engineered for it. Drywall, also known as plasterboard or gypsum board, is a panel made of gypsum plaster pressed between two sheets of thick paper. It's the standard material for interior walls and ceilings due to its fire resistance, sound dampening properties, and ease of installation compared to traditional plaster. However, its somewhat brittle gypsum core requires a fastener designed to secure it without causing undue damage or pulling through the paper face.
Why Drywall Screws Over Other Fasteners?
The unique design of drywall screws sets them apart from common wood screws or nails, making them the superior choice for securing gypsum board. Nails, while quick to install, can often lead to "nail pops" as the wood framing expands and contracts, pushing the nail heads through the drywall surface over time. This is a common and frustrating issue requiring additional repair work. Wood screws, designed for dense wood, often have a sharper point and coarser thread that can strip the softer gypsum, causing the screw to lose its grip or over-penetrate.
Drywall screws, in contrast, are engineered with specific features to optimize their performance in this material:
- Bugle Head: This conical shape is designed to dimple the drywall surface without tearing the paper, creating a slight recess for the screw head. This recess is crucial for a smooth finish, as it allows joint compound to completely cover the screw head without creating a bump.
- Sharp Point: A needle-sharp point allows for quick penetration of the paper and gypsum, reducing the need for pre-drilling in most applications.
- Aggressive Threads: The threads are designed to grip securely into both the drywall and the framing material (wood or metal studs) without stripping the gypsum core.
Types of Drywall Screws for Different Applications
Selecting the correct type of drywall screw is fundamental to a successful installation. The choice depends primarily on the framing material and the specific application.
Coarse-Thread Drywall Screws
These are the most common type and are easily identifiable by their wide, aggressive threads. They are specifically designed for use with wood studs, where their threads can bite deeply into the wood fibers, providing maximum holding power. The larger spacing between the threads allows them to clear wood fibers effectively during insertion, preventing stripping. For robust fastening into wood framing, consider options like our 6 x 1-1/4 Coarse Thread Drywall Screws, engineered for reliable grip and durability in wood.
Fine-Thread Drywall Screws
Distinguished by their finer, more numerous threads, these screws are specifically engineered for metal studs, typically 20-25 gauge steel. The finer threads create more contact points within the thin metal, ensuring a secure grip without stripping out the pilot hole. Using coarse-thread screws in metal studs can lead to stripping and poor holding power. For projects requiring secure fastening into metal studs, our 6 x 1 Fine Thread Drywall Screw offers the precision and holding power needed for steel framing.
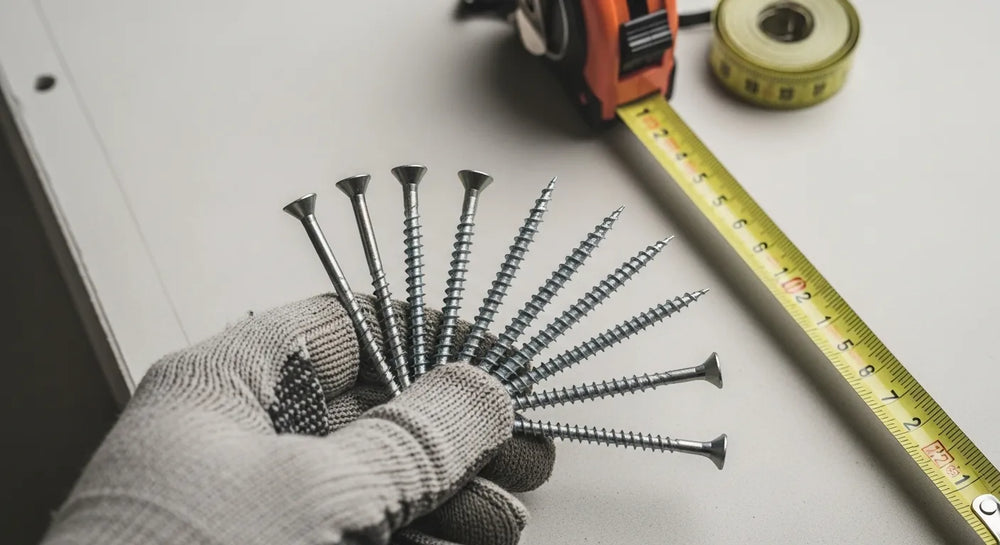
Length and Gauge Considerations
Drywall screws come in various lengths, typically ranging from 1 inch to 3 inches, to accommodate different drywall thicknesses and attachment requirements.
- 1-inch screws: Suitable for ½-inch drywall in single-layer applications.
- 1 ¼-inch screws: Most common for ½-inch drywall, providing ample penetration into studs. This length offers a good balance of penetration and resistance to pull-out.
- 1 ⅝-inch screws: Ideal for ⅝-inch thick fire-rated drywall or when attaching multiple layers.
- 2 inches and longer: Used for attaching two layers of drywall, or for specialized applications where deeper penetration is required. For scenarios demanding extended reach or robust fastening, our 8 x 4 Drywall Screw provides significant length and strength, ensuring deep penetration for thicker boards or double-layer applications.
The gauge (diameter) of a screw typically ranges from #6 to #8 for drywall screws. A higher gauge number indicates a thicker screw, offering greater shear strength and resistance to pull-out. Most standard drywall applications utilize #6 or #7 gauge screws.
Material and Coating Considerations
The material and coating of drywall screws are also important, particularly in specific environments. Most drywall screws are made from hardened steel, ensuring they can withstand the torque of installation without breaking. Black phosphate coating is common, offering a degree of corrosion resistance and allowing the screw heads to blend more easily with joint compound. For applications in high-moisture areas (like bathrooms or exterior sheathing) or where enhanced corrosion resistance is critical, screws with specialized coatings (such as ceramic or polymer coatings) or stainless steel variants may be necessary. Sourcing U.S.-made fasteners ensures that these specifications often adhere to rigorous industrial standards, providing peace of mind regarding quality and performance.
Essential Tools for Drywall Screw Installation
Equipping yourself with the right tools is half the battle in achieving a professional drywall finish. These tools not only make the job easier but also ensure accuracy and consistency, minimizing errors and rework.
The Power Drill or Driver
This is arguably the most critical tool for driving drywall screws. While a standard drill can work, a dedicated drywall screw gun or an impact driver offers superior control and efficiency.
- Drywall Screw Gun: This specialized tool features an adjustable nose cone that automatically sets the perfect depth for each screw, preventing over-driving and paper tearing. It also often has a higher RPM (revolutions per minute) suitable for fast, consistent driving.
- Cordless Drill/Driver with Clutch: If a dedicated screw gun isn't available, a cordless drill/driver with an adjustable clutch is a viable alternative. The clutch allows you to set the torque, preventing the screw from sinking too deep or stripping the head. Experiment with the clutch settings on scrap material to find the optimal depth.
- Impact Driver: An impact driver can also be used, especially for its power and ability to drive screws quickly. However, without a depth-setting nose cone, it requires more finesse to avoid over-driving.
Drywall Dimpler Bit
This small but mighty accessory is invaluable. It's a specialized driver bit that features a stop collar or magnetic sleeve that allows the screw head to recess slightly below the drywall surface (creating the "dimple") without tearing the paper. Some dimpler bits are designed for standard drill chucks, while others are integrated into drywall screw guns. Using a dimpler bit is highly recommended to achieve consistently recessed screw heads, which are essential for a smooth mudding and finishing process.
Safety Gear
Safety should always be a priority. When working with power tools and construction materials:
- Safety Glasses: Protect your eyes from dust, debris, and potential screw fragments.
- Gloves: Protect your hands from cuts and splinters.
- Dust Mask: Especially when cutting drywall, a dust mask is crucial to avoid inhaling gypsum dust.
Measuring Tools
- Tape Measure: Essential for accurately locating studs and marking screw lines.
- Pencil: For marking stud centers and layout lines.
- Chalk Line: Useful for creating straight lines across long spans of drywall, especially on ceilings or large walls.
Stud Finder
An electronic stud finder is indispensable for accurately locating the center of wood or metal studs behind existing walls or for finding studs in new framing. Marking these centers precisely ensures that every screw hits its target, maximizing holding power and preventing "missed" screws that require rework.
Preparing for Installation: Setting the Stage for Success
Proper preparation is the bedrock of any successful construction project. For drywall installation, this means not only organizing your tools but also meticulously planning your approach to ensure every screw serves its purpose effectively.
Safety First
Reiterating the importance of safety, ensure your work area is clear of obstructions, well-lit, and that you are wearing appropriate personal protective equipment (PPE). This includes safety glasses, gloves, and a dust mask, especially during any cutting phases.
Stud Location and Marking
Accurate stud location is paramount. Use your stud finder to locate the center of each vertical stud and horizontal blocking. Mark these centers clearly with a pencil, extending the line vertically across the height of where the drywall panel will sit. This visual guide ensures that every screw drives into solid framing, providing maximum holding power. For ceilings, marking the joist centers is equally critical. Remember, drywall screws are designed to secure the board to the framing, not just into the drywall itself.
Panel Placement Strategy
Before you even pick up a screw gun, consider the orientation of your drywall panels.
- Vertical Installation: Often preferred for walls because the taper edges of the drywall panels fall naturally along the studs, making joint finishing easier. However, it may require more cuts for varying wall heights.
- Horizontal Installation: Can be faster for long walls as it reduces the number of vertical joints. The tapered edges run horizontally, which can sometimes be easier to finish, as horizontal joints tend to be less prone to cracking than vertical ones, especially in older homes where studs might not be perfectly plumb.
Whichever method you choose, ensure the panels are tightly butted together with no significant gaps. Small gaps are acceptable and can be filled with joint compound, but large gaps compromise the structural integrity and finish quality.
Pre-Drilling (When Necessary)
In most standard drywall applications, pre-drilling is not necessary due to the sharp point of drywall screws. However, there are exceptions:
- Very Hard Framing Materials: If you encounter extremely dense or old, dry wood studs, a small pilot hole might prevent screw breakage or stripping, especially with longer, larger gauge screws.
- Edge or Corner Applications: Sometimes, near the very edge of a stud, pre-drilling can help prevent the wood from splitting, which could compromise the screw's grip.
Use a drill bit slightly smaller than the shank of the screw for pilot holes, typically 3/32" or ⅛" for common drywall screw sizes.
The Step-by-Step Process: How to Put Drywall Screws Effectively
With proper preparation, the actual process of driving drywall screws becomes straightforward. Precision and consistency are key to achieving a professional, durable finish.
1. Positioning the Screw
Hold the drywall panel firmly in place against the framing. Position the drywall screw perpendicular to the drywall surface and directly over the center of a marked stud. A common mistake is to angle the screw, which reduces its holding power and increases the risk of stripping or breaking the screw head.
2. Driving the Screw with Precision
Engage your power drill or screw gun.
- Start Slow: Begin driving the screw at a low speed to ensure the point penetrates the paper and gypsum cleanly. This prevents the screw from "walking" across the surface.
- Increase Speed: Once the screw has bitten into the drywall, increase the speed of the drill or screw gun. Apply steady, even pressure directly in line with the screw.
- Achieve the Perfect Dimple: The goal is to drive the screw head just below the surface of the drywall, creating a shallow "dimple," without tearing the paper facing. This is where a drywall dimpler bit or a drywall screw gun with depth control shines. The screw head should be flush with or slightly below the paper, but never break the paper surface, as this compromises the screw's holding power and requires repair.
3. Optimal Screw Spacing and Patterns
Consistent and appropriate screw spacing is vital for the stability of the drywall panel.
- Edges and Ends: Place screws approximately 7 inches to 8 inches apart along the edges and ends of the drywall panel where it meets a stud. These are critical areas for securing the board.
- Field (Middle) of the Panel: For screws going into intermediate studs in the "field" of the panel, spacing can be extended to about 12 inches apart.
- Corners and Joints: When joining two drywall panels on a single stud, stagger the screws slightly so they don't directly oppose each other. This prevents weakening the stud. Ensure screws are at least ⅜ inch from the edge of the drywall to prevent crumbling.
Following these spacing guidelines ensures the drywall is securely attached, preventing future movement, bulging, or cracking.
4. Common Mistakes to Avoid and Troubleshooting
Even with the best preparation, mistakes can happen. Recognizing and rectifying them promptly is part of the process.
Overdriving the Screw
This is perhaps the most common error. An overdriven screw tears through the paper facing and crumbles the gypsum core, losing its holding power. The screw essentially creates a large, unsupported hole.
- Fix: Remove the overdriven screw. Drive a new screw approximately 1 to 2 inches away from the damaged area. If the damage is significant, you may need to patch the area before finishing.
Stripping the Screw Head
When too much torque is applied without proper pressure, or if the driver bit slips, the Phillips head recess can strip, making it impossible to drive the screw further or remove it.
- Fix: If the screw is mostly driven but stripped, you might be able to leave it if it's holding adequately. If it's protruding, use a screw extractor or carefully cut the head off with a grinding tool, then drive a new screw nearby.
Missing the Stud
If you drive a screw and feel no resistance, or the screw just spins freely, you've likely missed the stud. This leaves the drywall unsecured in that spot.
- Fix: Remove the screw. Re-verify the stud location with your stud finder and re-mark it if necessary. Drive a new screw into the correct location. Mark any "missed" holes for future patching.
Not Enough Pressure or Inconsistent Depth
If screws are not driven deep enough, they will protrude from the surface, creating bumps that show through the finished paint. Inconsistent depth leads to an uneven surface requiring more joint compound and sanding.
- Fix: For screws that are too proud, you can often finish driving them in further with careful attention. For consistent depth, practice with your tools and consider using a drywall screw gun or dimpler bit.
Advanced Techniques and Best Practices
Moving beyond the basics, incorporating advanced techniques can significantly enhance efficiency and the quality of your drywall installation, especially for larger or more complex projects.
Using Drywall Lifts
For ceiling installations, or even for upper sections of tall walls, a drywall lift is an invaluable tool. These mechanical lifts allow a single person to raise and hold full sheets of drywall in place, reducing strain, improving safety, and ensuring precise alignment. This significantly speeds up the process and ensures consistently tight seams.
Corners and Edges
Special attention is required at corners and edges to ensure durability and a seamless finish.
- Inside Corners: Two pieces of drywall meet at an inside corner. Screws should be driven into the studs on each side of the corner, ensuring the boards are securely fastened. Do not attempt to drive a single screw through both pieces of drywall into the corner stud. Leave enough space (e.g., ½ inch) from the very corner edge for joint compound and tape.
- Outside Corners: These require corner bead, a metal or plastic strip that protects the vulnerable edge. The drywall panels should be cut precisely to meet the corner, leaving minimal gap for the corner bead to be attached securely, usually with short drywall screws or construction adhesive.
Ceiling Applications
Installing drywall on ceilings presents unique challenges due to gravity.
- Support: Always ensure adequate support, either with a drywall lift or multiple helpers.
- Screw Spacing: Ceiling screws often benefit from slightly closer spacing (e.g., 6 inches on edges, 8-10 inches in the field) to counteract sagging over time.
- Perpendicular Installation: It's often recommended to install drywall perpendicular to the ceiling joists. This allows the tapered edges of the drywall sheets to land on the joists, reducing the number of butt joints that need to be finished.
Repairing Mistakes
Even the most meticulous installation might require minor repairs.
- Small Holes/Dimples: These are easily filled with joint compound during the taping and mudding process.
- Larger Holes/Tears (e.g., from overdriven screws): For larger areas where the paper is significantly torn, or the gypsum is crumbled, you might need to apply setting-type joint compound (hot mud) in layers, or even cut out a small section and patch it with a drywall repair patch before applying standard joint compound.
Sourcing American-Made Drywall Screws: A Strategic Advantage with Maden.co
Beyond the technicalities of installation, the strategic decision of where and how you source your drywall screws — and all your industrial components — has a profound impact on project success, supply chain resilience, and even your company's bottom line. At Maden.co, our mission is to democratize access to American manufacturing, and this extends to every critical component, including high-quality drywall screws.
The Value of U.S. Manufacturing
Choosing American-made components, whether it's specialized fasteners, complex machinery parts, or everyday consumables like drywall screws, offers distinct strategic advantages for procurement managers, MRO buyers, and design engineers alike:
- Unrivaled Quality and Compliance: American manufacturers operate under stringent quality control standards and often adhere to specific industry regulations (e.g., DIN, NPT, ASTM). This ensures consistent product performance, reduces the risk of part failure, and simplifies compliance for critical projects. When you choose U.S.-made, you're investing in reliability.
- Enhanced Supply Chain Resilience: The past few years have highlighted the vulnerabilities of global supply chains. Sourcing domestically from verified U.S. manufacturers drastically reduces lead times, minimizes transportation complexities, and insulates your projects from international disruptions, tariffs, and geopolitical uncertainties. This directly improves your Total Cost of Ownership (TCO) by reducing the hidden costs of delays and expedited shipping.
- Transparency and Accountability: Our core value of Supply Chain Transparency means you have greater visibility into the manufacturing process and the origin of your components. With our network of 800+ verified U.S. manufacturers, you gain direct access to product specifications, certifications, and reliable support, fostering trust and accountability.
- Driving Industrial Excellence: By choosing American-made, you're not just buying a product; you're investing in the future of domestic industry. Our platform embodies Industrial Excellence by connecting industrial buyers with the best of American manufacturing, fueling innovation and job growth right here at home.
Maden.co's Role in Democratizing Access
We believe that sourcing high-quality, U.S.-made components should be as accessible and convenient as any global alternative. Maden.co is designed to be the definitive platform for this purpose. We connect industrial buyers with over 2.5 million American-made products, simplifying the procurement process and empowering businesses to make strategic sourcing decisions. Our commitment to Customer Empowerment ensures that you have the tools and resources to find exactly what you need, efficiently and reliably. You can learn more about our mission to champion American manufacturing and our vision to become the definitive platform for American-made components on our About Us page.
For a procurement manager under pressure to source a specific DIN 931 compliant hex cap screw, a design engineer needing specific material certifications for a new prototype, or an MRO buyer facing an unexpected equipment breakdown, the ability to quickly find and finance a verified, U.S.-made part is a game-changer. Our platform significantly reduces procurement friction, offering a seamless experience from search to delivery. We envision a future where "America's manufacturing revival is here," and our platform is the engine.
Are you a U.S. manufacturer producing high-quality components? Join our growing network and become part of this revival. Register as a vendor and connect with thousands of industrial buyers seeking American excellence.
Instant Financing: A Strategic Tool for Cash Flow Management
Recognizing that large-volume purchases or unexpected equipment breakdowns can strain working capital, Maden.co offers Instant Financing at checkout. This isn't merely a payment option; it's a strategic tool designed to empower procurement managers and business owners to manage cash flow effectively and execute critical projects without delay. By providing flexible payment solutions, we enable you to secure the necessary U.S.-made components, even for capital-intensive projects, ensuring your operations remain agile and responsive. This feature allows businesses to maintain liquidity while securing the critical materials needed to keep projects on track, bridging the gap between immediate need and budget cycles.
Conclusion
The successful installation of drywall screws is a testament to precision, patience, and a deep understanding of materials and techniques. From selecting the appropriate coarse-thread screws for wood studs or fine-thread screws for metal, to mastering the dimpling technique and adhering to optimal spacing, every detail contributes to a resilient and aesthetically pleasing finish. Overlooking these fundamental steps can lead to costly rework, project delays, and compromised structural integrity.
However, the value extends far beyond mere installation. The strategic decision to source high-quality, American-made drywall screws and other industrial components through a platform like Maden.co is a commitment to excellence, supply chain resilience, and industrial growth. By leveraging our network of over 800 verified U.S. manufacturers and our extensive catalog of over 2.5 million American-made products, businesses can significantly improve their Total Cost of Ownership, ensure compliance with critical standards, and support the revival of domestic manufacturing.
Don't let procurement challenges impede your progress. Explore the vast catalog of American-made products on Maden.co today, from our versatile 6 x 1-1/4 Coarse Thread Drywall Screws to the specialized 6 x 1 Fine Thread Drywall Screw, and discover robust solutions like our 8 x 4 Drywall Screw for demanding applications. Empower your projects with quality, reliability, and strategic financial flexibility. You can apply for Instant Financing at checkout to streamline your capital-intensive projects and keep your business moving forward. For any specific sourcing questions, our team is ready to help; feel free to contact us. America's manufacturing revival is here, and we're building it together.
FAQ
Q1: What's the main difference between coarse-thread and fine-thread drywall screws? A1: Coarse-thread drywall screws have wider, more aggressive threads designed to grip securely into wood studs. Fine-thread drywall screws have finer, more numerous threads that are specifically engineered to create more contact points and prevent stripping when fastening into metal studs, typically 20-25 gauge steel. Using the correct thread type for your framing material is crucial for optimal holding power.
Q2: How deep should a drywall screw be driven? A2: A drywall screw should be driven just below the surface of the drywall, creating a shallow "dimple" without tearing the paper facing. The screw head should be flush with or slightly recessed below the paper, allowing for easy concealment with joint compound. Overdriving rips the paper and reduces holding power, while underdriving creates bumps that will show through the finish.
Q3: Can I use a regular drill for installing drywall screws? A3: Yes, a regular cordless drill/driver with an adjustable clutch can be used. The clutch setting helps prevent overdriving by stopping the drill once a certain torque is reached. However, a dedicated drywall screw gun or a drill equipped with a drywall dimpler bit offers more precise depth control and efficiency, making the job faster and more consistent, especially for larger projects.
Q4: Why is sourcing American-made drywall screws important? A4: Sourcing American-made drywall screws and other components offers several strategic benefits. It ensures higher quality control, adherence to rigorous industry standards, and enhanced supply chain resilience by reducing reliance on overseas logistics. This can lead to improved Total Cost of Ownership (TCO) through fewer delays and consistent product performance, ultimately supporting domestic manufacturing and fostering greater transparency and accountability in your procurement process.


