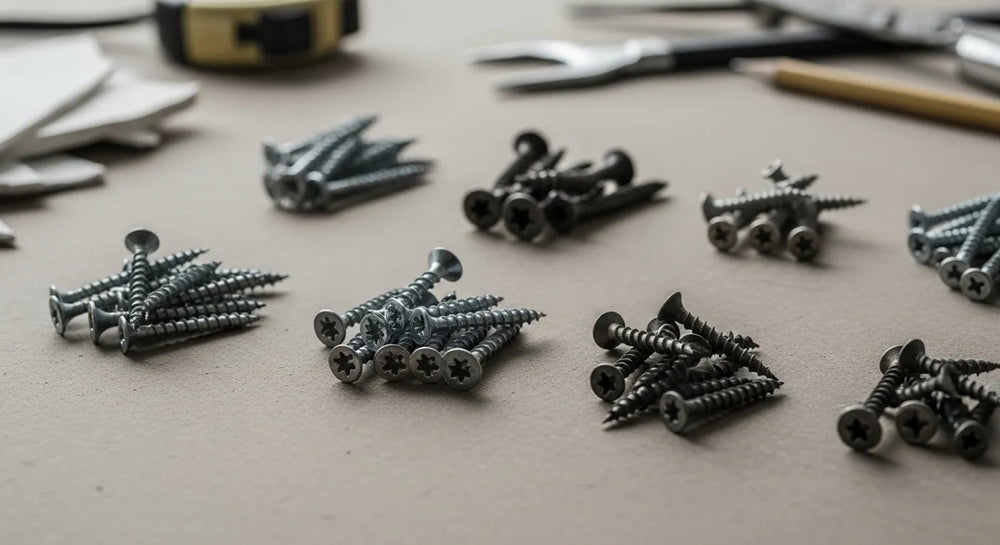
Removing Stubborn Anchor Bolts from Concrete Safely and Efficiently
Table of Contents
- Introduction
- Understanding Anchor Bolts and Their Inherent Challenges
- Safety First: Essential Preparations
- Method 1: The Mechanical Extraction Approach (When the Bolt is Accessible)
- Method 2: Chemical Dissolution (For Epoxy Anchors or Stubborn Cases)
- Method 3: Drilling Out (When Other Methods Fail or for Flush Removal)
- Method 4: Heat-Induced Stress (Advanced Technique)
- Post-Removal Procedures: Repairing the Concrete
- Preventative Measures and Smart Sourcing for Future Projects
- Optimizing Your Supply Chain with Maden.co
- Conclusion
- FAQ
Imagine a critical infrastructure project halted because a single, corroded anchor bolt refuses to budge. Or a manufacturing line facing extended downtime while MRO teams grapple with an obsolete machine base, held captive by seemingly immovable fasteners. These are not isolated incidents but costly realities that procurement managers, design engineers, and business owners frequently confront. The seemingly simple task of removing an anchor bolt from concrete can quickly escalate into a complex, time-consuming, and expensive endeavor if not approached with the right knowledge, tools, and strategic foresight.
Introduction
In the world of industrial maintenance, construction, and facility upgrades, the secure fastening of equipment and structures to concrete is paramount. Anchor bolts are the unsung heroes providing this stability. However, when the time comes for removal—whether due to equipment relocation, structural modification, or simply replacing a damaged component—these steadfast fasteners can present formidable challenges. The purpose of this comprehensive guide is to demystify the process of anchor bolt removal from concrete, offering practical, authoritative insights into various techniques, safety protocols, and strategic considerations. We will explore methods ranging from basic mechanical extraction to advanced drilling, ensuring you have the knowledge to tackle even the most stubborn situations effectively. Our overarching thesis is that mastering these removal techniques, combined with a strategic approach to sourcing high-quality, American-made replacement parts, is crucial for maintaining project timelines, structural integrity, and ultimately, optimizing your operational efficiency and bottom line. At Maden.co, we understand these challenges, and our mission is to empower industrial buyers with the resources to overcome them.
Understanding Anchor Bolts and Their Inherent Challenges
Before delving into removal techniques, it’s essential to understand the different types of anchor bolts and why their removal can be so difficult. Each type is designed for specific load conditions and materials, dictating the optimal removal strategy.
Types of Anchor Bolts
- Wedge Anchors: These are post-installed mechanical anchors. They work by expanding a clip against the concrete hole as the nut is tightened, creating a strong mechanical interlock. Their design often means a significant portion remains below the surface, making flush removal tricky.
- Sleeve Anchors: Similar to wedge anchors, but they use a sleeve that expands as the bolt is tightened, providing a secure grip. Often used for lighter to medium loads.
- Drop-In Anchors: Internally threaded anchors that are hammered into a pre-drilled hole, then expanded using a setting tool. The expansion occurs entirely within the concrete.
- Strike Anchors: Also known as hammer drive anchors, these are hammered into a pre-drilled hole, causing an internal pin to expand the anchor.
- Chemical/Adhesive Anchors: These rely on a chemical resin (epoxy, polyester, vinylester) injected into a hole before the anchor rod is inserted. The resin cures, creating an extremely strong bond with both the rod and the concrete. These are notoriously difficult to remove due to their superior bonding strength.
- Undercut Anchors: Mechanical anchors that create an interlock by cutting an inverted cone shape at the bottom of the hole, then expanding into this undercut.
- Headed Anchors (Cast-in-Place): These are embedded in the concrete before it cures, often featuring a head or a hook at the embedded end. They offer the highest strength but are, by their nature, permanent fixtures, making removal highly invasive. For robust fastening needs, quality headed anchors are essential. For those requiring the ultimate in strength and permanence, particularly in heavy construction or machinery mounting, ensuring you source precision-engineered components is key. You can find essential connecting elements like the 1-headed concrete anchor shear connector chuck on our platform. This illustrates the critical role of specialized tools and components in all phases of concrete work, from initial installation to eventual modification.
Why Anchor Bolt Removal is Difficult
The primary challenge in removing anchor bolts stems from their very purpose: to create a near-permanent bond with the concrete. This bond can be mechanical (friction and interlock), chemical (adhesive), or a combination. Factors contributing to removal difficulty include:
- Bond Strength: Chemical anchors, in particular, create an incredibly strong bond that effectively fuses the bolt to the concrete.
- Corrosion and Rust: Over time, especially in exposed or damp environments, steel anchors can corrode. Rust expands, further cementing the bolt within the concrete and making mechanical extraction almost impossible without significant force.
- Material Interaction: The concrete itself can be abrasive, and the drilling or cutting process can damage the surrounding material if not executed carefully.
- Limited Access: Bolts might be recessed, obstructed by surrounding structures, or too close to sensitive areas, complicating tool access.
- Age of Installation: Older installations often have deeper embeds and stronger mechanical bonds due to concrete curing and settling around the anchor.
Understanding these challenges is the first step toward selecting the most effective and least destructive removal method.
Safety First: Essential Preparations
Before attempting any anchor bolt removal, prioritizing safety is non-negotiable. Industrial environments inherently carry risks, and working with power tools, concrete, and potentially corrosive chemicals demands strict adherence to safety protocols.
Personal Protective Equipment (PPE)
Always wear appropriate PPE, which includes:
- Eye Protection: Safety glasses or goggles to shield against flying debris.
- Hearing Protection: Earplugs or earmuffs when using noisy power tools like grinders or rotary hammers.
- Gloves: Heavy-duty work gloves to protect hands from rough surfaces, sharp edges, and chemical exposure.
- Respiratory Protection: A dust mask or respirator, especially when cutting, grinding, or drilling concrete, to prevent inhalation of silica dust.
- Foot Protection: Steel-toed boots to protect against falling objects and punctures.
- Head Protection: A hard hat if there's any risk of overhead hazards.
Site Assessment and Preparation
- Identify Utilities: Before any drilling or cutting, verify the absence of electrical conduits, water pipes, gas lines, or other utilities embedded in the concrete. Ground-penetrating radar (GPR) or consultation with facility blueprints are critical steps.
- Clear the Area: Remove any obstructions, flammable materials, or unnecessary equipment from the immediate work zone.
- Ventilation: If using chemical removers or generating significant dust, ensure adequate ventilation.
- Containment: For chemical methods, prepare for spill containment. For dusty operations, consider dust barriers to protect adjacent machinery or areas.
- Tool Inspection: Ensure all power tools are in good working order, with appropriate guards and sharp cutting/drilling bits. Electrical cords should be inspected for damage.
Tool Preparation
Gather all necessary tools beforehand. This might include:
- Angle grinder with diamond cutting wheel
- Reciprocating saw with metal-cutting blades
- Rotary hammer drill with various masonry bits
- Core drill
- Wrench sets, pry bars, vice grips
- Chisels, hammers
- Chemical anchor remover (if applicable)
- Shop vacuum, brooms, dustpans
- Concrete patching material
Proper preparation not only ensures safety but also streamlines the removal process, reducing downtime.
Method 1: The Mechanical Extraction Approach (When the Bolt is Accessible)
This is often the first approach for bolts that are not too deeply embedded or chemically bonded. It focuses on physical removal or modification.
A. Cutting Flush
For bolts that protrude and cannot be unscrewed, cutting them flush with the concrete surface is a common solution.
- Preparation: Mark the cut line precisely at the concrete surface.
- Angle Grinder: Equipped with a metal-cutting or diamond blade, an angle grinder is ideal for cutting through steel bolts. Hold the grinder firmly, ensuring proper balance and wearing all necessary PPE. Make a slow, steady cut across the bolt, allowing sparks to fly away from your body.
- Reciprocating Saw: For bolts in awkward positions or where a grinder might be too aggressive, a reciprocating saw with a metal-cutting blade can be effective. It offers more control in tight spaces.
- Chisel and Hammer (for softer metals or smaller bolts): In some cases, especially with softer metals or when cutting a small bolt, a cold chisel and heavy hammer can be used to shear the bolt off at the surface. This requires precision to avoid damaging the concrete.
Scenario Spotlight: An MRO buyer needs to quickly replace a pump motor bolted down with a few stubborn anchors. The goal is to get the new motor in place with minimal delay. Rather than attempting a full, time-consuming extraction, cutting the old bolts flush and patching the holes can be the most efficient solution. Speed is critical to avoid extended production outages. For such situations, having readily available tools and components is essential. For instance, ensuring your workshop is stocked with high-quality consumables and accessories like a concrete anchor shear connector chuck set can significantly reduce response times and facilitate efficient repairs.
B. Grinding Down and Patching
If cutting flush leaves a slight protrusion or a rough surface, grinding can refine the area.
- Grinder: Use an angle grinder with a grinding wheel to smooth down any remaining metal until it's perfectly flush with or slightly below the concrete surface.
- Patching: Once smooth, the area can be cleaned and patched with a suitable concrete repair compound or epoxy. This creates a clean, level surface for subsequent installations or finishes.
C. Using an Anchor Bolt Puller
Specialized hydraulic or mechanical anchor bolt pullers are designed to exert upward force on an embedded bolt.
- Attachment: The puller is attached to the exposed thread of the anchor bolt.
- Activation: Mechanical force (turning a screw) or hydraulic pressure is applied, gradually pulling the bolt out of the concrete. This method is effective for wedge, sleeve, and some drop-in anchors, especially when minimal concrete damage is desired. However, it requires a significant exposed length of the bolt.
Method 2: Chemical Dissolution (For Epoxy Anchors or Stubborn Cases)
When mechanical methods fail, particularly with chemical anchors, chemical removers can be a viable, albeit more involved, option.
A. Understanding Chemical Removers
Various chemical compounds are designed to break down epoxy, polyester, or vinylester resins. These typically work by softening or dissolving the polymer structure of the adhesive.
- Types: Look for products specifically formulated for epoxy or chemical anchor removal. They often contain solvents like methylene chloride, acetone, or proprietary blends.
- Mechanism: These chemicals penetrate the resin, causing it to swell, soften, and lose its adhesive properties, allowing the anchor to be pulled out or drilled more easily.
B. Application Techniques and Safety Precautions
- Safety First: Always wear appropriate PPE, including chemical-resistant gloves, eye protection, and a respirator. Ensure excellent ventilation.
- Isolate the Area: Create a small dam around the bolt with wax or putty to contain the chemical solution.
- Apply and Soak: Carefully pour the chemical remover into the void around the bolt, allowing it to penetrate and soak into the adhesive. Follow the manufacturer's recommended dwell time, which can range from several hours to overnight.
- Reapply: For stubborn applications, reapply the chemical as needed.
- Extraction: Once the adhesive has softened, attempt to twist and pull the anchor bolt out with vice grips or a wrench. You may need to chip away softened concrete or adhesive residue.
- Disposal: Dispose of chemical waste and residue according to local environmental regulations.
This method requires patience and meticulous attention to safety but can be highly effective for chemically bonded anchors where mechanical force alone is insufficient.
Method 3: Drilling Out (When Other Methods Fail or for Flush Removal)
Drilling out an anchor bolt is a common and often necessary method, especially when a flush surface is required, or other methods have failed. It involves systematically removing the bolt material through drilling.
A. Pilot Holes and Progressive Drilling
This technique requires a rotary hammer drill and a series of masonry drill bits.
- Center Punch: Use a center punch to create a divot in the center of the anchor bolt. This prevents the drill bit from wandering.
- Pilot Hole: Start with a small-diameter masonry bit (e.g., 1/4 inch) and drill a pilot hole through the center of the anchor bolt. Ensure the drill is set to hammer drill mode for efficient concrete penetration.
- Progressive Enlargement: Gradually increase the drill bit size, drilling through the bolt and surrounding concrete. For instance, after the 1/4 inch pilot, move to 3/8 inch, then 1/2 inch, and so on, until the anchor is completely pulverized or the surrounding concrete is sufficiently weakened to allow for its removal.
- Chipping Out: As you drill larger holes, the remaining anchor material and weakened concrete can often be chipped out with a chisel and hammer.
B. Using a Core Drill for Minimal Damage
A core drill is a specialized tool that creates a perfectly circular hole. It's an excellent option when preserving the surrounding concrete and creating a clean, larger opening is paramount.
- Core Bit Selection: Choose a diamond core bit with an internal diameter slightly larger than the anchor bolt's external diameter.
- Drilling: Set up the core drill (often requiring a stand for stability) and begin drilling around the anchor bolt. Many core drills use water cooling, which helps reduce dust and prolong bit life.
- Core Removal: Once the core drill has cut completely around and past the embedded depth of the anchor, the concrete core (containing the anchor) can be carefully removed.
- Clean Up: Clean the resulting hole thoroughly.
Scenario Spotlight: A design engineer is overseeing the upgrade of a precision manufacturing facility. New, sensitive equipment requires an absolutely stable, level base, and old anchor bolts from previous machinery must be removed without compromising the concrete slab's integrity. Precise, controlled removal is paramount. Using a core drill for minimal collateral damage and sourcing a new set of high-quality drill bits for consistent performance would be a top priority for the procurement team. When precision and reliability are critical, sourcing the right tools and components is non-negotiable. For instance, exploring options like the BN Products 3/8 inch inside thread Sanko drop-in concrete anchor on Maden.co ensures you're selecting fasteners that meet stringent specifications for future installations, upholding the highest standards of Industrial Excellence.
Method 4: Heat-Induced Stress (Advanced Technique)
This is a less common but effective method for extremely stubborn metal anchors, often used as a last resort. It exploits the thermal expansion and contraction properties of metal.
A. Localized Heating and Thermal Shock
- Preparation: Clear the area of all flammable materials. Have a fire extinguisher readily available.
- Heating: Using an oxy-acetylene torch or induction heater, carefully apply localized heat to the exposed portion of the anchor bolt. Heat the bolt until it glows red hot. The goal is to cause the metal to expand significantly.
- Thermal Shock: Immediately after heating, rapidly cool the bolt by dousing it with cold water. This rapid contraction can help break the bond between the anchor and the surrounding concrete/adhesive. The sudden thermal shock can also weaken the metal structure itself.
- Extraction: While the bolt is still hot (or immediately after cooling), attempt to twist it out with a large wrench or pry it with a bar. The expansion and contraction can create micro-fractures in the bond, making extraction easier.
- Repeat: For very stubborn bolts, you may need to repeat the heating and cooling cycle several times.
B. Caution and Control
- Concrete Damage: Extreme heat can damage the surrounding concrete, causing spalling or weakening. Use this method cautiously and monitor the concrete for signs of distress.
- Fumes and Smoke: Heating metal can release fumes. Ensure excellent ventilation.
- Fire Hazard: The risk of fire is significant. Always have appropriate fire suppression tools on standby.
This method requires expertise and careful execution to avoid safety hazards and structural damage.
Post-Removal Procedures: Repairing the Concrete
Once the anchor bolt is successfully removed, the remaining hole or damaged area needs proper repair to ensure structural integrity and a clean finish.
A. Cleaning and Preparation
- Remove Debris: Thoroughly clean the hole or cavity. Use a wire brush, shop vacuum, and compressed air to remove all loose concrete, dust, and any remaining anchor material or chemical residue.
- Dampen: For cement-based patching materials, slightly dampen the concrete surface within the hole. This helps with adhesion and prevents the concrete from drawing water too quickly from the patching material.
B. Filling and Patching
- Epoxy-Based Fillers: For smaller holes or when superior strength and chemical resistance are required, epoxy-based concrete repair compounds are excellent. They offer high bond strength and cure rapidly.
- Non-Shrink Grout: For larger voids or when matching the compressive strength of the surrounding concrete is important, non-shrink grout is a good choice. It ensures the patch doesn't shrink away from the edges, maintaining a tight bond.
- Cementitious Patching Compounds: These are general-purpose options suitable for various repairs. Follow manufacturer instructions for mixing and application.
C. Surface Finishing
- Overfill Slightly: When applying the patching material, slightly overfill the hole.
- Leveling: Use a trowel or straight edge to screed the material flush with the surrounding concrete surface.
- Curing: Allow the patching material to cure fully according to the manufacturer's recommendations. Proper curing is crucial for achieving full strength. Keep the patch moist if required for cementitious products.
Preventative Measures and Smart Sourcing for Future Projects
Effective anchor bolt removal is critical, but preventing future complications through informed choices during installation is even better. This involves selecting the right anchor and leveraging strategic sourcing.
Choosing the Right Anchor for the Job
- Load Requirements: Always match the anchor's capacity to the anticipated tensile, shear, and combined loads.
- Substrate Conditions: Consider the type and condition of the concrete (cracked vs. uncracked, strength).
- Environmental Factors: For corrosive environments, specify stainless steel anchors or those with appropriate coatings.
- Future Considerations: If future removal or modification is highly probable, consider anchors that are easier to remove or those that leave minimal impact. For instance, some types of mechanical anchors can be designed for easier extraction or cut-off flush without extensive damage.
- Compliance: Always ensure anchors meet relevant industry standards, such as DIN or NPT, which is a hallmark of quality and reliability in industrial components.
Importance of U.S.-Made Components for Reliability
The decision of what to procure is as important as how you implement it. In an increasingly complex global supply chain, sourcing American-made components offers distinct advantages that directly impact long-term reliability and operational efficiency. At Maden.co, our mission is to democratize access to American manufacturing, connecting industrial buyers with over 2.5 million American-made products from our network of 800+ verified U.S. manufacturers. This commitment isn't just about patriotism; it's about strategic business value.
When you choose U.S.-made anchors and related components, you benefit from:
- Higher Quality Standards: American manufacturers often adhere to stringent quality control measures, resulting in more consistent and reliable products.
- Supply Chain Resilience: Reduced lead times, fewer geopolitical risks, and better traceability enhance the resilience of your supply chain.
- Simplified Compliance: American-made products are more likely to meet domestic industry standards and regulatory requirements without additional verification headaches.
- Support for the Domestic Economy: Investing in American manufacturing fosters innovation and job growth within the United States.
You can learn more about our unwavering commitment to championing American manufacturing and our vision to become the definitive platform that proves American-made components are as accessible and convenient as any global alternative by visiting our About Us page. We believe America's manufacturing revival is here, and we're proud to be at its forefront.
The Maden.co Advantage: Simplified Procurement, Enhanced Resilience
For procurement managers, MRO buyers, and design engineers, the ability to quickly and reliably source verified, U.S.-made industrial components is a game-changer. Maden.co provides precisely this advantage. Our platform is built on core values of American Manufacturing Pride, Digital Innovation, Supply Chain Transparency, Industrial Excellence, and Customer Empowerment. We aim to:
- Reduce Procurement Friction: Our intuitive platform simplifies the search and acquisition of even hard-to-find components. For a procurement manager under pressure to source a specific DIN 931 compliant hex cap screw, a design engineer needing specific material certifications for a new prototype, or an MRO buyer facing an unexpected equipment breakdown, the ability to quickly find and finance a verified, U.S.-made part is a game-changer.
- Improve Total Cost of Ownership (TCO): By ensuring access to high-quality, durable U.S.-made products, we help businesses reduce maintenance, replacement, and downtime costs over the product lifecycle.
- Enhance Supply Chain Resilience: Our network of verified U.S. manufacturers provides a robust, transparent, and responsive supply chain, mitigating risks associated with international sourcing.
- Ensure Compliance: We facilitate access to products that meet critical industry standards, giving you peace of mind.
At Maden.co, we are more than just a marketplace; we are a strategic partner in building a more reliable and efficient procurement process. We invite you to explore our vast catalog and experience the difference for yourself by visiting the Maden.co homepage.
Optimizing Your Supply Chain with Maden.co
The complexity of anchor bolt removal underscores a larger truth about industrial procurement: every component, every tool, and every process impacts efficiency and profitability. Our platform is designed to provide unprecedented access to the very best of American manufacturing, ensuring that when you need a new anchor, a specialized chuck, or any industrial component, you're not just buying a part—you're investing in reliability, compliance, and a resilient supply chain.
We believe that sourcing U.S.-made products should be as convenient and competitive as any alternative. That’s why we continually innovate our digital platform to offer features that empower our customers. For large-volume purchases or critical projects, managing cash flow can be a significant concern. To address this, we offer Instant Financing options directly at checkout. This strategic tool allows businesses to make necessary capital-intensive purchases without immediate strain on working capital, providing flexibility and supporting project continuity.
Are you a qualified U.S. manufacturer looking to expand your reach and contribute to the revitalization of American industry? We invite you to join our growing network. Register as a vendor and partner with us to connect with thousands of industrial buyers across the nation.
Conclusion
The task of removing an anchor bolt from concrete, while often daunting, is entirely manageable with the right knowledge, tools, and a systematic approach. From mechanical cutting and grinding to the precision of core drilling and the careful application of chemical removers, each method offers a pathway to resolution. Crucially, anticipating these challenges and proactively sourcing high-quality, reliable components for future installations is paramount.
At Maden.co, we stand as your dedicated partner in this endeavor, providing unparalleled access to 2.5 million U.S.-made industrial products from our network of 800+ verified manufacturers. Our commitment to American Manufacturing Pride, Digital Innovation, Supply Chain Transparency, Industrial Excellence, and Customer Empowerment means you gain more than just a supplier; you gain a strategic advantage. We simplify complex procurement, enhance supply chain resilience, ensure compliance, and ultimately reduce your Total Cost of Ownership.
Don't let a stubborn anchor bolt or a missing component disrupt your operations. Explore the vast Maden.co catalog today and discover how our platform can revolutionize your procurement process, offering everything from essential tools like a 1-headed concrete anchor shear connector chuck to robust fasteners like the BN Products 3/8 inch inside thread Sanko drop-in concrete anchor. Leverage our Instant Financing option at checkout to streamline your capital-intensive projects and keep America's manufacturing revival moving forward. If you have specific sourcing questions or need guidance, our team is ready to help; simply contact us.
FAQ
Q1: What is the most difficult type of anchor bolt to remove from concrete?
A1: Chemical or adhesive anchors are generally the most difficult to remove due to the extremely strong bond created by the epoxy or resin with both the anchor rod and the concrete. These often require a combination of chemical dissolution and mechanical extraction.
Q2: Can I reuse the hole left after removing an anchor bolt?
A2: Generally, it is not recommended to reuse the exact same hole for a new anchor, especially if the removal process caused damage to the concrete or the hole's integrity. Even if the hole appears intact, micro-fractures might exist. It is best practice to drill a new hole a short distance away or properly fill and repair the old hole before drilling into the repaired section.
Q3: When should I call a professional for anchor bolt removal?
A3: You should consider calling a professional contractor or specialized service if: the anchor is critical to a structural element; the bolt is exceptionally large or deeply embedded; chemical anchors are proving impossible to remove with standard methods; the area contains hidden utilities; or if you lack the necessary specialized tools or experience with the advanced techniques (like core drilling or heat-induced stress).
Q4: What are the key benefits of using U.S.-made anchor bolts for new installations?
A4: Sourcing U.S.-made anchor bolts offers several advantages, including often higher quality control and adherence to stringent standards, enhanced supply chain resilience due to shorter lead times and reduced geopolitical risks, and easier compliance with domestic industry regulations. This strategic choice helps improve the Total Cost of Ownership by reducing potential failure points and associated downtime.


