Removing Wedge Anchors from Concrete Safely
Table of Contents
- Understanding Wedge Anchors and Why Removal is Complex
- Safety First: Essential Precautions Before Starting
- Method 1: The Cut-Off Method (Surface Level Removal)
- Method 2: The Hammer and Chisel Method (For Small, Exposed Anchors)
- Method 3: Drilling Out the Anchor (Precision Removal)
- Method 4: The Core Drilling Method (Minimal Concrete Disturbance)
- Method 5: Chemical Dissolution (Less Common, Specific Cases)
- Post-Removal Procedures and Concrete Repair
- Strategic Sourcing for American Manufacturing Excellence
- Common Challenges and Troubleshooting
- Beyond the Basics: Advanced Considerations for Large-Scale Projects
- Conclusion
- Frequently Asked Questions
Industrial settings, whether bustling manufacturing plants, expansive warehouses, or complex infrastructure projects, are dynamic environments. Equipment is relocated, production lines are reconfigured, and structures are adapted to meet evolving operational demands. Often, these changes necessitate the removal of firmly embedded components, among the most common being wedge anchor bolts from concrete. The sight of a stubbornly affixed anchor can present a significant hurdle, not just in terms of labor but also in potential damage to the surrounding concrete, project delays, and even safety risks if not approached correctly. For procurement managers, MRO buyers, and design engineers, understanding the nuances of how to remove wedge anchor bolts from concrete is crucial for maintaining operational efficiency and preserving structural integrity.
This detailed guide will demystify the process, offering a comprehensive, step-by-step approach to safely and effectively extract wedge anchors. We will explore various methods, discuss essential safety precautions, and highlight the tools and techniques that yield the best results while minimizing concrete damage. Our aim is to provide practical, authoritative insights that empower industrial professionals to tackle this common challenge with confidence and precision, underscoring the value of robust, U.S.-made tools and components readily available through platforms like Maden.co, America's premier B2B marketplace for industrial excellence.
Understanding Wedge Anchors and Why Removal is Complex
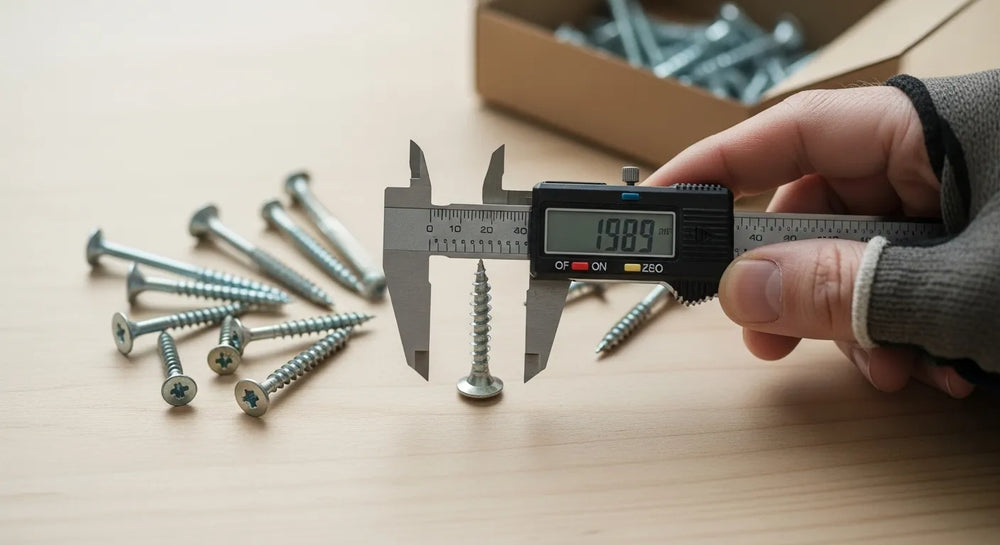
Wedge anchors are a popular choice for fastening heavy objects to concrete due to their strong, reliable hold. They typically consist of a threaded stud, an expansion clip (or "wedge"), a nut, and a washer. When installed, the anchor is hammered into a pre-drilled hole, and as the nut is tightened, the wedge is pulled upwards, expanding against the concrete walls of the hole. This creates a powerful mechanical interlock, making them exceptionally secure for applications ranging from securing heavy machinery and structural supports to mounting racking systems and electrical conduits.
The very mechanism that makes wedge anchors so effective—their expansion and tight grip within the concrete—is what makes their removal particularly challenging. Unlike some other anchor types that can be unthreaded or simply pulled out, wedge anchors are designed for permanent or semi-permanent installation. Attempting to remove them improperly can lead to:
- Concrete Damage: Spalling, cracking, or weakening of the concrete slab, which can compromise its structural integrity and necessitate costly repairs.
- Tool Damage: Using the wrong tools or incorrect techniques can damage expensive equipment.
- Personal Injury: Flying debris, slipping tools, or the sheer physical exertion involved can lead to cuts, bruises, or more severe injuries.
- Project Delays: Inefficient removal methods can consume valuable time, impacting project timelines and increasing labor costs.
Given these complexities, a methodical and safety-conscious approach is not just recommended, but essential.
Safety First: Essential Precautions Before Starting
Before any tools are even picked up, prioritizing safety is non-negotiable. Industrial environments demand a stringent adherence to safety protocols, and wedge anchor removal is no exception. Ignoring these precautions can lead to serious accidents, extensive property damage, and significant operational setbacks.
Personal Protective Equipment (PPE)
Always start with the right gear:
- Safety Glasses or Goggles: Crucial for protecting against flying concrete chips, metal shards, and dust.
- Hearing Protection: Grinders, hammer drills, and impact tools can generate high noise levels that can damage hearing.
- Gloves: Heavy-duty work gloves protect hands from cuts, abrasions, and vibrations.
- Dust Mask or Respirator: Concrete dust contains silica, which can cause serious respiratory issues if inhaled over time.
- Steel-Toed Boots: To protect feet from falling objects or dropped tools.
Workspace Assessment and Preparation
A thorough assessment of the work area is vital:
- Clear the Area: Remove any obstructions, equipment, or personnel that are not directly involved in the removal process.
- Secure the Zone: Use barriers, caution tape, or warning signs to prevent unauthorized access to the immediate work area.
- Identify Utilities: Before drilling or cutting, confirm the absence of electrical conduits, plumbing, or data lines embedded within the concrete. Ground-penetrating radar (GPR) or consulting blueprints are critical steps.
- Assess Concrete Integrity: Look for existing cracks or signs of weakness in the concrete around the anchor. This will inform your choice of removal method and help prevent further damage.
- Ventilation: If using power tools that generate dust or cutting tools that produce fumes, ensure adequate ventilation.
For a procurement manager overseeing a plant floor reconfiguration, ensuring worker safety during anchor removal is paramount. Sourcing certified safety equipment and reliable removal tools from a trusted marketplace like Maden.co is not just a preference, it's a critical compliance requirement. Our platform is dedicated to providing access to U.S.-manufactured products that meet rigorous industrial standards, empowering buyers to enhance workplace safety and operational integrity.
Tool Inspection
Before use, inspect all tools:
- Power Tools: Check cords for damage, ensure guards are in place, and confirm proper functioning.
- Hand Tools: Look for cracks, chips, or excessive wear on chisels, hammers, and pry bars. Dull or damaged tools are less effective and more prone to slippage, increasing the risk of injury.
- Drill Bits/Cutting Discs: Ensure they are sharp, properly seated, and appropriate for the material being worked on (concrete, steel).
With safety protocols firmly in place, let's explore the various methods for removing wedge anchors. The optimal approach will depend on factors such as the anchor's size, depth, accessibility, the desired outcome (flush cut vs. full extraction), and the importance of preserving the surrounding concrete.
Method 1: The Cut-Off Method (Surface Level Removal)
This is perhaps the simplest and most common method when full extraction isn't necessary, and leaving a portion of the anchor embedded in the concrete is acceptable. It's ideal for situations where you need to remove an obstruction or achieve a flush surface, such as preparing a floor for new tiling or equipment placement.
When to Use This Method
- When the anchor only protrudes slightly above the concrete surface.
- When aesthetics or structural integrity of the immediate area allow for the anchor to be cut flush.
- When future drilling in the exact same spot is unlikely.
Tools Required
- Angle Grinder with Metal Cutting Disc: The most efficient tool for this task. Ensure the disc is rated for metal and is in good condition.
- Reciprocating Saw with Metal Blade: An alternative for anchors in awkward positions or if an angle grinder isn't available.
- Cold Chisel and Heavy-Duty Hammer: For smaller, less obtrusive anchors or when power tools are not feasible.
- Wire Brush: For cleaning the area.
- Shop Vacuum: For dust control.
Step-by-Step Guide
- Clean Around the Anchor: Use a wire brush and shop vacuum to remove any dirt, dust, or debris from around the anchor. A clean work surface improves visibility and tool control.
- Mark the Cut Line (Optional but Recommended): If precision is critical, use a marker or scribe to indicate where you intend to cut, ensuring the anchor will be flush or slightly below the concrete surface.
-
Cut the Exposed Shaft:
- Angle Grinder: Position the grinder so the cutting disc is flush with the concrete surface. Apply steady, even pressure, allowing the grinder to do the work. Move it slowly back and forth to cut through the metal shaft. Be mindful of sparks and direct them away from flammable materials or personnel.
- Reciprocating Saw: Hold the saw firmly with both hands. Position the blade against the anchor shaft as close to the concrete as possible. Start slowly, allowing the blade to bite, then increase speed.
- Cold Chisel and Hammer: For smaller anchors, place the chisel blade against the base of the anchor shaft, just above the concrete. Strike the chisel repeatedly with the hammer, rotating the anchor as needed, until the shaft severs. This method is more labor-intensive and may leave a less smooth finish.
- Grind Smooth (Optional): After the anchor shaft is cut, use the angle grinder (with a grinding disc, if available) to smooth out any sharp edges or unevenness, making the surface truly flush with the concrete.
Pros and Cons
- Pros: Quick, relatively easy, requires common industrial tools.
- Cons: Leaves the bottom portion of the anchor embedded, which can complicate future work in the same spot. May not be suitable for areas requiring absolute structural integrity or if future full extraction is anticipated.
Sourcing high-quality cutting discs and angle grinders is straightforward when partnering with Maden.co. We provide access to a vast selection of U.S.-made industrial tools that are built for durability and performance, ensuring that procurement managers can confidently equip their teams for efficient and safe operations.
Method 2: The Hammer and Chisel Method (For Small, Exposed Anchors)
This low-tech method is effective for smaller wedge anchors that are not deeply embedded or are already slightly loose. It requires patience and precision but can be performed with minimal specialized equipment, making it a viable option for minor tasks or in areas where power tools are restricted.
When to Use This Method
- For smaller diameter wedge anchors (e.g., 1/4 inch to 3/8 inch).
- When the anchor is somewhat loose or corroded.
- In situations where power tools are not accessible or desirable due to noise, dust, or spark concerns.
- When minimal concrete disruption is acceptable around the anchor.
Tools Required
- Cold Chisel: A high-quality, sharp cold chisel with a sturdy handle is essential. Different sizes may be useful.
- Heavy-Duty Hammer (e.g., Sledgehammer or Club Hammer): The weight of the hammer is crucial for delivering effective blows.
- Pry Bar or Crowbar: For leverage, especially if the anchor starts to loosen.
- Wire Brush: For cleaning.
Step-by-Step Guide
- Clean and Clear: As with all methods, ensure the area around the anchor is clean of debris.
- Attack the Base: Position the tip of the cold chisel at the very base of the exposed wedge anchor, aiming it at the point where the anchor meets the concrete. The goal is to drive the chisel underneath the expansion sleeve or to deform the anchor's shaft.
- Work Around the Anchor: Strike the chisel repeatedly and firmly with the hammer. Rotate the chisel and the anchor, striking from different angles around the perimeter. The objective is to gradually loosen the anchor's grip on the concrete by either breaking the bond, deforming the shaft, or shearing off the expansion clip.
- Leverage and Extract: Once the anchor shows signs of loosening or begins to deform, you might be able to get a pry bar underneath the head or shaft. Apply leverage to pull the anchor out of the hole. If it's still stubborn, continue with the chisel and hammer technique, focusing on breaking the bond.
Pros and Cons
- Pros: Requires minimal equipment, good for small tasks, reduces noise and dust compared to power tools.
- Cons: Labor-intensive, time-consuming, less effective for larger or deeply embedded anchors, may cause minor chipping of concrete if not careful.
High-quality, U.S.-made chisels and hammers are fundamental tools in any industrial toolkit. Maden.co provides access to a range of such hand tools, emphasizing Industrial Excellence and ensuring that our customers have reliable equipment for every task, no matter how simple or complex.
Method 3: Drilling Out the Anchor (Precision Removal)
This method is highly effective when complete removal of the wedge anchor is required, or when the anchor is deeply set and other methods prove insufficient. It involves using a drill to essentially destroy the anchor's expansion mechanism or its shaft, allowing for its extraction. This method demands precision and the right power tools.
When to Use This Method
- When full extraction of the anchor is necessary, leaving a clean hole.
- For larger or more stubborn wedge anchors that won't yield to cutting or chiseling.
- When the surrounding concrete must be preserved with minimal damage.
Tools Required
- Rotary Hammer Drill: Essential for drilling into concrete and through metal.
- Masonry Drill Bits: Various sizes, specifically chosen to match and then exceed the anchor's diameter.
- Metal Drill Bits: High-speed steel (HSS) or cobalt bits, for drilling into the anchor's metal shaft.
- Center Punch and Hammer: For starting the drill hole precisely.
- Pry Bar, Vice Grips, or Pliers: For gripping and extracting loosened parts of the anchor.
- Shop Vacuum and Wire Brush: For cleaning the hole.
Step-by-Step Guide
- Center Punch the Anchor: Use a center punch and hammer to create a small indentation in the exact center of the exposed anchor shaft. This provides a starting point for your drill bit and prevents it from "walking."
-
Drill into the Anchor Shaft (Smaller Bit First):
- Start with a masonry bit slightly smaller than the anchor's diameter. Drill down through the center of the anchor. The goal here is to weaken the anchor's core and, if possible, destroy the expansion wedge.
- Switch to a metal-specific drill bit (HSS or cobalt) once you are confident you are past the initial concrete layer and engaging with the metal of the anchor. Continue drilling deeper.
- Progressively Larger Bits to Weaken: Gradually increase the size of your masonry and/or metal drill bits, working your way up to a bit size that is just slightly larger than the anchor's original diameter. Drill around the remaining parts of the anchor, focusing on the expansion sleeve if it's still present. The repeated drilling will pulverize the metal and concrete directly surrounding the anchor, breaking its grip.
- Remove Weakened Parts/Extract: Once the anchor's integrity is compromised, use a pry bar, vice grips, or even a smaller hammer and punch to break off and remove any remaining pieces. Often, the expansion clip will detach, and the threaded rod can then be pulled out or shattered and removed in pieces. Use the shop vacuum to clear debris from the hole as you go.
When precision is paramount, as it often is when trying to carefully drill out or work around a stubborn wedge anchor, the right tooling makes all the difference. Specialized equipment, like a 1 Headed Concrete Anchor Shear Connector Chuck, is designed for robust performance in demanding concrete applications, essential for both installation and meticulous removal efforts. For a comprehensive toolkit, having access to a Concrete Anchor Shear Connector Chuck Set ensures that procurement managers and MRO buyers are equipped for a wide range of tasks, minimizing downtime and optimizing operational efficiency. These U.S.-made tools exemplify the Industrial Excellence we champion at Maden.co, providing the reliability and durability needed for critical operations.
Pros and Cons
- Pros: Highly effective for complete anchor removal, minimizes damage to surrounding concrete when done carefully, leaves a clean hole for potential re-use or patching.
- Cons: Requires specific power tools and a range of drill bits, can be time-consuming, requires a steady hand and precision to avoid drilling off-center.
Method 4: The Core Drilling Method (Minimal Concrete Disturbance)
For scenarios where the preservation of the surrounding concrete is absolutely critical, or for very large and deeply embedded anchors, core drilling offers the most precise and least disruptive removal method. It involves drilling a circular core around the anchor, extracting it and a perfectly cylindrical section of concrete together.
When to Use This Method
- For large-diameter wedge anchors where other methods risk extensive concrete damage.
- In structural areas where preserving the integrity of the concrete slab is paramount.
- When a clean, perfectly round hole is desired for subsequent patching or re-anchoring.
Tools Required
- Core Drill Machine: A specialized, heavy-duty drill designed for cutting precise holes in concrete.
- Diamond Core Bit: Sized slightly larger than the anchor's diameter to encompass the entire anchor within the core.
- Water Source: Many core drills use water for cooling the bit and dust suppression.
- Anchoring System for Core Drill: To secure the drill machine to the concrete.
Step-by-Step Guide
- Mark the Core: Carefully measure and mark the exact center point for your core drill, ensuring the diamond bit will encompass the entire wedge anchor.
- Set Up the Core Drill: Securely anchor the core drill machine to the concrete surface according to the manufacturer's instructions. This is crucial for stability and safety. Attach the appropriate diamond core bit.
- Drill Around the Anchor: Begin drilling at a slow speed, gradually increasing as the bit cuts into the concrete. Maintain a steady flow of water to cool the bit and flush away slurry. The core drill will cut a perfect cylinder of concrete around the anchor.
- Remove the Core and Anchor: Once the core drill has cut through the concrete depth, the cylindrical core, with the wedge anchor embedded within it, can be lifted out. This typically requires a pry bar or a specialized lifting tool.
Pros and Cons
- Pros: Extremely precise, causes minimal disturbance to the surrounding concrete, leaves a clean, repairable hole, effective for very large anchors.
- Cons: Requires specialized, expensive equipment, often necessitates professional expertise, can be slower due to setup and drilling time.
Method 5: Chemical Dissolution (Less Common, Specific Cases)
While not a standard method for typical steel wedge anchors in concrete, it's worth noting that for very specific types of anchors made from certain alloys or in highly controlled environments, chemical dissolution might be considered. This typically involves applying a strong acid or other corrosive agent to break down the metal.
When to Use This Method
- Extremely rare for standard steel wedge anchors in concrete.
- Potentially for specialized anchors made of specific metals that react predictably with certain chemicals.
- In environments where mechanical removal is absolutely impossible or would cause unacceptable damage.
Considerations
- Chemical Compatibility: Thoroughly research the anchor's material and the concrete's composition to ensure the chemical agent will selectively attack the anchor without compromising the concrete.
- Safety and Ventilation: Chemical dissolution involves hazardous materials. Strict PPE, excellent ventilation, and controlled environments are essential to prevent exposure and manage fumes.
- Environmental Impact: Proper disposal of chemical waste is critical.
Pros and Cons
- Pros: Non-destructive to the concrete surface (if applied correctly), can be effective for specific materials.
- Cons: Highly specialized, dangerous, slow, expensive, environmental concerns, generally not applicable to common steel wedge anchors.
Post-Removal Procedures and Concrete Repair
Once the wedge anchor is successfully removed, the job isn't quite finished. Proper post-removal care and concrete repair are crucial for restoring the area's appearance and structural integrity.
- Cleaning the Hole: Use a shop vacuum to thoroughly remove all dust, debris, and any remaining anchor fragments from the hole. A wire brush can help dislodge stubborn particles from the hole walls. A clean hole is essential for any subsequent repair or re-anchoring.
- Assessing Concrete Damage: Carefully inspect the surrounding concrete for any cracks, spalling, or structural weaknesses caused during the removal process.
-
Repairing the Hole:
- Patching Compound: For small holes or minor surface damage, a standard concrete patching compound can be used.
- Epoxy Mortar: For more robust repairs or when a higher strength bond is needed, epoxy-based repair mortars are an excellent choice. They offer superior adhesion and durability.
- Non-Shrink Grout: If the hole is deep and needs to support future loads, a non-shrink grout provides excellent compressive strength and ensures the patch doesn't pull away from the existing concrete.
- Color Matching: If aesthetics are important, try to match the color of the patching material to the existing concrete.
- When to Consult a Structural Engineer: If the anchor removal resulted in significant concrete damage, if the anchor was part of a critical structural element, or if you plan to re-anchor in the same vicinity with a high-load application, it is always wise to consult a qualified structural engineer. Their expertise can ensure that the integrity of the structure is maintained and that any repairs are adequate for future demands.
After successfully removing a wedge anchor, the next step often involves preparing the site for a new installation. Choosing the correct replacement anchor is vital for long-term structural integrity. For applications requiring a robust and easily removable (if needed in the future) solution, consider high-quality options like the BN Products 3/8 Inch Inside Thread Sanko Drop-In Concrete Anchor. Sourcing these critical components from our platform ensures compliance and performance, reinforcing America's manufacturing revival and providing peace of mind for future operations.
Strategic Sourcing for American Manufacturing Excellence
At Maden.co, we understand that efficient and reliable procurement is the backbone of successful industrial operations. Whether you're removing outdated fixtures or installing new, high-performance machinery, access to the right tools and components, manufactured to stringent standards, is non-negotiable. Our mission is to democratize access to American manufacturing, connecting industrial buyers with over 2.5 million American-made products from our network of 800+ verified U.S. manufacturers.
Our platform stands as a testament to our core values:
- American Manufacturing Pride: We believe in the quality, durability, and innovation inherent in U.S.-made products.
- Digital Innovation: We leverage cutting-edge technology to streamline the procurement process, making it easier than ever to find exactly what you need.
- Supply Chain Transparency: We offer clear visibility into the origins of your products, ensuring you source from verified American manufacturers.
- Industrial Excellence: Our catalog is curated to meet the high demands of industrial applications, supporting MRO buyers, procurement managers, and design engineers.
- Customer Empowerment: We equip our users with the tools and information to make informed decisions and optimize their operations.
Sourcing through Maden.co offers tangible benefits for your business, including improving your Total Cost of Ownership (TCO) by reducing lead times and ensuring product longevity, guaranteeing compliance with critical industry standards (e.g., DIN, NPT), enhancing supply chain resilience through domestic sourcing, and significantly reducing procurement friction with our user-friendly interface. Our entire business model is built on this principle; you can learn more about our mission to champion American manufacturing here: About Us.
Are you a U.S. manufacturer with the high-quality tools and components needed for these industrial applications? We invite you to join our growing network. Register as a vendor and be a part of America's manufacturing revival.
Common Challenges and Troubleshooting
Even with the right methods, removing wedge anchors can present challenges. Knowing how to troubleshoot common issues can save time and prevent frustration.
- Stuck Anchors: If an anchor refuses to budge, revisit your initial method. Consider if a more aggressive approach (e.g., drilling out) is needed. Sometimes, repeatedly striking the anchor from different angles with a chisel and hammer can break its internal grip.
- Damaged Concrete: If you encounter significant concrete damage, stop and reassess. Patching compounds or epoxy mortars may be sufficient for minor chips, but larger cracks or spalling near structural elements might require a professional assessment.
- Anchors Too Deep: If the anchor is flush or below the surface, making it hard to grip or cut, the drilling out method is usually the most effective solution. A center punch can help locate the core before drilling.
- Dealing with Rusted Anchors: Rust can make anchors even more difficult to remove by creating a tighter bond with the concrete. Penetrating oil can sometimes help loosen the rust, but often, mechanical methods like drilling or cutting are still required. Be prepared for increased resistance.
Beyond the Basics: Advanced Considerations for Large-Scale Projects
For large-scale industrial projects involving numerous anchor removals, several additional factors come into play:
- Structural Integrity Evaluations: In projects that involve removing anchors from load-bearing walls, foundations, or critical structural elements, a detailed engineering assessment is crucial. This ensures that the removal process does not compromise the overall integrity of the structure.
- Regulatory Compliance: Ensure all removal and disposal methods comply with local, state, and federal regulations, especially regarding hazardous materials (if applicable) or waste disposal.
- Project Management for Anchor Removal: For significant projects, integrate anchor removal into the overall project plan. This includes allocating sufficient time, resources, budget, and skilled personnel. Detailed planning helps prevent delays and cost overruns.
- Waste Management: Develop a plan for the safe and efficient disposal of concrete debris, metal fragments, and any other waste generated during the removal process.
For more complex procurement needs or specific inquiries about specialized tools and materials for your demanding projects, our expert team is ready to assist. Contact Us today; we are committed to providing solutions that drive your industrial success.
Conclusion
The ability to safely and efficiently remove wedge anchor bolts from concrete is a valuable skill for any industrial professional involved in construction, renovation, or equipment management. From the swift angle grinder cut to the precise core drill extraction, each method offers distinct advantages depending on the specific demands of the task. Regardless of the chosen technique, a steadfast commitment to safety, proper tool utilization, and meticulous post-removal repair are paramount to protecting personnel, preserving infrastructure, and ensuring operational continuity.
At Maden.co, we are more than just a marketplace; we are a strategic partner in building a more reliable and efficient procurement process. We equip you with access to the highest quality, U.S.-made tools, components, and materials, ensuring that every project, from the simplest anchor removal to the most complex industrial installation, is backed by uncompromised quality and reliability. By choosing to source through our platform, you invest in the resilience of your supply chain and directly contribute to America's manufacturing revival.
We encourage you to explore the extensive catalog of U.S.-manufactured industrial supplies available on Maden.co. Discover the right tools and materials for your next project, confident in their origin and quality. For capital-intensive projects or larger-volume purchases, remember that you can apply for Instant Financing at checkout to streamline your operations and manage cash flow effectively. America's manufacturing revival is here, and we invite you to be a part of it.
Frequently Asked Questions
Q1: Can I reuse a wedge anchor after I remove it?
A1: No, wedge anchors are generally designed for single use. The expansion mechanism deforms during installation, and attempting to reuse a removed anchor would compromise its holding strength and reliability, posing a significant safety risk for future applications. It is always recommended to use new anchors for any new installations.
Q2: What is the most common reason for needing to remove wedge anchors?
A2: The most common reasons include equipment relocation or upgrades, facility renovations, changes in floor plans, or the need to replace damaged or corroded anchors. Sometimes, an anchor might also be removed if it was installed incorrectly or in the wrong location.
Q3: How can I ensure I don't damage the concrete when removing an anchor?
A3: To minimize concrete damage, always select the least aggressive removal method suitable for the task. For instance, if a flush cut is sufficient, avoid full extraction. If full extraction is necessary, methods like precise drilling out or core drilling are preferred over forceful hammering and chiseling, especially for larger anchors. Proper tool selection, careful technique, and adequate preparation of the work area are key.
Q4: Is it better to cut off a wedge anchor or try to extract it completely?
A4: The "better" approach depends entirely on your project's requirements. Cutting off the anchor is faster and less labor-intensive if leaving the embedded portion is acceptable (e.g., if you're covering it with flooring or pouring a new concrete layer). Complete extraction is necessary if the hole needs to be perfectly clean for a new anchor, if the area needs to be structurally sound without embedded metal, or for aesthetic reasons where a flush cut is not enough. Assess the specific needs of your project to determine the most appropriate method.


