Safely Removing a Wedge Anchor From Concrete
Table of Contents
- Understanding the Challenge: What Makes Wedge Anchors So Stubborn?
- Essential Preparations Before Removal
- Methods for Removing a Wedge Anchor
- Post-Removal: Repairing and Preparing the Concrete
- When to Call a Professional
- The Maden.co Advantage: Sourcing for Success
- Conclusion
- Frequently Asked Questions (FAQ)
The sight of a stubborn wedge anchor, firmly embedded in concrete, can be a point of frustration for any MRO buyer, design engineer, or procurement manager overseeing a critical project. Whether it’s due to a change in design, a necessary repair, or simply a misplaced installation, the task of extracting these robust fasteners can halt progress, introduce safety risks, and inflate project costs if not handled correctly. The challenge isn't merely physical; it’s about preserving structural integrity, maintaining site safety, and ensuring that the removal process doesn't cause more damage than the anchor itself. In an environment where every minute and every dollar counts, a clear, authoritative guide on wedge anchor removal is indispensable.
This guide will demystify the process of extracting wedge anchors from concrete, providing a comprehensive overview of techniques, essential tools, critical safety precautions, and post-removal remediation. We will explore various scenarios, from anchors that need a simple trim to those requiring more advanced extraction methods, all while emphasizing best practices for efficiency and safety. Our goal is to equip you with the knowledge to approach this common industrial challenge with confidence, ensuring minimal disruption and maximum effectiveness, highlighting how strategic sourcing of quality American-made tools and replacement parts is crucial to these operations.
Understanding the Challenge: What Makes Wedge Anchors So Stubborn?
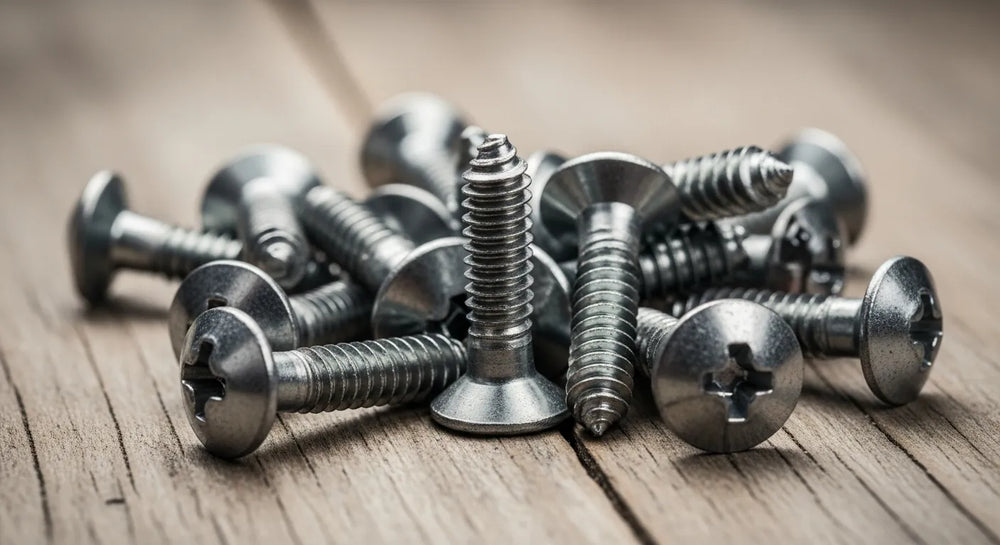
Wedge anchors are designed for permanence, providing exceptional holding power in solid concrete. Their efficacy stems from a simple yet brilliant design: as the nut is tightened, the anchor body pulls upwards, expanding a wedge clip against the sides of the drilled hole. This creates a powerful friction fit that resists pull-out and shear forces. This very strength, however, becomes the primary obstacle during removal.
The expanded wedge, often deeply set, can resist common prying or pulling forces. Factors like the anchor’s diameter, embedment depth, the age of the concrete, and environmental conditions (e.g., moisture, chemical exposure) can all contribute to how difficult an anchor is to remove. Furthermore, the type of concrete—whether standard, reinforced, or lightweight—will influence the anchor's grip and the integrity of the surrounding material during removal attempts. For critical infrastructure or high-stress applications, ensuring the integrity of the anchor itself, or its appropriate removal and replacement, often requires specialized tools and a deep understanding of the materials involved. Sourcing reliable components and tools is key to ensuring project success, a principle at the heart of our mission at Maden.co, where we connect buyers with robust American-made products from a network of 800+ verified U.S. manufacturers.
Essential Preparations Before Removal
Before attempting any removal, thorough preparation is paramount. This initial phase not only ensures safety but also streamlines the entire process, preventing costly mistakes and potential injuries.
Site Assessment and Planning
Begin by evaluating the immediate environment around the anchor. Consider:
- Structural Impact: Is the anchor part of a load-bearing structure? Removing it could compromise stability. Consult structural engineers if there's any doubt.
- Surrounding Utilities: Are there electrical conduits, water pipes, or gas lines embedded in the concrete near the anchor? Accidental contact with these could be catastrophic. Use a stud finder or ground penetrating radar if necessary.
- Accessibility: How much working space is available? This will dictate the size and type of tools you can comfortably and safely use.
- Concrete Condition: Inspect the concrete for cracks, spalling, or other signs of damage. Weakened concrete may require a more delicate approach to prevent further degradation.
A detailed plan outlining the chosen removal method, required tools, and potential contingencies should be drafted. This systematic approach minimizes surprises and ensures a smoother operation, reflecting the meticulous planning that goes into effective industrial procurement.
Safety First: Personal Protective Equipment (PPE)
Safety is non-negotiable. Always wear appropriate PPE, which typically includes:
- Eye Protection: Safety glasses or goggles to shield against flying debris.
- Hearing Protection: Earplugs or earmuffs, especially when using power tools like grinders or rotary hammers.
- Hand Protection: Heavy-duty work gloves to prevent cuts, abrasions, and reduce vibration impact.
- Respiratory Protection: A dust mask or respirator, particularly when cutting or grinding concrete, to prevent inhalation of concrete dust (which can contain crystalline silica).
- Foot Protection: Steel-toed boots to protect against falling objects or dropped tools.
- Head Protection: A hard hat if there's any risk of falling objects or working in overhead areas.
Clear the work area of any unnecessary equipment, materials, or personnel to prevent trips, falls, and other accidents. Ensure adequate lighting and ventilation. These safety considerations are foundational to industrial excellence, a core value at Maden.co, where we prioritize the well-being of those working with our supplied components and tools.
Methods for Removing a Wedge Anchor
The approach to removing a wedge anchor largely depends on how much of the anchor is exposed and the desired finish for the concrete surface. We'll detail common methods from the simplest to the more complex.
Method 1: Cutting or Grinding Flush
This is the most common method when the anchor only needs to be flush with the concrete surface, either for aesthetic reasons or to prepare for a new installation without disturbing the existing hole.
- Preparation: Ensure the surrounding area is clear and protected from sparks if using a grinder.
- Tools: An angle grinder with a metal cutting wheel (for steel anchors) or a carbide-tipped concrete cutting blade (if you need to cut into the concrete slightly). A reciprocating saw with a metal-cutting blade can also be used for accessible anchors.
-
Process:
- Cutting: Using an angle grinder, carefully cut the anchor shaft as close to the concrete surface as possible. Apply steady pressure and allow the tool to do the work. Be mindful of sparks and hot metal.
- Grinding: After cutting, switch to a grinding wheel to smooth down any remaining protrusions, making the anchor perfectly flush with the concrete. This creates a clean finish, vital for industrial flooring or machinery bases.
-
Considerations:
- Heat: Cutting generates significant heat. Allow the anchor to cool before touching.
- Dust & Debris: This method creates metal filings and concrete dust. Ensure proper PPE and ventilation.
- Finish: While effective for making flush, the embedded portion of the anchor remains.
This method is often sufficient for minor repairs or when a new fixture can be installed adjacent to the old anchor. For projects that require precision tools, such as specialty chucks for specific drill sizes or anchoring systems, exploring American-made options ensures higher quality and reliability. For instance, if you're looking for robust tooling to handle demanding tasks, a high-quality 1-Headed Concrete Anchor Shear Connector Chuck can provide the precision and durability needed for cutting or drilling.
Method 2: Prying and Rocking (for Protruding Anchors)
If the anchor shaft protrudes significantly from the concrete, you might be able to extract it with leverage.
- Preparation: Loosen the nut as much as possible without removing it entirely. This can help disengage the wedge slightly.
- Tools: Pry bar, large claw hammer, vise grips, or a pipe wrench.
-
Process:
- Grip: Securely grip the exposed portion of the anchor with a pipe wrench or vise grips.
- Leverage: Use a pry bar or the claw of a hammer, positioned under the wrench or grip, to pry the anchor upwards.
- Rocking: Gently rock the anchor back and forth while applying upward pressure. This can help loosen the wedge clip from the concrete.
- Twisting: Simultaneously twisting and pulling can sometimes help, especially if the concrete isn't overly dense.
-
Considerations:
- Concrete Damage: Be careful not to chip or spall the concrete around the anchor hole while prying. Place a scrap piece of wood or metal under the pry bar for protection.
- Stubborn Anchors: This method is less effective for deeply embedded or very tightly wedged anchors.
- Shaft Bending: Applying too much force without adequate leverage can bend the anchor shaft, making further removal difficult.
Method 3: Drilling Out the Anchor
When an anchor is completely flush, stubborn, or needs to be entirely removed to reuse the hole, drilling it out is often the most effective, albeit more intensive, solution.
- Preparation: Mark the center of the anchor. Protect the surrounding concrete if using a hammer drill, as vibrations can cause spalling.
-
Tools:
- Rotary Hammer Drill: Essential for drilling into concrete.
- Carbide-Tipped Masonry Drill Bit: Slightly larger than the anchor's diameter.
- Cold Chisel and Hammer: For breaking up the remaining material.
- Punch: To drive out stubborn remnants.
- Shop Vac: To clean out debris.
-
Process:
- Drill Around the Anchor: Using a masonry drill bit that is slightly larger than the anchor's diameter, carefully drill around the perimeter of the anchor. The goal is to separate the anchor from the concrete, effectively enlarging the hole around it. You may need to drill multiple holes around the shaft.
- Break Up Concrete: Once you've drilled sufficiently around the anchor, use a cold chisel and hammer to carefully break away the concrete surrounding the anchor, focusing on freeing the wedge clip.
- Extract Remnants: Once the concrete around it is weakened, the anchor can often be wiggled loose with pliers or vise grips. If parts of the anchor or wedge remain, use a punch to drive them further into the concrete or break them apart.
- Clean the Hole: Use a shop vac to remove all debris from the hole.
-
Considerations:
- Precision: This method requires a steady hand and precision to avoid damaging the surrounding concrete excessively.
- Dust & Noise: High levels of dust and noise are generated. Ensure full PPE.
- Hole Integrity: The original hole will be enlarged. If you plan to reuse the hole for a new anchor of the same size, you will need to fill it with epoxy or concrete patch and redrill.
- Specialized Chucks: For demanding drilling tasks that require precise and consistent performance, a Concrete Anchor Shear Connector Chuck Set can significantly enhance efficiency and accuracy. Such sets provide the necessary tools for both anchor installation and removal, reflecting Maden.co’s commitment to providing comprehensive solutions for industrial needs.
Method 4: Using an Anchor Puller or Specialized Tools
For critical applications or when minimal concrete damage is paramount, specialized tools designed for anchor removal can be invaluable. These tools, often hydraulic or mechanical, are engineered to extract anchors with controlled force.
- Tools: Hydraulic anchor puller, mechanical anchor extractor.
- Process: These devices typically grip the exposed portion of the anchor and apply direct upward force, often combined with a twisting motion, to extract the anchor without significant damage to the surrounding concrete.
-
Considerations:
- Cost: Specialized pullers can be expensive, making them more suitable for projects with numerous anchors to remove or where concrete integrity is critical.
- Availability: These tools may not be readily available to all teams.
- Effectiveness: Highly effective for their intended purpose, minimizing collateral damage.
Post-Removal: Repairing and Preparing the Concrete
Once the anchor is removed, the work isn't done. The concrete will likely have a hole, and possibly some spalling or damage, that needs addressing.
- Clean the Hole: Thoroughly clean out all dust, debris, and loose concrete from the hole using a shop vac and a stiff brush.
- Assess Damage: Inspect the hole and surrounding concrete for any chips, cracks, or structural weakening.
-
Repair Options:
- Filling for Aesthetics: If the hole doesn't need to support another anchor, it can be filled with a non-shrink grout or epoxy patching compound for a smooth finish.
- Filling for New Anchor (Same Size): For reusing the hole with a new anchor of the same size, you'll need to fill the existing enlarged hole with a high-strength epoxy mortar or a quick-setting concrete repair product, ensuring it cures completely before redrilling. This requires careful material selection to match strength requirements.
- Larger Anchor: If the original hole is simply too large or damaged, you might consider installing a larger diameter anchor or a different type of anchoring system, such as a drop-in anchor, which accommodates larger hole sizes or different installation needs. For example, a BN Products 3/8-inch Inside Thread Sanko Drop-In Concrete Anchor might be an excellent American-made replacement option if you're looking for internal thread functionality and specific certifications.
- Surface Finishing: After the repair material has cured, grind or sand the surface smooth to match the surrounding concrete.
For a procurement manager under pressure to source a specific DIN or NPT compliant hex cap screw, a design engineer needing specific material certifications for a new prototype, or an MRO buyer facing an unexpected equipment breakdown, the ability to quickly find and finance a verified, U.S.-made part is a game-changer. This ensures not only the right fit but also compliance and longevity, enhancing your overall supply chain resilience.
When to Call a Professional
While many wedge anchor removal tasks can be handled in-house with the right tools and knowledge, certain situations warrant calling a professional concrete contractor or structural engineer:
- Structural Concerns: If the anchor is in a critical load-bearing wall, column, or slab, or if its removal could compromise the structure.
- Large-Scale Removal: For projects involving numerous anchors, especially if precise holes need to be preserved.
- Deep Embedment/Large Diameter: Very large or deeply set anchors can be exceptionally difficult and risky to remove without specialized equipment.
- Damaged Concrete: If the concrete surrounding the anchor is already compromised or shows signs of severe cracking.
- Hazardous Environments: Working in confined spaces, at heights, or near active machinery requires specialized training and safety protocols.
Professionals have the experience, specialized equipment, and insurance to handle complex removal tasks safely and efficiently, minimizing risks to personnel and property.
The Maden.co Advantage: Sourcing for Success
Successfully removing a wedge anchor, repairing the concrete, and often installing a replacement anchor, hinges on having access to the right tools, materials, and components. At Maden.co, we understand the intricate demands of industrial procurement. Our mission is to democratize access to American manufacturing, connecting industrial buyers with over 2.5 million American-made products from our network of 800+ verified U.S. manufacturers.
Our platform is built on values of American Manufacturing Pride, Digital Innovation, Supply Chain Transparency, Industrial Excellence, and Customer Empowerment. We aim to become the definitive platform that proves American-made components are as accessible and convenient as any global alternative, driving the manufacturing revival with our tagline: "America's manufacturing revival is here."
When you're facing a challenging task like wedge anchor removal and replacement, sourcing through Maden.co offers tangible benefits:
- Verified Quality: Every product listed on our platform is sourced from a verified U.S. manufacturer, ensuring adherence to rigorous quality standards and critical industry compliance (e.g., DIN, NPT). This reduces the risk of part failure and enhances project longevity. You can learn more about our commitment to quality and our mission to champion American manufacturing here: About Us.
- Supply Chain Resilience: By choosing American-made, you mitigate risks associated with international logistics, geopolitical instability, and fluctuating shipping costs. Our platform simplifies finding components, enhancing your supply chain resilience.
- Reduced Procurement Friction: Our intuitive B2B marketplace is designed for efficiency, saving procurement managers and MRO buyers valuable time. You can quickly locate hard-to-find components, specific tools, or replacement anchors for your projects.
- Total Cost of Ownership (TCO): While the initial cost might sometimes differ from international alternatives, the long-term strategic value of U.S.-made products—factoring in reliability, reduced lead times, fewer failures, and enhanced compliance—often leads to a lower TCO.
- Instant Financing: We understand that large-volume purchases or unexpected equipment needs can strain cash flow. That's why we offer Instant Financing directly at checkout. This strategic tool allows you to manage capital effectively and procure essential items without delay, ensuring your projects stay on track. This feature helps businesses like yours maintain liquidity while still accessing the highest quality American-made industrial supplies.
For any questions about specific products, sourcing needs, or navigating our platform, our team is ready to help. Please don't hesitate to reach out to us directly: Contact Us.
Conclusion
The removal of a wedge anchor from concrete, while seemingly a minor task, requires careful planning, the right tools, and a steadfast commitment to safety and precision. From simply cutting an anchor flush to the more involved process of drilling it out, each method demands a thoughtful approach to preserve concrete integrity and ensure successful project outcomes. By adhering to proper preparation, utilizing appropriate techniques, and prioritizing post-removal repairs, industrial operations can tackle this common challenge efficiently and effectively.
As America's premier B2B marketplace for U.S.-manufactured products, we at Maden.co are committed to empowering businesses with the highest quality American-made tools and components needed for every step of their industrial processes. By choosing U.S.-made through our platform, you are not only securing reliable products but also investing in a robust, transparent, and resilient supply chain. Explore our vast catalog of over 2.5 million American-made products today and discover the strategic advantage of sourcing from verified U.S. manufacturers. For large-volume purchases or to manage cash flow effectively, remember you can apply for Instant Financing at checkout to streamline your capital-intensive projects. Your next critical component or specialized tool is just a click away, ready to drive America's manufacturing revival forward.
Frequently Asked Questions (FAQ)
Q1: Can all wedge anchors be removed completely without damaging the concrete?
A1: While many wedge anchors can be removed, completely extracting them without any damage to the concrete, especially around the immediate hole, is challenging. Methods like drilling out or using specialized anchor pullers minimize damage, but some level of repair or filling is often required afterward. The extent of damage largely depends on the anchor's size, embedment depth, and the concrete's condition.
Q2: What should I do if the wedge anchor breaks off below the surface?
A2: If a wedge anchor breaks off below the concrete surface, you typically have two main options. First, you can try to drill it out using a masonry bit slightly larger than the remaining anchor, carefully chiseling away the surrounding concrete to free the pieces. Second, if complete removal isn't critical, you can fill the hole with a strong epoxy or concrete patch, effectively encasing the broken anchor, and then smooth the surface.
Q3: Is it possible to reuse the hole after removing a wedge anchor?
A3: Yes, it is often possible to reuse the hole, but it requires careful preparation. The original hole will likely be slightly enlarged or damaged. To reuse it for a new anchor of the same size, you'll need to thoroughly clean the hole, fill it with a high-strength epoxy mortar or a non-shrink grout, allow it to cure fully, and then redrill for the new anchor. Alternatively, you might install a larger diameter anchor or a different type of anchoring system that accommodates the existing hole.
Q4: What are the main alternatives to wedge anchors if I need a different fastening solution?
A4: There are several alternatives to wedge anchors, each suited for different applications and load requirements. Common alternatives include:
- Drop-in anchors: Ideal for overhead applications or when an internally threaded anchor is needed.
- Sleeve anchors: Suitable for lighter loads and offer good adjustability.
- Tapcon screws (concrete screws): Excellent for lighter-duty applications, easy to install and remove.
- Epoxy anchors (adhesive anchors): Provide very high load capacities and are resistant to vibration, often used for critical structural applications.
- Undercut anchors: Offer mechanical interlock for high performance in cracked concrete. The best choice depends on load requirements, concrete conditions, and installation preferences.


